
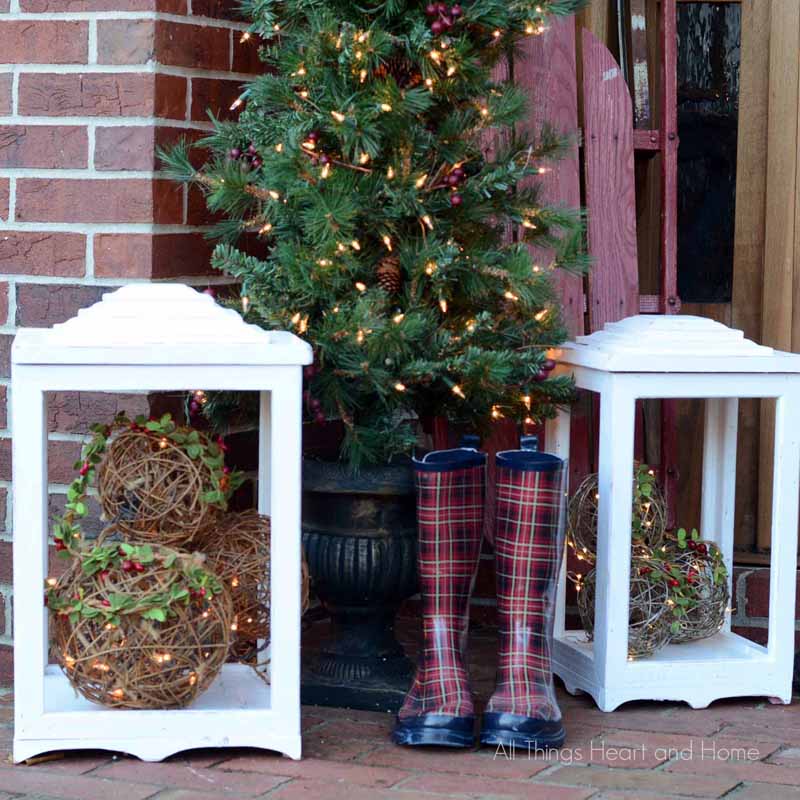
The Outdoor lanterns, when glow, look attractive enough to push visitors home happily. So, I tried these DIY wood lanterns to brighten up my front door for a special moment of Christmas. I shall now teach you how you can make these lanterns mainly for outdoor in this step-by-step tutorial with the tips. This wood project will feature a giant rustic lantern with a grapevine orb light inside. It looks beautiful because it is finely decorated and designed. So, let’s learn how to do that!
I drew up a simple design, and Mike whipped up some DIY wooden lanterns for me! It is great for an intermediate-level person.
What is the best wood for DIY outdoor lanterns?
Any pressure-treated wood will work best for outdoor DIY projects like garden lanterns due to its resistance to decay, moisture, insects, and fungus. I have tried several other types and untreated ones, too, but they all ruined my garden environment. My favorite pressure-treated wood type is pine, which is softwood, but when treated, it becomes superwood! Also See: DIY Wood Playhouse For Kids
What can you fill inside the outdoor lantern?
The best thing to love about building your own wood lanterns is you can replace the filling when the occasion or mood changes. Below are the popular ideas to fill inside the lanterns:
- Candles for every evening or night sitting.
- Crafted Fairy Garden with the string lights for the festivals.
- Seasonal Decorations like lighting ornaments or even flower arrangements.
- Outdoor chandeliers in grapevine orb.
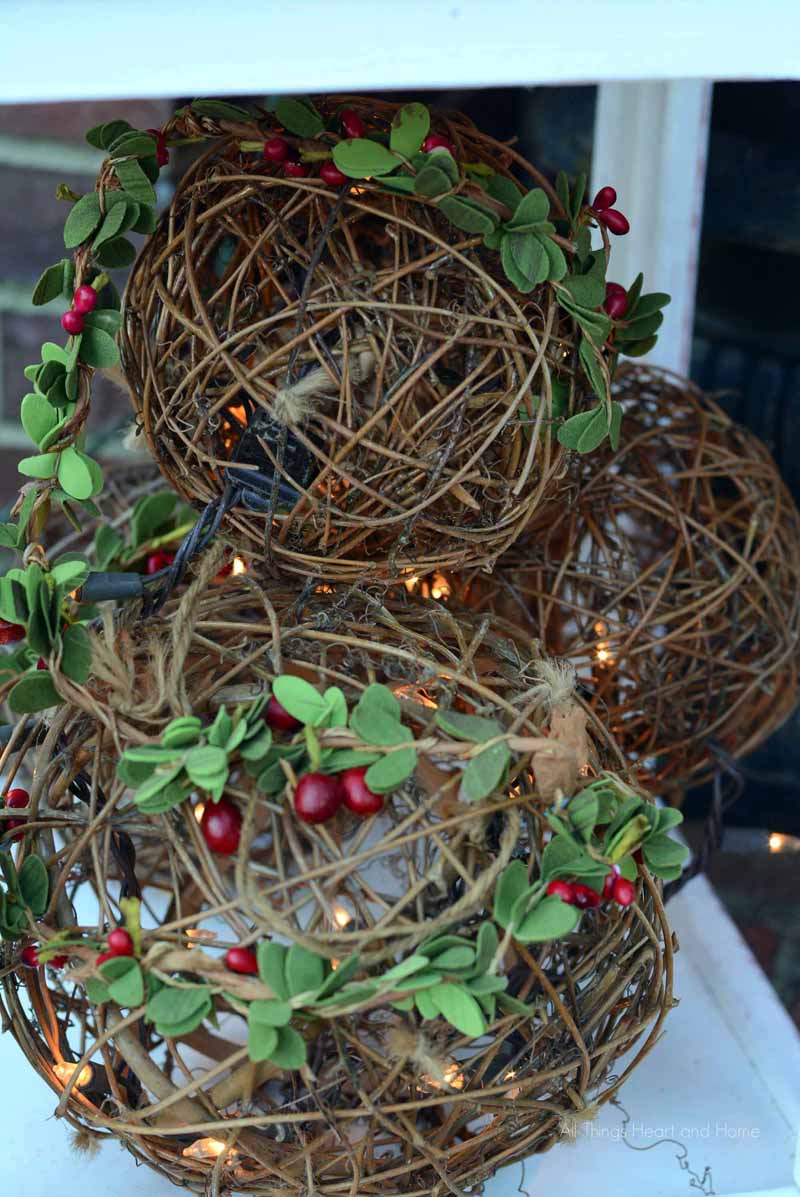
In our case, we fill the grapevine balls decorated with fake leaves and cherries and small lights inside. See Also: DIY Mason Jar Lights You Can Put Inside Lanterns

How to Make Rustic Wood Lanterns for Outdoor?
Below are the step-by-step instructions on how to make wood lanterns for outdoors: Skill Level: Intermediate (involves straight to complex decorative cuttings working with unique tools, painting, and proper designing) Symbols Used: x” = x length in inches and y’ = y length in feet, where x and y can be any numerical value.
Step 1: Gather Tools & Materials
Materials:
- Pressure Treated Lumber (I used the boards with the following dimensions:
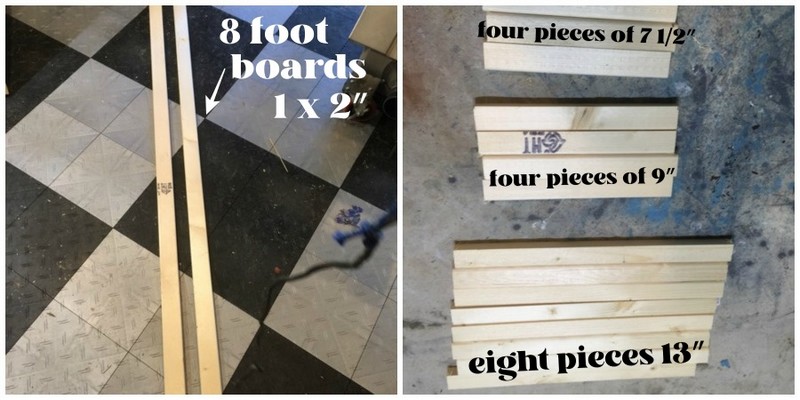
- Two 8 foot 1 x 2”
- One 8 foot 1 x 10”)
- Exterior Wood Glue ( You can also use the nails instead)
- Paint
Tools:
- Mitre Saw or Jigsaw (to cut the lumber into small pieces)
- Pin Nailer (to join the lumber cuttings if you do not want to use the adhesive)
- Router (to create stylishly cut wood for decoration)
Step 2: Cut the Lumber Boards
Before you cut! Follow the safety tips below as Pressure-treated lumbers have certain harmful:
- Wear a dust mask and gloves.
- Necessarily wear the work clothes and wash them separately after cutting or working.
- Wash hands, too, after cutting.
- Never cut the pressure-treated lumber in a place with foods, drinks, and other edible items.
After the safety precautions, here is how to cut the lumber pieces:
- Out of the two 1 x 2’s, cut eight pieces 13″ long & four pieces 9″ long & four pieces 7 1/2 ” long using the table saw or jigsaw as follows:
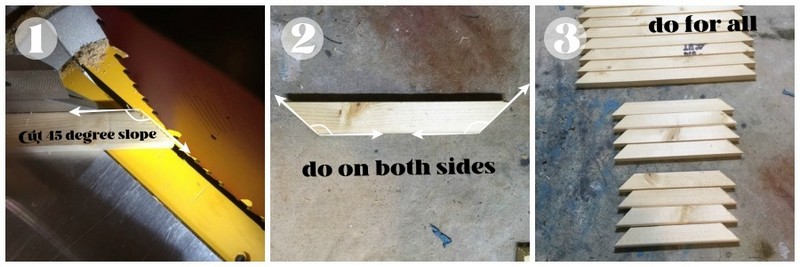
- On both ends of each cut piece, cut 45-degree angles using a miter saw. For the exact angle, use the protractor and mark the angle.
Step 3: Assemble Basic Lantern Structure
A basic hollow structure for a lantern is easy to assemble as follows:

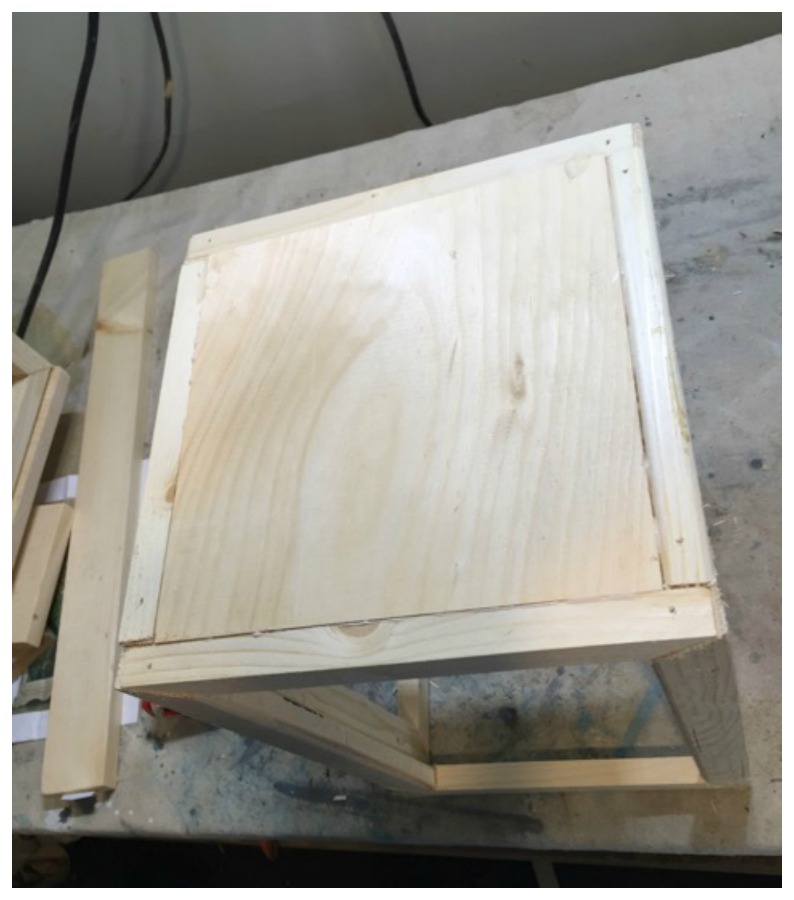
- Take two– 13″ and two– 9″ sloped cut pieces & set them together to make a rectangle. (Fitting corners together)
- To connect permanently, you can use wood glue, but we used pin nailers.
- Repeat this step with the other four pieces to make two 13 x 9″ rectangles.
- Now take two 13″ pieces & two 7 1/2″ pieces and do the same thing.
- Repeat with the remaining wood. You will have a total of 4 rectangles, which you will join together along the height to make a cuboid shape. Use a pin nailer and glue or tiny screws to put the cuboid together. Measurements are 13” x 9” x 7 1/2 ”.
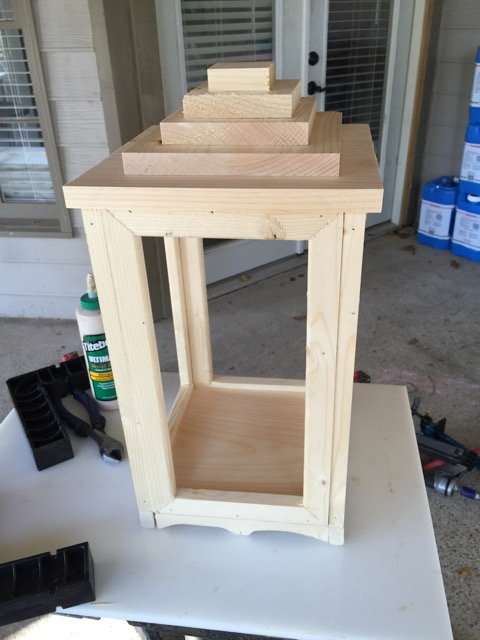
Step 4: Decorate Structure With Wood Designs
For a decorative bottom. use the 1 x 2 – cut two 9″ pieces and two 7 1/2″ pieces. Then, use a pencil to draw a pattern of what you want the base to look like. Use a band saw or a jigsaw to cut out the pattern. Use a pin nailer and glue to attach to the bottom.
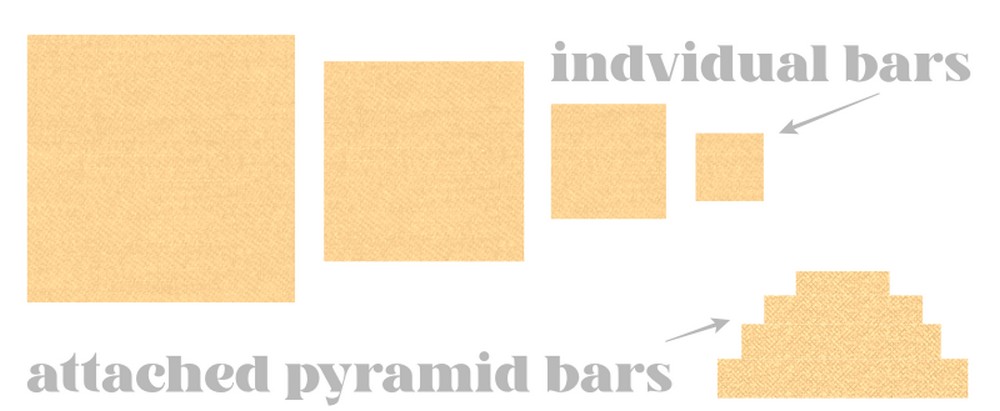
For a decorative top, use some of your 1 x 10 to make different stair-step blocks – dropping down 1″ around each edge. Attach the top and bottom and sand the structure to be ready for paint.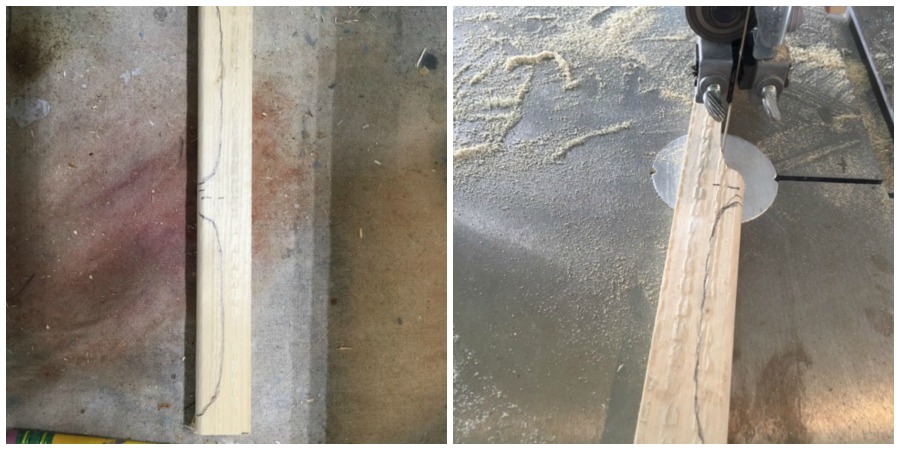
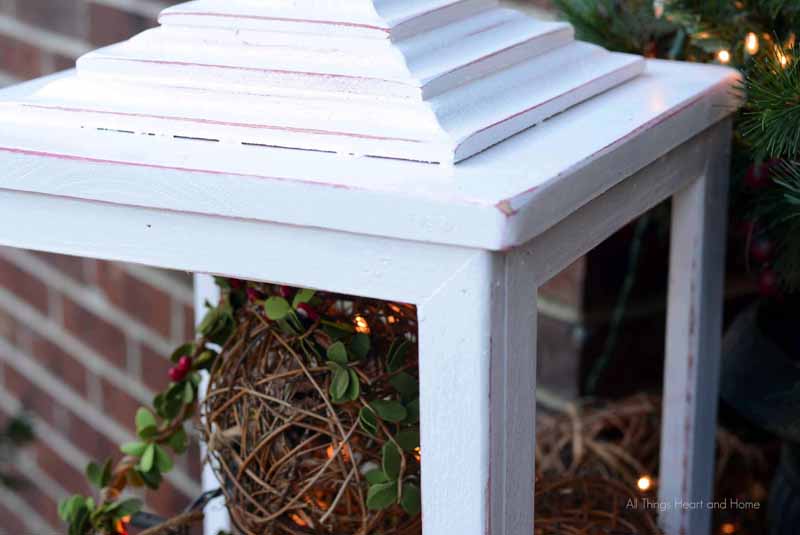
If you have a router, make a pattern on the edge with your router bit- this is what we did- (see finished lantern).
Step 5: Paint & Sand the Lantern
- Clean the prepared and decorated lantern structure.
- Then, I sprayed a coat of primer in a reddish color.
- Then, a rough single coat of white paint.

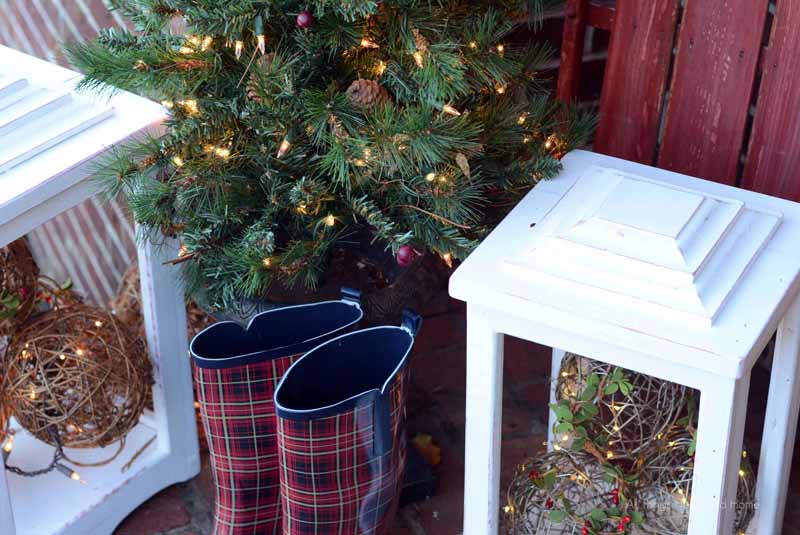
Step 6: Insert Something & Place Lanterns
Mine are tucked under a little overhang, so they won’t be in pouring rain. I added some lighted grapevine orbs. You can place it anywhere from the gardens, backyard, or porch if you are upgrading it for Christmas. See Also: DIY Screen Porch Makeover Guide
And a bit of greenery…
Step To Take Additional Care of DIY lanterns for outdoors?
If you have outdoor decorations that need painting… be sure to use exterior paint to protect your project!
Have you decorated outside? If you’d like these outdoor DIY wood lanterns as Christmas inspiration, leave a comment.
FAQs
Rain can ruin even the finest wood, so it is better to use outdoor lanterns under a roof.
Yes, securely attach a hook to the lantern and then with the longer one to the wall and hang it. However, Double-check the security because the giant lanterns are heavy.
Leave a Reply