
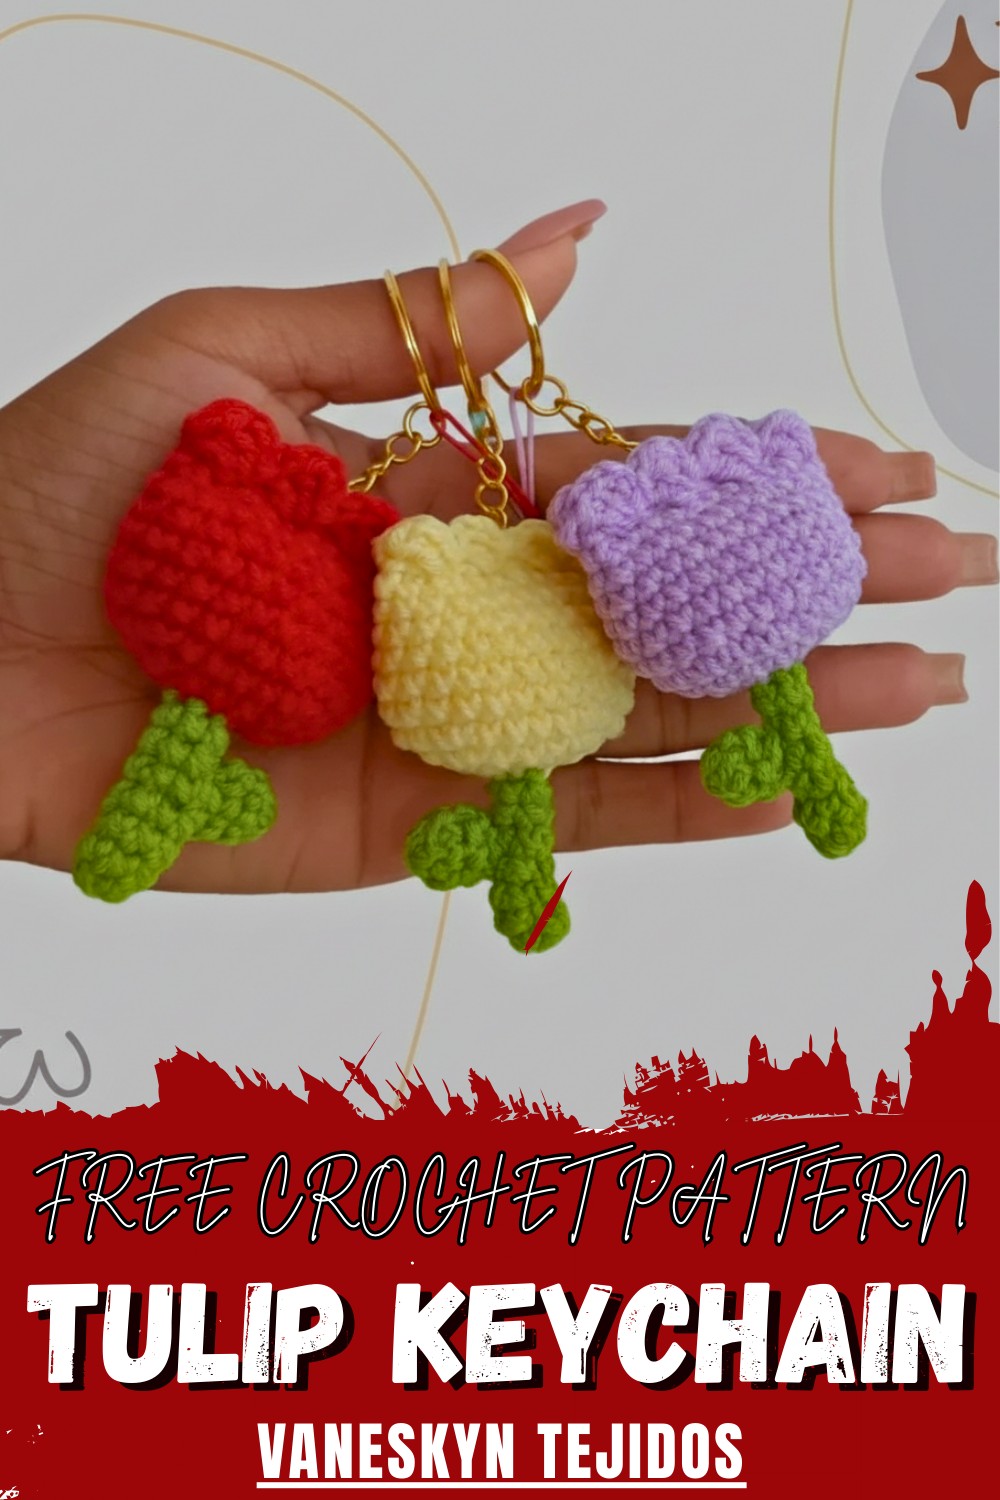
Sprout cheerful style into your day with free crochet tulip keychain pattern that brings pop color to your favorite accessories effortlessly.
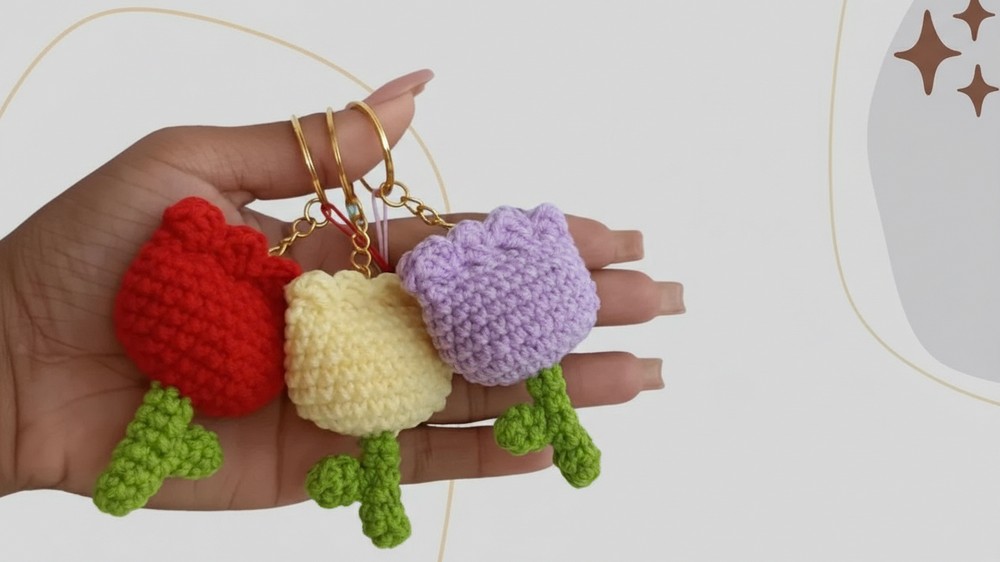
A little flower can bring smiles to every face and brighten up a simple day with color and cheer. Soft petals and a gentle green stem make this adorable bloom the perfect choice for small gifts or personal treasures. With the crochet tulip keychain pattern in hand anyone can create a tiny tulip that fits easily on any keyring backpack or purse. The finished keychain sits neatly in your palm with lively colors that catch the eye and a joyful shape that feels cheerful in every season.
Beginner Friendly Free Crochet Tulip Keychain Pattern
Using just a few easy stitches you get a pretty accessory that never needs water and will stay beautiful for years. Friends and family love getting this hand-made surprise for no special reason at all. It is sturdy light and easy to carry anywhere so every key looks special and unique. A project like this is perfect for sharing happiness in everyday life.
Crocheted Tulip Keychain Pattern
Materials
- Yarn:
- DK weight yarn, such as Katia Twitch (100% acrylic recommended)
- 1 color for flower (e.g., purple)
- 1 color for stem/leaf (e.g., green)
- Crochet Hook: 2.5 mm to 3 mm (according to preference)
- Yarn Needle (wool needle): for sewing/assembly
- Scissors
- Keychain Ring: (split ring or hoop for attaching)
- Fiberfill/Stuffing: Polyester stuffing (or cotton/wadding)
- Optional: Stitch marker
Key Abbreviations (US Terms)
- ch: chain
- sc: single crochet
- sl st: slip stitch
- st(s): stitch(es)
- inc: increase (2 sc in one st)
- rnd: round
Special Notes
- Work in joined rounds (join with sl st and ch 1 at end of each round, unless otherwise indicated).
- Example colors: Purple for tulip, green for stem/leaf.
- Adjust hook size if needed for a tight fabric to hold stuffing.
- Use stitch marker if needed for rounds.
Pattern Instructions
Tulip Flower
With flower color:
- Foundation:
Ch 6. - Rnd 1:
- Sk first ch, sc in next 3 ch.
- In last ch, 3 sc in same st (curve formed).
- Working along the other side of the foundation chain: sc in next 2 ch,
- In last ch, 2 sc in same st (this is the first ch made; 2 sc here).
- Join to first sc with sl st. (Total: 10 sc)
- Rnd 2:
- Ch 1. Inc in first st (2 sc in same st), sc in next 3 sts.
- 3 inc (2 sc in each of next 3 sts — curved edge)
- Sc in next 3 sts.
- 2 inc (each in next 2 sts — end).
- Join with sl st. (Total: 16 sts)
- Rnd 3:
- Ch 1. Sc in first st, inc in next st. (repeat: sc, inc, across 4 times).
- Sc in next 4 sts.
- (On curved edge) Repeat [sc, inc] 3 times.
- Sc in next 4 sts.
- (Other end) Repeat [sc, inc] 2 times.
- Join with sl st. (Check: you should now have 24 sts)
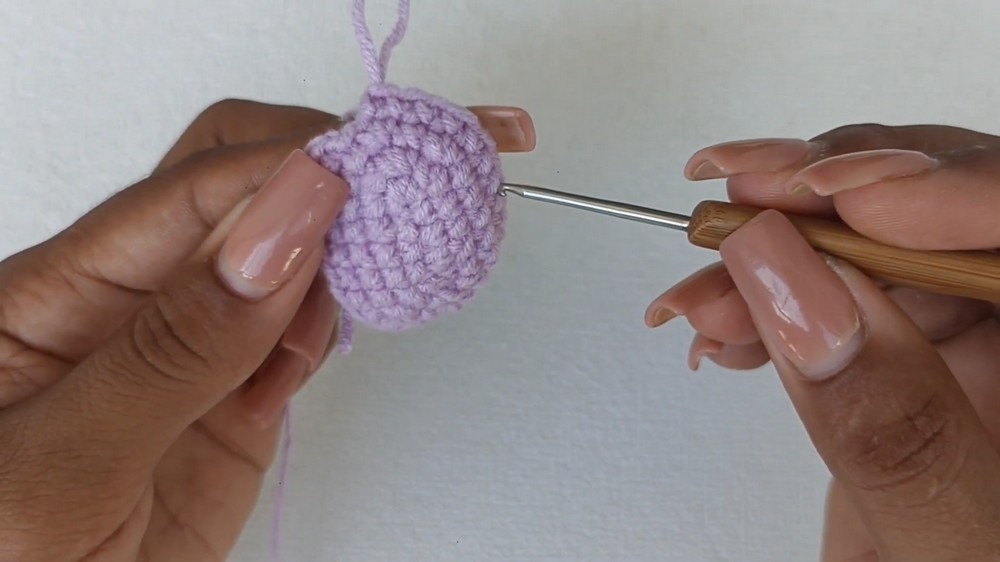
- Rnd 4:
- Ch 1. Sc in each st around (24 sc).
- Join with sl st.
- Rnd 5–9:
- Repeat Rnd 4 (sc in each st around; join with sl st at end).
- At end of Rnd 9, fasten off, leaving a long strand for sewing.
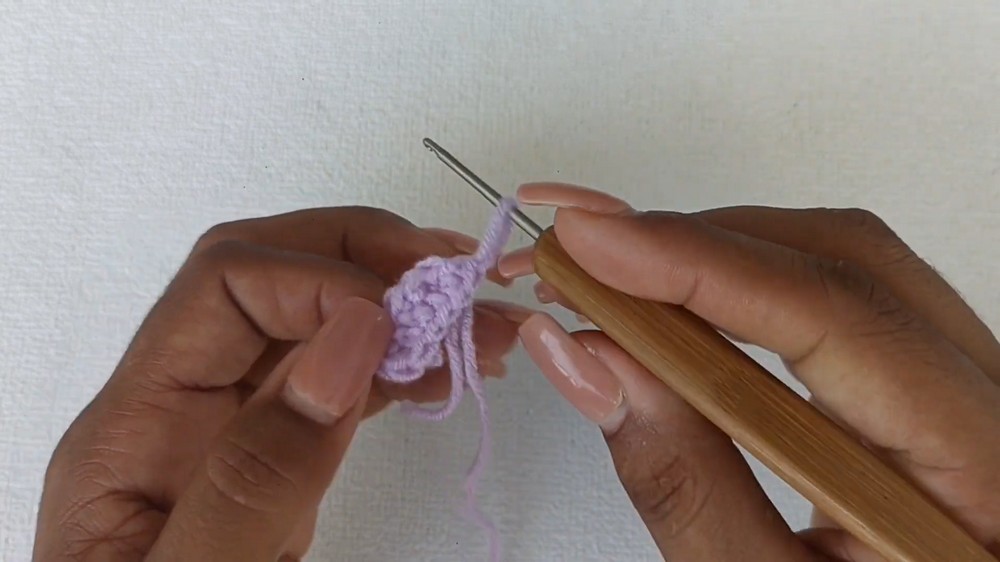
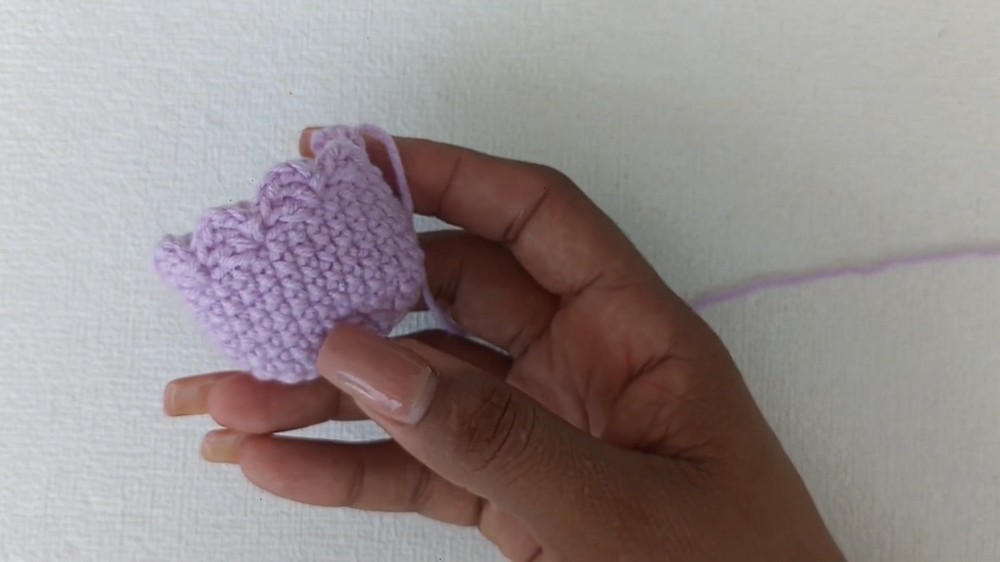
Tulip Petals (Optional “Ruffle” Edge)
With flower color:
- Rnd 10 (Petals):
- Attach yarn at any st.
- [Ch 3, 2 dc in same st, skip 2 sts, sl st in next st] around (repeat this petal segment).
- Adjust if necessary to fit around evenly.
- Fasten off and weave in end.
Stuffing
- Gently stuff the tulip through the open bottom, adjusting the firmness as you like. Do not over-stuff.
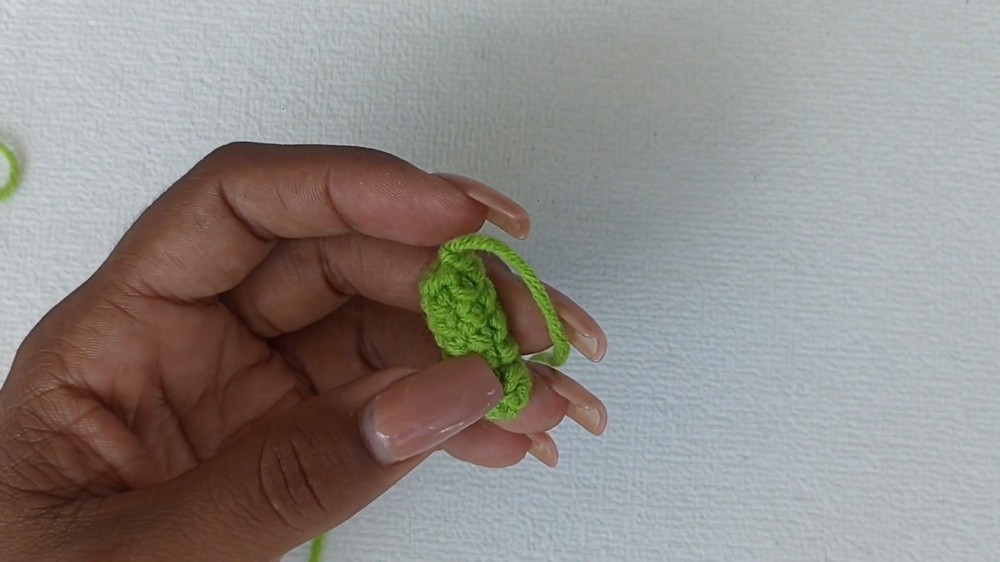
Leaf
With green yarn:
- Magic Ring:
Make a magic ring, ch 1 to secure. - Rnd 1:
- 5 sc into ring, pull closed.
- Rnd 2:
- Ch 1, sc in each st around (5 sc).
- Rnd 3:
- Repeat Rnd 2. (You should now have 3 rounds total; make leaf as long as you like; 3 rounds is the sample.)
- Fasten off leaving a tail for sewing.
Stem
With green yarn:
- Magic Ring:
Make a magic ring, ch 1 to secure. - Rnd 1:
- 5 sc in ring, pull closed. Join with sl st if desired.
- Rnd 2–7 (Stem):
- Sc in each st around (5 sc per round) for 7 rounds (or to length needed for your tulip and keychain).
- If preferred, stuff lightly for a firmer stem, or leave unstuffed for flexibility.
- Fasten off, leaving a tail for sewing.
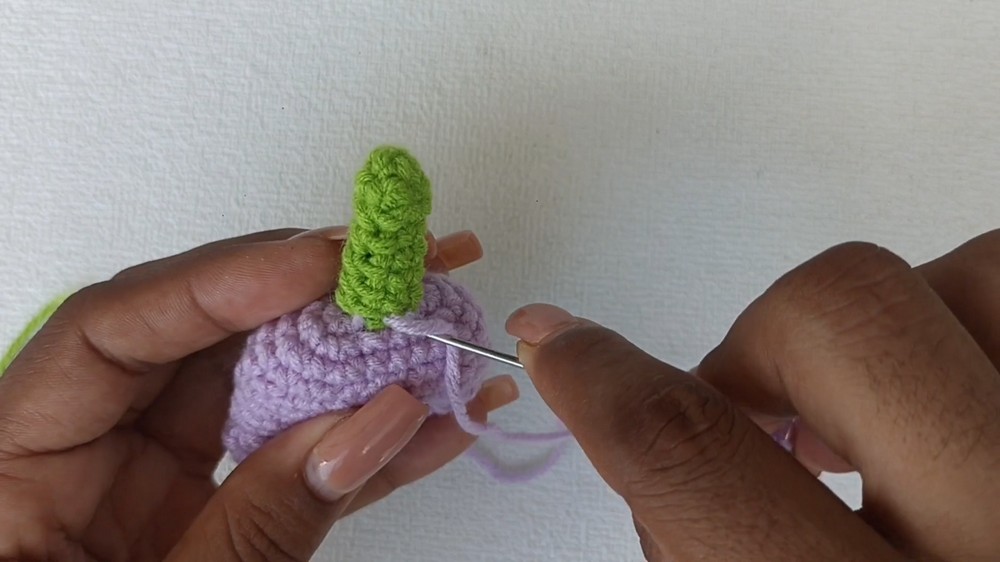
Assembly
- Sew Tulip Base:
- Position and sew closed the opening at the base of the tulip (rnd 9), shaping as you go.
- Attach Stem:
- Center and securely sew the stem to the base of the flower; fasten off and weave in yarn.
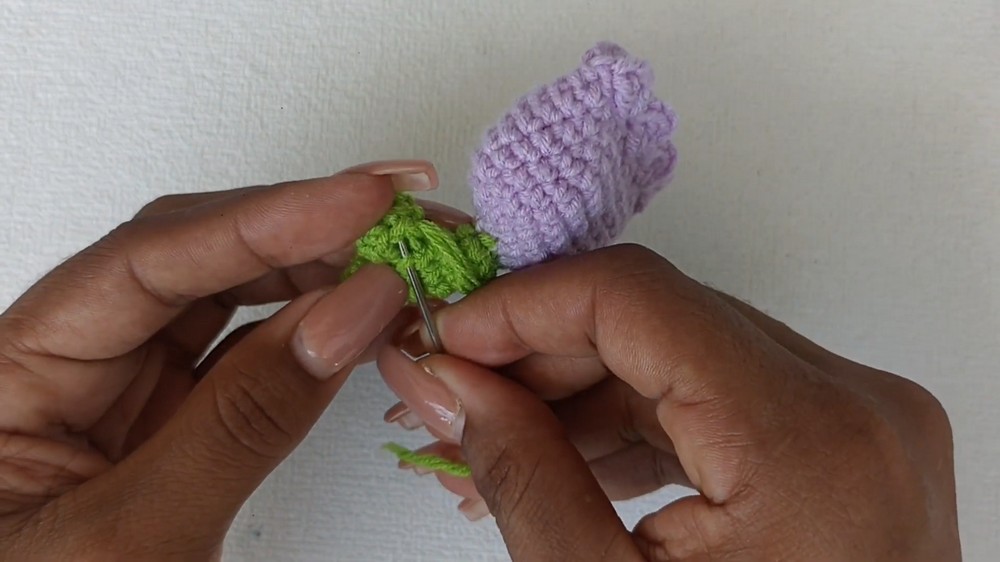
- Attach Leaf:
- Sew the leaf to the side of the stem using invisible stitches; fasten off and hide the ends inside the stem.
- Keychain Attachment:
- Insert keychain ring/hoop through top or stem. Alternatively, use a strong string or yarn loop threaded through the flower top, secured to the key ring.
- Finishing:
- Weave in any remaining yarn tails carefully and trim.
- Shape your tulip and ensure all pieces are firmly attached.
Conclusion
Your adorable tulip keychain is complete! With soft curves, closing petals, and a sturdy stem and leaf, it’s a perfect, cheerful accessory. Gift to someone special, or keep for yourself to brighten your day!
Pattern Corrections & Tips
- Keep stitches tight to ensure stuffing does not protrude.
- Invisible Join: For a neater finish, use the invisible join when sewing the flower closed.
- Counting Rounds: Use a stitch marker if you have difficulty tracking rounds.
- Adjust Lengths: Feel free to adjust the length of the stem and size of the leaf for a different look.
- Keychain Security: Use strong sewing and firmly attach the keychain ring for longer wear.
Leave a Reply