
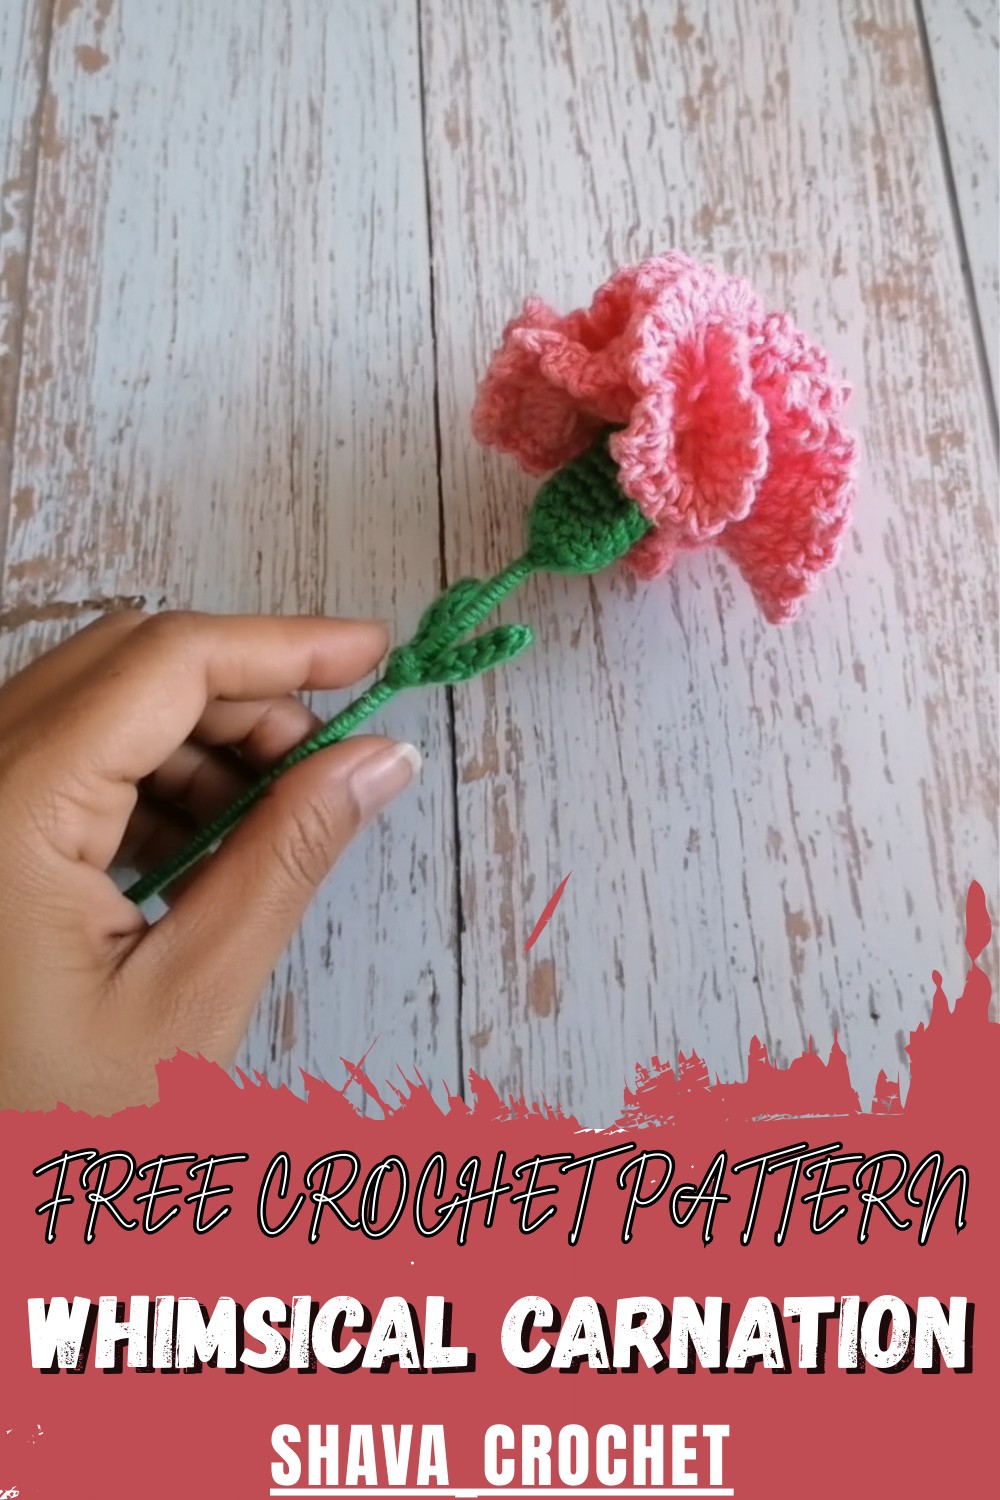
Sprinkle charm into your day with free crochet carnation pattern & fill your space with everlasting color that is simple & perfect for anyone.
Color swirls and a single petal curls in a way that catches every eye—a flower that never wilts can brighten any space. Delicate ruffles and lively shape bring a touch of nature’s beauty right into your hands, giving each project something extra special. Using the crochet carnation pattern, one blossom can be made for home decoration, a gift, or worn as a lovely accent on clothes and accessories. This flower stands out for its soft yet bold appearance, making it perfect for every occasion.
Free Crochet Carnation Pattern – Perfect for Spring
Simple supplies transform into a cheerful carnation, and no need to worry about watering or fading—this bloom lasts forever. Choose a favorite shade to match mood or space and watch your creation bring smiles wherever it’s placed. More than just decorative, this carnation adds warmth and charm, helping everyone share kindness in colorful ways. Each petal tells a story, and all ages enjoy making and gifting this wonderful handmade flower.
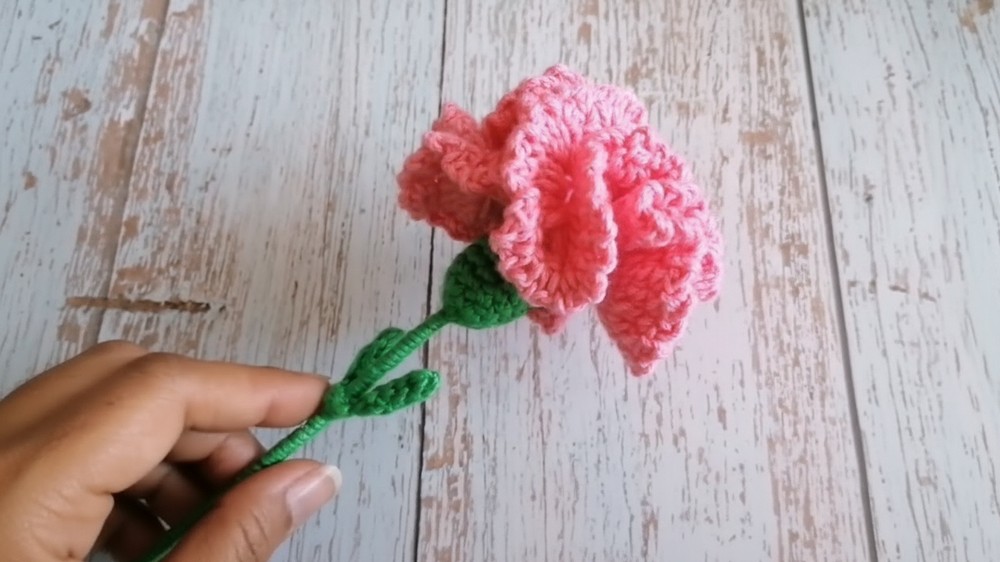
Crochet Carnation Flower Pattern
Materials
- Yarn: Two colors of your choice—
- Color A (flower)
- Color B (stem and leaf)
- Hook: 3.0 mm crochet hook (or size appropriate to your yarn)
- Tapestry Needle: For sewing and weaving in ends
- Scissors
- Stick, Skewer, or Florist’s Wire: For the flower stem
- Hot or Cold Glue (hot glue preferred for quick setting)
Key Abbreviations (US Terms)
- ch: chain
- sc: single crochet
- dc: double crochet
- sl st: slip stitch
- st(s): stitch(es)
- inc: increase (work 2 sts in the same st)
- rnd/row: round/row
Special Notes
- Work tightly so your carnation maintains structure.
- Hot glue is recommended for assembly but cold glue is also acceptable.
- Pattern is for one carnation; make more for a bouquet!
Pattern
Flower Center (Base)
With Color A (flower):
- Magic Ring:
- Make a magic ring or a slip knot loop.
- Rnd 1:
- Work 6 sc into the ring, pull tight to close. Do not close too tightly; you will pass the stick/wire through here.
- Rnd 2:
- Inc in each st around (2 sc in each) – 12 sc.
- Rnd 3–6:
- Sc in each st around (12 sc per round; work 4 rounds).
- Place a stitch marker after Rnd 2 if needed.
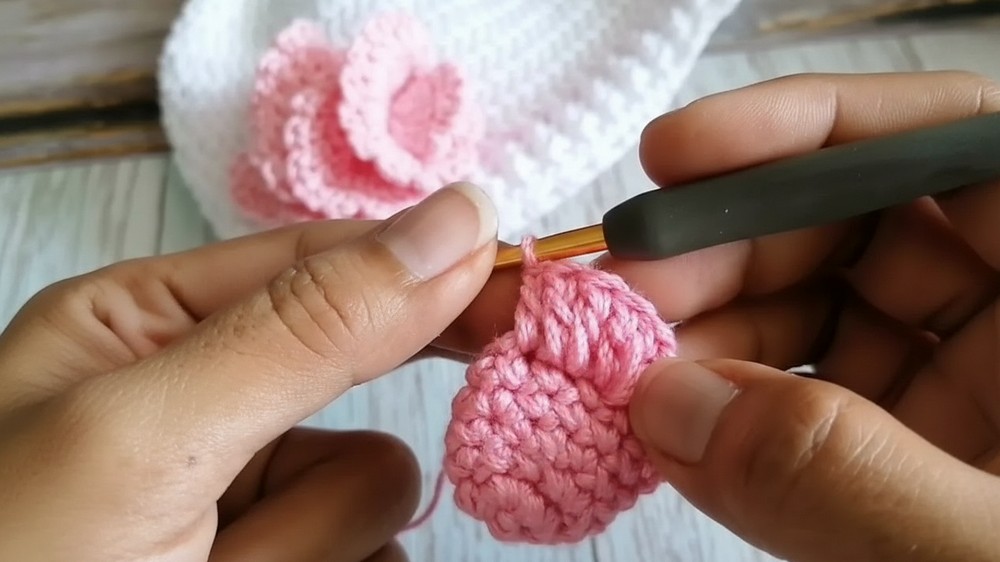
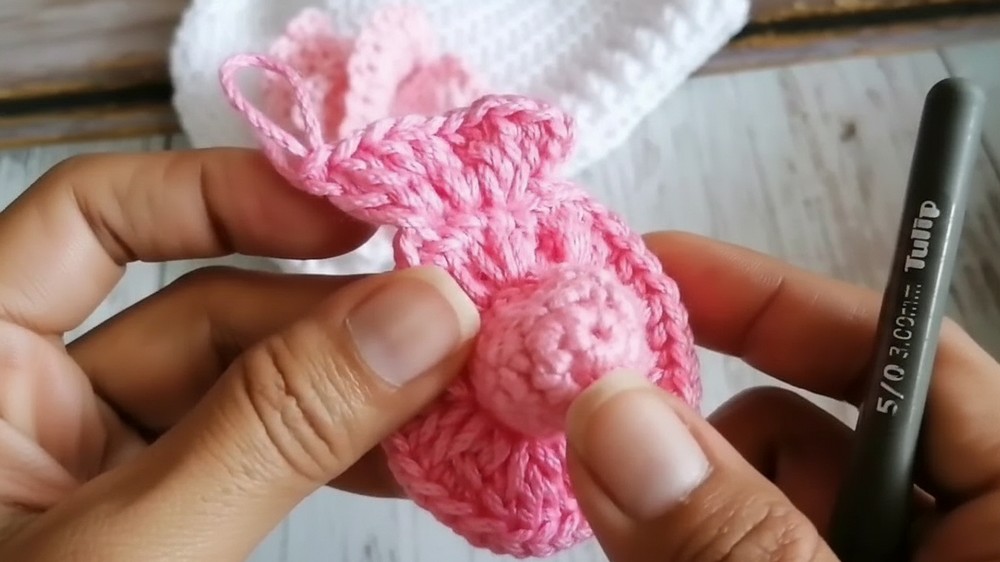
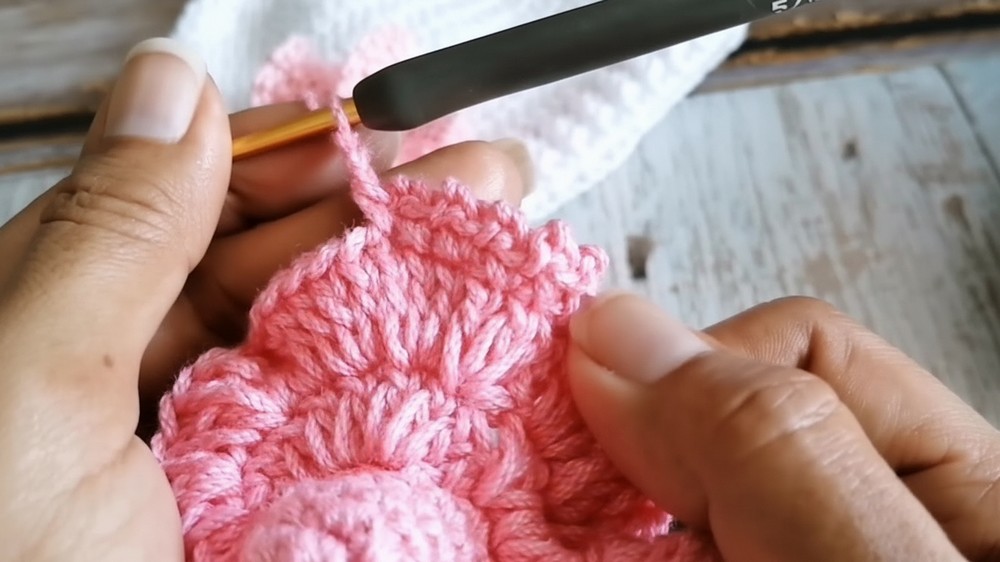
Petal Frill
- Rnd 7:
- 3 dc in each st around (i.e., make 3 dc in every single crochet of previous round).
- At end of round, join with a sl st.
- Rnd 8:
- Ch 3 (counts as dc), 4 dc in each st around (i.e., 4 dc in every dc of previous round).
- Join with a sl st in top of beginning ch-3.
- Rnd 9 (Edge):
- Ch 1, sc in first st, ch 2, *skip 1, sc in next st, ch 2; repeat from * all the way around for a frilly edging.
- Join with a sl st, fasten off, and weave in end.
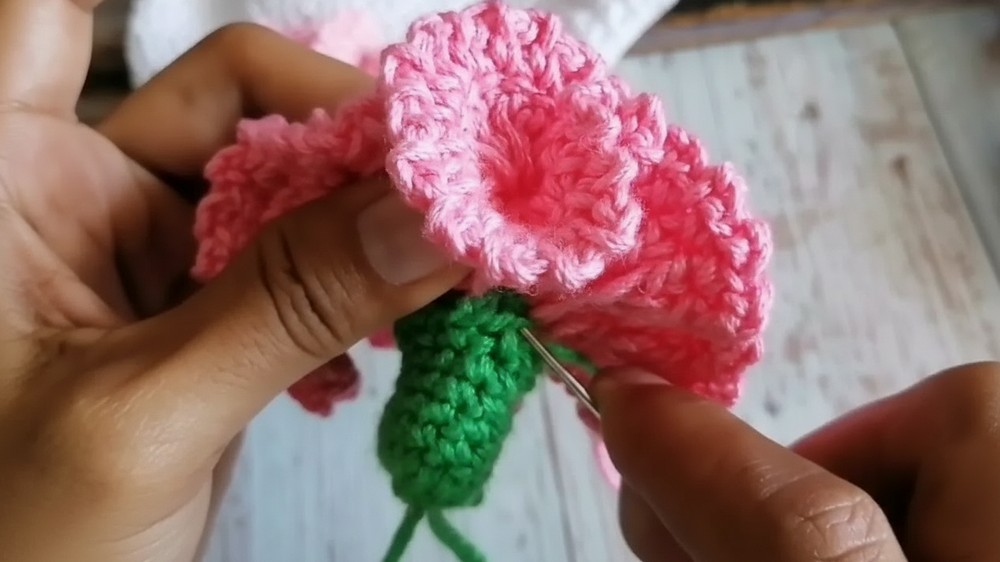
Flower Assembly
- Insert your stick/skewer through the flower center.
- Apply glue at the insertion point to hold in place.
Stem (Make 1)
With Color B (green):
- Magic Ring:
- Make a magic ring.
- Rnd 1:
- 6 sc into the ring. Do not close tightly (the stick will pass through).
- Rnd 2:
- Inc in each st around (2 sc in each) – 12 sc.
- Rnd 3–6:
- Sc in each st around (12 sc per round; 4 rounds).
- Use stitch marker if needed.
- Rnd 7 (Finishing Edge):
- [Sc in next st, ch 1] repeat around.
- Fasten off, leaving a tail.
Attaching the Stem
- Slide the stem over the stick until it meets the base of the flower.
- Secure with glue.
- Use the yarn tail and tapestry needle to sew the stem and base together neatly, catching the inside loops so the seam is invisible from the outside.
Stem Wrapping
- Using Color B:
- Apply a line or stripes of glue to the stick just below the green base.
- Attach the yarn at the top of the stick and wrap it tightly, covering the stick completely down to the desired stem length.
- Add glue as you go to secure and finish off at the stem base.

Leaf
With Color B:
- Leaf Base:
- Ch 4, turn, sl st in first ch to make a small ring/base.
- First Side of Leaf:
- Ch 6, sl st in second ch from hook, sl st in next, sc in next 2, sl st in next.
- Sl st in next base stitch.
- Second Side of Leaf:
- Ch 6, repeat as on first side to form a symmetrical leaf.
- Sl st in remaining base stitch to finish.
- Fasten off leaving a long tail for sewing.
- Attach Leaf:
- Carefully open a space in the ring and insert the stick through.
- Sew the base of the leaf to the stem with the long tail, making a few tight stitches back and forth.
- Weave in and hide all ends inside the leaf.
Conclusion
You have now crafted a beautiful, full crochet carnation with a frilled flower and a realistic stem. This project works up quickly and is beginner friendly, perfect as standalone gifts or grouped as a bouquet!
Pattern Corrections & Tips
- Petal Height/Frill: Add another round of dc increases for a fuller flower.
- Changing Size: Use thicker yarn for a larger carnation or finer thread for a delicate mini.
- Leaf Construction: Adjust the number of chains for longer or shorter leaves.
- Finishing: Secure all knots well and use a tapestry needle for hidden stitching.
- Assembly: Hot glue makes for a faster, neater finish.
- Stem Wrapping: Wrap the yarn tightly and smoothly for a professional appearance.
Leave a Reply