
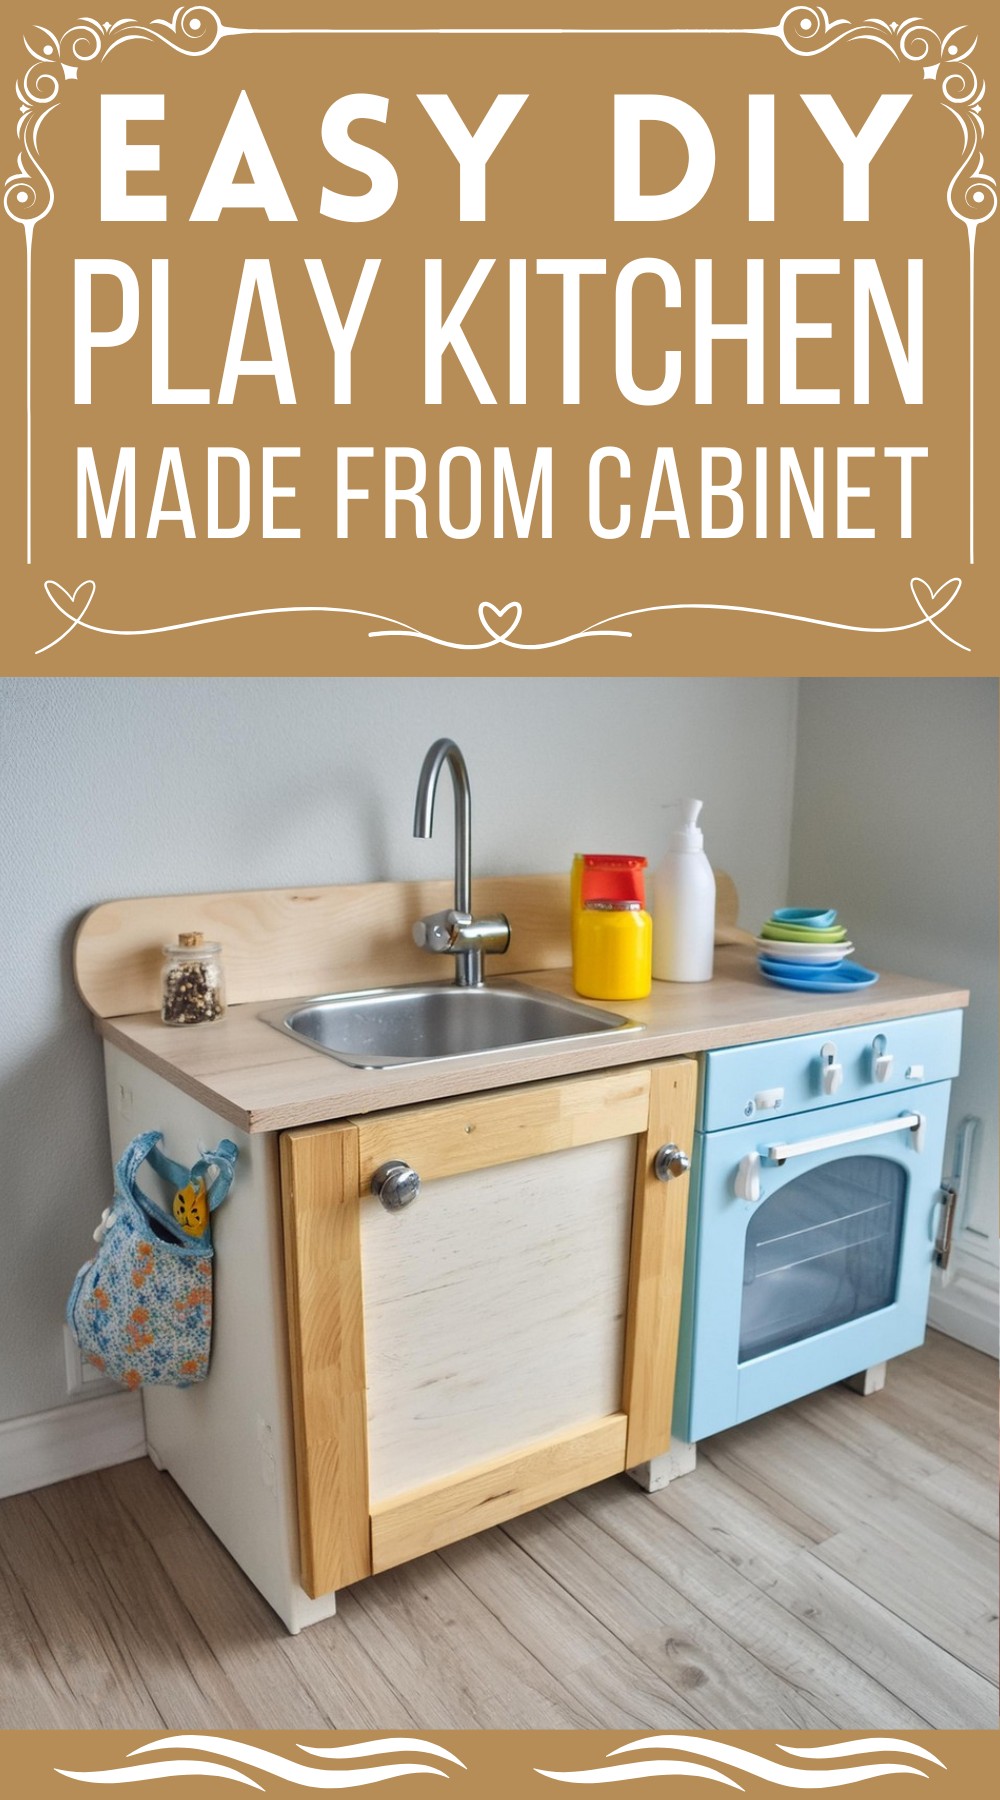
Create a charming DIY play kitchen for a child using simple materials like a cabinet, wood remnants, and actual kitchen hardware. Follow step-by-step instructions to build a space where imagination cooks up endless fun. The project added unique touches like turning oven knobs, a light, a real yet unconnected faucet, and a chic baking rack, enhancing playtime realism. Its construction from a spare cabinet and other cost-effective materials, like a $10 faucet and a metal bowl sink, not only saved money but also allowed for creative customization. This DIY kitchen combines fun, functionality, and frugality, making it a valuable addition to any child’s play area.
DIY Play Kitchen 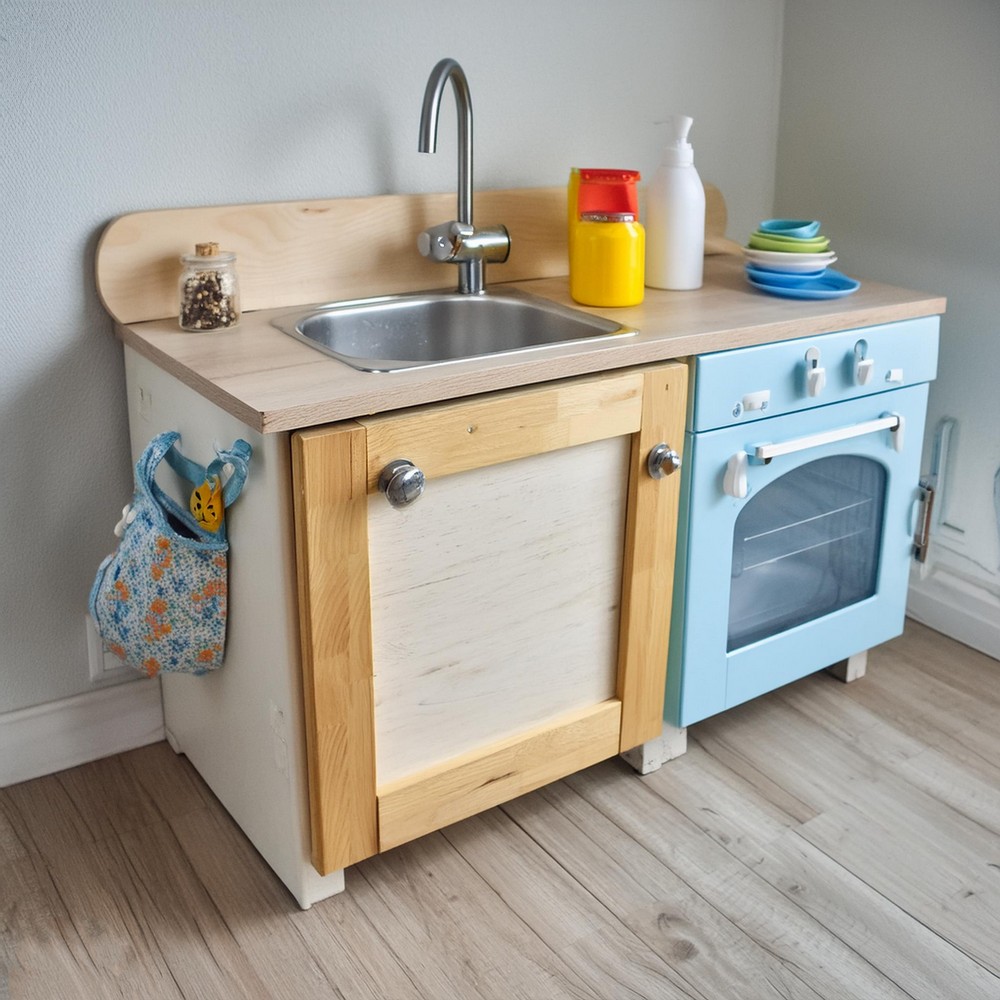
Materials List
- Base kitchen cabinet
- 1 x 4″ wood plank
- Spare 1 x 12″ board
- Leftover plank for the backsplash
- Actual kitchen faucet and handle
- Stainless steel bowl
- Jigsaw
- Wrench and copper pipe cutter
- Heavy-duty screws and a block of wood
- Fence hinges
- Pre-cut plexiglass
- Thin craft wood
- Small wooden discs (for stove knobs)
- Kreg Jig drill bit
- Wood adhesive
- Wood putty
- Primer
- Paint in chosen colors
- Clear silicone caulk
- Tap light
- Black wire rack
- Trivet and round wooden plaque
- Silver spray paint
- Chrome door handles
- Various other crafting tools and supplies
Tools Used
- Drill
- Jigsaw
- Wrench
- Copper pipe cutter
- Dremel Trio
- Craft saw
- Screwdriver
- Paintbrushes
- Caulking gun
- Sander or sandpaper
Step-By-Step Process
Preparation and Base Building:
Start by giving the base cabinet some height. Create a stand using a 1 x 4″ remnant, ensuring it’s offset to mimic the toe-kick of a real cabinet. Elevate the kitchen’s look with a 1 x 12″ board and a leftover plank, fashioning a countertop with a petite backsplash. Trim these to fit just right.

Sink and Faucet Installation:
To bring the sink area to life, nab a chic metal bowl and an actual faucet from the ReStore. Trace the bowl on the counter and use a jigsaw to cut just inside the line to fit it snugly. Slim down the faucet hardware with a wrench and pipe cutter, discarding unnecessary tubes. Drill holes and fasten the fixtures in place, adding support blocks as needed.
Oven Transformation:
Convert a cabinet door into an oven with $3 fence hinges. Score pre-cut plexiglass for the oven’s window and frame it with craft wood to disguise any uneven cuts. Hold off on attaching the plexiglass until after painting.
Crafting the Knobs:
Use small wooden discs, washers, and bolts to construct interactive oven knobs. Drill holes in the door with a Kreg Jig drill bit to ensure the nuts sit flush. Assemble and paint the knobs, adding crafted wooden arrows for a finished look.

Painting and Priming:
Sneak the structure away to prime thoroughly. Follow up with paint, applying a cheerful color scheme to mimic a real kitchen setup.
Final Touches:
Attach a tap light inside the oven with velcro, emulating a working oven light. Slot in a wire rack as an oven shelf. Secure the framed plexiglass into the oven door using clear silicone caulk. Add extra shelving inside the cabinet for storage with the help of wood remnants. Fashion a makeshift hot plate by combining a painted wooden round and a trivet.
Finishing Flourishes:
Apply silver spray paint to the knobs for a metallic sheen. Install shiny chrome door handles for an authentic kitchenette vibe and towel hanging. Apply felt pads under the DIY burner to protect the countertop.

Leave a Reply