
If you love enjoying quality time outdoors with family and friends, then a do-it-yourself (DIY) outdoor kitchen could be a fun project for you. Built with sturdy stones, it can weather all seasons and need very little maintenance, making it a lasting addition to your backyard. It can be best to create a lovely and sturdy place for cooking and enjoying time outdoors, plus also provide an unmatchable cooking experience along with the soothing atmosphere around. The project involves designing, constructing, and finishing a stylish kitchen island out in the open. You can find a full step-by-step guide on how to create your kitchen island below.

DIY Outdoor Kitchen Made Of Stones
Materials Required
- Steel
- Cement Board
- Mortar
- Stone for exterior
- Granite for countertop
- Grill, Burner, Ice Chest
- Anchor Bolts
Tools Used
- Welding tools
- Grinder
- Paintbrush
- Anchoring tools
- Cutting tools
- Making an Outdoor Kitchen Island
Design
Prepare a detailed design considering the sizing for the necessary appliances and additional elements fitted into the frame. Using a digital designing tool, such as AutoCAD, makes this phase easy and accurate.
Cutting & Assembling the Steel:
Using your design as a reference, cut the received steel into the required pieces and start welding them to form the frame.
Refining the Welds:
Post-welding, refine the welds by grinding them down to create a smooth surface, which ensures a flush fit for the cement board later. Don’t forget to clean up the inside welds too!
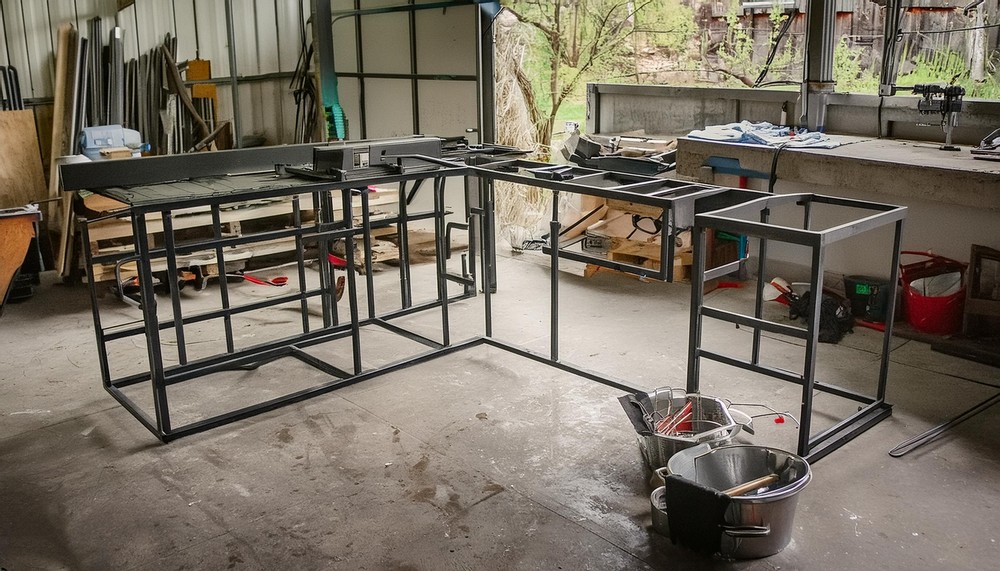
Finalizing the Steel Frame:
After the tedious process of welding and grinding, inspect the frame for accurate measurements and level. Once verified, paint the frame for a finished look and added protection.
Setting the Frame & Fastening the Cement Board:
After appropriately placing the frame on the concrete slab, ensure enough space for seating and adhere to county codes for pool proximity. The frame is secured to the slab using anchor bolts. Cement boards are measured, cut, and fastened to the steel frame after this.
Securing the Cement Board:
Once the cement board is in place, it’s time to tape it and apply a layer of mortar compound.
Exterior Construction:
A stylish stone layer is chosen next to amp up the exterior design of your Outdoor Kitchen Island.

Setting Up the Kitchen
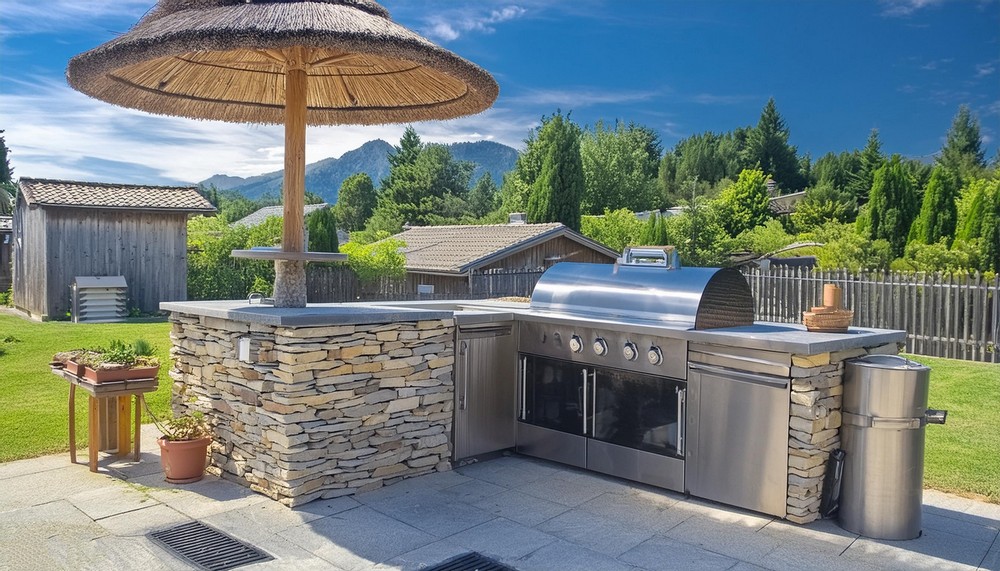
Install double doors and the stone exterior. Dry fit the grill to ensure precision for the stone fitting. Finally, place your chosen granite as a countertop.
Final Assembly of the Outdoor Kitchen Island:
This is the most satisfying step – cleaning up and setting everything up. Hook up the grill and burner, place the umbrella and chairs, and arrange any other accessories you have. Your L-shaped outdoor Kitchen is ready for action!
Building an Outdoor Kitchen Island adds much more than aesthetic appeal to your outdoor space. It’s a fun and rewarding project that results in a functional space adaptable to countless gatherings and meal preparations.

Leave a Reply