
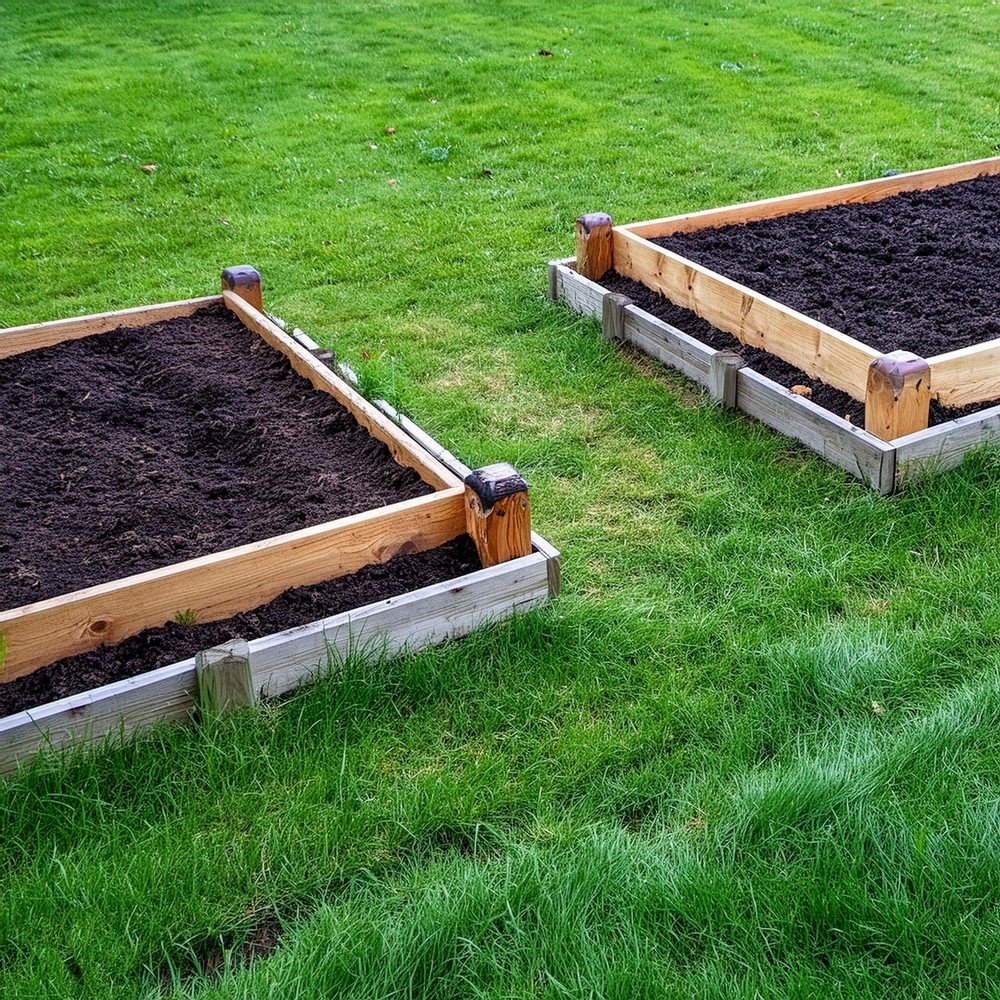
The Double Tier Raised Bed offers a neat solution for growing fresh vegetables, herbs, and flowers in your backyard. This smart design gives your plants a cozy, raised space to thrive, away from foot traffic, which can compact the soil. The garden bed exhibits a distinctive tiered structure, presenting a dual-level planting area. This innovative design not only adds visual depth to any garden space but also offers a practical way to organize and distinguish different types of plants. The lower tier, slightly shallower and narrower, is perfect for smaller plants such as herbs, marigolds, or salad greens.

DIY Double Tier Raised Bed
Materials
- Wood (specific kind and quantity per printed plan)
- 1-¼” Exterior Screws
Tools
- Tape Measure
- Miter Saw or Circular Saw
- Jigsaw
- Drill
- Forstner Bit
- Countersink Drill Bit
- Speed Square
- Kreg Multi-Mark
Building A Tiered Raised Garden Bed
Step 1: Cut the Sides
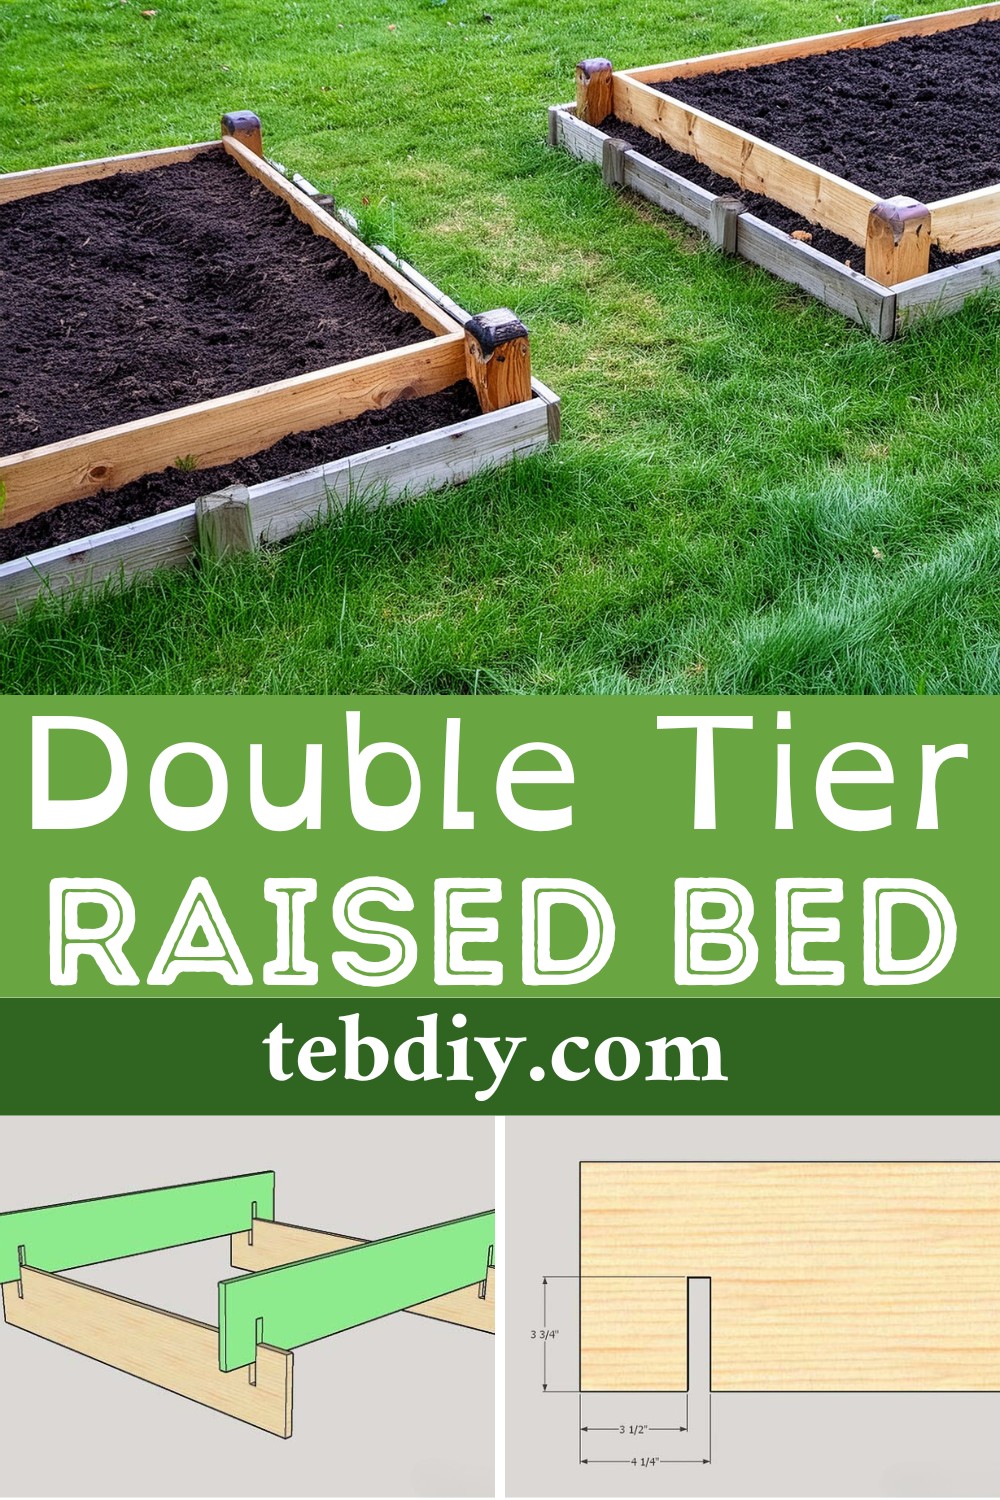
Grab your seeds and soil; this part is quick. Start by cutting four pieces of wood to length. To connect the sides effectively, you’ll cut slots into these pieces. Use the Kreg Multi-Mark to mark where each slot will go. Drill a hole at one end of where the slot will be with a Forstner bit. Then, with a jigsaw guided by a speed square for precision, cut along the marked lines up to the drilled hole, squaring off the ends.
Step 2: Cut the Posts
You’ll need four pieces of wood for the posts. Measure and mark 8″ up each side of these posts. At each 8″ mark, cut a 45-degree angle. This trimmed design helps fit the posts snugly into corners and adds a refined look to your garden bed.
Step 3: Assemble the Garden Bed
Position two sideboards on your work surface with the slots facing upwards. Carefully slide the remaining two sides into these slots to create a box shape. Place the posts in their respective corners. With everything aligned, clamp the pieces together. Pre-drill holes with a countersink bit at the end of the boards for screws. Secure the posts to the sides with screws to stabilize the structure.
Step 4: Attach the Lower Tier
Prepare four more pieces of wood for the lower tier. At one end of each, mark ¼” and cut a 32-degree angle. This angled cut ensures that the lower tier sits perfectly below the top tier. Drill countersink holes on each end of these boards, center them on the box about ¼” from each side, and use screws to attach them securely.
Step 5: Finish the Tiered Raised Garden Bed
Choose a sunny location for your garden bed and prepare the site by cutting the grass as short as possible. Line the bottom of the bed with several layers of newspaper to inhibit grass and weed growth. This step ensures a “no-dig” installation process. Place your garden bed over this lined area. Fill the tiers with organic soil, plant your seeds or young plants, and water as needed. Your tiered raised garden bed is now ready for you to enjoy the fruits (and vegetables) of your labor.
Building a DIY Tiered Raised Garden Bed is a rewarding project that beautifies your outdoor area and makes gardening more efficient and enjoyable. With straightforward steps and common tools, you can create a functional and charming raised garden bed that elevates your gardening ambitions.
Leave a Reply