
Spruce up every project with this free crochet rose pattern that brings floral charm to your home style or thoughtful handmade accessories.
A single bright petal can light up a whole space and this beautiful flower never fades or loses its charm, no matter how much time passes. With just yarn and a bit of patience, anyone can make a blossom that looks almost real and feels gentle to the touch. Using a crochet rose pattern, this lovely flower takes shape in your favorite shades and size, fitting perfectly to your style.
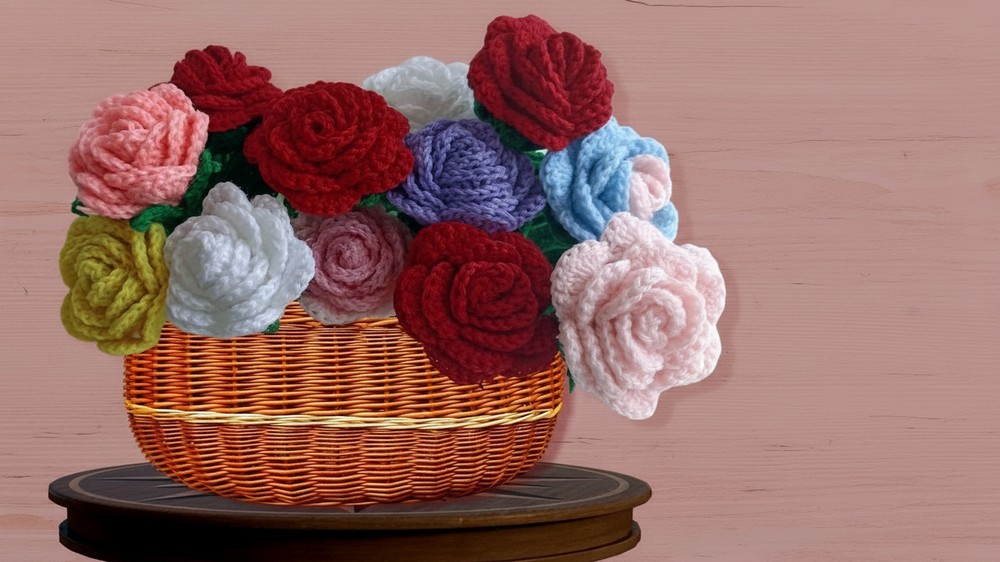
Beautiful Free Crochet Rose Pattern Step-by-Step
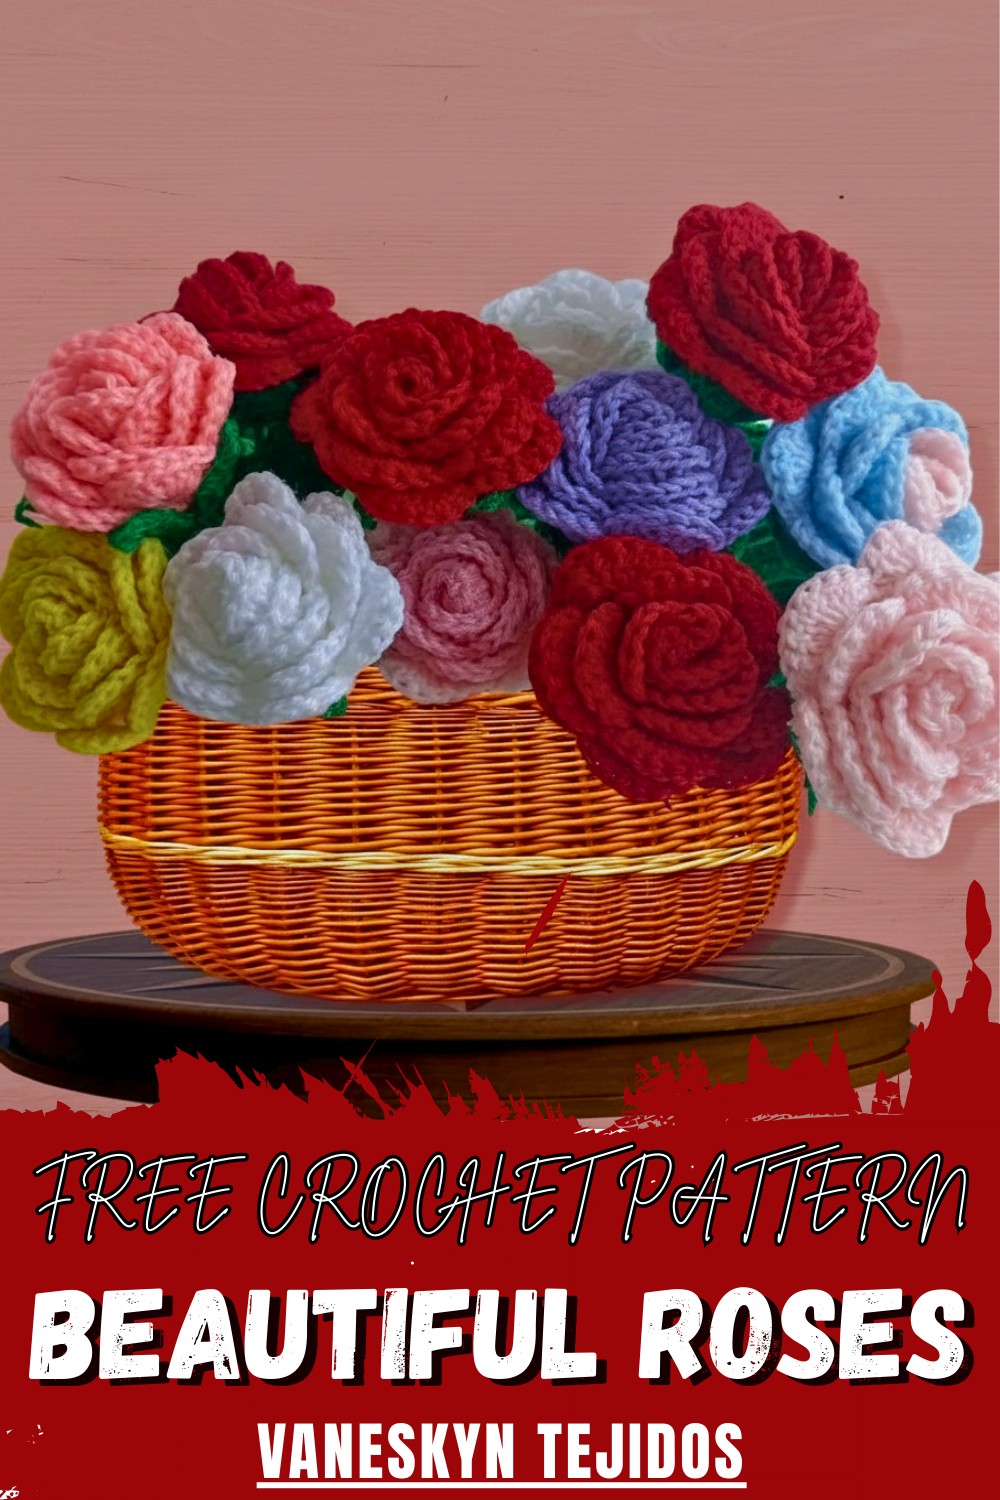
People enjoy using this special bloom to decorate a room, pin on a hat or headband, or give as a meaningful gift to someone dear. The rose stands out with layered petals and a lifelike form, making it a delightful accent for tables, windows, or clothing. Always fresh and easy to care for, the rose brings a touch of warmth and love wherever it goes. Sharing it with friends or family adds a little extra joy to everyday moments.
Crochet Rose with Stem Pattern
Materials
- Yarn: 100% acrylic yarn or your preferred fiber
- Color A: For rose (petals)
- Color B: For leaves and stem wrap
- Hook: 5 mm crochet hook (or size to match chosen yarn)
- Florist Wire: For shaping leaves and adding structure
- Wooden Skewers or Sticks: 1 to 2 for stem support (combine if thin)
- Scissors
- Wire Cutters
- Yarn/Tapestry Needle
- Hot Glue Gun & Glue Stick
- Lighter (optional): For sealing ends and removing fuzz from acrylic yarn
Key Abbreviations (US Terms)
- ch: chain
- sc: single crochet
- dc: double crochet
- sl st: slip stitch
- st(s): stitch(es)
- beg: beginning
Special Notes
- The flower base (petals) is worked with multiples of 2 + 1 chains.
- Flower and leaves are crocheted separately, then assembled/glued around a firm stem.
- Lighter is optional for finishing acrylic edges and giving shine.
- Adjust size by increasing foundation chain in steps of 2.
Step-by-Step Pattern
Rose (Petal Strip)
With Color A (petal color):
- Foundation Chain:
- Ch 53 (for standard rose; for a bigger rose, use multiples of 2 + 1).
- Row 1:
- Sc in 2nd ch from hook and in every ch across. (Total: 52 sc)
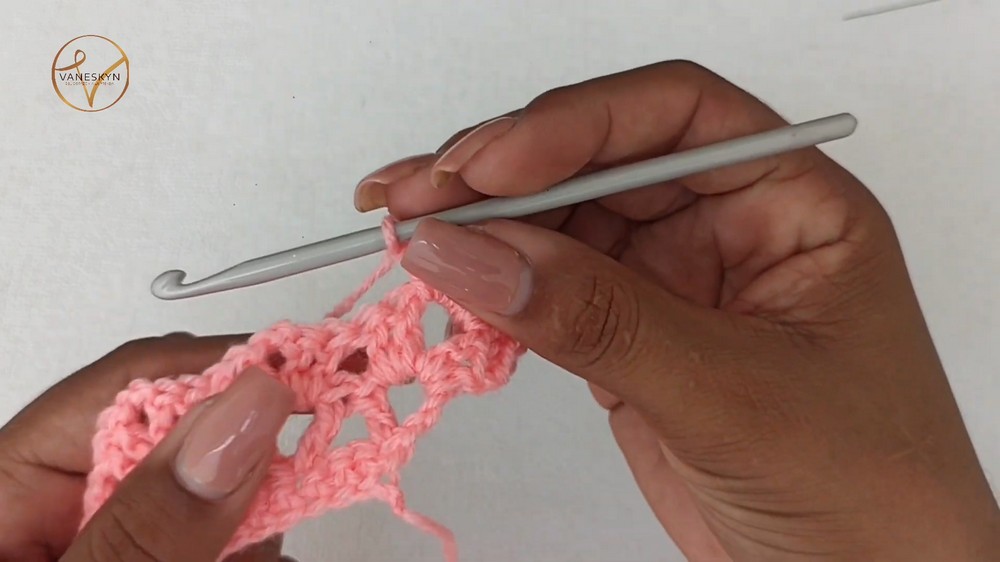
- Row 2 (Start of Shell Pattern):
- Ch 3 (counts as dc), turn.
- Ch 2 (separation).
- Dc in first st.
- [Skip 2 sts, (dc, ch 2, dc) in next st] – repeat across row until 1 st remains at end.
- Finish with (dc, ch 2, dc) in last st.
- Row 3:
- Sl st into the first fan (ch-2 space).
- Ch 3, dc, ch 2, 2 dc in same space (first shell complete).
- In each next ch-2 space: 2 dc, ch 2, 2 dc.
- Repeat across the row.
- End, fasten off.
- Row 4 (Petals):
- Turn work.
- In first ch-2 space, sc, then 7 dc, then sc (all in the ch-2 space — forms 1 large petal).
- In each subsequent ch-2 space, repeat: sc, 7 dc, sc for a full, ruffled petal effect.
- In very last ch-2 space, work sc, 13 dc, sc to end.
- Fasten off, weave in end securely.

Assembling the Rose Bloom
- Lay out the petal strip with right side up.
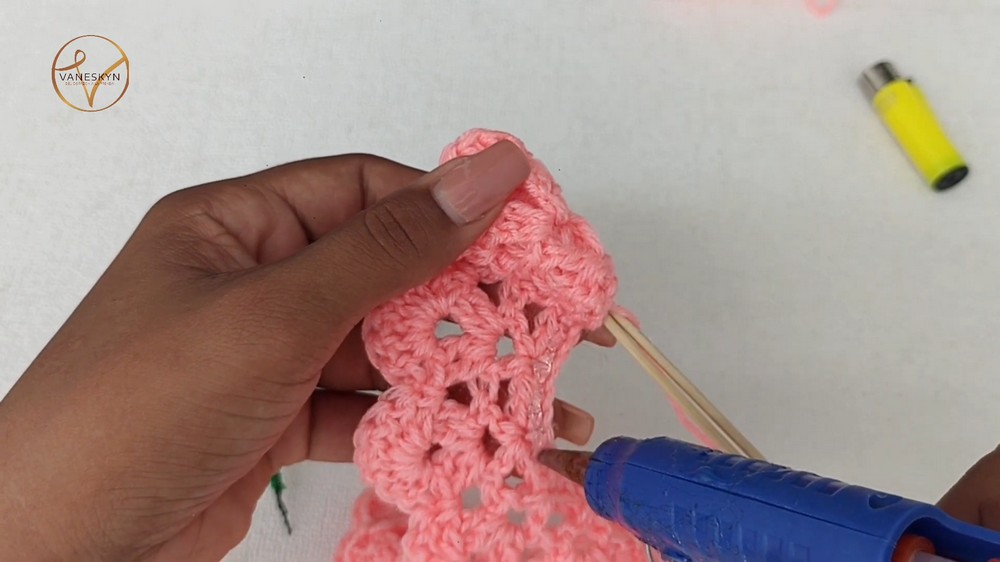
- Apply a strip of hot glue along one long edge as you tightly roll the petal strip into a spiral (petals facing outward), forming a bloom.
- As you roll, periodically add a dab of glue to keep the spiral firm. Align the bottom to be flat and snug.
- At the end, glue the strip secure and insert your wooden stick(s) for support up the center base.
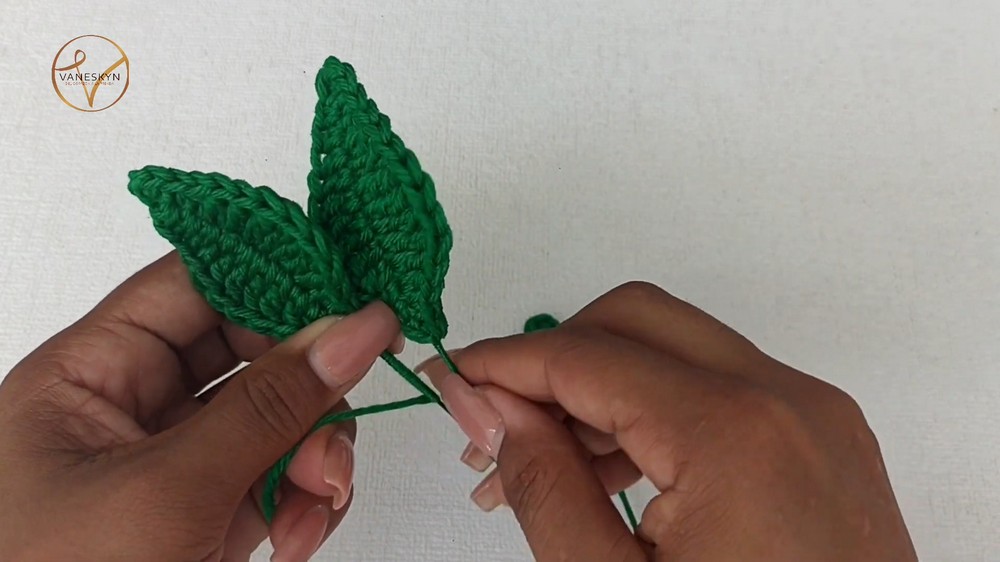
Leaves (Make 3)
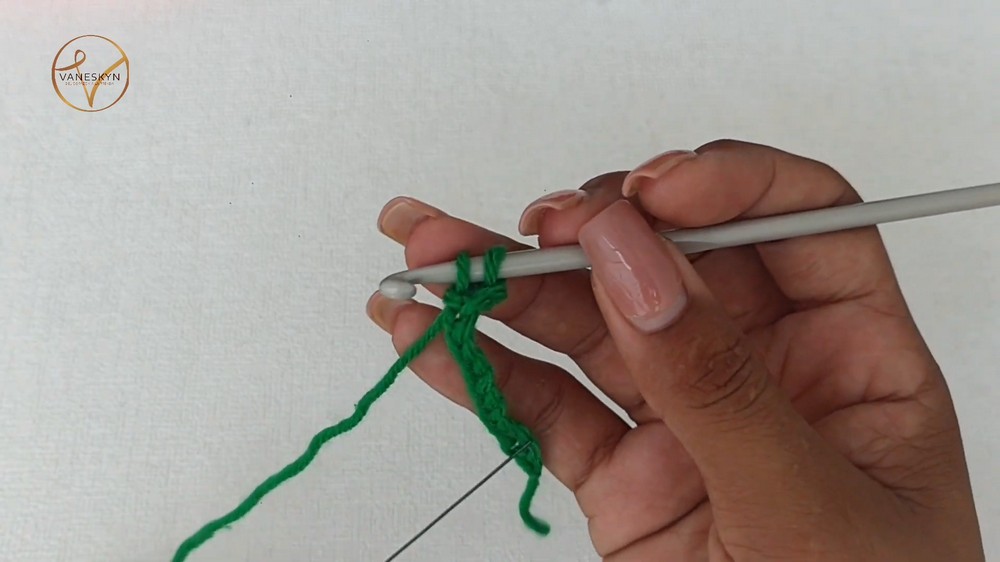
With Color B (green for leaves):
Each leaf is worked around wire for shaping.
- Foundation:
- Ch 13.
- Working with Wire:
- After the second chain from hook, hold a length of florist wire along the foundation chain (so you crochet around it).
- Sc in second ch from hook and next ch (2 sc).
- Hdc in next ch.
- Dc in next ch.
- 2 dc in next ch (increase).
- Dc in next ch.
- Hdc in next ch.
- Sc in next 2 ch.
- In last ch, work 3 sc (curve).
- Continue working along the opposite side of the chain (now forming the other side of the leaf), crocheting over the wire:
- Sc in next 2 sts, hdc in next, dc in next, 2 dc in next st, dc in next, hdc in next, sc in last 2 sts.
- Sl st in first st, fasten off leaving a long tail.
- Shaping & Finishing:
- Trim wire leaving a small tail.
- Slightly curve, pinch and flatten to leaf shape.
- Use yarn tail to wrap and finish the wire base for neatness.
- Lightly run a lighter over (optional, only for acrylic yarn) to remove fuzz and set shape.
- Repeat for a total of three leaves.
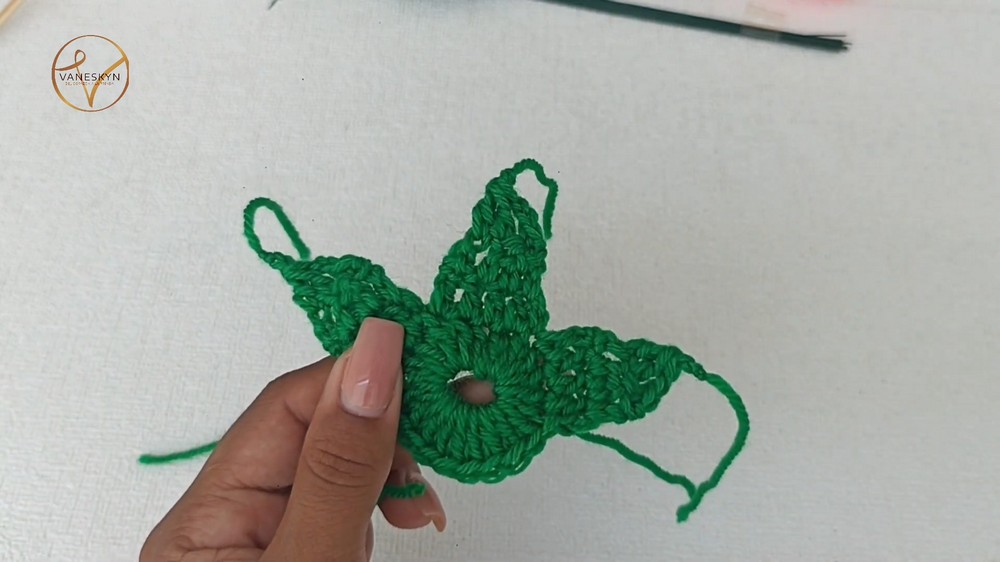
Pistil (Base Calyx)
With Color B:
- Magic Ring:
- Make a magic ring, ch 1.
- Round 1:
- Work 20 dc into the ring; pull tight.
- Join with sl st to first dc. (20 dc)
- Petal Points:
- Ch 2, then work 4 dc, turn.
- Sc in first st, ch 2, decrease next two stitches together, dc in last; turn.
- Sc, ch 2, dc2tog.
- Final petal is pointed; ch 3 & fasten off.
- Repeat to make 5 points/petals of the calyx around the base.
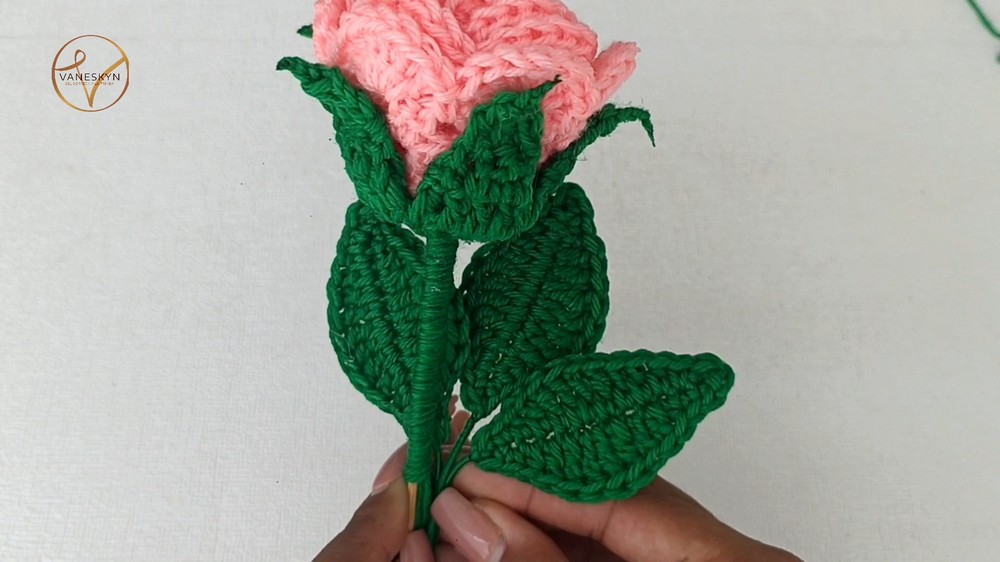
Assembly
- Form the Bloom:
- Glue or sew the petal strip—rolled—around the skewer(s), ensuring petals stay outward for a rose shape.
- Attach Pistil (Calyx) to Base:
- Glue or sew the green calyx (pistil) under the bloom, hiding the spiral end and securing the stick(s).
- Arrange and Attach Leaves:
- Gently wrap the leaf wire bases around the stick for even positioning. Secure with glue or by wrapping with yarn.
- Wrap Stem:
- Apply glue along stem and wrap with Color B yarn, covering all wire and stick neatly. Secure the end and (optionally) seal with a lighter for a clean finish.
- Final Touches:
- Fluff petals, adjust leaf shapes.
- Use lighter to gently remove stray fibers (acrylic only) for polish.
Conclusion
You’ve created a realistic, ever-blooming crochet rose—an impressive handmade gift or keepsake perfect for special occasions. Customize color and size as you wish.
Pattern Corrections & Tips
- Petal count: For fuller roses, increase foundation chain by 2s for more petals.
- Size: Use thicker yarn or larger hook for a larger rose, or use finer thread for miniatures.
- Assembly: Careful alignment and secure gluing result in the best shape.
- Stem: For utmost stability, use two skewers if the stick is thin.
- Finishing: Use a lighter carefully on acrylic yarns only to remove fuzz and add shine—never leave in one spot for long.
- Leaf shaping: Curl or bend the wire for naturalistic leaves.
Leave a Reply