
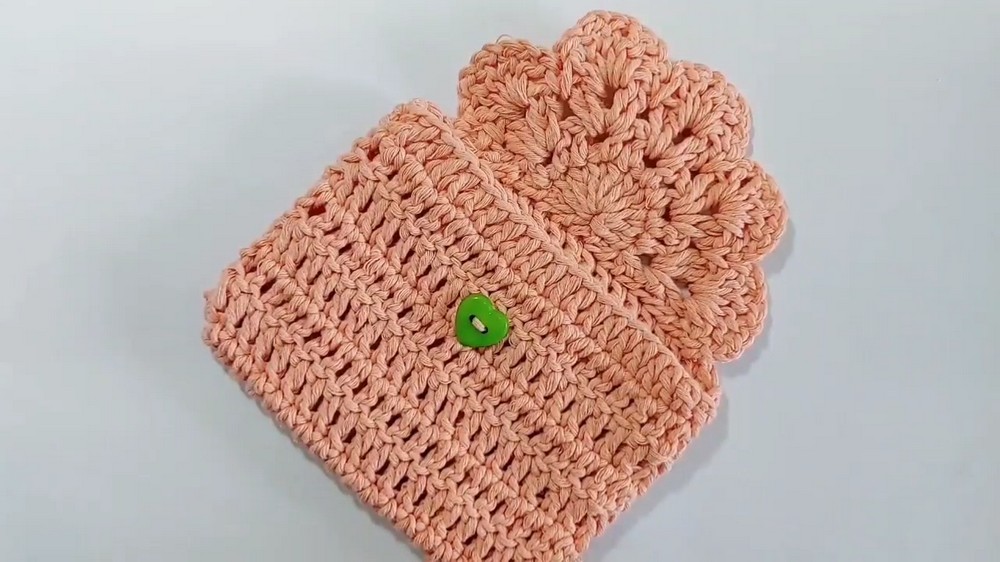
Stitch a delightful crochet coin purse with this free pattern for storing tiny treasures, it combines charm and functionality in a compact design.
A stylish way to keep your loose change, cards, or small treasures safe while adding charm to your everyday accessories. A crochet coin purse is a beautiful and functional handmade item that showcases intricate patterns and vibrant yarn colors. Crocheted with love, this tiny purse is perfect for carrying essentials like coins, keys, or even lip balm in a compact, lightweight design.
Free Crochet Coin Purse Pattern That’s Easy to Carry
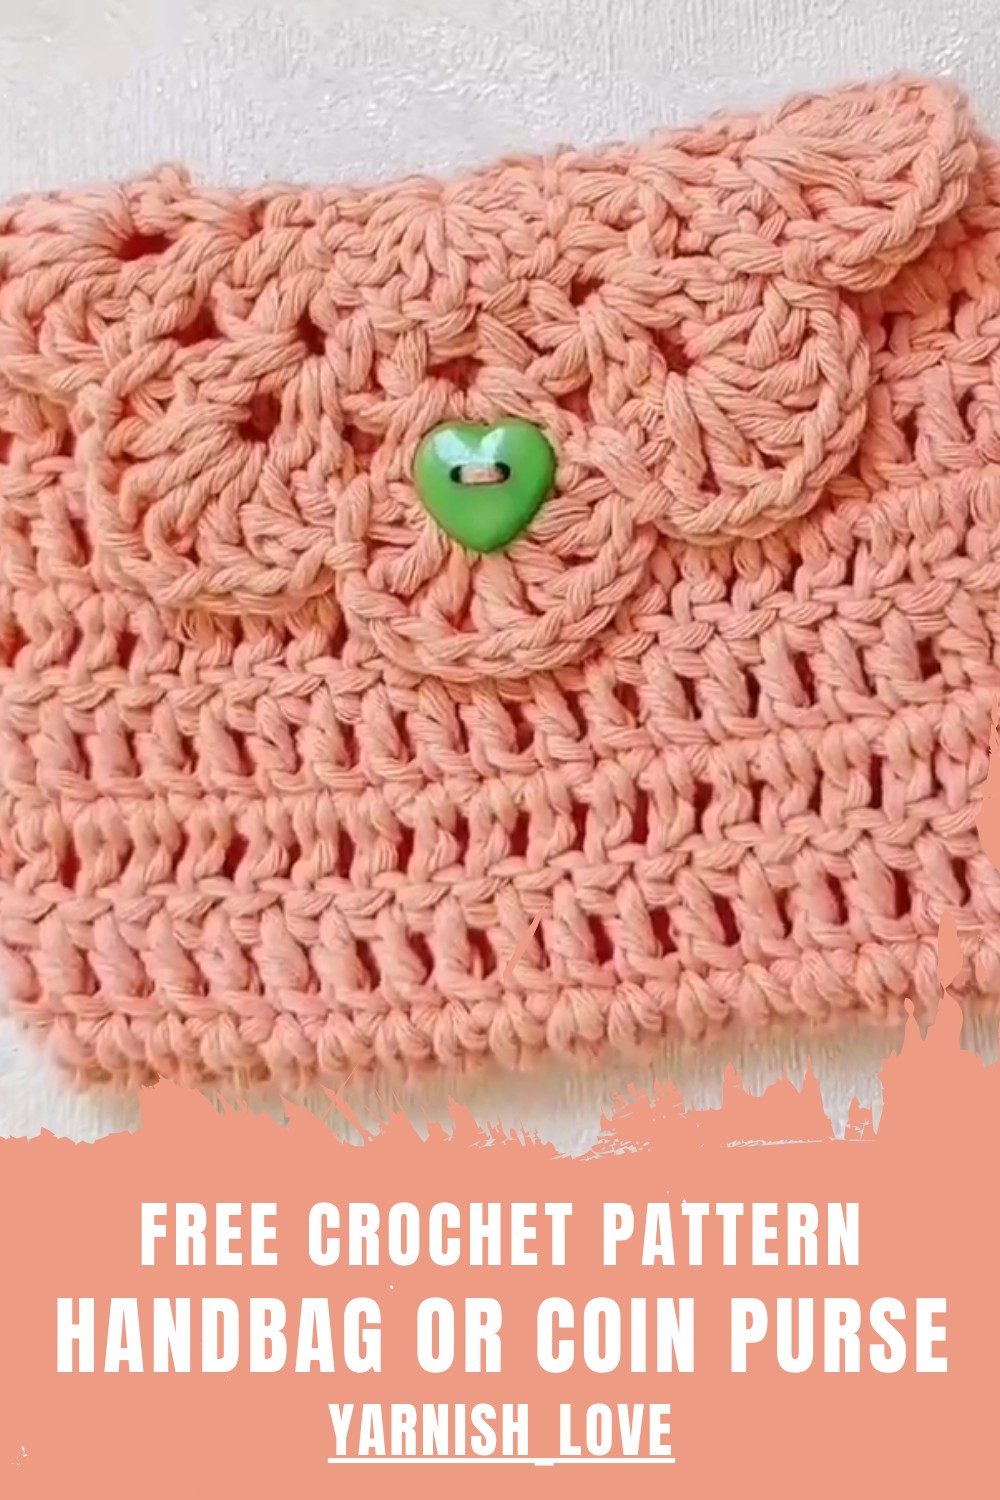
This free crochet coin purse pattern offers an easy and fun way to create something unique and meaningful, whether as a gift or a personal project. The soft texture of yarn combined with delicate stitches gives this coin purse an appealing look that stands out. Its secure closure ensures everything stays in place while being convenient to use. Whether you need it for daily errands, travel, or just to organize your little belongings, this crochet coin purse blends practicality with eye-catching beauty effortlessly.
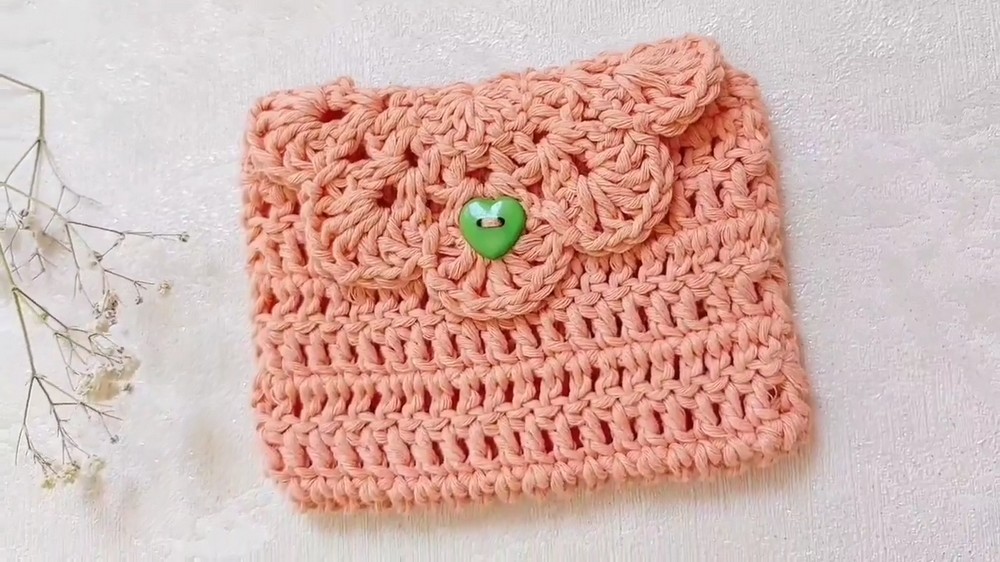
Crochet Pattern: Cute Tiny Crochet Coin Purse
Materials Needed
- Yarn: Natural cotton yarn (100% cotton)
- Hook Size: 3 mm crochet hook
- Notions: Tapestry needle, scissors, and optional stitch markers
- Gauge: 20 double crochets and 10 rows = 4 inches (10 cm), when worked with the yarn and hook specified. Adjust hook size to meet the gauge if necessary.
Finished Size
- Width: Approximately 8 cm (3.15 inches)
- Height: Approximately 8-10 cm (3.5-4 inches), depending on the number of body rows completed.
Special Techniques
- Magic Ring: Used to start circular work seamlessly.
- Half Double Crochet (hdc): Yarn over, insert hook into the stitch, pull up a loop (3 loops on hook), yarn over, and pull through all three loops.
- Slip Stitch (sl st): Insert hook into the stitch, yarn over, and pull through both loops on the hook.
Pattern Instructions
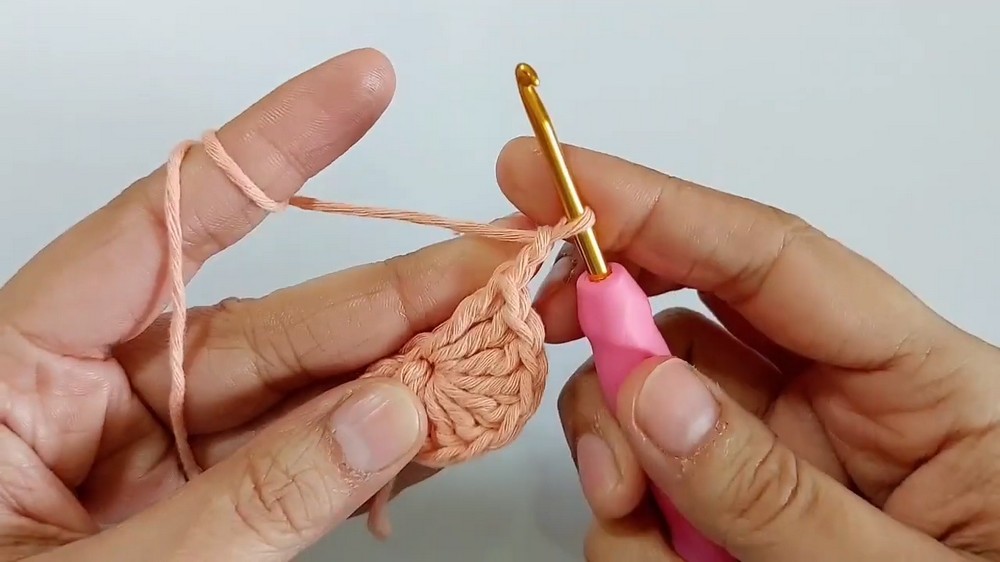
1. Top Part of the Bag
- Magic Ring Setup:
- Create a magic ring and chain 2 (this chain 2 does not count as a stitch).
- Round 1:
- Make 10 double crochets (dc) into the magic ring.
- Pull the ring tight and join with a slip stitch into the first double crochet.
- Round 2:
- Chain 2 (does not count as a stitch) and turn.
- Make 1 half double crochet (hdc) into the first stitch.
- Chain 1, make 1 hdc in the next stitch, chain 1.
- Repeat from * to the end (you will have 10 hdc and 9 chain-1 spaces).
- Round 3 (V-stitch round):
- Turn and insert the hook into the first chain-1 space. Slip stitch to join, then chain 2 (considered as 1 hdc).
- Make [2 dc, chain 1, 2 dc] in the same chain-1 space (forms a V-stitch).
- Skip the next chain-1 space, and in the following chain-1 space, make [2 dc, chain 1, 2 dc].
- Repeat this pattern around, skipping one space between each V-stitch.
- Round 4 (Petal Round):
- Turn. Into the chain-1 space of the V-stitch:
- Make 1 dc, chain 1, 1 dc, chain 1 (repeat until you have 5 dc separated by chain-1 spaces).
- Slip stitch into the next V-stitch’s chain-1 space and repeat the petal pattern.
- Continue until the last space. In the final space, make only 4 dc with chain-1 spaces, then make the 5th dc into the last corner stitch for symmetry.
- Turn. Into the chain-1 space of the V-stitch:
- Secure and Weave:
- Fasten off the yarn, leaving a long tail for sewing later.
- Weave the ends into the work securely to avoid unraveling.
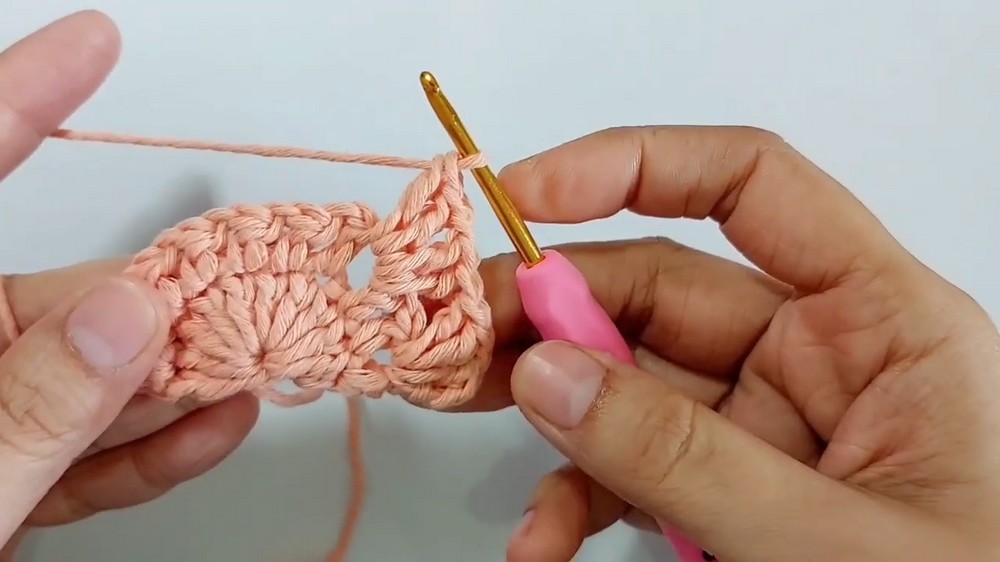
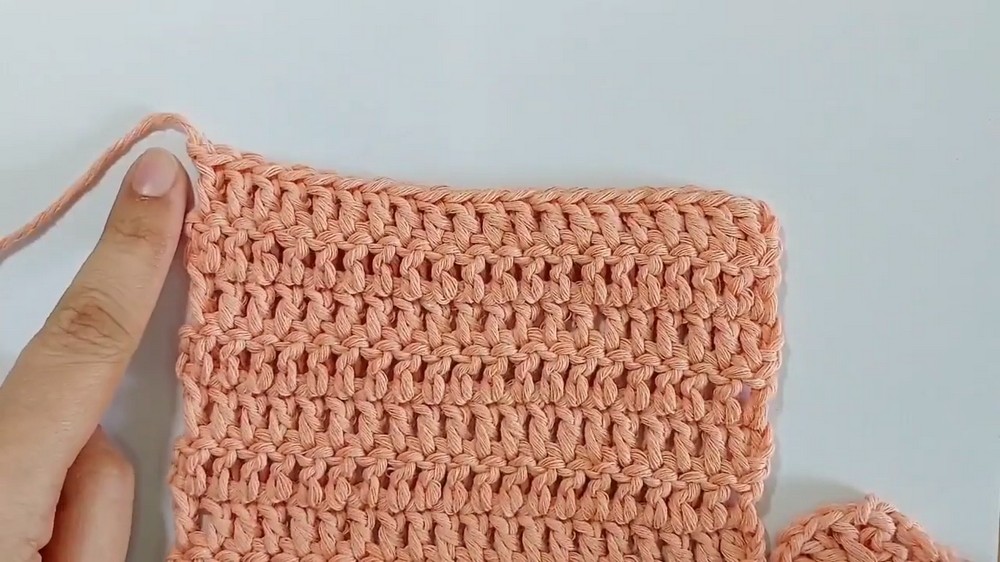
2. Body of the Purse
- Foundation Chain:
- Make a slipknot, then chain 23.
- Row 1:
- Skip the first 3 chains (turning chain) and work 1 double crochet (dc) into the fourth chain from the hook, using the back bump for a neater edge.
- Continue making 1 dc into each back bump along the chain. You will have 20 dc by the end of the row.
- Row 2 and Subsequent Rows:
- Chain 3 (does not count as a stitch), turn the work, and make 1 dc into the first stitch.
- Continue making 1 dc into each stitch across. You will have 20 dc per row.
- Repeat this pattern until you have a total of 16 rows (or adjust for your desired bag height).
- Fasten Off:
- After completing the last row, fasten off, leaving a tail for assembly.
Assembly Instructions
1. Attaching the Top Part to the Body
- Align the top part (petal portion) to the upper edge of the body.
- Use the front loop only of the body’s last row to attach the top part with a needle and thread (or slip stitches with yarn).
2. Joining the Sides:
- Fold the body in half to form the purse shape.
- Use the tail remaining from fastening off to sew the sides together, working through the corresponding loops from each side.
3. Finishing Off:
- Weave in all remaining loose ends securely. Trim excess yarn.
- Optional: Add a button, snap closure, or drawstring to the top for added functionality.
Tips for Customization
- Colors: Use different yarn colors for the top and body for a unique look.
- Size: To adjust the size of the bag, increase the foundation chain and the number of rows in the body.
- Edging: Add a scalloped edge around the top petals for a decorative finish.
- Strap: Crochet a small chain strap and attach it for a coin purse you can carry on your wrist.
Conclusion and Final Remarks
This adorable crochet coin purse is perfect for carrying small items like coins, jewelry, or tiny trinkets. The combination of V-stitches and petals creates an elegant yet functional design. It’s beginner-friendly and a great way to use up leftover yarn. Be sure to experiment with color combinations and finishes to personalize your purse.
Leave a Reply