
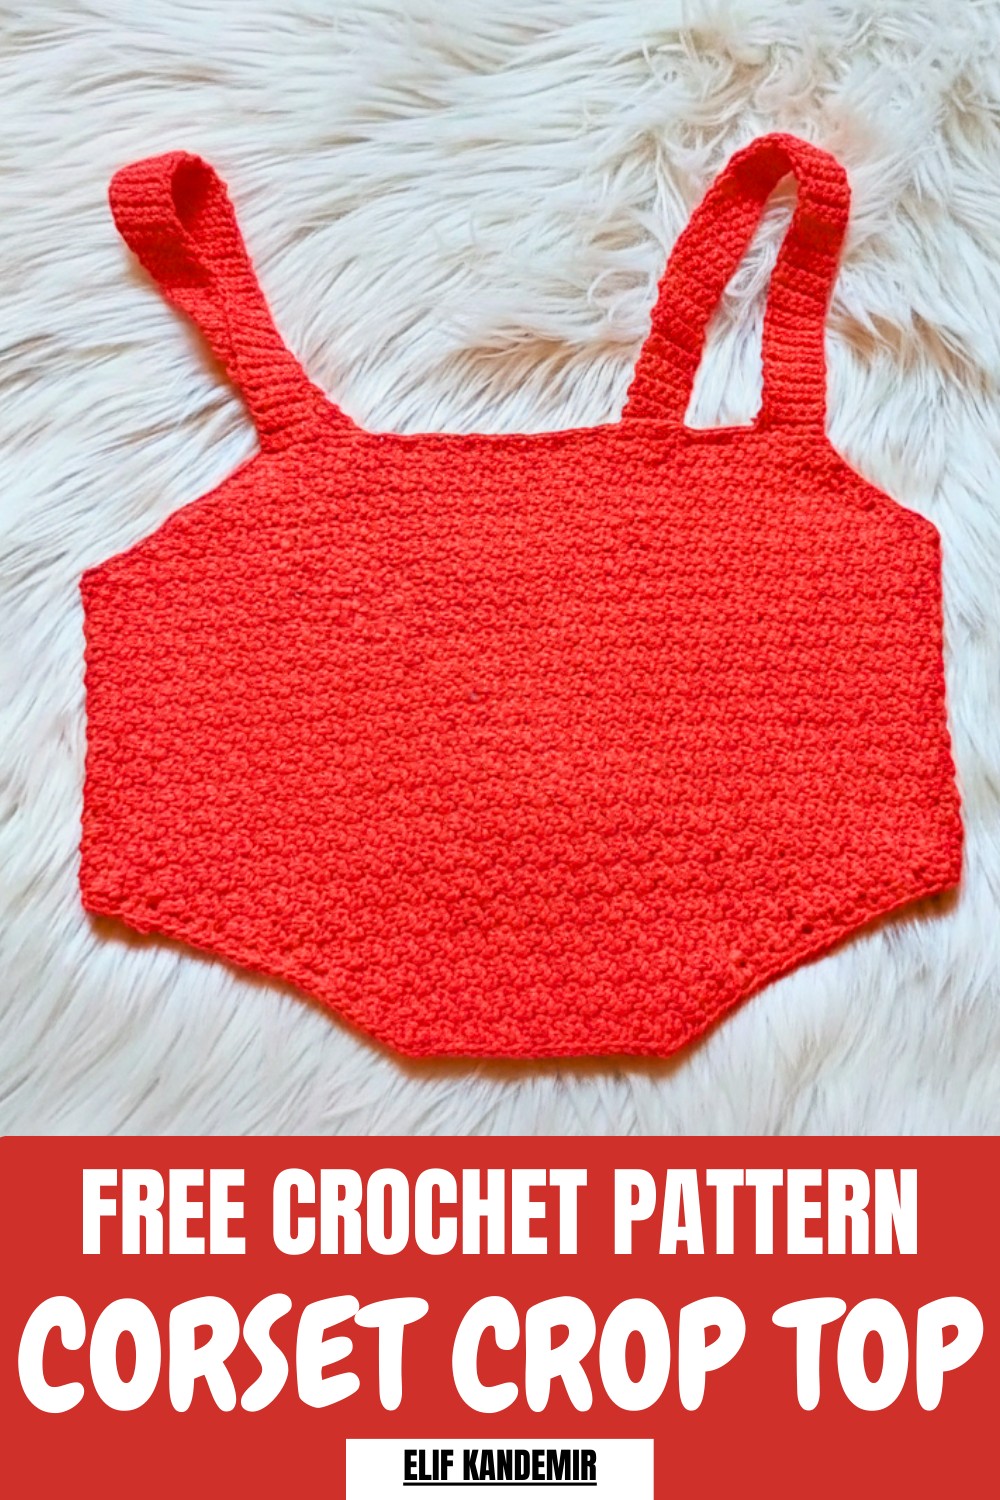
Feel stylish and cool all season long with our free crochet corset crop top pattern that is easy to follow and perfect for any outfit and day.
There’s a special kind of beauty in a top that feels handmade and brightens every smile. With soft fabric woven in pretty patterns, this stylish piece stands out with laces in the back and lovely details along the front. Wearing a crochet corset crop top pattern means feeling fresh and cool, as the open spaces let gentle breezes in on sunny days. It’s easy to match with jeans, shorts, or long skirts, making it perfect for wearing anywhere, from fun times with friends to relaxing at home.
Free Crochet Corset Crop Top Pattern That’s so Comfortable
Every tie can be made just right so it fits well and feels gentle on the skin. This pattern brings the chance to show your own style and joy each day. A crochet corset crop top pattern adds a touch of charm, softness, and happiness, turning a simple outfit into something special for everyone.
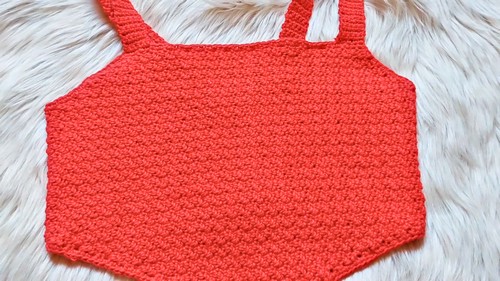
Free Crochet Corset Top Pattern
Materials
- Yarn: Daisy’s String, color Red, approx. 50-60 grams (or any similar DK/Category 3-4 yarn)
- Hook: 4 mm crochet hook
- Notions: Measuring tape, scissors, stitch markers (optional), yarn needle for sewing/weaving ends
- Pen & Paper: Highly recommended for notes on rows with increases or decreases
Key Abbreviations (US Terminology)
- ch – chain
- sc – single crochet
- dc – double crochet
- sl st – slip stitch
- st(s) – stitch(es)
- rep – repeat
Special Notes
- The corset includes frequent increases and decreases. Use a notebook or your printed pattern to track where adjustments are made.
- The measurements provided are for a bust circumference of approximately 85 cm (33.5 inches). Adjust your length/rows as needed for different sizes.
- Where the pattern says “continue straight,” work each stitch (sc on sc, dc on dc) as established.
Pattern
Bodice Foundation
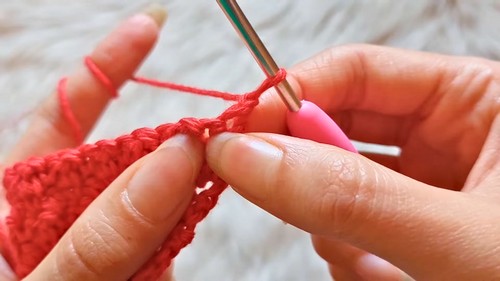
- Ch 25 (this will be the width of your corset; adjust for fit if needed).
- Skip the first ch, sc in the 2nd ch from the hook.
- Dc in the next ch. [Alternate: sc, dc, sc, dc…] across to the end of the row.
- Turn, ch 1.
Main Pattern (Rows 2 and following)
- Row 2:
- On top of each sc, work a dc. On top of each dc, work a sc.
- Continue to the end of the row. Turn, ch 1.
- Repeat Row 2 until your work measures 14 cm (about 5.5 inches).
Side/Underarm Shaping (Increases)
- To form the underarm area:
- At the end of the row, work [sc, dc, sc] all into the last st (increase made).
- Always work sc into dc and dc into sc in the rest of the row.
- You will increase at this outer edge on every increase row (typically the last st).
- Alternate rows:
- 1st row (with increase): Increase at end (as above).
- 2nd row: Work straight across (no increases).
- Repeat: Continue for a total of 10 rows, alternating an increase row with a non-increase (straight) row.
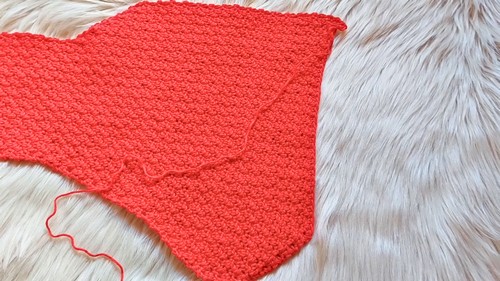
Upper Cup Section
- When starting the upper part of the bodice:
- Do not increase or decrease on the upper (neckline) edge.
- Continue increases only on the lower (underarm/side) edge as before.
- Continue working even for 6 rows (with increases only at the lower edge).
Side Decreases
- For the next section, make decreases at the end of the row as follows:
- At the end, insert hook into next 2–3 sts, yo, pull through all loops together (sc3tog or sc4tog), creating a decrease.
- Work normally on return rows.
- Typically, decrease at the end of every other row for the next 6 rows (or as needed for shaping).
Shaping Continued
- Continue for another 6 rows:
- Work 1 decrease at the end of every other row as established.
- The upper edge remains unchanged; only the lower/side/underarm edge is shaped.
- Track your decreases so both sides are even.
Final Underarm and Lower Edge Shaping
- Once you have the desired bust and underarm shape:
- Begin working straight for 6 rows (no increases or decreases).
- Final decreases:
- For the next sections, decrease in the first, third, and fifth rows (for 6 rows total), working straight in the other rows.
- Continue as established for your fit.
Mirroring/Second Panel
- Repeat above sections as required for second side (if working your corset in two panels), OR, if working in one piece, move to the finishing instructions.
Edging & Finishing
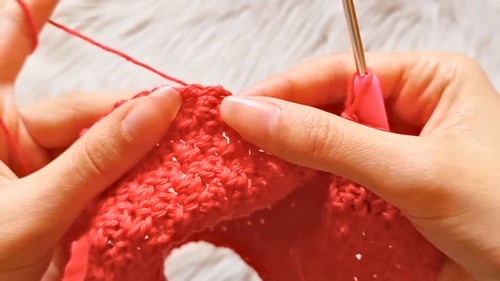
Edge Single Crochet & Eyelet Creation
- When the main corset base is finished, do not cut the yarn.
- Work sc evenly along all edges for a neat finish.
- At the corners, work 2 sc into each corner to maintain shape.
- To create eyelets for the lace-up back:
- Work 2 ch, skip 2 sts, sc in the next st at regular intervals along the two back vertical sides (where the corset will lace up).
- Continue 5 sc, (2 ch, skip 2, sc) across to place eyelets.
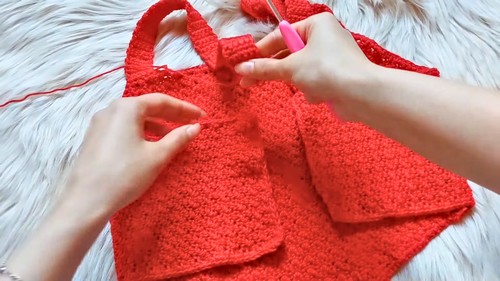
Straps
- Attach yarn at each top front corner.
- Ch 1, sc 5 across for the width of strap.
- Work single crochet rows (turning after each), for a total of 60 rows (or desired strap length).
- Sew or sl st the strap to the back edge at an appropriate position to fit your shoulders.
Lace-Up Chain
- Ch 300 (or desired length) to create the corset tie/lace.
- Weave through the eyelets at the back in a zig-zag/corset style.
Final Touches
- Weave in all loose ends with a yarn needle.
- Add any desired embellishments such as decorative ribbon or beads.
Conclusion
Your crochet corset is now complete! This project introduces increases and decreases for shaping, eyelet creation, and simple straight straps—excellent for both practice and a chic wardrobe addition. Track your rows carefully, especially where increases/decreases occur, for even and symmetrical shaping.
Pattern Correction
- Always alternate sc and dc stitches across the row (i.e., sc on dc and dc on sc).
- Increases and decreases should be matched on both sides for best fit and symmetry.
- The initial chain and base row may be adjusted for size; test fit after several rows before proceeding.
Tips
- Keep a notebook and mark each row, indicating increases/decreases and row count for easier referencing.
- Try on your work at intervals to ensure a good fit, especially in the bust and underarm areas.
- If using another yarn, check your gauge and adjust your starting chain for correct width.
- Make sure to keep tension even when working increases/decreases along the edges.
Leave a Reply