
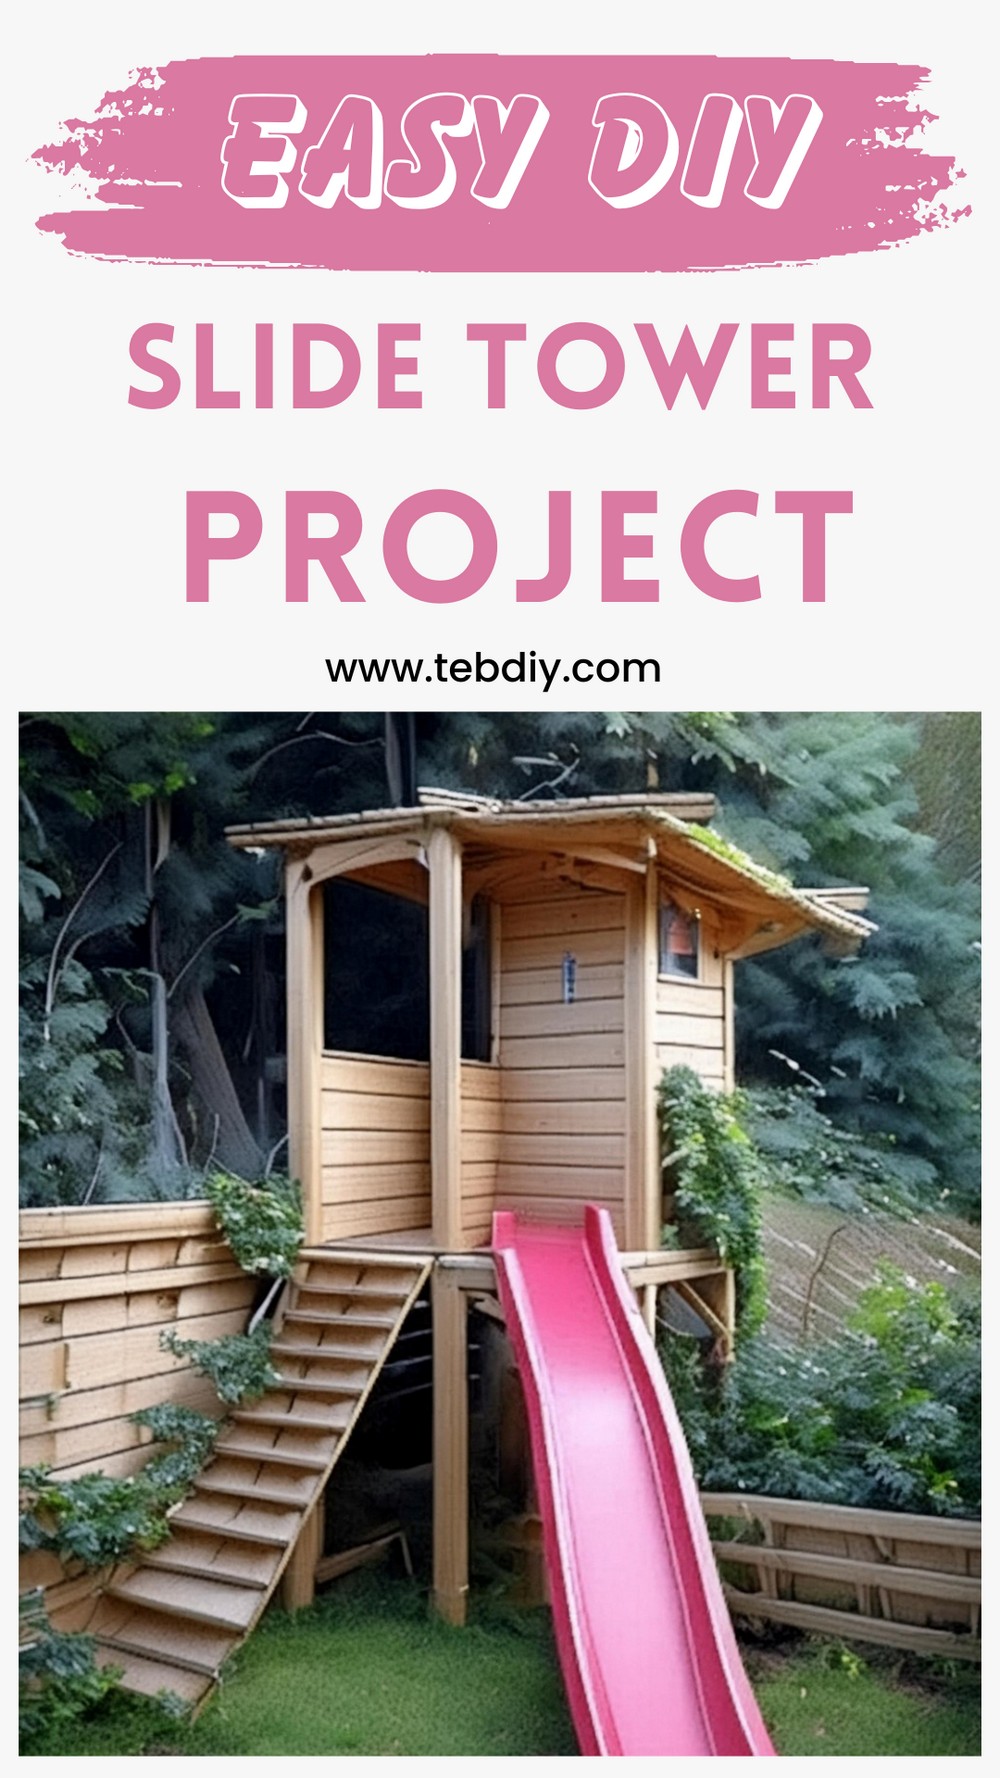
Transform your backyard into a paradise for your children where their laughter fills the air as they slide down a tower built with love, dedication, and a touch of engineering. That’s exactly what unfolded in our journey to create a slide tower for two little adventurers aged 5 and 7. The vacant space left by great thujas once towering in our backyard ignited a blueprint in our minds, blossoming into a project that marries fun, function, and family. This DIY Slide Tower Project will walk you through each meticulously planned and executed step of constructing a wooden slide tower, promising not just a playground, but an heirloom built on memories of shared joy.
DIY Slide Tower Project

Materials List:
- Spruce Beams (13 feet long with cross-sections of 4×4, 2×4, 2×6 inches)
- One inch boards for planking and possibly roofing
- Concrete for leg bases
- Screws for joints and slide attachment
- Spot-glaze for painting
Tools Required:
- 3D planning software (for design)
- Hand tools (for detailed craftsmanship)
- Power hand tools (for efficiency in cutting and joining)
Step-by-step Guide
Cleaning the Backyard
Our first action was to clear the space, acknowledging the loss of our thujas but looking forward to the joy the new structure would bring. This step is crucial for setting a solid foundation, both literally and metaphorically, for the project ahead.
Planning
Every successful project begins with a meticulous plan. Utilizing 3D software, several iterations were explored before finalizing the design. This phase is crucial for visualizing the final outcome and ensuring all measurements fit the allocated space perfectly.

Purchasing
With the plans set, procuring the right materials was next. Long, sturdy spruce beams formed the backbone of our structure, ensuring durability and safety for the playful occupants.
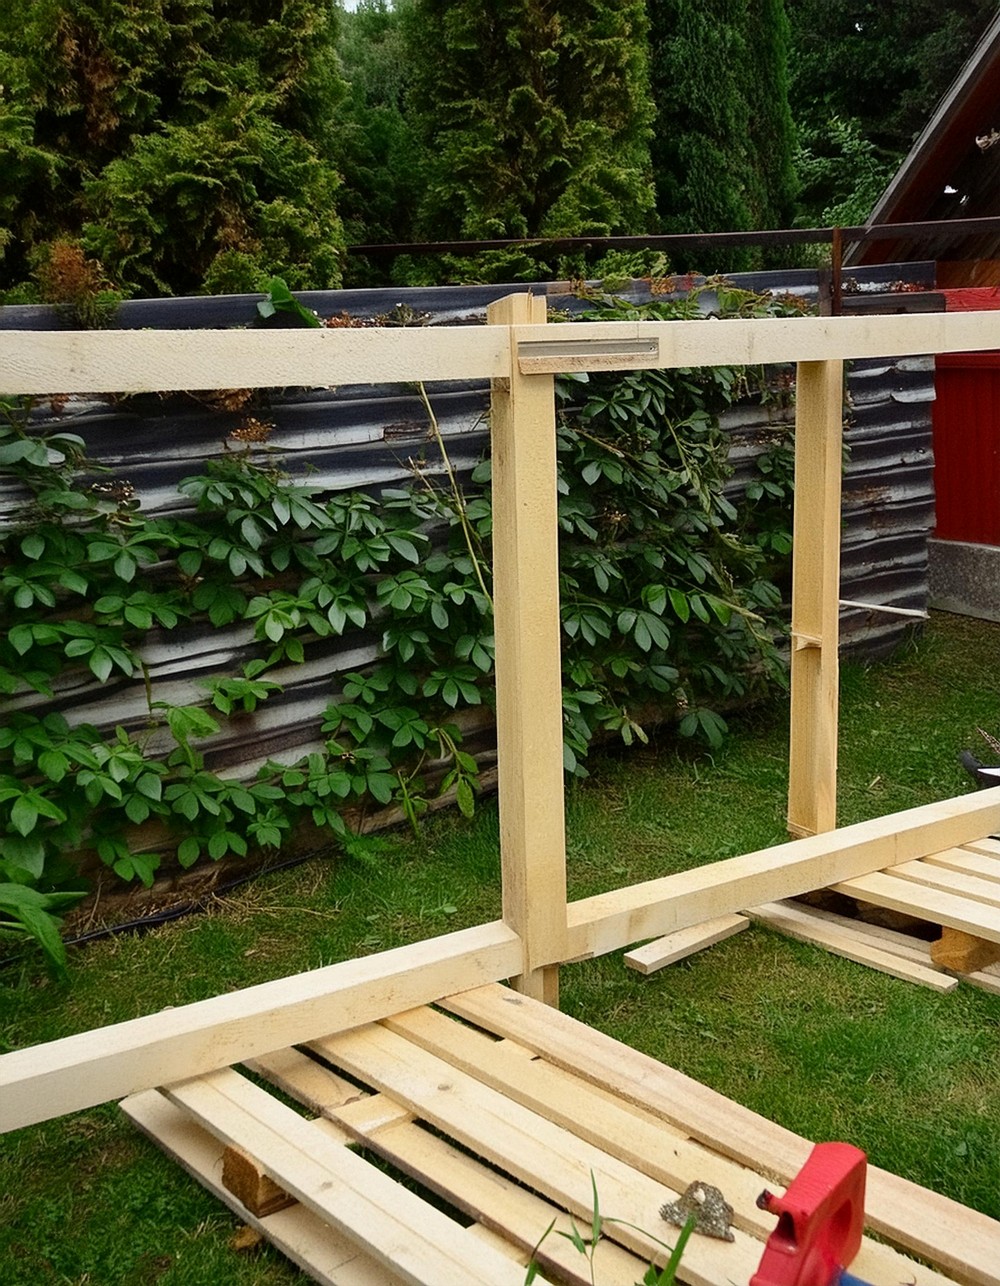
Joint Planning
Eschewing the temptation to rely solely on screws, wood joints were planned to add strength and aesthetic value to the tower. This step underscores the craftsmanship that goes into a project of this magnitude.
Joinery
Executing the joint plan, the legs were fashioned along with the timber frame of the middle platform. Concurrently, concrete bases were laid to anchor the structure, ensuring stability. The assembly of these parts marked a significant milestone in our project.
About Legs
Attention to detail was paramount in connecting the legs to the platform frame, with special coverings crafted for the leg holder’s screws. This not only enhanced the tower’s safety but also its visual appeal.
Planking, Painting, Slide
Finishing touches involved planking for handrails and the back, followed by a coat of spot-glaze to protect the wood while maintaining its natural hue. The crowning step was attaching the slide, which promised endless fun. The roofing decision was postponed to potentially welcome a natural canopy of woodbine.
Conclusion
This journey from conception to completion not only enriched our backyard but also our family’s collective memory. Each step, from planning through to the final painting and installation of the slide, was imbued with anticipation and joy. We hope this guide inspires you to embark on your own project, crafting not just a play area, but a legacy of laughter and love.

Leave a Reply