
Turn pieces of wood into a stunning, durable chair that not only serves a practical purpose but also adds a touch of elegance to your space. Whether it’s for your patio, garden, or simply an addition to your home furniture, this DIY wooden chair project invites you to immerse yourself in the world of woodworking. With the freedom to choose from a variety of wood types, you can ensure that your creation perfectly matches the ambiance you desire.
DIY Wooden Chair Project
Ideal for both novices and seasoned DIY enthusiasts, this project promises not just a piece of furniture, but a fulfilling experience of creation.
Crafting Your Own Wooden Chair: A Journey of Creativity and Utility
Embarking on a journey to craft something with your own hands brings a sense of accomplishment and pride. Imagine turning pieces of wood into a stunning, durable chair that not only serves a practical purpose but also adds a touch of elegance to your space. Whether it’s for your patio, garden, or simply an addition to your home furniture, this DIY wooden chair project invites you to immerse yourself in the world of woodworking. With the freedom to choose from a variety of wood types, you can ensure that your creation perfectly matches the ambiance you desire. Ideal for both novices and seasoned DIY enthusiasts, this project promises not just a piece of furniture, but a fulfilling experience of creation.
Materials List
For this project, you will need:
Lumber:
- 10 pieces of 4” x 4” lumber, each 3.5″ in length
- 2 pieces of 4” x 4” lumber, each 38.75″ in length
- 5 pieces of 4” x 4” lumber, each 43.75″ in length
- 8 pieces of 4” x 4” lumber, each 20″ in length
- 4 pieces of 4” x 4” lumber, each 31.5″ in length
- 2 pieces of 4” x 4” lumber, each 21″ in length
- 2 pieces of 4” x 4” lumber, each 38″ in length
While the types of tools, hardware, or additional materials you may use are left to your discretion, ensuring you have suitable woodworking tools, such as:
- Saw
- Drill
- Screws/bolts
- Sandpaper
- Wood Glue
Making Your Wooden Chair
Crafting the Main Frame
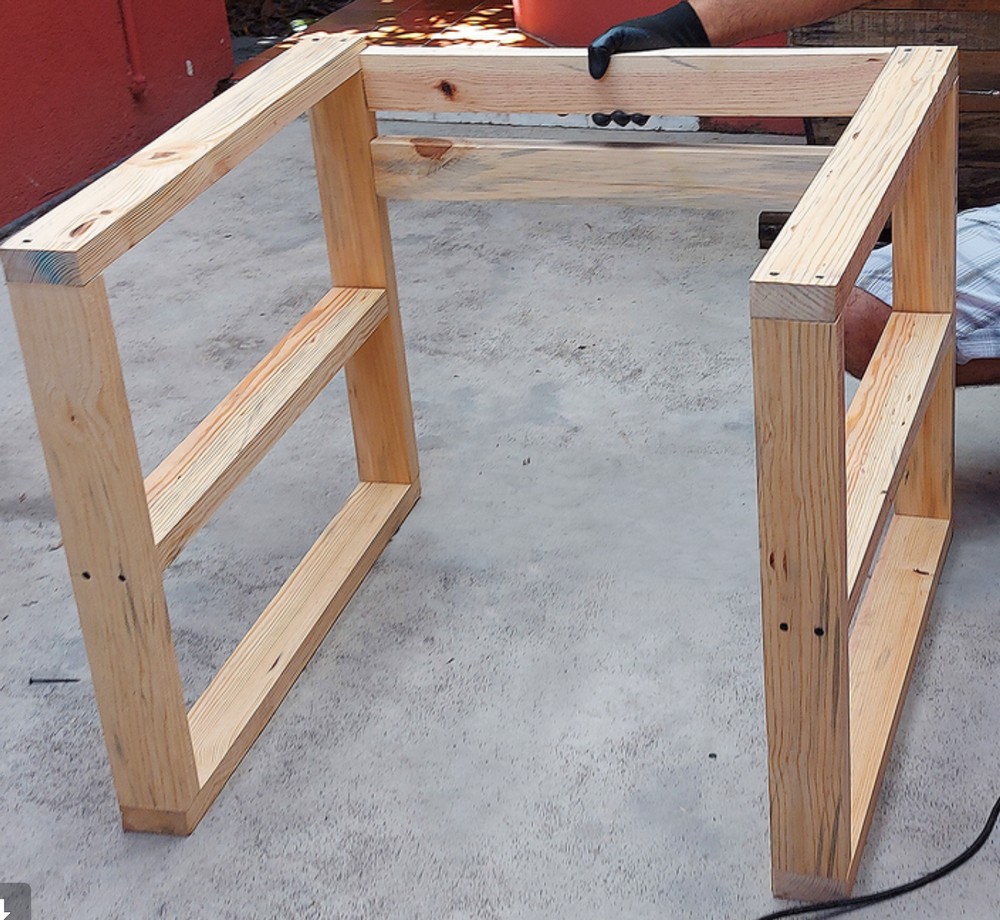
Your chair’s foundation is crucial for its stability. Start by laying out the pieces that form the frame on a flat surface, connecting them at right angles. Initiate the process by assembling the back frame first before moving onto the side frames. This method allows for easier assembly and ensures accuracy in the framework.

Assembling the Side Supports
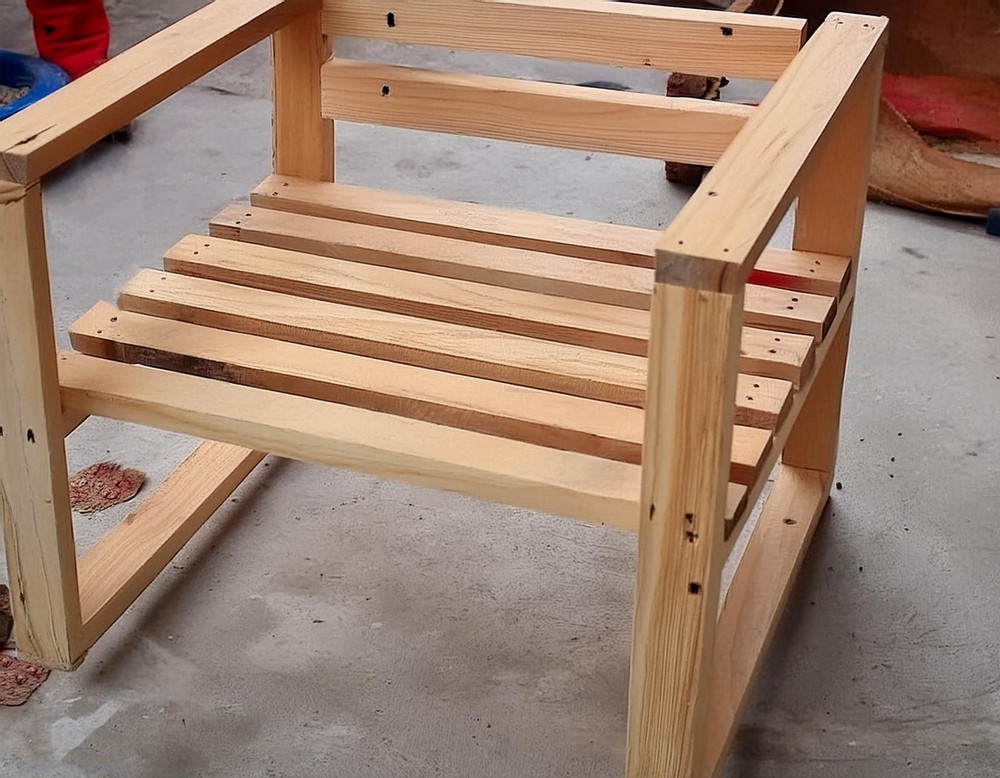
This next phase involves setting up the seat rest alongside the necessary lateral supports. Given that these components need to be securely attached to the chair’s frame, consider turning the frame either upside down or on its side for better maneuverability. You might find it simpler to prepare each “module” separately (comprising the seat and each side) before bringing them all together as part of the whole construct.
Adding Complementary Supports
You’re nearly at the finish line! Now is the time to add those complementary supports that will bring everything together. Before affixing them, make sure to precisely measure and mark where your horizontal side supports will reside. Inserting the small 4×4 block into the lower part of your chair frame comes next, rounding off the main construction phase.
Customizing Your Creation
While the steps provided guide you through making a standard wooden chair, remember, this project is a canvas for your imagination. If you’re inspired to alter the design, seek out design applications or tools that enable you to customize 3D models for woodworking projects. Make this chair uniquely yours!
Conclusion
After following these steps, step back and admire your handcrafted wooden chair. It’s more than just a piece of furniture; it’s a testament to your creativity, effort, and woodworking skill. Whether you keep it for yourself or gift it to someone special, this chair is sure to be a topic of conversation and a source of pride. So, grab your favorite book, take a seat, and enjoy the comfort of your own creation.

Leave a Reply