
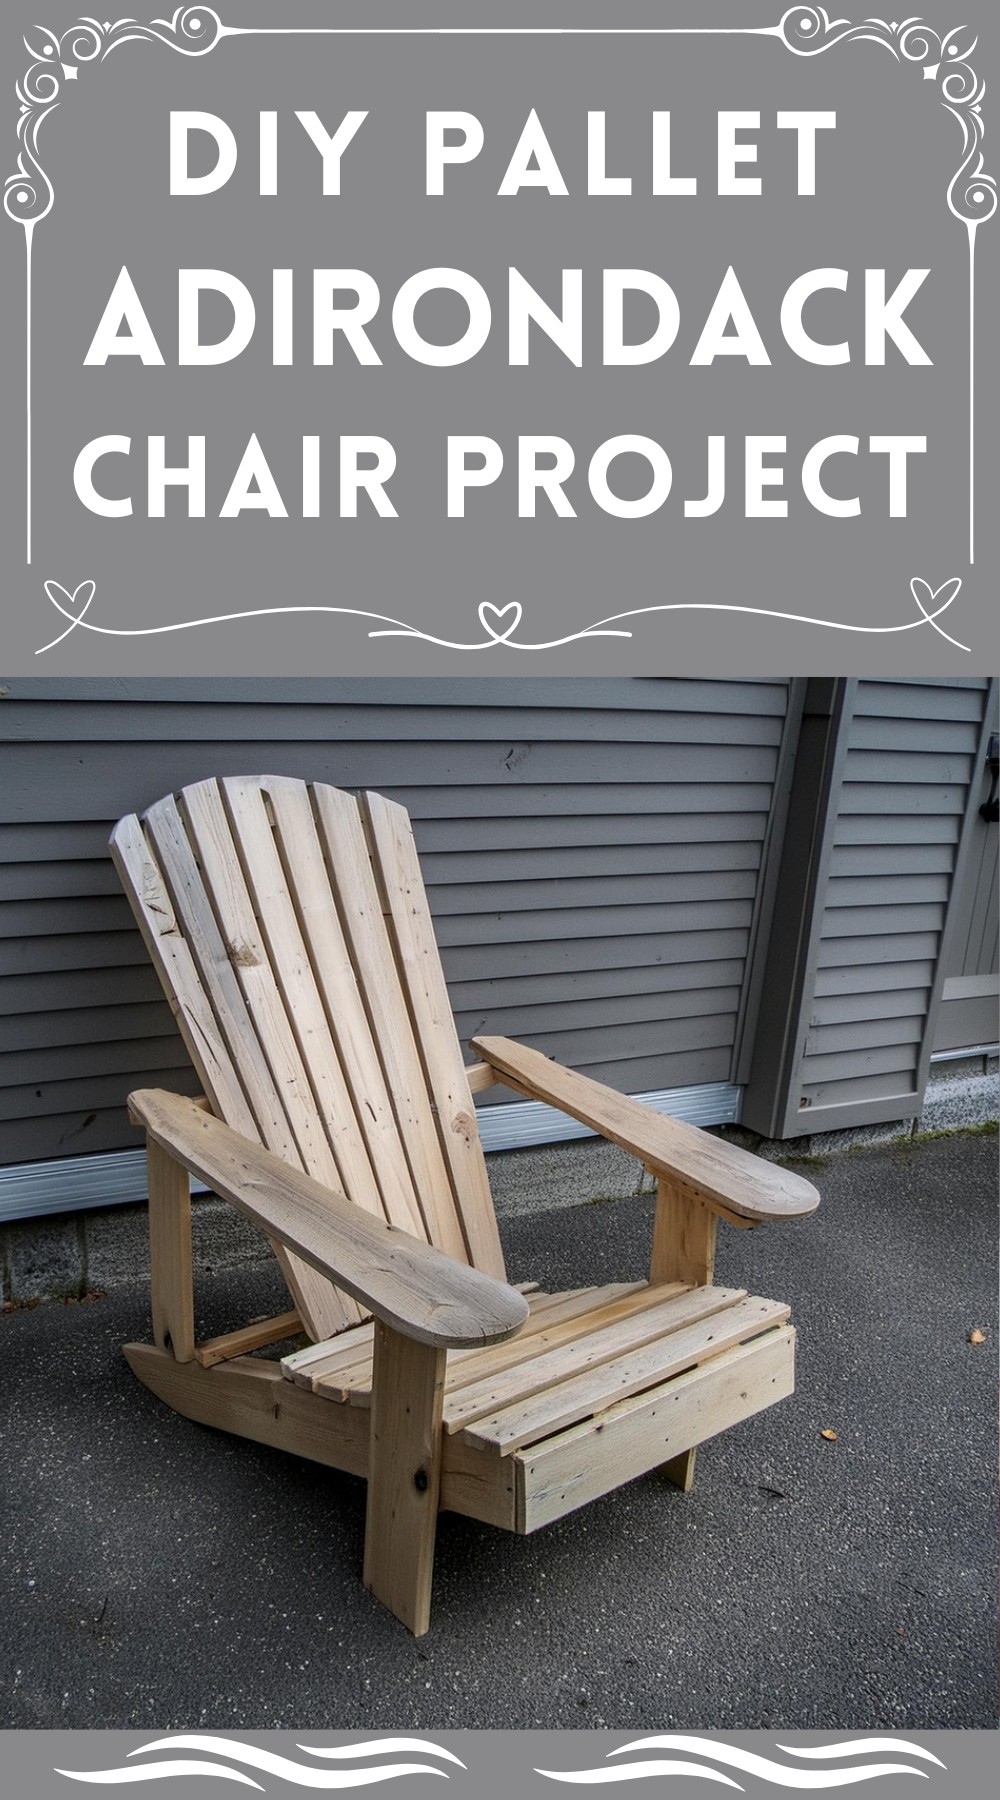
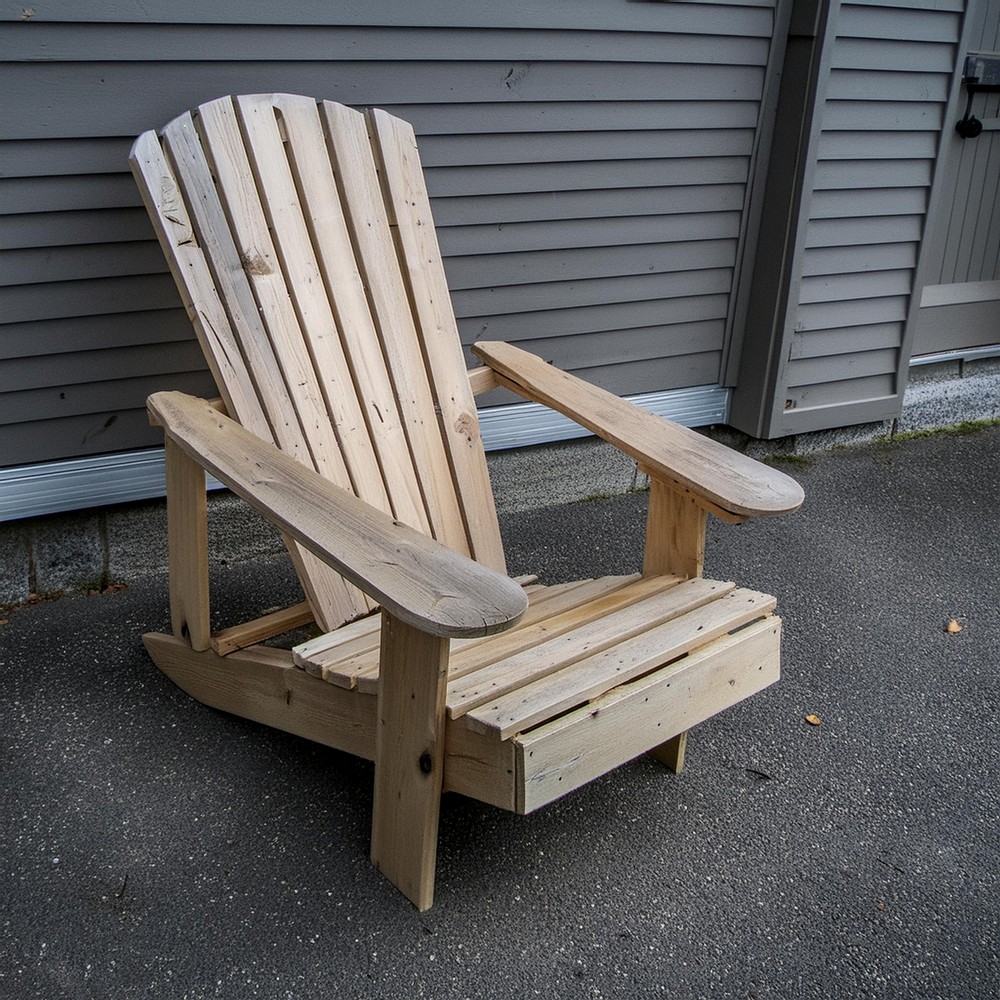
Starting a DIY project is like setting off on a creative adventure that also makes your home feel more like you. Think about turning plain, easy-to-miss stuff into a comfy and charming chair. That’s what happens when you make an Adirondack chair from pallets. People love pallet furniture not just because it looks cool and old-fashioned but also because it’s good for the planet and doesn’t cost much. With a bit of hard work, some tools, and this guide, you’ll be able to make something awesome that everyone will love to relax in outdoors.
DIY Pallet Adirondack Chair Project
Materials List
To begin, gather the following materials:
- Hammer
- Crowbar/prybar
- Drill (a cordless drill is optimal, though a hand drill can suffice)
- Small drill bit for pilot holes (size will vary depending on screw size)
- 3/8″ Spade or forstner bit for creating countersinks
- A circular saw (although hand saws could work, power saws like a jigsaw, bandsaw, and table saw will ease the process)
- Screwdriver (or a power drill with a screwdriver bit)
- Wood glue
- Screws
- Wood putty
- 3-4 good quality pallets
Tools Required
The project requires a set of tools that are commonly found in a DIYer’s workshop:
- Hammer
- Crowbar/prybar
- Drill (preferably cordless)
- Small bit for drilling pilot holes
- 3/8″ Spade or forstner bit
- Saw (Circular saw recommended)
- Screwdriver or a power drill as a screwdriver
- Wood glue
- Wood putty
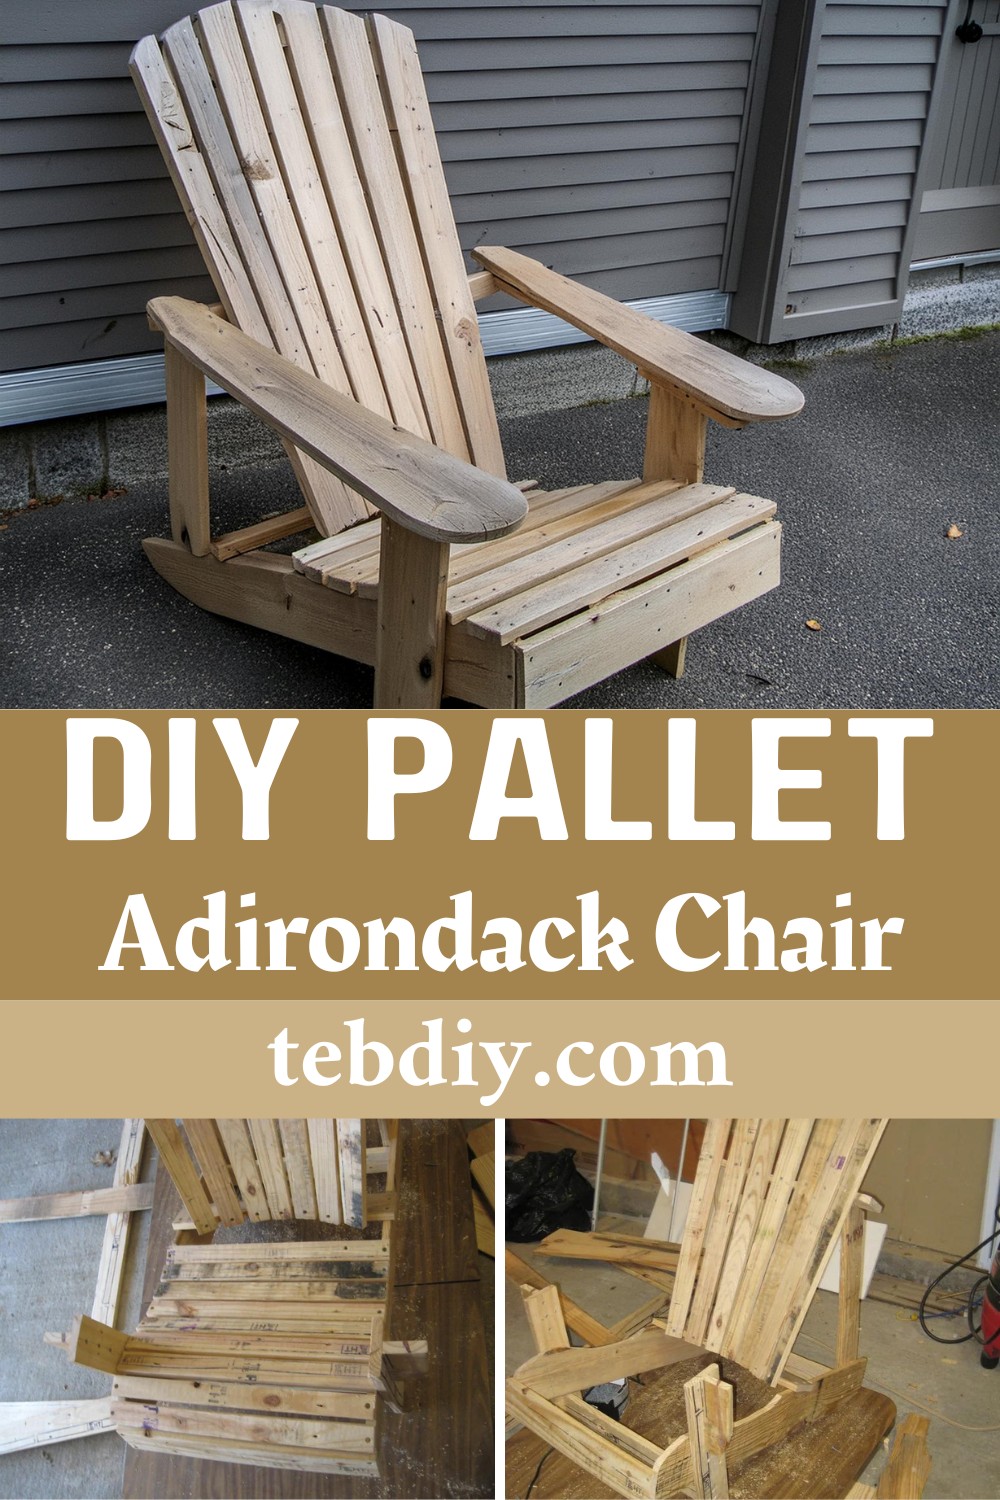
Steps to Create Your Pallet Adirondack Chair
Understanding Pallets
First, recognize that pallets, while plentiful and often free, can be challenging to disassemble and might not always yield the highest quality wood. Opt for heat-treated (marked “HT”) pallets to ensure safety and usability for your chair.
Selecting Your Pallets
Source your pallets from local businesses or online marketplaces. Look for ones that are relatively new and have been used to ship non-chemical products. Ensure they are marked “HT” to indicate heat treatment.
Pallet Disassembly
Begin by cutting the outside stringers with a circular saw. Use a chalk line for guidance to ensure straight cuts. Flip and repeat on the other side. Remember, safety first! Pallet wood can be tricky to work with.
Removing Boards
After the stringers are cut, you’ll be left with central boards attached to a 2×4. Rock them back and forth to detach. Be mindful of nails and dispose of damaged boards appropriately.
Preparing Your Materials
From each pallet, you should aim to retrieve about six 1x4s, three 1x6s, and three 4′ lengths of 2×4. This will be your raw material to start crafting the chair.
Shaping the Chair Components
Begin with the rear legs/seat stringers, marking a grid on a 35″ 1×6 and cutting out the pattern. Use this pattern to cut a mirror image for the second stringer. Repeat a similar process for armrests using a 32″ 1×6, and for backrest rails with specified lengths of 1x4s.
Assembly Preparation
Cut out armrest brackets, top and bottom brackets, rear legs/seat stringers, and armrests. Mark and cut the additional components: front legs, front crosspiece, and front seat slat from 20″ x 3.5″ boards.
Final Assembly Steps
Cut rear crosspiece and rear back supports to specified dimensions. Prepare seat slats by ripping a 3.5″ board to 1.75″ width and cutting to 20″ lengths. Drill pilot holes and countersink.
For the chair back slats, taper cuts are needed. You can use a homemade jig or mark and rip the taper with a circular saw. Cut the slats to a rough length between 34″-36″.
Creating the Fantail
Align the back slats and sketch an arc for the fantail top. Carefully cut along this line to shape the distinctive backrest of your Adirondack chair.
Conclusion
By following these steps, you’ll turn humble pallets into a stylish and comfortable Adirondack chair. This project not only recycles but transforms, inviting you to relax in a chair infused with your hard work and creativity. Enjoy the satisfaction of sitting back on a piece of furniture that you brought to life from reclaimed wood.
Leave a Reply