
Are you excited to create a cozy and safe snuggle space for your little adventurers with a DIY toddler bed rail? We’ve got your back with easy-to-follow plans to make you the DIY hero of bedtime stories. You can build a cool bed rail that looks awesome in your kid’s room and promises sweet dreams by keeping them safe all night long. Our series is jam-packed with simple ideas and tips you can follow without fuss. Start this journey with us, and watch your kiddo’s room transform with your handmade touch.
DIY Toddler Bed Rail

DIY Pipes For Bad Rails

Uses: DIY Pipes for Bed Rails make for an efficient, reliable solution to keep your toddlers safe when they’re asleep. They are perfect for your kids who have a habit of moving a lot during their sleep. The best part is that these bed rails can be adjusted as your child grows and stored easily when not in use, giving you a convenience unmatched by store-bought options.
Materials:
3 x 10’ sections of 1-1/4″ PVC pipe
PVC Cement
Small Wood Screws (3/4” suggested)
Drill bits
Making:
Making DIY pipes for bed rails is a process that requires a bit of planning and assembling. You start by cutting PVC pipes to your desired lengths. After the cutting process, dry fitting is necessary by assembling the parts together without cement to ensure your cuts are correct. Once comfortable with the setup, the pieces taken apart and are ready for the cementing process. The PVC cement is applied to both the outside of the pipes and the inside of the fittings, then the pipe is inserted into the fitting and held for some seconds. For additional sturdiness, each fitting meets the pipe at the drilled holes, and small screws are added at each end.
DIY As Simple As It Gets

Uses: This practical solution keeps your little roller from accidentally falling out of bed during sleep. In addition to providing safety, this bed railing is designed for easy removal to offer your child the freedom to climb out of bed at their leisure.
Materials:
Wood board
Felt furniture pads
Saw
Sandpaper
Making:
Begin by selecting the appropriate board and cutting the corners off to create smooth brackets. Attach felt furniture pads to the brackets’ ends, ensuring they snugly fit against the bedframe without causing any damage. The bed railing should have brackets that slide effortlessly over the bedframe, allowing you to remove and store it under the bed during the day.
DIY Toddler Bed Rails

Uses: These bed rails ensure active toddlers are secure in their beds, especially when they have a knack for rolling over in their sleep. More so, these bed rails transform the overall look of your child’s room into something more stylish and personal.
Materials:
Wood boards, 48″ long (sides)
Four L brackets
Wood Screws
Wood Glue
Power Sander
60 Grit Sandpaper
Minwax Polyshades in Antique Walnut or any color to match existing furniture
Making:
You start by getting the wood cut into exact pieces per your measurements. Then, glue and screw the boards together. Carefully sand down the edges and corners of the bed rail, ensuring it is smooth and safe for your toddler. With two coats of paint, it could blend perfectly with your child’s existing furniture.
DIY Rail attached to the bottom of the bed

Uses: Due to its functional aspects, it enhances the bed’s aesthetic appeal, making it more than just a protective device. With this DIY design, the bed rail appears just as an extension of the bed, not an add-on.
Materials:
1x3x6 boards (qty:4)
L brackets (qty: 2)
Either a pocket hole jig or a biscuit joiner
Wood glue
Palm sander
Rope – Home Depot
Paint – Oxford Gray from Benjamin Moore
Making:
The process of making the DIY Rail involves cutting, joining, sanding, painting, and finally attaching it to the bed. Start by cutting wooden boards to fit the bed’s size, then make joining points (or biscuits) where the middle bars meet the sides. To ensure this rail’s sturdiness, a small amount of wood glue is added, the pieces are joined, and a few nails are used for extra strength. Once assembled and the glue has dried, smoothen the overall structure with a sander. Then, paint it with the color of your choice and attach two “L” brackets at the back to secure the rail to the bed. Further, embellish the rail with a rope border if desired.
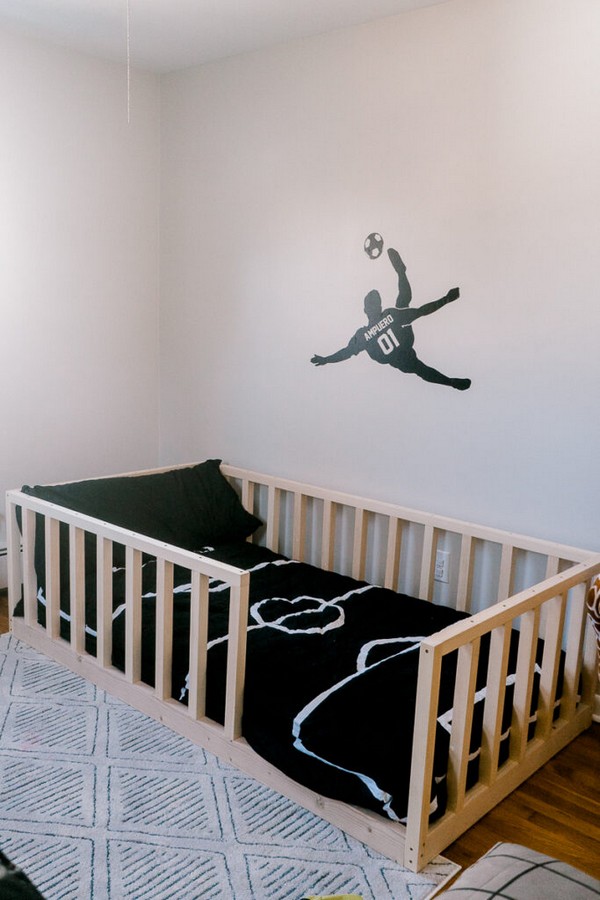
DIY Floor platform bed with rails

Uses: The DIY Floor Platform Bed with Rails is the perfect nest for toddlers moving to their first bed. It’s low to the ground, making it easy for little legs to hop in and out, while the snug rails keep them safe all night.
Materials:
Pine boards (1×6, 2×4)
A single sheet of plywood
Screws for assembly
Sandpaper for smoothing
Paint of your choice to add color
Making:
To create this unique bed, construct a sturdy frame for the mattress to rest on. Lay the plywood on top of the frame, screwing it into place for a solid base. Craft four protective rails, ensuring they’re tall enough to provide safety and fix them securely around the bed. Sand away rough edges before brushing on some paint for a smooth, polished finish.
DIY Toddler Bed Rails

Uses: These protective barriers give comfort and peace of mind by preventing active kids from rolling off the bed. They add an element of coziness, making the bed feel more secure, just like the familiar border of a crib. So, these rails aren’t just for safety: they help transition your child from crib to bed smoothly, adding a personal touch to their room.
Materials:
8 feet 1×4’s wood boards (qty: 4)
Wood screws
Wood putty
“L” brackets (qty: 2)
Paint of your choice
Polycrylic
Making:
After measuring and cutting the wood into specifically-sized pieces, holes are drilled into the lower parts of the posts. The posts are then joined to the connectors under the mattress with screws, ensuring they fit snugly. The screws are then concealed with wood putty for a clean look. An “L” bracket is added to enhance stability. Following this, the two ‘U’ shaped structures are securely connected by attaching the rails to the posts. Once assembled and dried, smooth the edges by sanding them. Lastly, apply primer, a couple of coats of paint, and a coat of polyacrylic for a stylish finish.
DIY Easy Toddler Bed Rails

Uses: Easy DIY Toddler Bed Rails keep your little one snug and safe at night! Unlike the common store-bought kinds, these wooden rails look nicer and give your child’s bed a custom touch. Simple and strong, they’re made just right for your growing kid’s bed.
Materials:
A 2 x 4 x 96″ piece of pine wood
Two 1 x 4 x 72″ pine boards
1-1/4″ pocket screws
Cut list and dimensions
Making:
Start by cutting the wood to make the sides and the supports. Then, using a special jig, put holes in place for the screws that will hold everything together. Line everything up, and then put the screws in to make it all tight and steady. After that, make sure everything is smooth to the touch. In the last steps, you can paint the rails to match the bed, making them an even better part of your child’s room.
DIY Twin Floor Bed With Rails
Uses: Sitting snugly on the floor, it’s a bed that’s easy for little ones to get into and out of while the rails hug the sides to keep them safe at night.
Materials:
Select pine boards
Plywood sheet or 1×3″ boards for slats
Screws (both pocket hole screws and regular wood screws)
Wood glue
Making:
Putting together this twin bed is something you can do with ease! Once the wood is cut to the right size and all parts are smooth, it’s just a matter of joining the pieces. The sides, front, and back come together with screws in a way that hides them from view, keeping the look clean and tidy. This bed comes to life in no bigger space than the bedroom it’s made for.
Leave a Reply