
This DIY project not only infuses a sense of accomplishment but also brings an artistic touch to your garden space. This DIY Timber Model Garden Windmill project is perfect for those who cherish the idea of adding a whimsical, yet functional piece to their outdoor decor. Made with love and precision, this garden windmill stands as a testament to the beauty of manual craftsmanship. Whether you are an experienced DIY enthusiast or a curious beginner, this eco-friendly DIY project promises to engage your creative instincts and provide a gratifying experience.

DIY Timber Model Garden Windmill Project
Materials Required:
Timber:
- 2.8 meters of 150 x 20 mm Planed All Round (PAR) board for Tower Cover Boards
- 1 meter of 100 x 20 mm PAR board for Sails
- 1 meter of 150 x 38 mm timber for Octagonal Platforms and Roof
- 0.2 meters of PAR spar, roughly 60 x 60 mm section, for the tower’s central core
Metal Components:
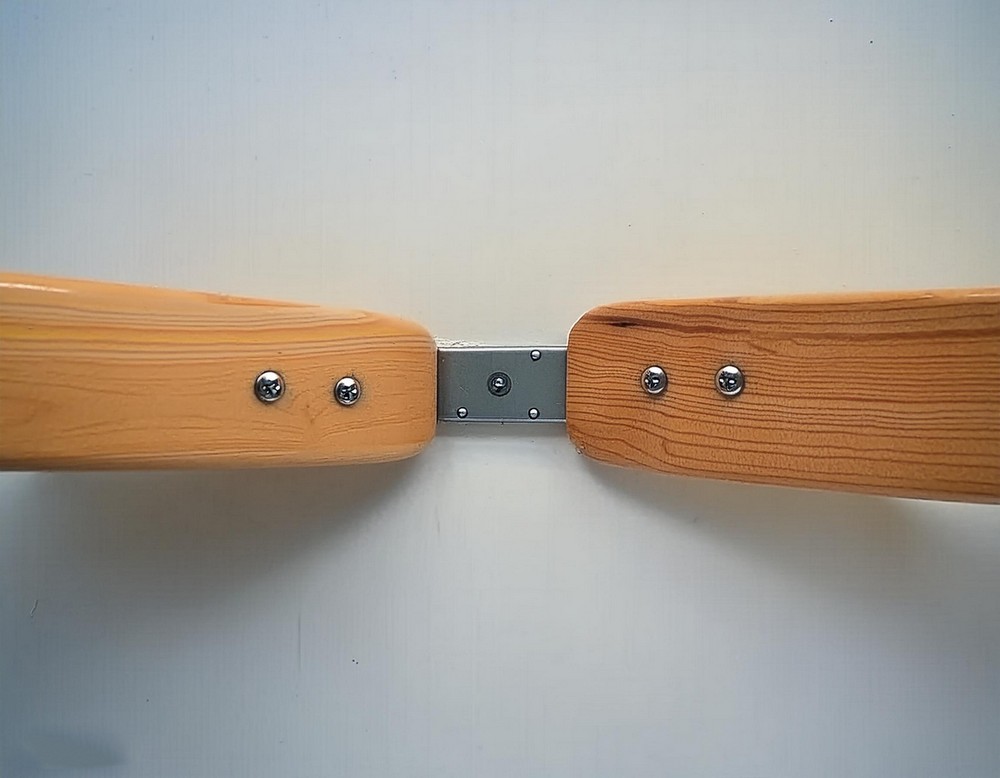
- Two pieces of flat steel or aluminium bar, approximately 250 x 30 x 2 mm
Hardware:
- Two lengths of 300 mm M6 threaded rod
- Two small 90-degree thin angle brackets
- M6 Locknuts (pack of 20)
- Woodscrews (40 x 3.5 mm, pack of 50)
- Two miniature 6 mm bore ball bearings pre-mounted in bearing blocks

Estimated Cost: Approximately £35 for timber, bearings, metal straps, threaded rod, locknuts, and woodscrews.
Tools Required:
- Timber Saw, Metal Hacksaw
- Power Drill, Drill Bits, Countersinking Drill
- Screwdrivers, Spanners
- Workbench or Engineer’s Vice
- Set-square or 90 Degree Angle Tool
Step-by-Step Guide:
Drawing Octagonal Shapes
Creating octagonal shapes is straightforward with the right technique. Begin by drawing two perpendicular lines using a set-square. Outline a square whose sides match the octagon’s face-to-face length. Mark half the face width on each square side to pinpoint the octagon’s corners. Join these points to complete the octagonal outline.
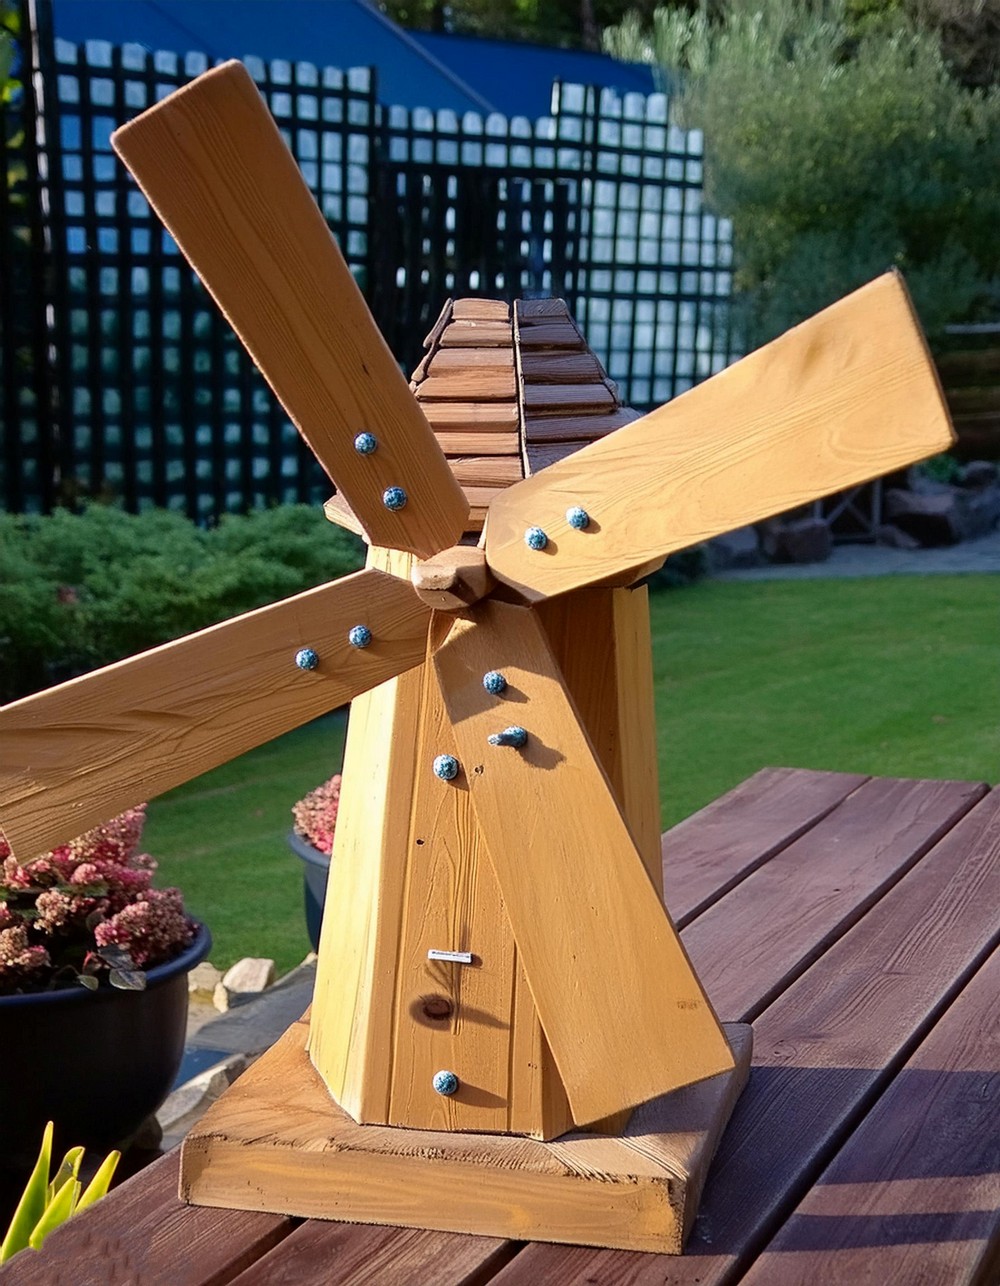
Windmill Tower Upper and Lower Octagonal Platforms
Select timber thick enough for structural support, marking out both octagon shapes with adequate space between them. Carefully saw around each penciled outline, filing any excess for a smooth edge. Remember to note the ‘UPPER SURFACE’ on each octagon.
The Windmill Tower Central Core
Choose a square timber piece for the tower’s core, ensuring ends are cut perpendicular for structural integrity. This step might require the creation of a makeshift jig for precise cuts.
Assembly of Central Core and Octagonal Platforms
Prepare the octagons and central core for assembly by drilling clearance and countersunk holes for the woodscrews. Attach each octagonal platform to the central core securely with the screws.
Completing the Windmill
Continue with crafting the Tower Cover Boards, fitting them carefully around the tower structure. Assemble the bearing housing, supporting the windmill’s rotating mechanism. The sails and sail attachment bar are then made and mounted on the shaft, followed by crafting and fitting the roof. A baseboard gives the structure stability, with yacht varnish applied for weatherproofing. Lastly, detailed steps including the creation of a DIY aid for making perpendicular saw cuts and an optional swivelling mechanism provide the finishing touches to the windmill.
Leave a Reply