
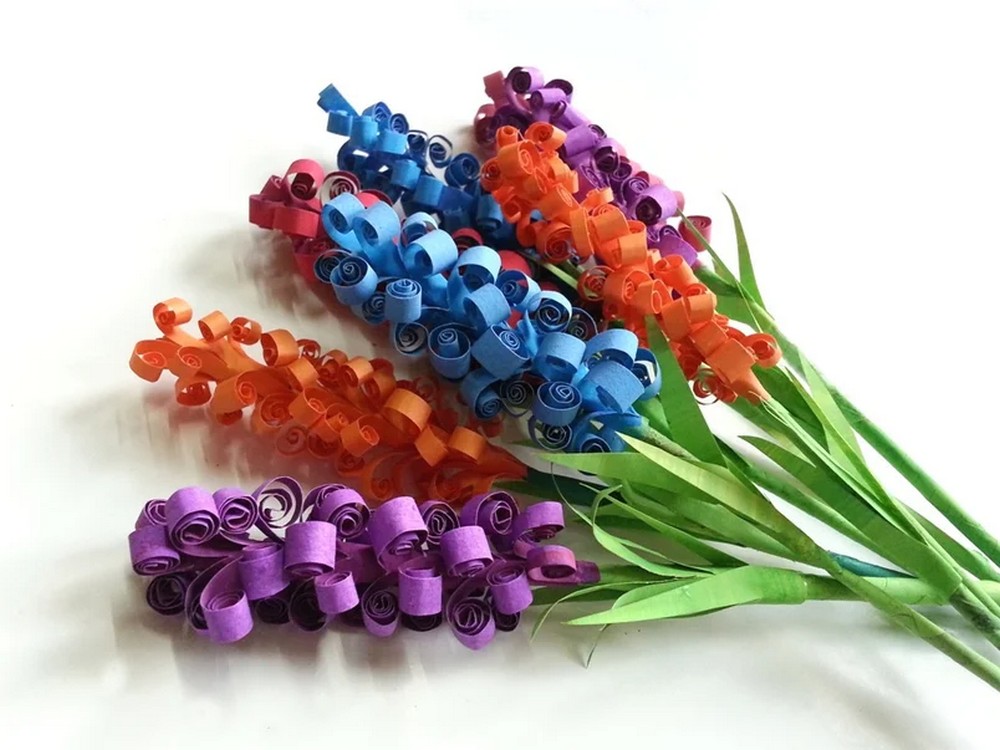
Are you seeking a simple yet creative activity to brighten your day? Let’s set our hands in motion and explore the colorful world of DIY. I’m thrilled to guide you through a delightful project, making DIY Swirly Paper Flower. It’s astonishing how a couple of paper strips can flourish into such elegance, mirroring the lovely form of Saccharum spontaneum (or kans grass). With their enticing swirls, these radiant flowers will undoubtedly add a vibrant dash of color to your décor or handmade gifts.
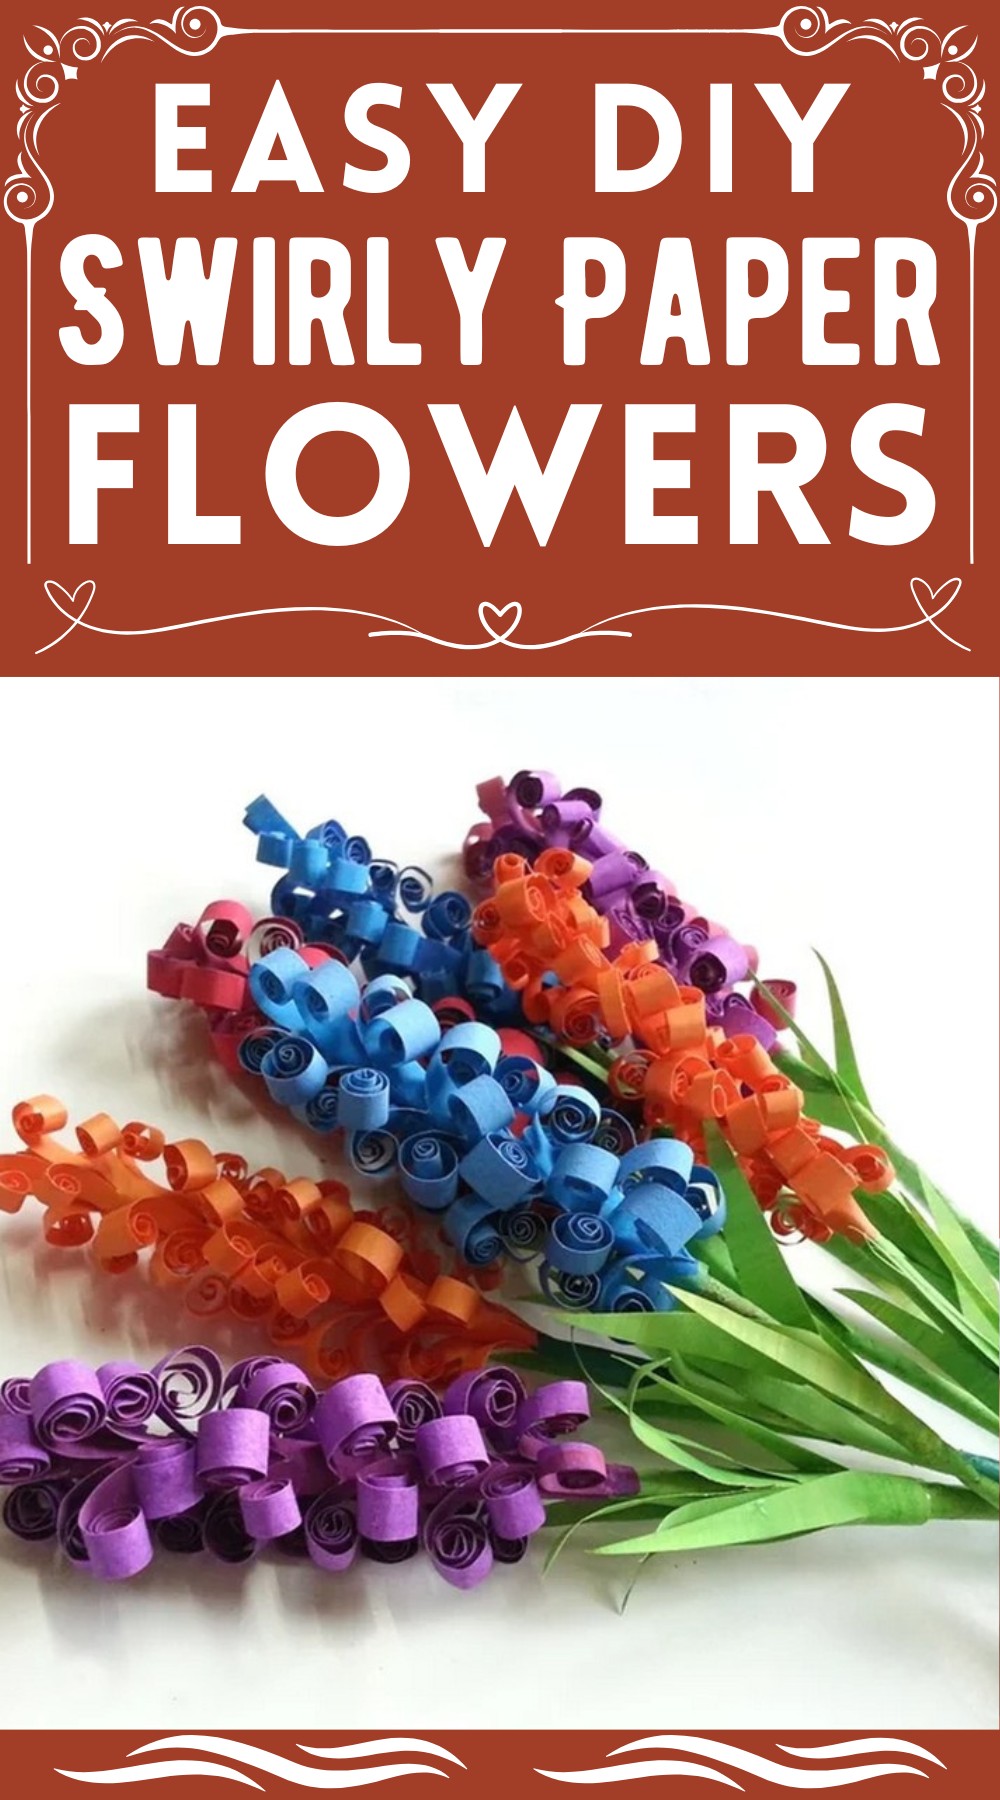
DIY Swirly Paper Flower
Materials Required
- Colored paper
- Customized colored paper
- Green craft paper (for stems and leaves)
- Glue
- Scissors

Step-by-step Instructions
Preparing Your Paper Strips: Kick-start the process by transforming colored papers into paper strips around 2 inches wide. You’re welcome to choose the length based on your preference, but I’ve found that 8 inches work excellently. For a personalized touch, create shades on your paper strips through painting. Once done, create a thin fold along one of the vertical edges.
Cutting Your Fringes: Take your paper strip and fold it in half. This practical move will make cutting fringes a breeze! Cut the strip horizontally, making sure not to sever it entirely. Preserve a centimeter along the vertical edges. Aim for equal, thin fringes, rendering the flower even more captivating.
Crafting the Swirls: With the fringes cut, prepare yourself for meticulous work. Roll each fringe from end to end, shaping a lovely swirly pattern. This key step might take some time, but the resulting elegance is worth every second!
Creating the Stem: Before your beautiful blossom comes to life, creating a supporting stem is essential. Select a green craft paper strip (2 X 10 inches), initiate a diagonal rolling from one corner, and continue towards the other end. Apply a dab of glue on both extremes to secure your stem.
Sculpting the Flower:
Brush on some glue on the uncut section of your swirly-fringed paper. Gently coil the glued area around your prepared green stem from top to bottom. Maintain the rolling action until you’ve thoroughly wrapped the swirly paper. Marvel at the stunning flower taking shape!
Attaching the Leaves: Every flower loves the company of leaves. Slice out a small part of the green paper (2 X 3 inches) and fashion an accordion fold of 1 cm. Snip one side into a pointed form to mimic a leaf. Expand the paper, apply glue, and affix the prepared leaves around your stem beneath the blossom.

Leave a Reply