
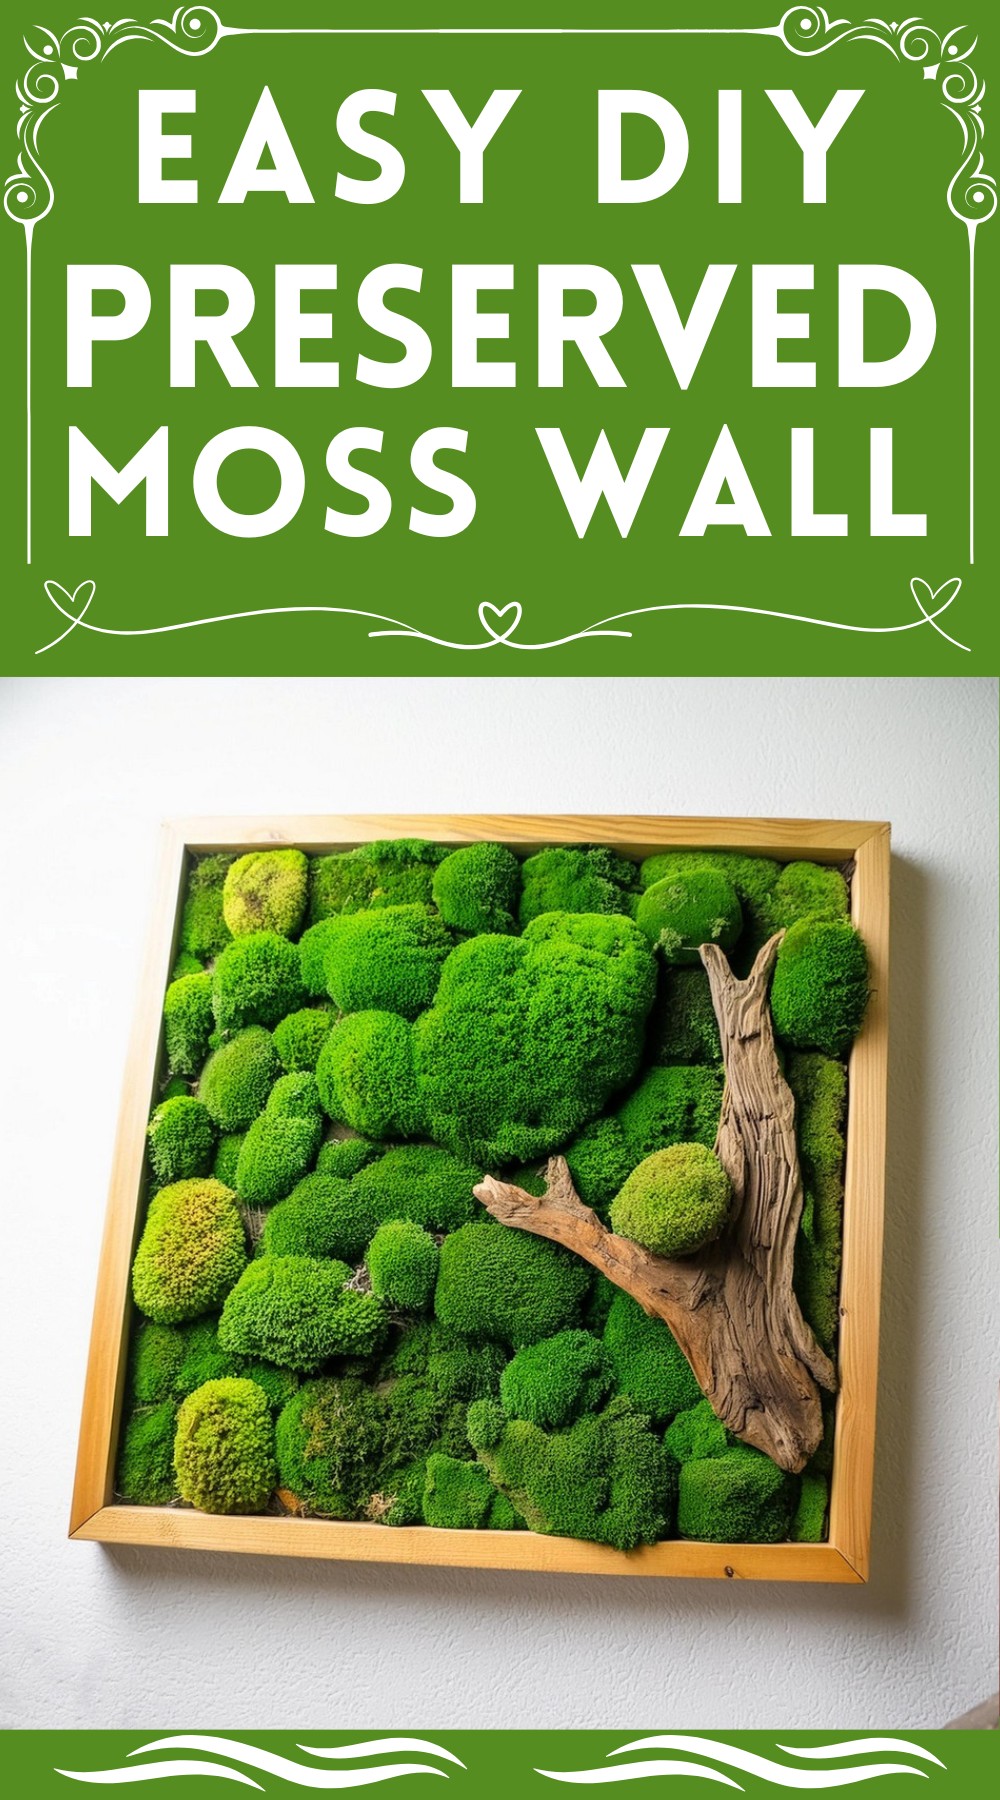
Have you ever wanted a piece of nature in your home but didn’t want the hassle of taking care of a plant? Then, a preserved moss wall is just what you need. A moss wall is beautiful to look at and requires no maintenance. They are made using preserved moss, not living moss, so you don’t have to water or feed it. The moss is treated with a non-toxic preservative, so it keeps its nice, soft texture and bright color. This DIY project is quite simple and affordable to make, even if you have no craft experience. I’m going to show you step-by-step instructions on how to make your moss wall art.
DIY Preserved Moss Wall

Materials Required:
A frame or a panel
Gorilla wood glue
A diverse selection of preserved moss
Optional: Preserved or artificial plants for added dimension and variety
Creating Your Moss Masterpiece: Step by Step
Envision Your Design: Before any moss meets glue, it’s crucial to have a clear design. Map out your intentions on paper, mirroring your frame’s dimensions and arranging your materials until it clicks. Snapshot this layout for your reference.
Secure Your Backing:
Pour your wood glue liberally onto your chosen frame or panel. Spread it evenly across the surface. If you’re working on a flat panel, consider using tape as a border to contain the adhesive.
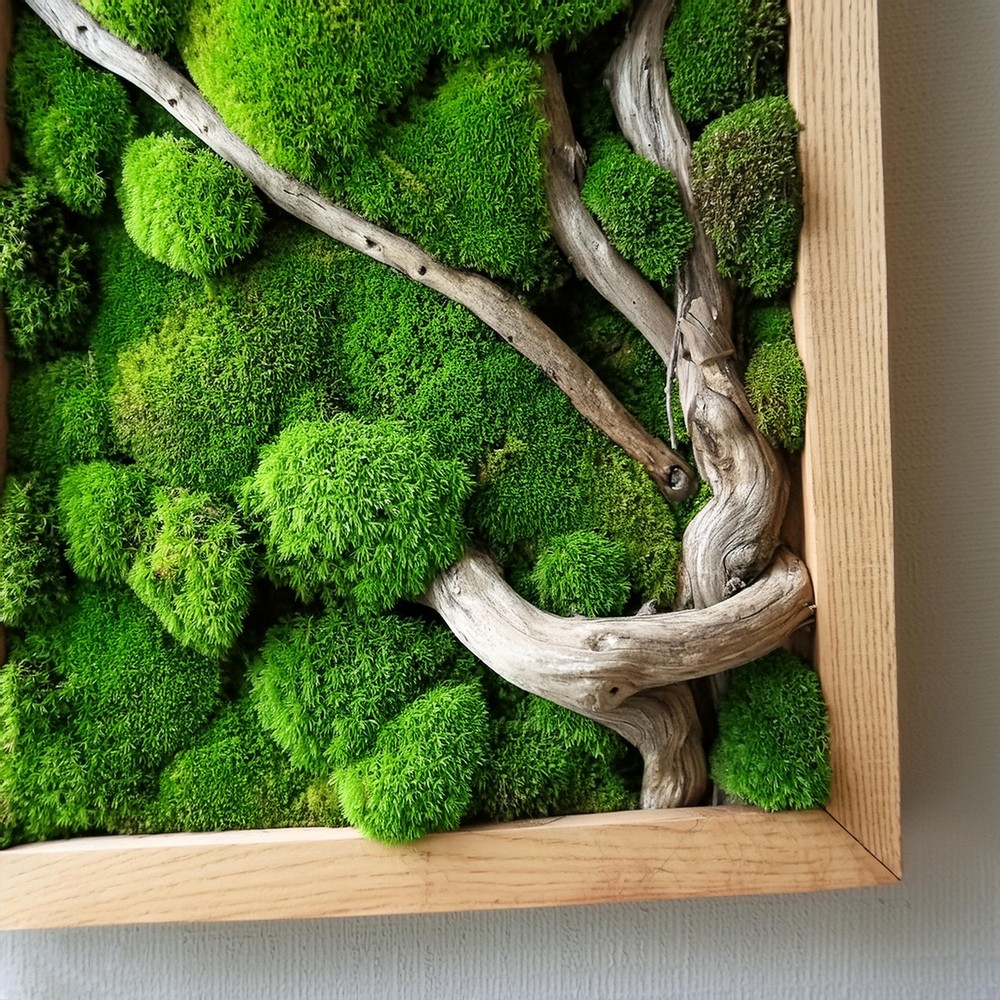
Embed Your Hardscape:
Carefully set your rocks or wood pieces onto the glue-covered surface, pressing each into place. Utilize a spreader to ensure the glue encapsulates the hardscape for a firm attachment.
Position Your Moss:
Gently yet firmly press each moss piece down, starting with the larger segments and then fitting smaller bits in the remaining spaces. If you’ve chosen to include your preserved plants, accommodate them at this stage.
Adorn With Final Touches:
Study your work closely for any blank spots. Fill these gaps with moss fragments secured with superglue to ensure a complete, lush carpet.

Let It Set:
Place a flat, heavy object atop the greener canvas to compress the contents gently for optimal adhesion, and leave it undisturbed for 24 hours.
The Final Check:
Following the drying period, ensure all pieces are firmly affixed and fill any remaining gaps with small moss bits and super glue, allowing this to set fully.
You’ve crafted something magical! All that’s left is to find the perfect spot to hang your living artwork and bask in its enduring beauty.
Leave a Reply