
String Art is a popular DIY craft that is loved by people across all ages. This unique and fun art form involves weaving colorful threads around nails hammered into a wooden board to create intricate and beautiful patterns or images. People adore this craft mainly for its simplicity and versatility, and it requires minimal tools to get started. If you have also been delighted by the beauty of this art but don’t know how it’s done. You can follow the simplest guide given below. This craft is wonderfully straightforward, requiring only basic supplies that are easy to find. So, let’s start an easy but beautiful craft with us!
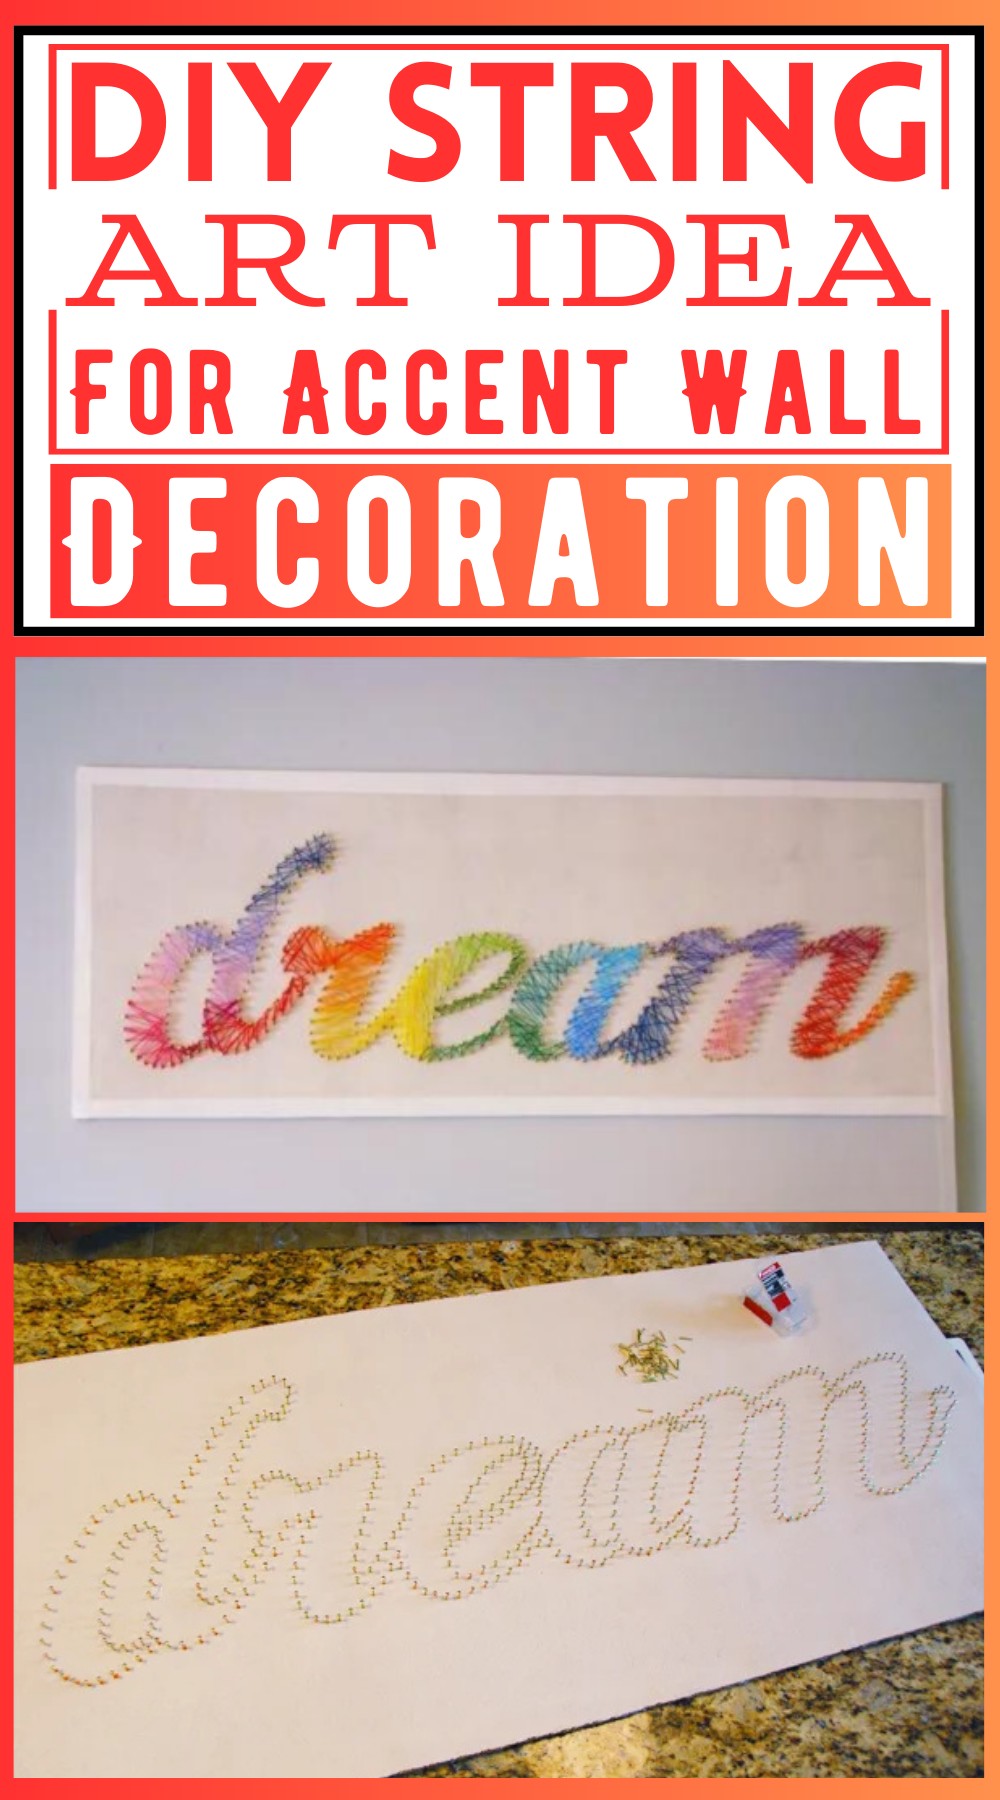
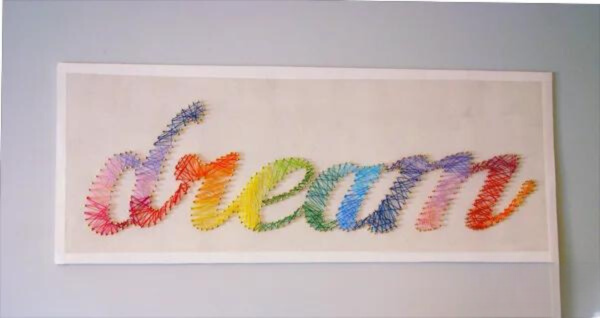
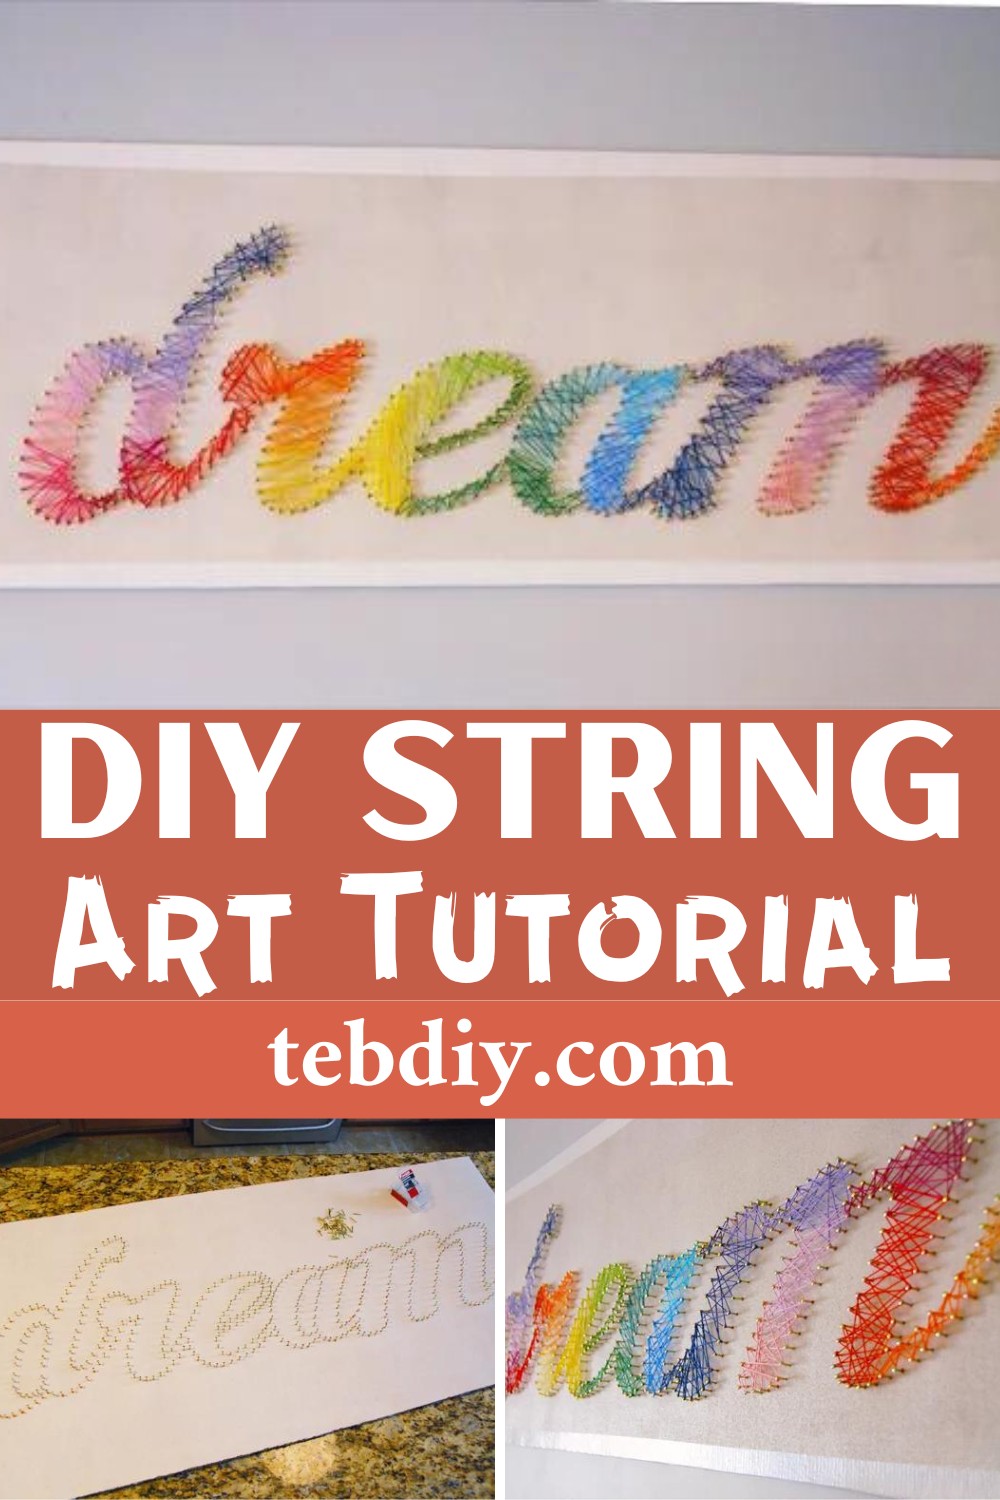
This DIY String Art features the word “dream” on a corkboard canvas, providing a lightweight and customizable option for art enthusiasts. Chosen for its ease of handling, the cork is painted white for contrast, with linoleum nails outlining the letters. The piece dazzles with a rainbow of embroidery floss woven back and forth, creating a vibrant blend of colors. Framed with white duck tape for a clean finish, this creative DIY project combines simplicity with a touch of creativity, resulting in a personal and striking art piece suitable for any space.
How to Make DIY String Art
Materials Needed:
- Corkboard rolls
- Linoleum nails
- 3M Hanging strips
- Embroidery floss
- White duck tape (optional)
- Cutting tools (Scissors)
- Paint (optional)
Step by step Process
Flatten Your Cork & Glue It Together:
Unroll the cork boards and place a bunch of heavy books on them to straighten them. Once straightened, stack three corkboard pieces together and use a glue gun to glue them. Put them back under some heavy books for an hour or so to allow them to dry completely.
Create Your Word Template:
You can design a word template and cut out the letters. Reinforce the spaces in letters like “e” and “a” with tape for stability. You do not need to cut out the inside of the letters.
Center Your Template & Cut Your Cork:
Center your template out on your corkboard. If there’s too much cork, trim it using scissors (not a box cutter).
Paint Your Cork (Optional):
If you desire a different background color (eg. white), you can paint the corkboard using latex paint. Don’t worry if there’s a bit of buckling; it won’t be noticeable after you’re done.
Apply Your Hanging Strips:
Flip the canvas over and apply your hanging strips. It’s easier to do this now before all your nails are in place.
Begin Outlining Your Word:
Center your template and tape it down. Insert your nails into the cork, following the outline of your template.
Remove Your Template:
- Once you’ve traced the entire template, carefully remove the paper.
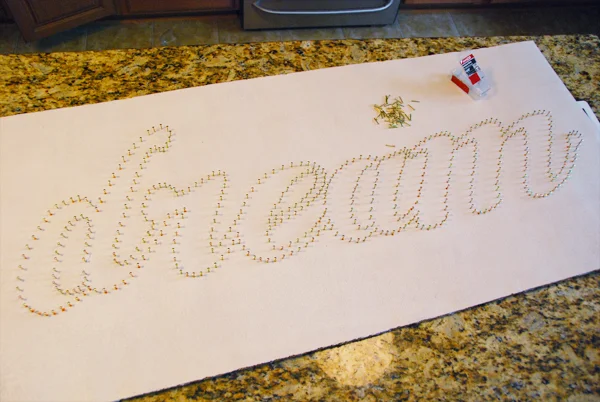
String Your Canvas:
Start stringing by tying onto a nail at the start of a letter, then weave back and forth. If you don’t like a certain section looks, unwind and do it again. You can also decide to do it in variations of colors.
Add a “Frame” (Optional):
If the edges of your corkboard look rough, frame out the whole piece with some white duck tape for a cleaner look.
Now, your DIY string art is ready to be showcased!
Leave a Reply