
Make a cozy, safe nook for your furry companion made with your own hands—something that not only provides comfort to your pet but also a touch of your personal style. This DIY plywood pet carrier can be an incredibly rewarding project, perfect for those who love to merge functionality with creativity. Whether you’re a seasoned woodworking enthusiast or a curious beginner keen to tackle a new challenge, making a custom pet carrier out of plywood offers a great opportunity to enhance your skills and show some love for your pet.
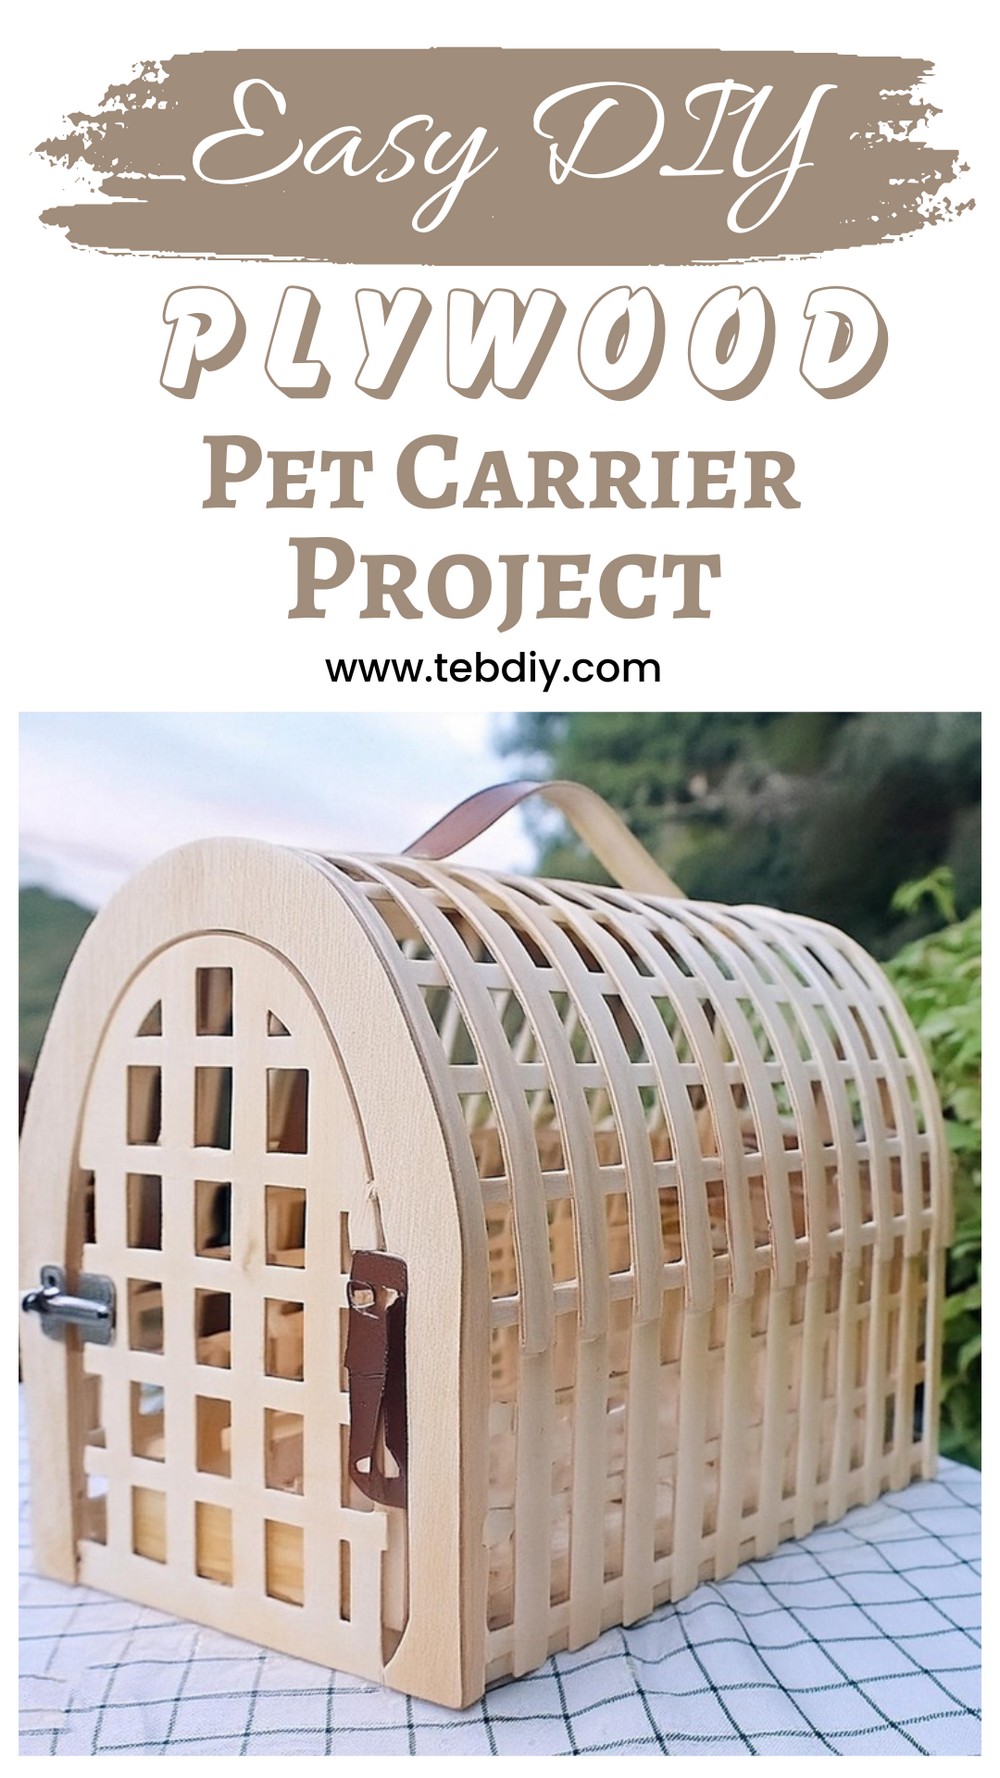
DIY Plywood Pet Carrier Project

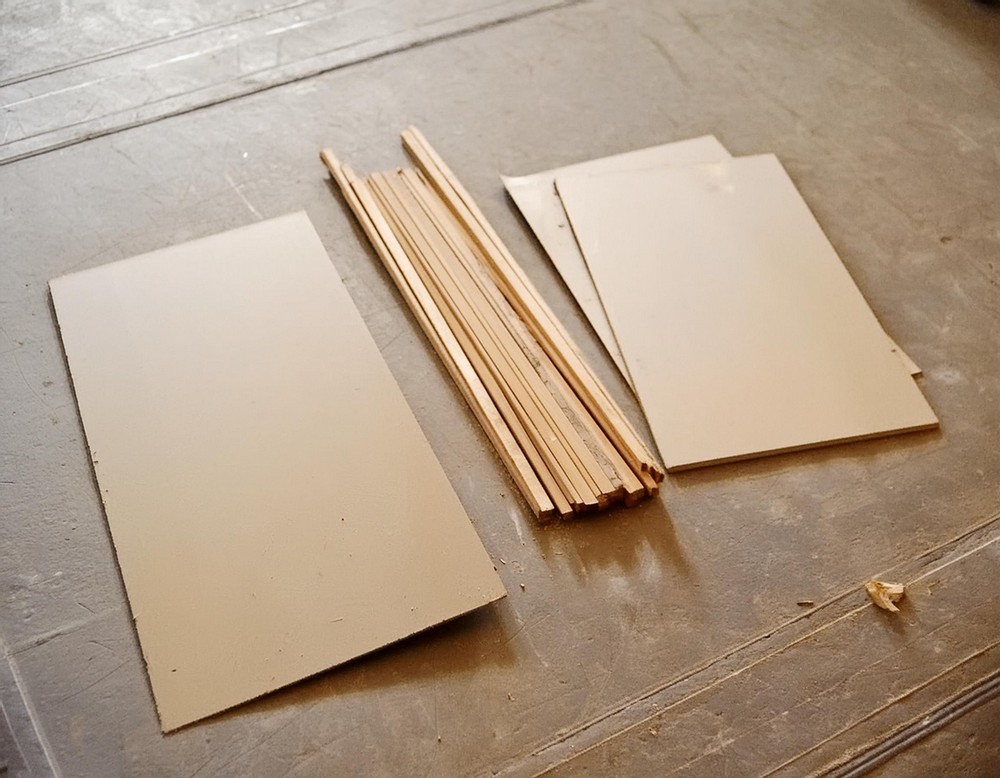
Materials Needed
- Plywood (9mm or similar): 40cm wide and 100cm in length.
- Plywood (4mm or similar): 40cm wide and 75cm in length (This piece should be flexible).
- A pair of hinges: Brass, or a piano hinge as a substitute.
- Latch: To securely close the door.
- 4 Rubber feet: For stability.
- Small screws: For attaching the hardware.
- Small nails: To piece together your project.
- Fabric for the handle: A 5X30cm piece.
- 2 Furniture bolts, 2 large washers, 2 nuts: For the handle.
- Spray lacquer: For the finish.
- Spray adhesive: For making the handle (sewing is an alternative).
- Wood putty: To correct any imperfections.
- Wood glue: For assembling wooden parts.
Tools Required
- Table saw
- Scroll saw
- Disc sander
- Router with a straight bit
- Ryoba saw (flush trim hand saw)
- Drill with wood bits
- Clamps (various sizes)
- Hammer
- Screwdriver
- Marking tools
- Scissors
- Ruler/tape measure
Step-by-Step Guide
Cutting the Material
- Preparation: Measure and cut the plywood pieces to the specified dimensions using a table saw for precision.
- Shaping: For the front and back pieces, mark a rounded top on each, cutting it out with a scroll saw. Tip: Tape the pieces together to ensure symmetry.
Optional: Adding a Rabbet
- Enhancement: Router a rabbet along the edges of the front and back pieces to increase the glue surface and ensure proper alignment of horizontal strips.
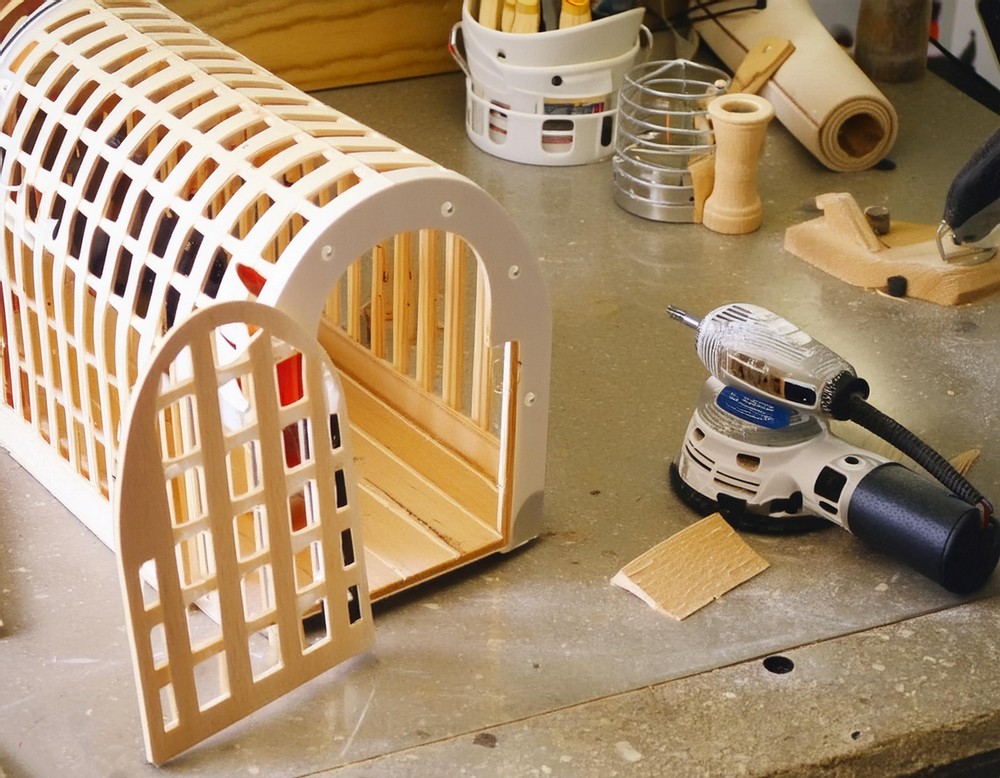
Crafting the Door and Its Pattern
- Door Creation: Mark and cut out a door from one panel, considering the placement of the latch and hinges.
- Designing Details: Use the scroll saw to cut out a grid pattern on both the door and backside for ventilation and aesthetics.
Assembling Horizontal Strips
- Framework: Attach the front and back to the base with glue, reinforcing with small nails.
- Spacing: Glue horizontal strips across the frame, maintaining equal spacing between them for a cohesive look.
Adding Vertical Strips
- Vertical Integration: Cut thin, vertical strips and arrange them on one side of the crate, ensuring flexibility for bending.
- Finishing Touches: Once glued and secured, trim any excess from the strips for a neat finish.
Sanding and Finishing
- Smoothening: Fill imperfections with wood putty, then sand the entire structure for a smooth surface.
- Sealing: Apply two coats of spray lacquer, allowing it to dry in between.
Installing Hardware
- Functional Elements: Attach hinges, latch, and rubber feet, pre-drilling for screws.
Fabricating the Handle
- Personal Touch: Create the fabric handle with a piece of synthetic leather, attaching it with furniture bolts for a secure hold.
Conclusion
Crafting your own plywood pet carrier is not just about creating a space for your pet; it’s about pouring your love and effort into something that will be a part of many journeys with your furry friend. This project blends practical woodworking skills with creative design, resulting in a unique carrier that stands out from the rest. It’s an undertaking that rewards patience, creativity, and the joy of DIY. Happy crafting!

Leave a Reply