
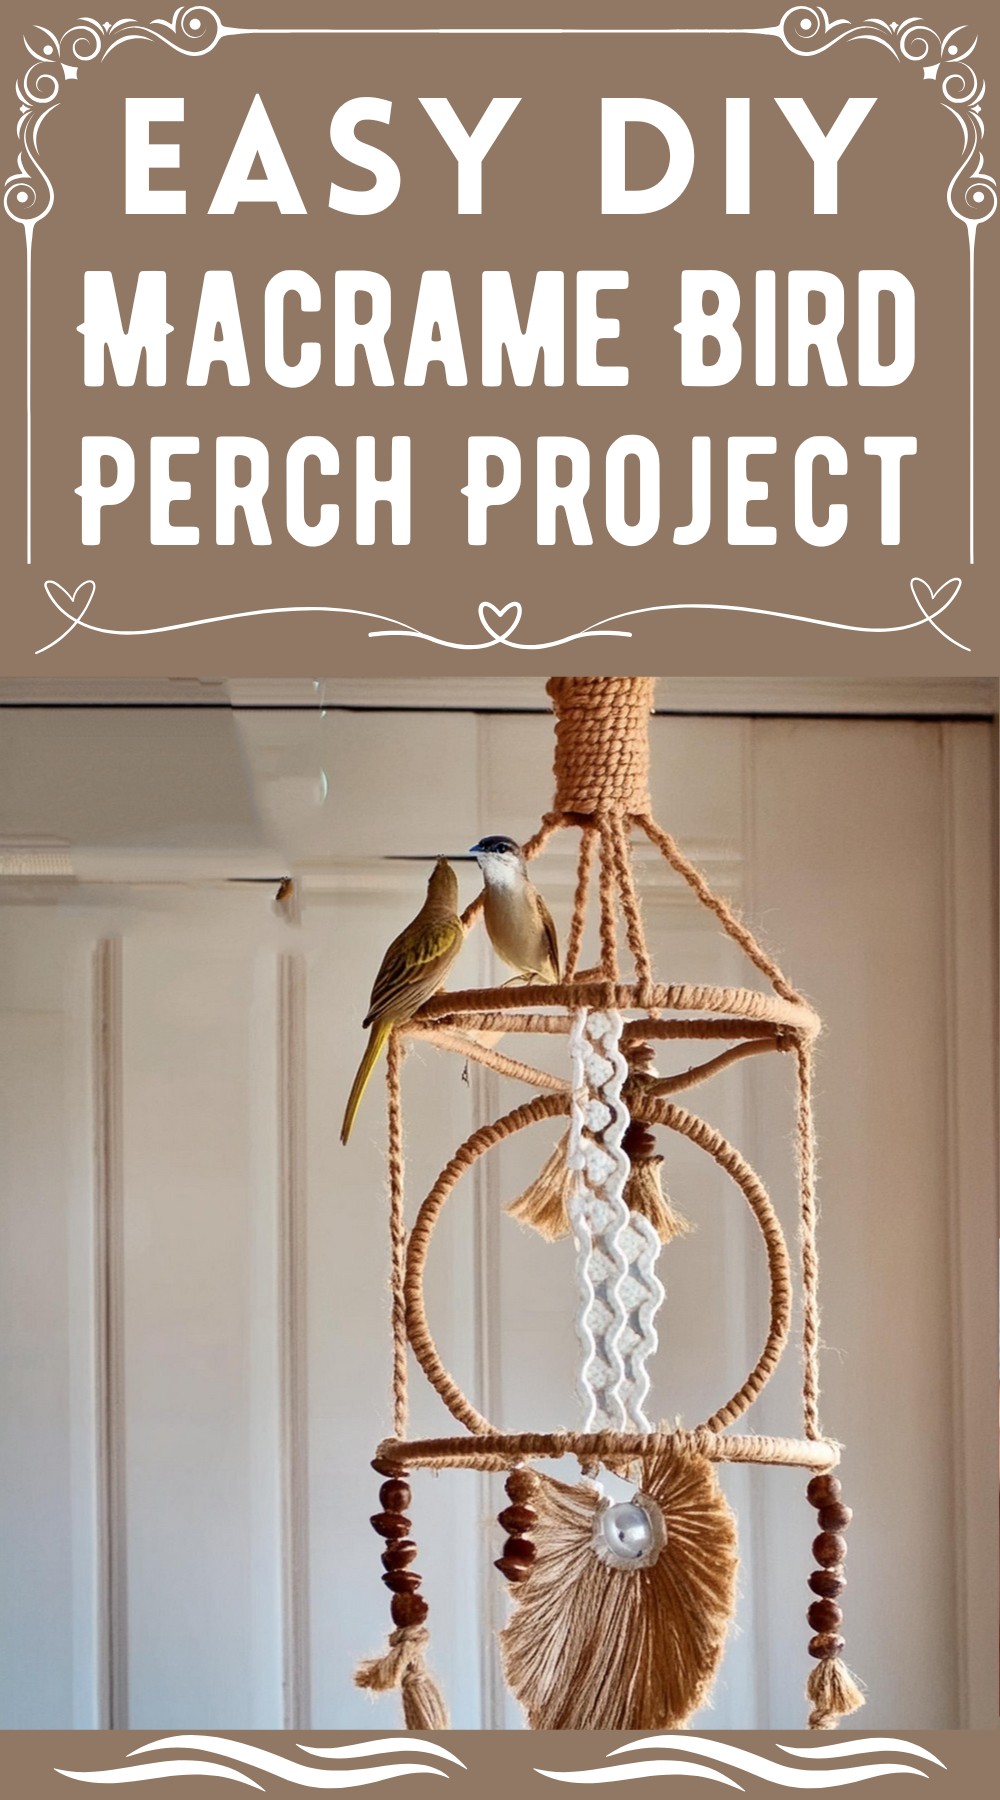
Creating an environment that your pet birds will adore will not only cultivate their physical well-being but also provide an enriching sanctuary for these feathered friends to explore and call their own. Imagine transforming simple strands of natural jute into a stunning, multi-level DIY macrame bird perch, ringing with the sound of tiny bells and adorned with the rustic allure of wooden accents. This handcrafted perch is not only a delightful addition to your home decor but a testament to your love for your avian companions. Whether they’re swinging with gusto or nibbling on beads, this enclave becomes a vertex of activity and rest.
DIY Macrame Bird Perch Project

Materials:
- Approximately 65 feet of 100% natural/undyed 7 mm jute rope
- Several inches of jute twine
- 1 Screw hook with anchor (for ceiling installation)
- 1 2-1/2″ wooden ring (for the top attachment point)
- Multiple raw/unfinished wood beads
- Several Liberty bells (Note: jingle bells are not safe for birds)
Tools:
- Measuring tape or ruler
- Scissors (sharp, for precise cutting and feathering of rope ends)
- A secure anchor point in the ceiling (where the completed perch will hang)

Step-by-Step Guide
Rope Strands Preparations
Begin by measuring and cutting four 10-foot lengths of the 7 mm jute rope. These will be the primary supports for the perch structure.
Forming the Initial Attachments
Secure each rope strand to a wooden ring using Lark’s Head Knots. The process involves folding each rope in half, threading the looped end through the ring, and then pulling the tails through the loop. Perform this knot with each of the four strands.
Building the Perch Frame with Square Knots
Create a series of Square Knots with pairs of rope strands to form the perch’s structure. This is a straightforward knot resembling the number ‘4’, followed by its mirrored image. Make sure to pull the knots tightly to ensure stability.
Attaching the Upper Horizontal Ring
Position your knotted ropes equidistantly around the top horizontal ring. Then secure each set of rope strands to this ring, ensuring each knot is snug and the structure hangs correctly.
Incorporating Alternating Half Hitch Knots
Add visual interest and fine texture with Alternating Half Hitch Knots on two opposite segments between the top and bottom rings. These knots should steadily reduce in size as they near the bottom ring.
Assembling the Swing
For the middle portion of your perch, create a swing assembly by joining lengths of rope from opposite sides together around a vertically-oriented ring. This will be the playful center ring where your pet can sway to their heart’s content.
Fixing the Lower Horizontal Ring
Now, attach the last of the ropes to the bottom horizontal ring, which serves as the base of the perch. Ensure that you tie these knots tightly for a strong and durable structure.
Crafting Macrame Feathers
Near the bottom of the perch, form macrame feathers using short lengths of jute rope tied in simple knots, unraveled and fluffed out. Trim the edges to mimic the shape of feathers, providing an engaging aspect for your birds to preen and fuss over.

Final Embellishments with Beads, Bells, and Tassels
For a bit of charm and to pique your birds’ curiosity, string beads and bells onto the remaining rope ends, finishing them off with tassels. Each embellishment adds its own enjoyable sound and texture for your birds to explore.
Ready for Avian Amusement
With the perch assembled, secured, and embellished, it’s ready to be installed. Affix the entire structure to your chosen anchor point in the ceiling using the screw hook. The joyous exploration that ensues from your feathered friends will be the ultimate reward for your crafting efforts.
This macrame bird perch isn’t just an item of beauty; it’s a towering playground and restful alcove for your birds. The excitement that you will feel at their first tentative hop onto this handwoven wonder will only be surpassed by their zeal for adventure as they make it their own.

Leave a Reply