
The flock of happy hens clucking gently in your backyard, a serene picture of sustainable living. The joy of collecting fresh eggs each morning, knowing exactly where they came from and that they were produced in a kind and natural environment. You can try creating this DIY Hen House From Old Garage Cupboard not with expensive, store-bought materials but with the artifacts of past renovations – old garage cupboards, to be precise.
Building this hen house in this eco-friendly manner not only gives you fresh eggs but also recycles materials that might otherwise end up in a landfill. The beauty of this project is not just in the end-product but in the process itself – transforming the old into something new and purposeful. Ready to embark on a fulfilling venture that benefits your feathered friends, the planet, and your breakfast plate.
DIY Hen House From Old Garage Cupboards
Materials List
- One-by-twelve pine boards from old garage cupboards
- Reclaimed lumber, various dimensions
- 18 x 8-foot fir two-by-fours
- Pine one-by-twos for screen frames
- A two-by-three stud for the roost
- Stair rail (for the main roost)
- Simpson Strong Ties, approximately 30
- Screws, several boxes suitable for framing and attaching siding
- Hinges and latches for doors
- Poly-carbonate plastic roofing (26-inches by 12-feet)
- Roofing supports for under the roof panels
- Wood preservative
- Metal plates for joint reinforcement
Tools Used
- Power drill with flip-drill-drive attachments (size 8 and 10)
- Power miter saw
- Skill Saw
- Belt sander
- Jig saw or tin snips (for roofing material)
- Square and tape measure
- Screwdriver
- Hammer
Step-By-Step Process
Framing Begins
Construct the framework using the two-by-four fir planks, ensuring sturdiness with metal plates at the joints. Formulate two end frames and one inner wall frame on a level base, solidifying each with the Simpson Strong Ties. Erecting the end frames can be challenging; assistance here is invaluable. To prevent decay, treat the bottom of the legs with wood preservative. Above the door frames, add additional framing pieces to create square tops for the doors, which also function as stoppers.
Organizing the Old Lumbers
Sorting your reclaimed boards is a crucial step in this hen house’s formation, with the best boards selected for the facade and the less desirable pieces allocated to the rear and roof. Start by earmarking the longest boards needed, then parse out pieces for each part of the structure while considering the warping.

Crafting the Nest Box
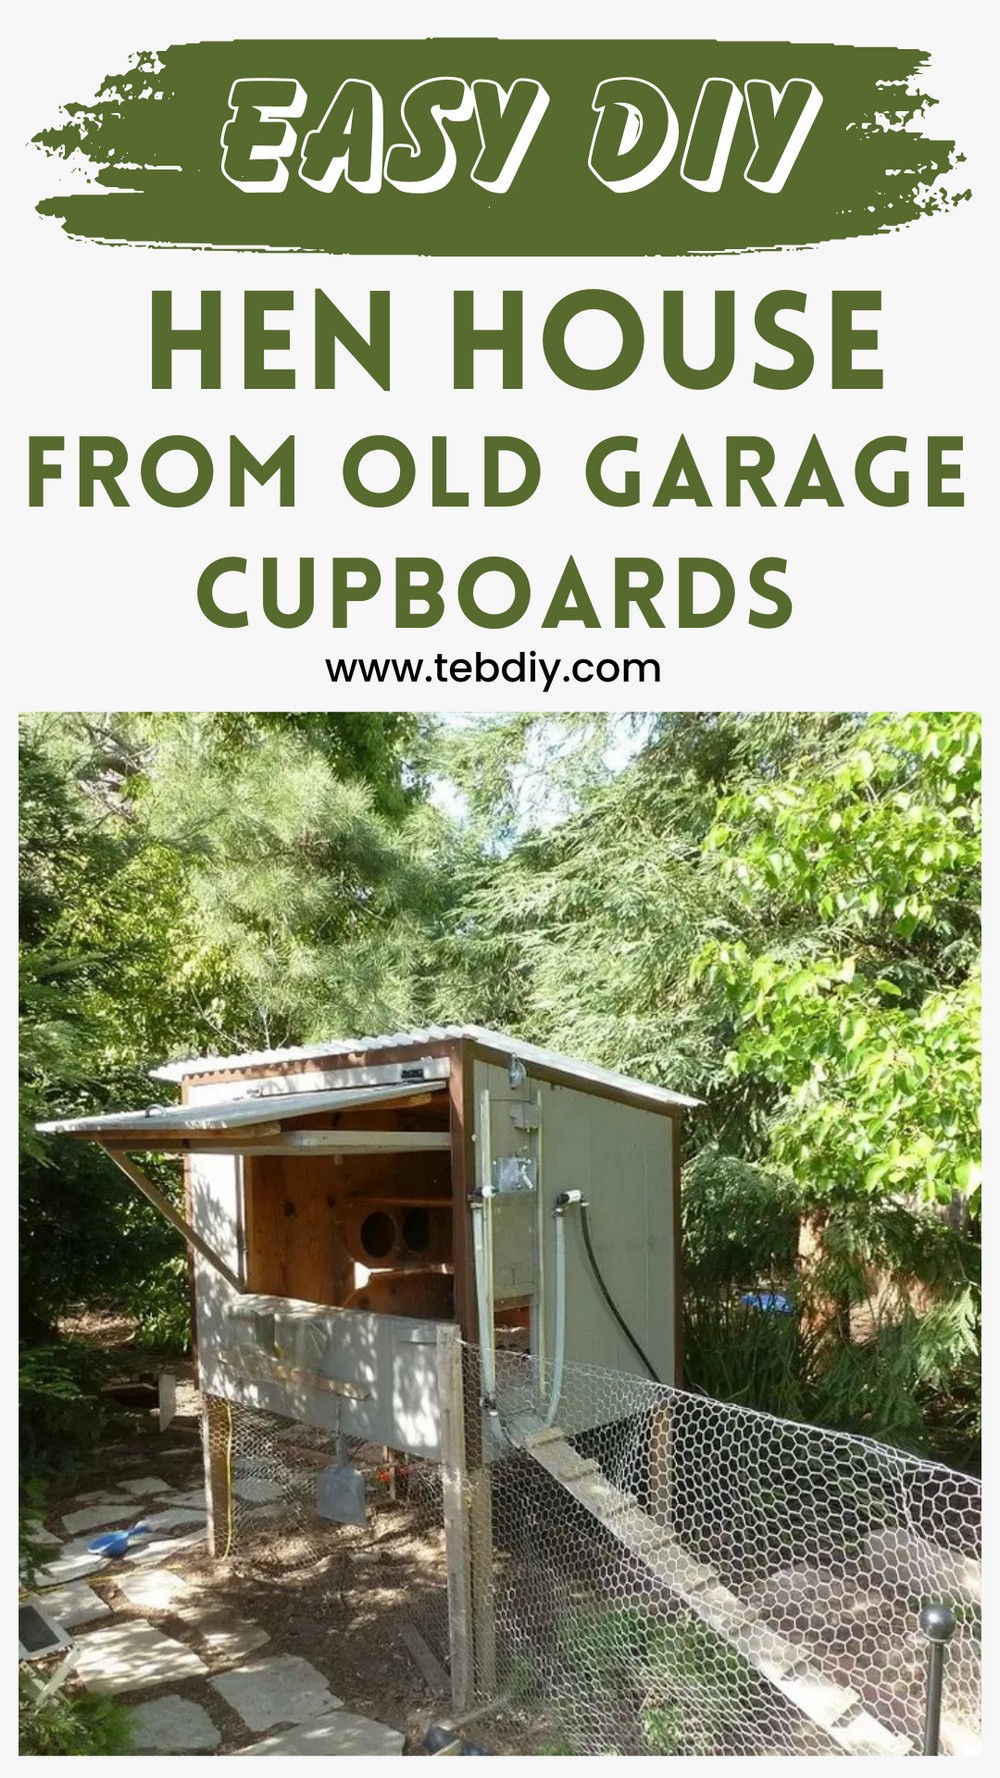
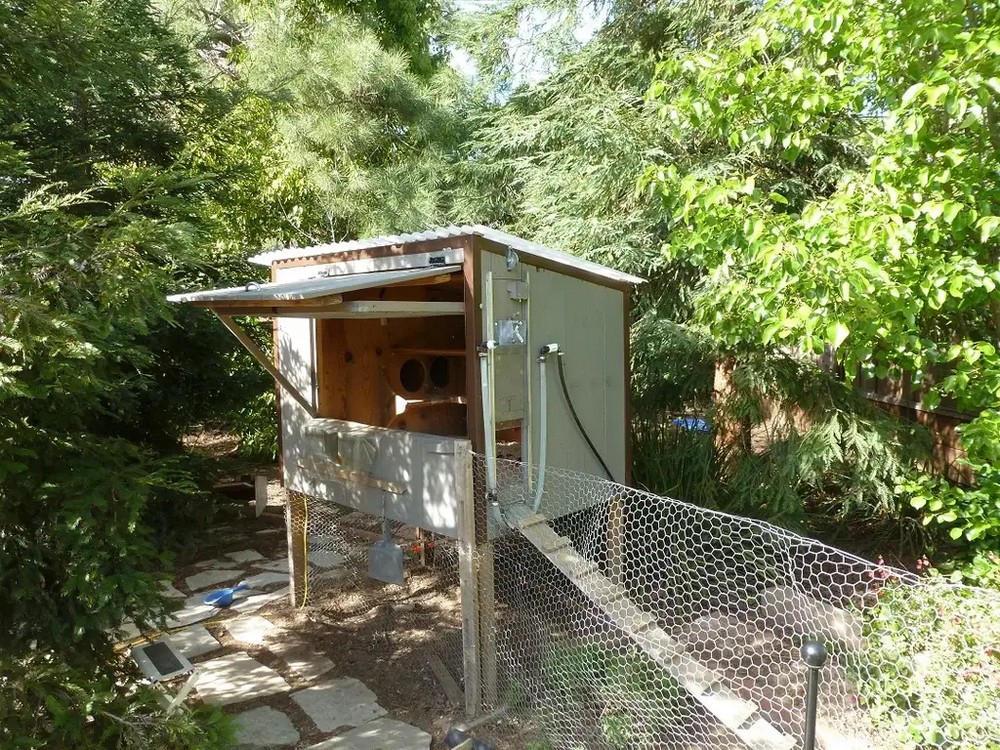
The nest box requires careful attention, with dimensions roughly twelve inches on each side and entry points elevated about a foot from the floor. Integrate a roost before the nest boxes to deter the hens from sleeping and soiling their laying area. Extra roost positions can be rejigged if overlapping causes an issue. The base of the cupboards is attached beneath the framing to maximize space and reduce areas where spiders might dwell. Install additional shelves above for storage.
Completing the Nest Box and Cupboard
Finalize the nest box by fitting the doors and installing extra siding. While aesthetic, the cutouts on the nest box door—which appeared like a half-moon—were not necessary and could potentially be eliminated for simplicity. Mount a shelter for the water tank which connects to the hen house’s automated watering system.
Reflections on Design and Materials
Be aware of the actual sizes of your reclaimed lumber before cutting. The frame’s footprint measures five feet by three and a half feet, with height differences catering to roof slope. Side walls, including the three side walls (counting the inner wall and cupboard doors) posed a carpentry puzzle with their variety of openings and cutout needs.

Additional Design Tips
Take great care to ensure joints start squarely to facilitate subsequent assembly. Checking each cut for accuracy with a square is better than relying on preset saw notches. For precision in ripping boards, guide the saw with clamped boards. The subtly uneven finishes in wood lengths and corner alignment reflect the adaptive nature of using reclaimed wood. Plan to conceal imperfections with metal flashing, providing a neater finish. Cover the roof with poly-carbonate plastic roofing with proper overlaps and support.
Conclusion
Embracing this project means embracing imperfection, a hallmark of resourcefulness and sustainability. At the end, not only have you’ve provided a haven for your hens, but also enacted a personal story of transformation. What awaits is not just the satisfaction of completing a valuable project, but the anticipation of the contented clucking and the unmatched taste of home-harvested eggs.

Leave a Reply