
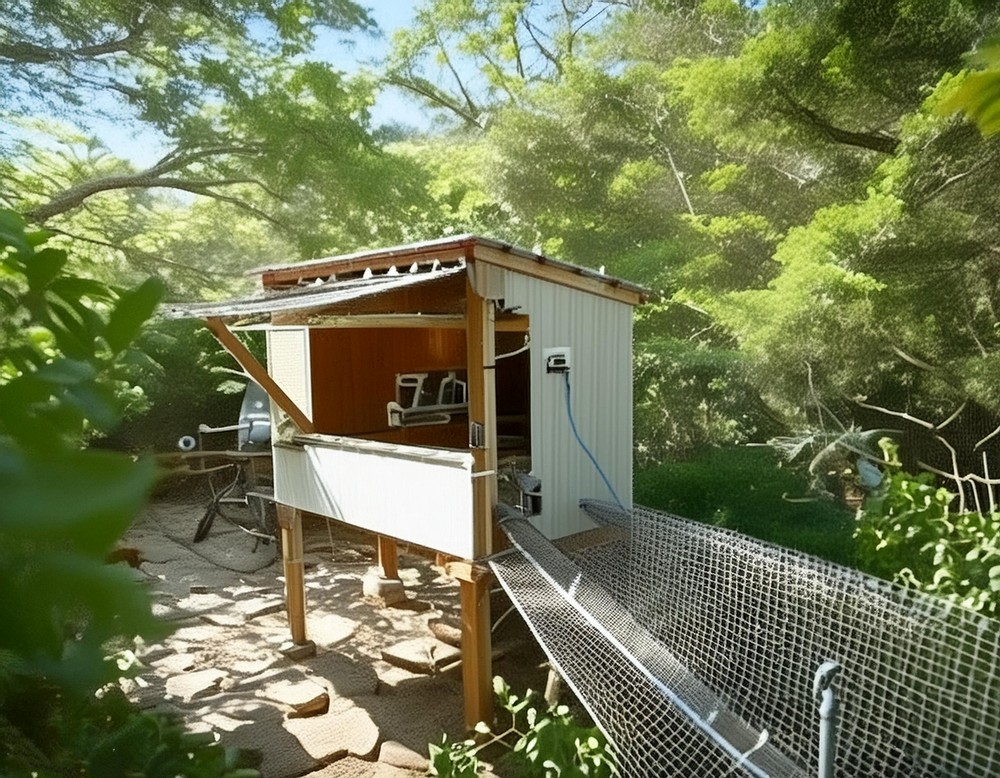
Enjoy the charm of homegrown eggs by transforming old garage cupboards into a DIY state-of-the-art house for hen. This project is not just about giving these cupboards a new lease on life, it’s about creating a sustainable home for your feathered friends, tailored to ensure their comfort, safety, and happiness.

DIY Hen House Project
Materials:
- One-by-twelve pine boards (repurposed from old garage cupboards)
- Eighteen 8-foot fir two-by-fours
- Five or six pine one-by-twos (for screen frames)
- One two-by-three stud (for the roost)
- Six-foot piece of stair railing (for the main roost)
- Simpson Strong Ties (approximately 30)
- Screws (several boxes for framing and siding attachment)
- Hinges
- Latches
- Poly-carbonate plastic roofing (26-inches by 12-feet, cut into three 48-inch pieces)
- Metal flashing (for cosmetic touch-ups and protection)
Tools:
- Power drill with flip-drill-drive attachments (size 8 and 10)
- Power miter saw
- Skill saw
- Belt sander
- Jig saw or tin snips (for cutting the roofing material)
- Square
- Tape measure
Hen House Construction Process
Framing the Foundation
Constructing a sturdy base involves assembling numerous two-by-fours into end frames and inner-wall frame, all secured with Simpson Strong Ties for extra stability. Assistance from a friend can be invaluable during this step, especially when erecting the frame. Treat the wood with a preservative to ensure durability, particularly at the base where it contacts the ground.
Preparing Your Lumber
Sorting through the lumber to identify usable pieces can be challenging, especially when dealing with old, sometimes warped wood. Prioritize the allocation of the best boards for visible areas like the front, while assigning the less appealing ones to the back and roof. Efficiency and aesthetics are key in this stage.

Crafting the Nest Box and Cupboard
The nest box is a critical feature that requires precise measurements and thoughtful placement within the hen house. Incorporating a roost in front of the nest boxes helps keep the nests clean and encourages natural roosting behavior. For added functionality, design the cupboard and nest box setup with ease-of-access in mind, opting for a layout that supports easy cleaning and organization.
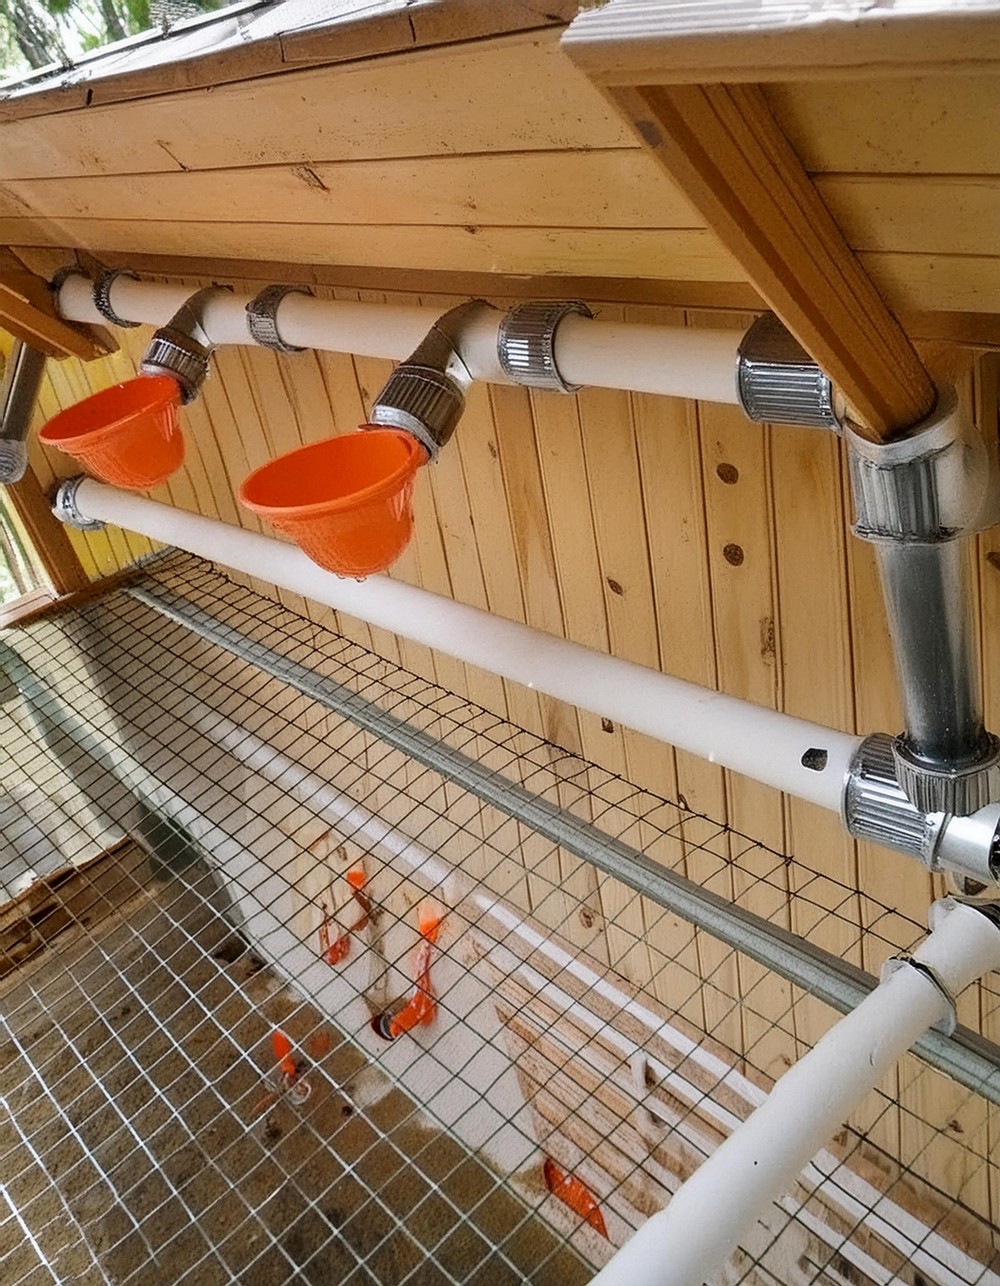
Assembling the Nest Box and Cupboard
In this phase, doors and additional siding are attached to the nest box and cupboard area. Although aesthetics are important, efficiency in design and functionality should take precedence. The installation of the water tank and automatic watering system can be considered at this stage, ensuring your hens have constant access to fresh water.
Final Touches and Considerations
Attention to detail in the final design influences both the hen house’s function and form. Using almost twelve-inch wide boards enables you to achieve a uniform look, while strategic placement of metal flashing can conceal any irregularities, giving your hen house a polished finish. The roofing requires careful handling, ensuring sufficient coverage and protection from the elements.

Conclusion
Making a hen house from old garage cupboards not only provides a sustainable solution to repurposing unwanted materials but also offers a rewarding DIY project resulting in a comfortable and secure home for your hens. With careful planning, the right tools, and a bit of elbow grease, you can create a welcoming space for your feathered friends to flourish.
Leave a Reply