
Have you ever considered that the little four-pawed member of your family deserves a dining space that’s both stylish and comfortable? Crafting an Oak Dog Bowl Stand isn’t just a DIY project; it’s a labor of love that adds a touch of elegance to your pet’s daily meals. Inspired by a combination of necessity and creativity, this make-it-yourself stand brings functionality and design together in harmony. Whether you’re a seasoned woodworker or picking up the tools for the first time, this project offers a rewarding challenge with a beautiful, practical result.
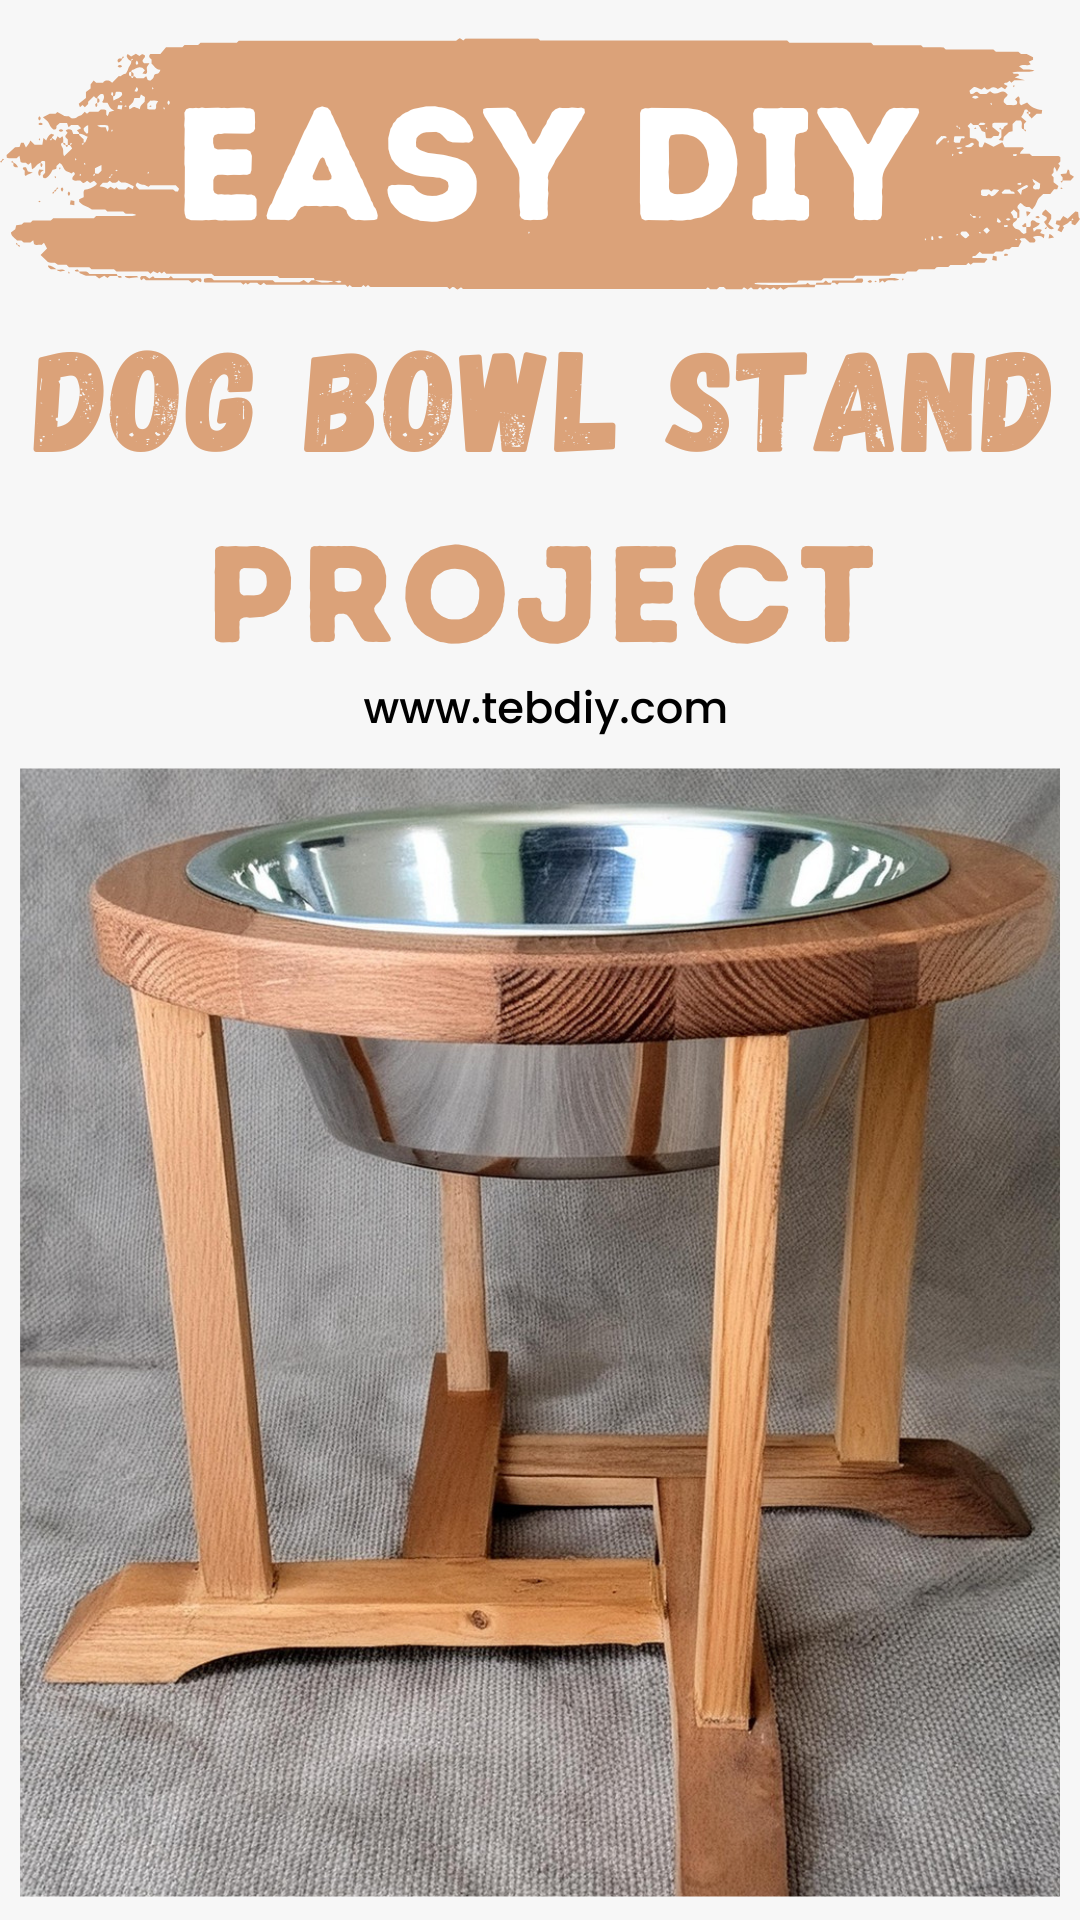
DIY Oak Dog Bowl Stand Project

Materials Needed
- Oak plywood
- Lumber core plywood (for the base)
- Solid oak (for the face frame)
- Stainless steel dog bowls (PEGGY11 brand, 6 cups)
- 1/2 inch MDF (for jig construction)
- 8-32 x 2 inch screws
- #8 washers
- #8 lock washers
- #8 wing nuts
- Titebond 3 waterproof glue
- Polyurethane finish
Tools Required
- Scroll saw
- Sander
- Surface planer
- Miter saw
- Router table
- Incra jig (for precision adjustments)
- Spiral router bit (1/4 inch)
Project Workflow
Creating the Top Piece
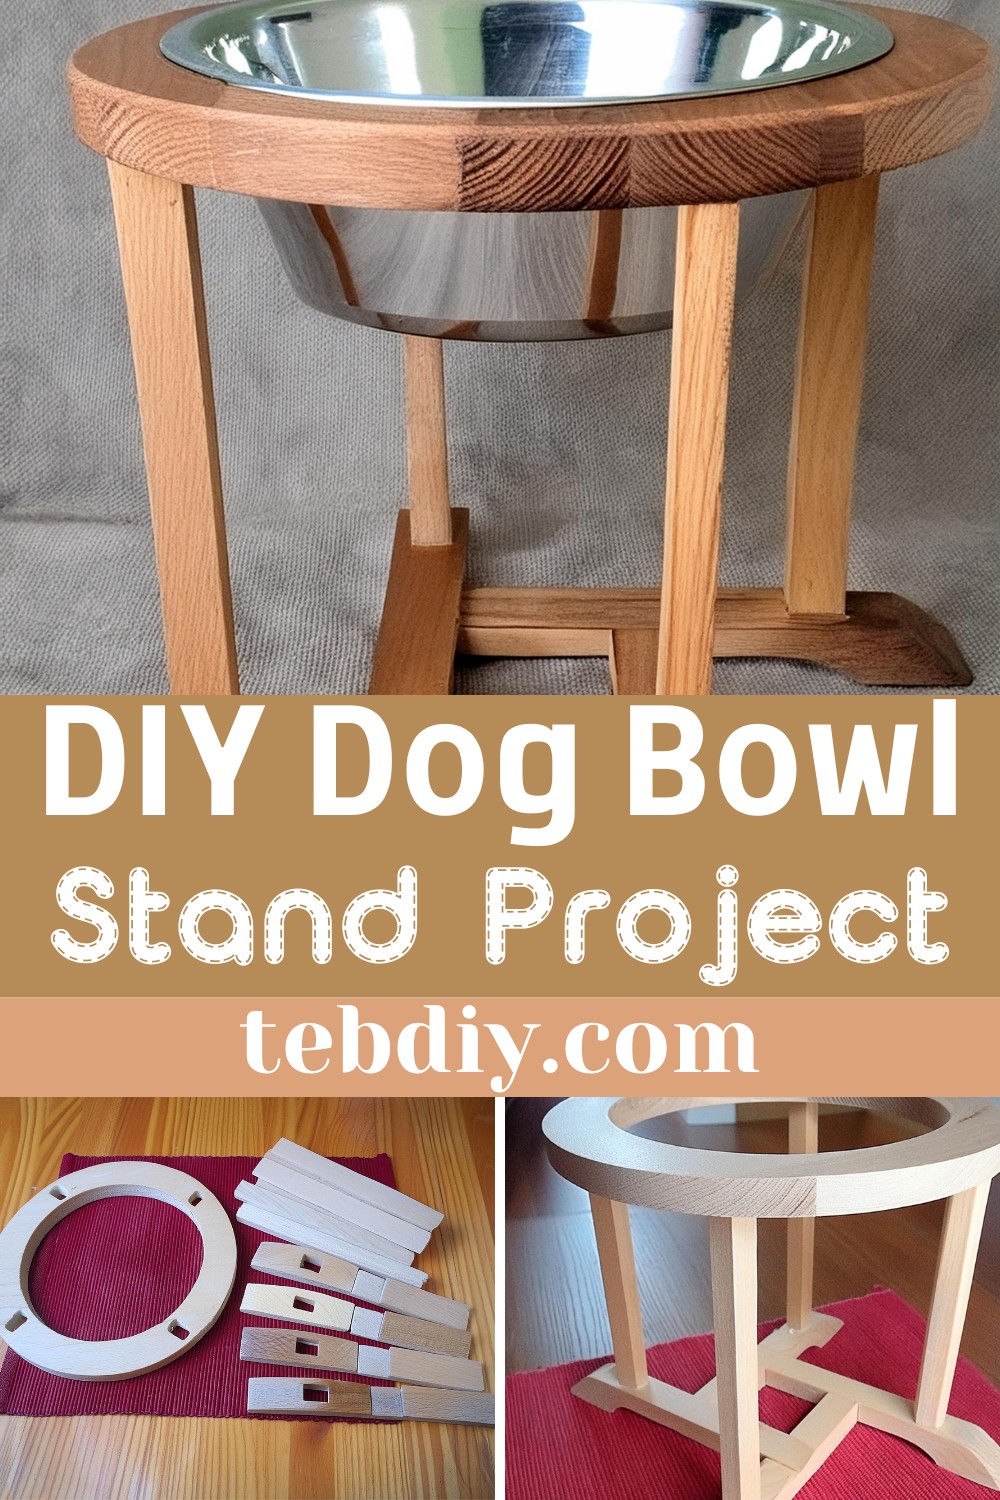
The heart of your dog bowl stand starts with cutting the top piece from 3/4 inch thick lumber core plywood to accommodate the dog bowls. Measure and trace the diameter needed (7-1/2 inches for inside, 10-1/4 inches for outside) before cutting it out with a scroll saw. Smooth the edges with a sander for a clean finish.
Fashioning the Vertical Base Pieces
Cut four vertical base pieces from a 1×2 oak face frame to the dimensions of 1/2 inch thick by 3/4 inch wide by 8-1/4 inches long. These will support your structure vertically. Precision is key, so use a surface planer for accuracy, and trim them to length on a miter saw.
Preparing the Horizontal Base Pieces
Similarly, prepare four pieces for horizontal support, ensuring they are 1-1/8 inches wide, 1/2 inch thick, and 8-1/2 inches long. Accuracy in dimensions is critical for a snug fit during assembly, focusing on meticulous cutting.
Crafting the Feet
From the remnants of the horizontal base pieces, cut out the stand’s feet, each 2-3/4 inches long. These should match in thickness and width to maintain stability and aesthetic symmetry.

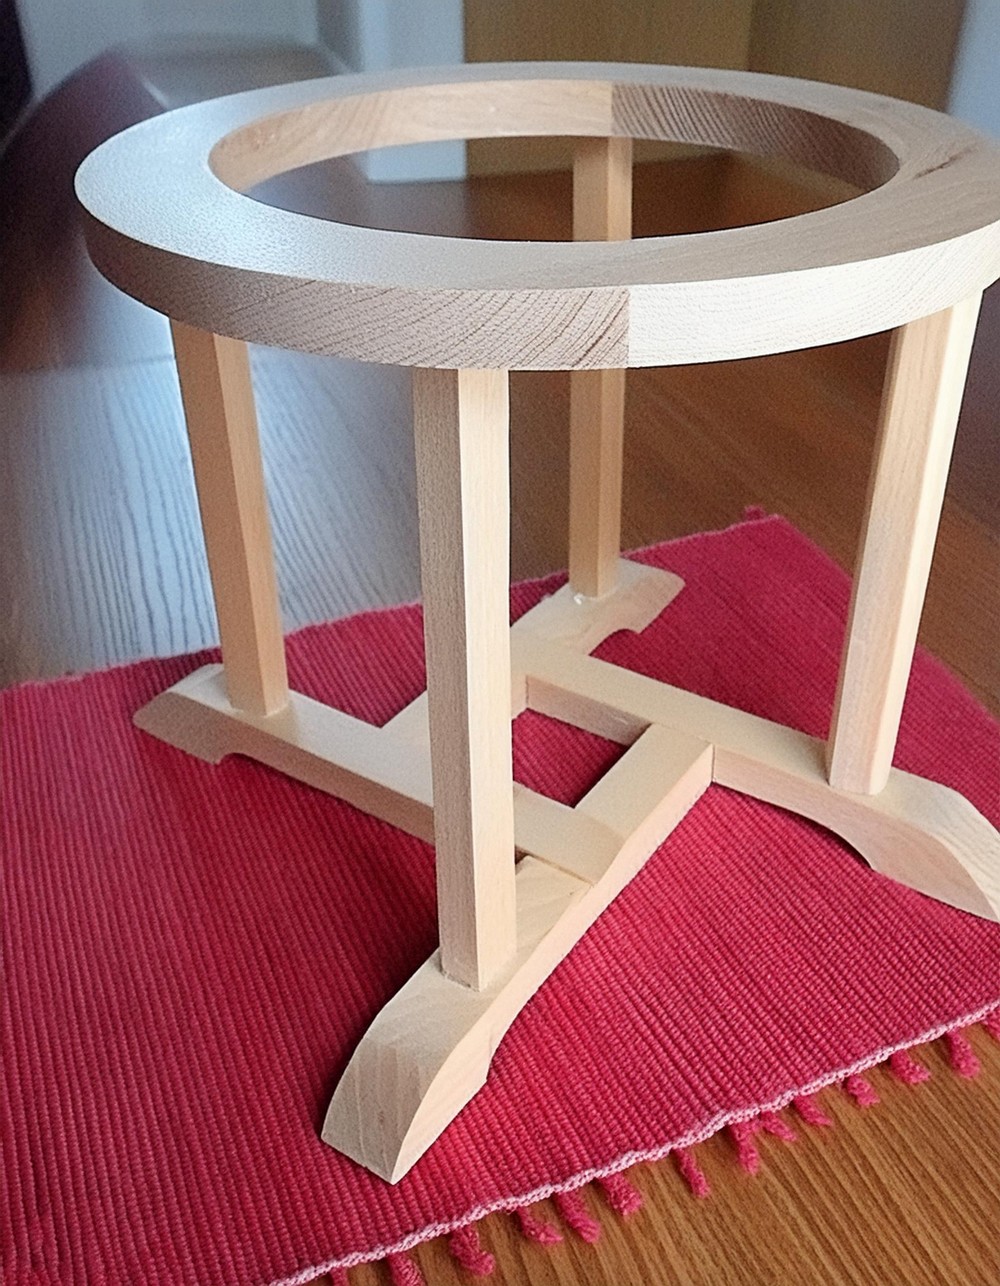
Blank Pieces Ready for Shaping
With all wooden pieces cut, it’s time for detailed shaping. Sand a curve into one side of each foot for elegance, cut half-lap joints and a mortise on the horizontal pieces, and similarly prepare the top piece and vertical supports for joining.
Building the Half Lap Jig
Construct a custom jig using 1/2 inch thick MDF to facilitate cutting precise half-lap joints. Accuracy in assembling the jig ensures the base pieces fit snugly and uniformly. The dimensions aren’t set in stone but aim for stability and compatibility with your router table. Precision slots allow for router bit access and ease of use.
Making the Half Lap Joints – Setup
Celebrate the art of precision as you cut flawless half-lap joints using your homemade jig and an adjustable Incra jig on the router table. Adjustments should be made to allow the 1/4 inch spiral router bit to slightly touch the inside edge of the slot in your jig. Use pencil marks for accurate bit positioning.
Executing the Half Lap Joints – Routing
With the initial setup dialed in, it’s time to route your pieces. Keep the jig steady and motion uniform for clean cuts. Adjust the fence to accommodate the full width of the joint and repeat the process, ensuring depth and alignment are consistent.
Conclusion
Crafting a dog bowl stand from oak is not just woodworking; it’s creating a piece of your family’s daily life. With the right materials, careful planning, and a bit of elbow grease, you’ll have a stand that’s both functional and fetching. This project not only puts your skills to the test but rewards you with a piece that will bring joy to your furry friend’s meal times.
Leave a Reply