
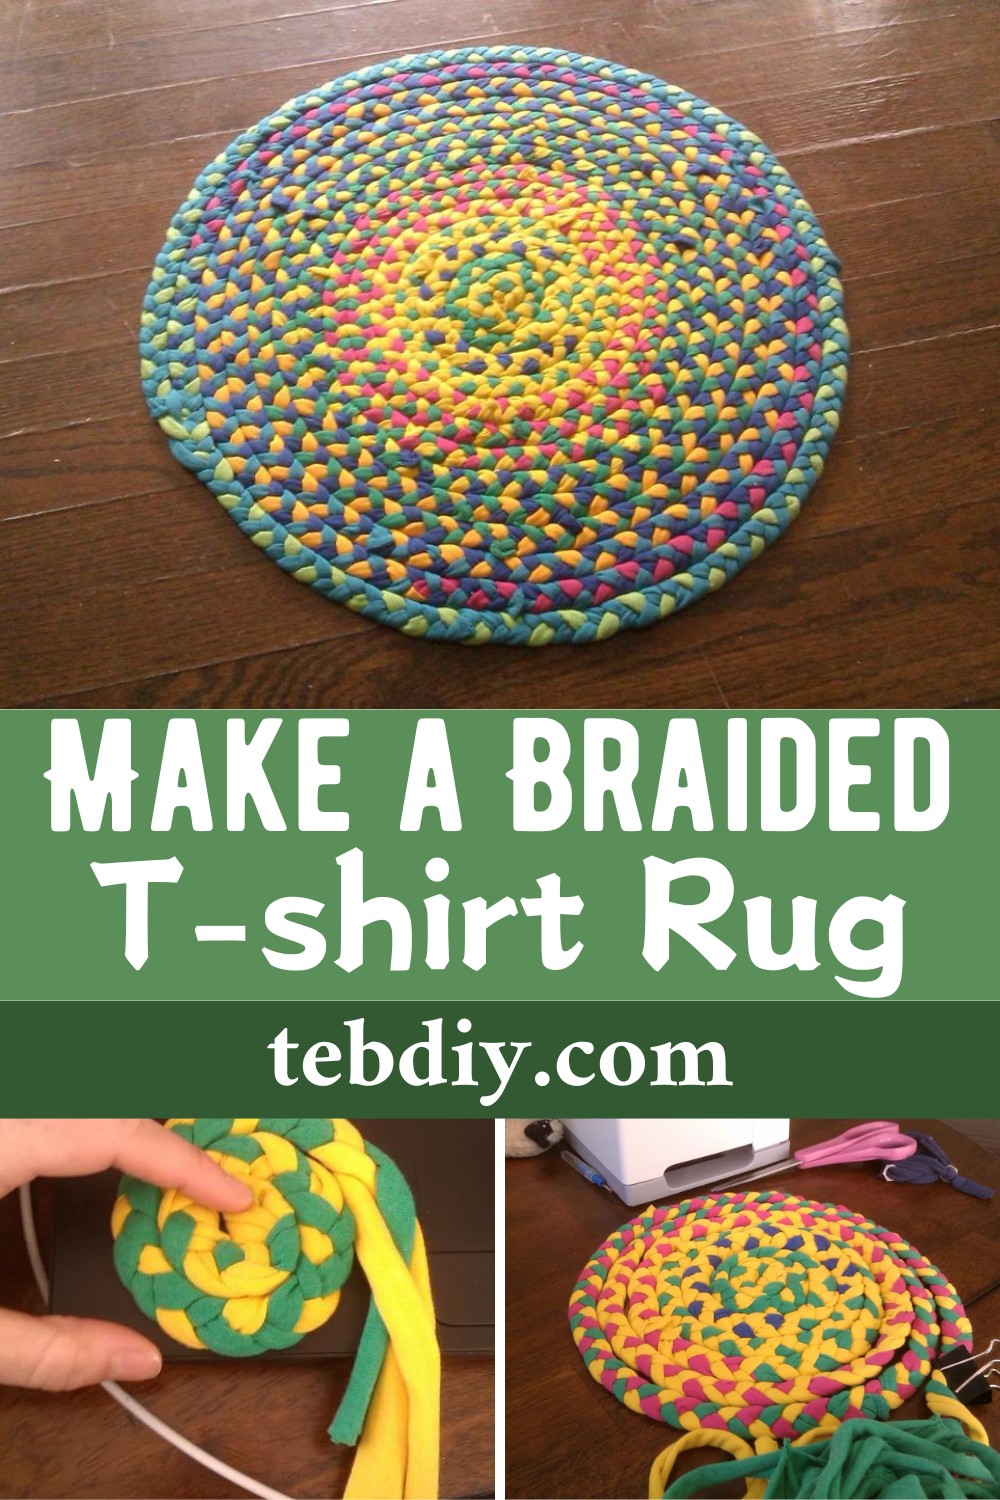
T-shirts, those comfortable pieces of cloth we wear almost every day, can have a second life after they’ve become old or worn out. Instead of throwing them away, we can turn them into something valuable and beautiful for our homes, like a rug. Yes, we are giving the clear steps to make a rug using just a few worn-out T-shirts and a bit of creativity. There’s no need for complicated equipment or skills; with just a few simple tools and the t-shirts you already have, you can begin crafting your rug!
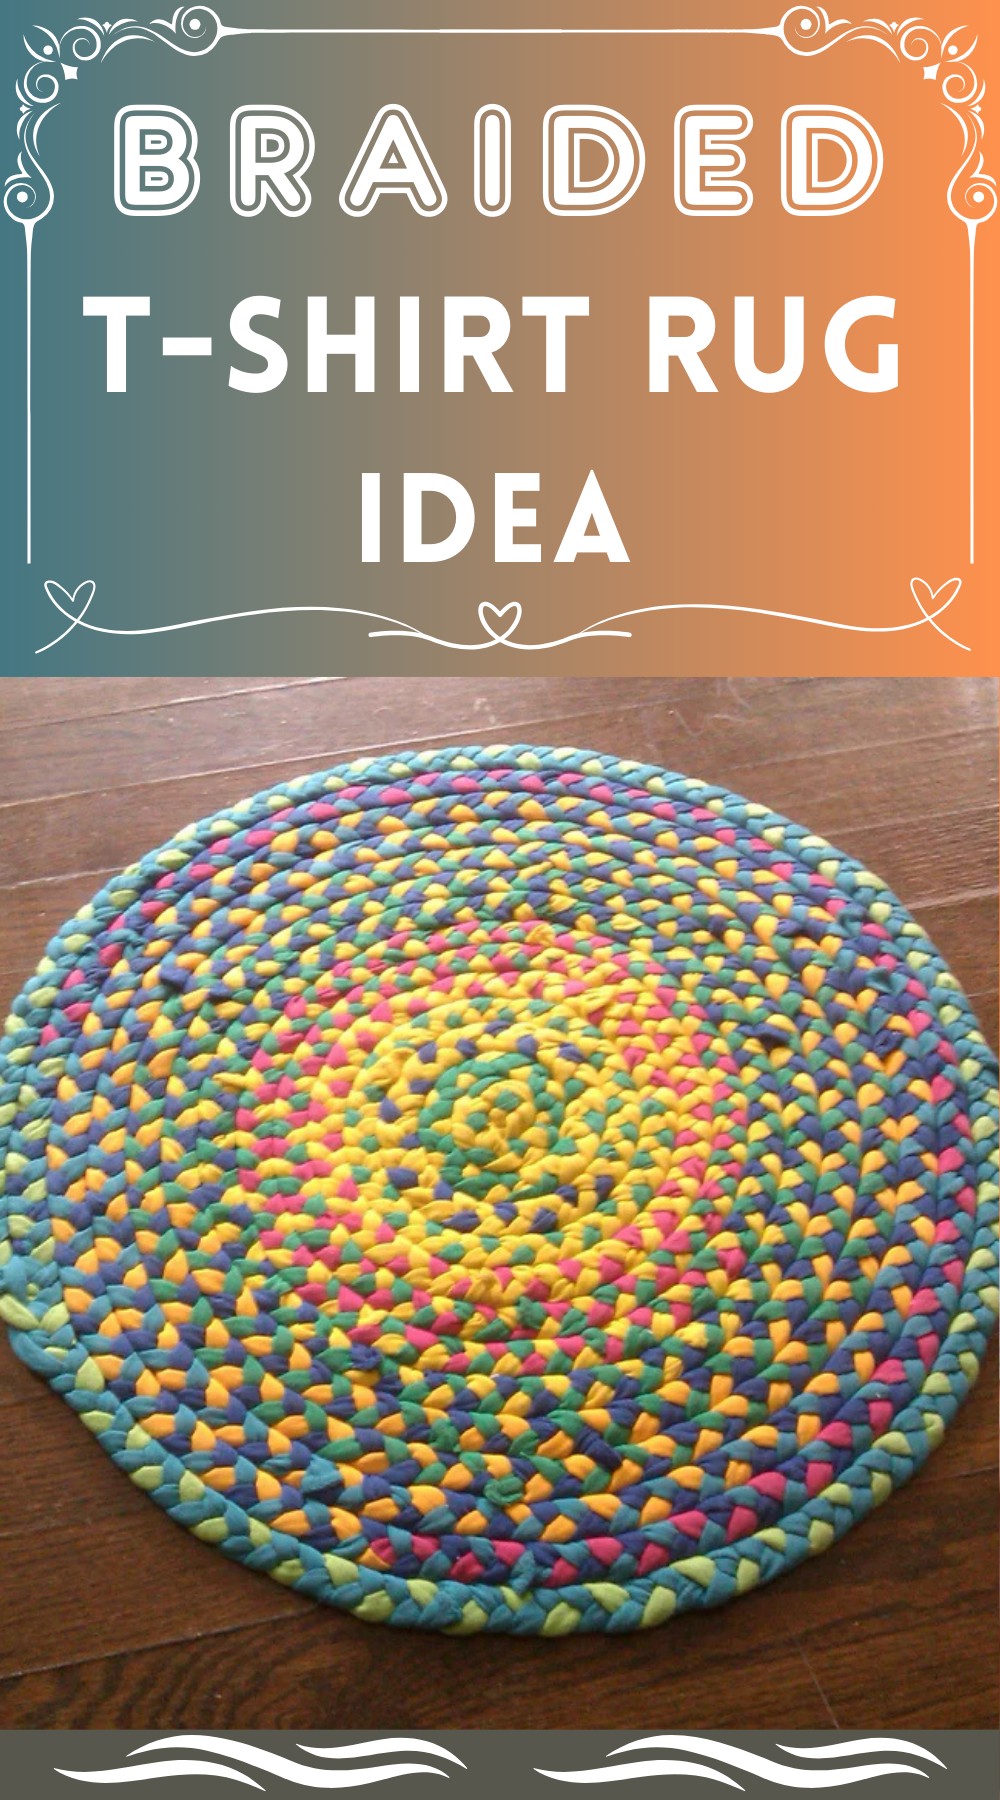
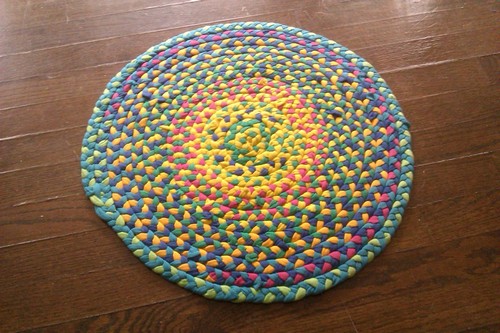
The Braided T-shirt Rug is a colourful, unique piece made from old T-shirts. You can tailor its patterns and colours to match your decor. This rug is eco-friendly, using materials that might otherwise end up in the trash. It’s a soft and comfy rug that is great for bedrooms or living rooms. You’ll save money by using old shirts, and the braided design means it’s durable. It’s a creative, low-cost, and sustainable DIY project that adds a personalized touch to your home. So, whether you use this magical creation as a cozy floor mat, a vibrant addition to home decor, a comfy pet bed, or even a unique wall hanging its always ready to add color and personality to your space!
Making Your Braided T-shirt Rug
Materials Needed
- 5-10 old t-shirts (number will depend on the desired rug size)
- Scissors
- Needle and thread
- Sewing machine (optional)
Step-by-Step Process
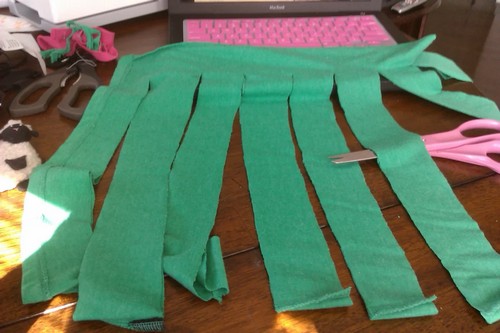
Cut The T-shirts:
Choose the T-shirts and flatten them out. Measure out every 2 inches from the bottom seam of the shirt to under the sleeves. Mark each spot with chalk. Cut on each mark or line, but leave 3-4 inches of the sweater still intact on the far side. Do this up to the sleeves, where you should cut to the other seam. You should keep the shirt to look like a ribcage in front of you. You want to cut the fabric you didn’t cut diagonally. This will create one long strip of fabric from the t-shirt, which you should stretch out and wind into a ball. Repeat for all t-shirts.
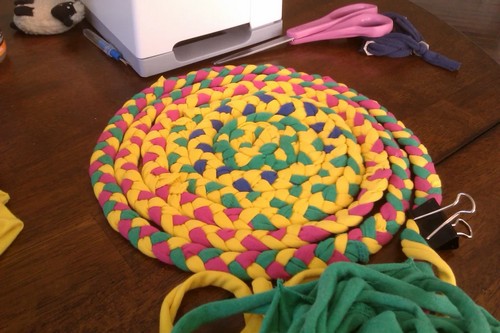
Braid The Strips:
When you have prepared all your t-shirts and made them into yarn, start your braid. Begin by sewing the end of one yarn strip to the middle of a different coloured strip to create a “T” shape. Braid from here, covering up the stitches as you start. Keep braiding until you need to sew on another colour. Add a new colour by sewing diagonally, placing the fabric from the right side to the right side at a 90-degree angle, and trimming off the tiny corner. After this is done, the strand will transition smoothly from one colour to the next.

Coil The Braid:
Begin to coil your rug gently to prevent it from puckering up. Make sure there are no gaps from one ring to the next. Pre-coiling the braid will help you stay organized while sewing and will also give you an idea of how big your rug will be. It will also hint at whether adding or removing shirts is necessary.
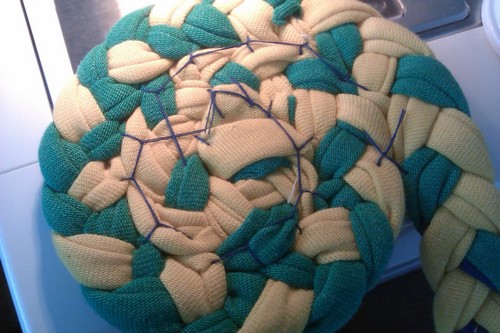
Sew The Spiral:
Starting from the middle, begin to sew your braid together, working your way in a spiral. This involves a lot of hand sewing as it may be too thick to be put under the sewing machine presser foot.
Lay The Rug: Once you’ve finished all the previous steps, lay your new rug down and enjoy!
Credited by: By suzelac
Leave a Reply