
Sunshine invites you to create this crochet kitty purse pattern featuring adorable feline details, blending charm and creativity for perfect gifts or accessories.
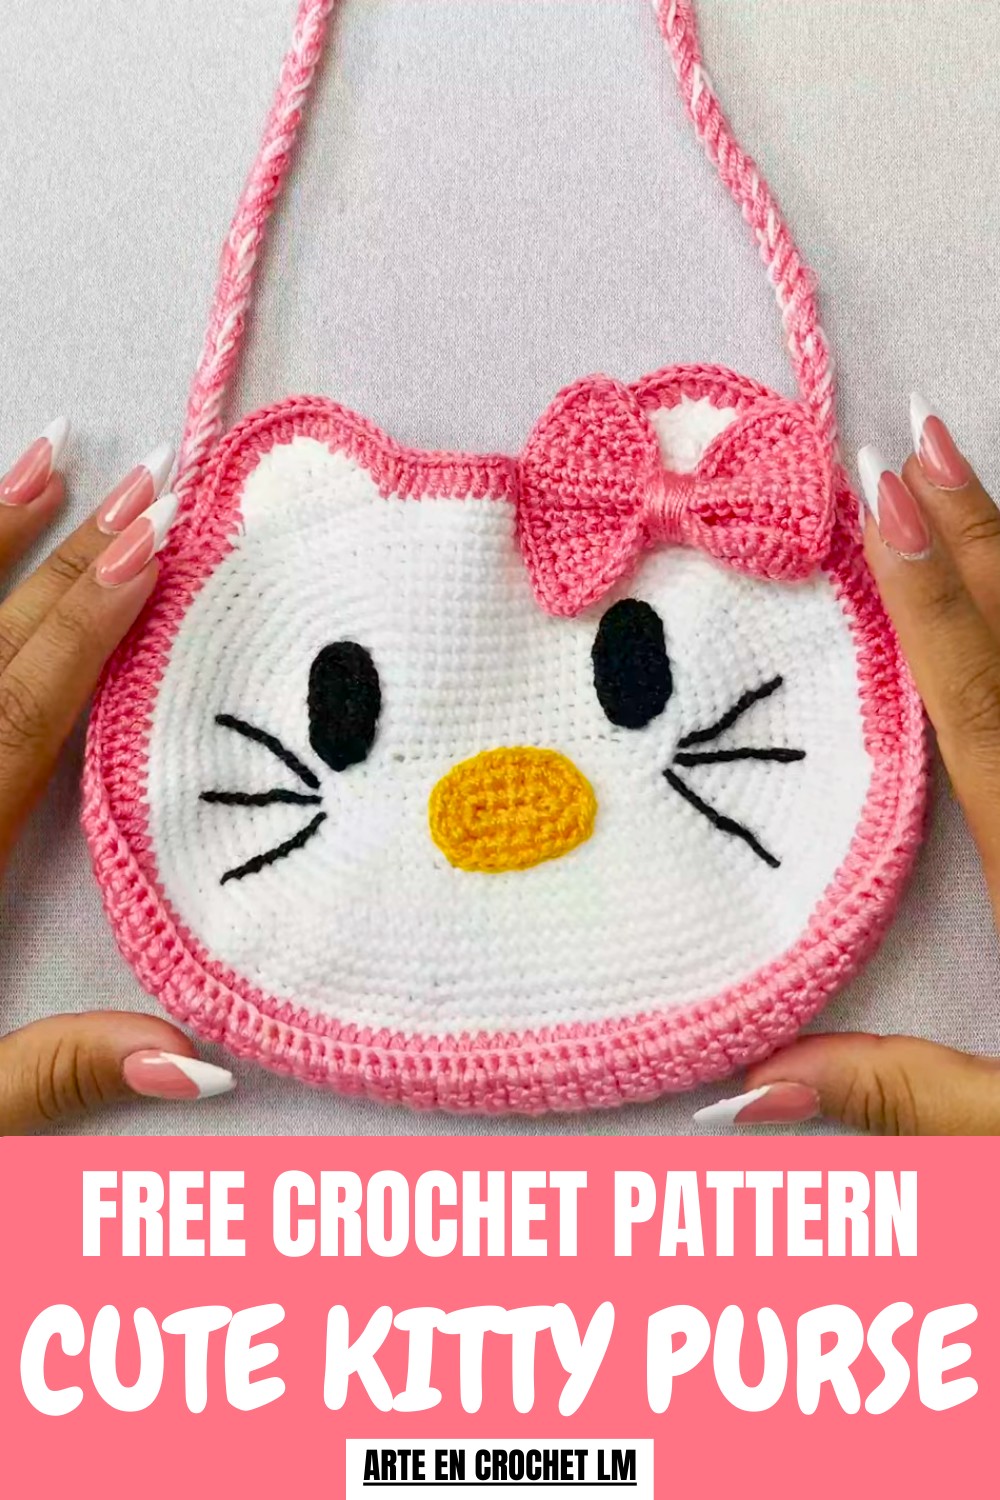
Tapping into your playful side while crocheting has never been more fun! Imagine crocheting a charming kitty purse, complete with perky ears, whiskers, and all the feline flair. A crochet kitty purse pattern isn’t just about practicality; it’s a canvas for creativity. Add playful colors, a tiny paw print, or even a stripey tail to make it uniquely yours.
Crochet Kitty Purse Pattern to Delight Cat Lovers
Perfect for stashing small treasures or as an adorable gift for cat-loving friends, this project is as delightful to work on as it is to show off. Whether you’re a crochet expert or just getting started, this purse pattern lets you combine charm and craftsmanship into one irresistible accessory that’s guaranteed to steal hearts, just like a curious kitty!

Crochet Kitty-Shaped Shoulder Bag
Skill Level
Intermediate to Advanced
This project combines fundamental crochet stitches with shaping techniques for the bag, ears, and surface embroidery for the facial details. It also integrates sewing assembly for various parts of the design.
Materials
- Yarn:
- Main Body: White and Purple (medium weight yarn or DK yarn).
- Face Details: Black and Yellow pearl cotton for the eyes, whiskers, and mouth (or other embroidery thread).
- Crochet Hook: Size 0 or 2.00mm.
- Needle: Tapestry needle (blunt-tipped needle for weaving and sewing).
- Scissors: For trimming excess yarn.
- Optional: Stitch markers (to track rounds and key stitches).
Abbreviations
- ch: Chain.
- sc: Single Crochet.
- hdc: Half Double Crochet.
- dc: Double Crochet.
- inc: Increase (2 stitches worked in the same stitch).
- sl st: Slip Stitch.
- (…): Repeat the instructions within parentheses as indicated.
Special Notes
- Gauge: No specific gauge required. The size of the bag will depend on your yarn weight and hook size. Ensure consistent tension for all parts of the project.
- Lining (Optional): To make the bag more durable, consider stitching a fabric lining inside the bag.
- Organization: The parts of this pattern are created separately (two base panels, ears, bow, strap, and facial details) and then assembled.
Pattern Instructions
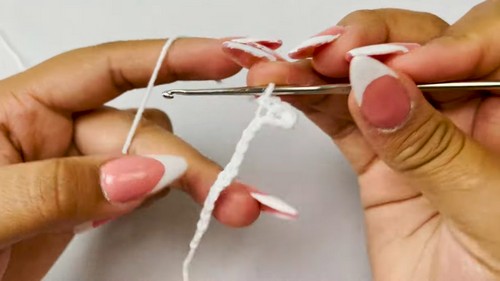
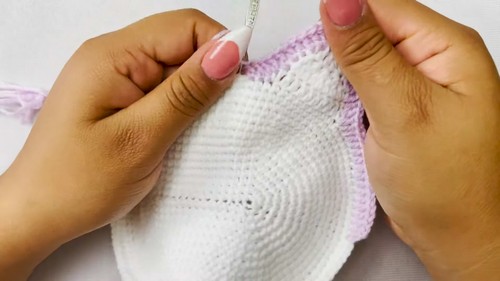
1. Base Panel (Make 2)
The bag is made in two identical panels, forming the front and back.
- Start with White Yarn:
- Create a slip knot, then chain 15.
- Round 1:
- In the 2nd chain from the hook, work 2 sc.
- Work 1 sc in each of the next 12 chains.
- In the last chain, work 4 sc (this rounds the corner).
- Now work along the other side of the foundation chain, making 1 sc in each chain.
- In the first chain, work 2 sc. (Total: 32 sc).
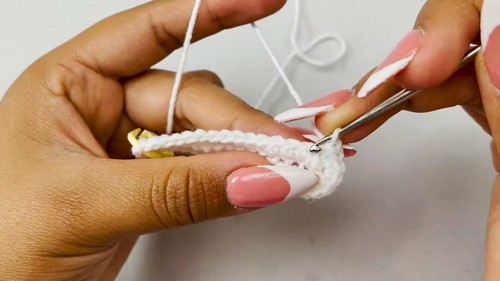
- Round 2:
- Work inc in the first stitch. Place a stitch marker here to mark the start of the round.
- Inc in the next stitch, then work 12 sc.
- Inc, sc, inc (in the next 3 stitches).
- Work 12 sc, then inc, sc, inc. (Total: 40 sc).
- Round 3:
- Work 1 sc, followed by an inc in the next stitch. Repeat (1 sc, inc) for a total of 5 increases.
- Work 12 sc, then repeat (1 sc, inc) for another 5 increases.
- Work 12 sc, and continue the (1 sc, inc) pattern until the end. (Total: 48 sc).
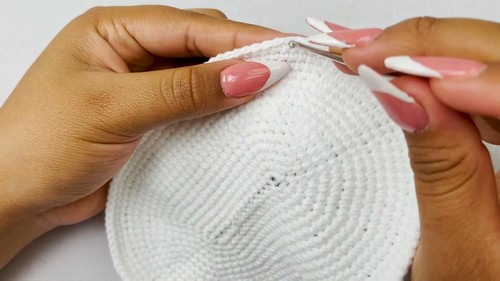
- Rounds 4 – 6:
Repeat the above structure with the increases positioned evenly around the corners, adhering to the following patterns:- Round 4: (2 sc, inc) around the increases. (56 sc).
- Round 5: (3 sc, inc). (64 sc).
- Round 6: (4 sc, inc). (72 sc).
- Rounds 7 – 9:
- Work evenly 1 sc into each stitch without increasing. (72 sc per round).
- Round 10 (Final Increase Round):
- (5 sc, inc) around the base, ensuring the increases align centrally. (108 sc).
- Rounds 11 – 12:
- Work evenly 1 sc into each stitch, maintaining your stitch count.
- Fasten off, leaving a long tail for sewing.
Repeat Steps 1-8 to create the second panel.
2. Kitty Ears (Make 2)
- With White Yarn:
- Count 17 stitches from the side of the panel and join your yarn.
- Row 1:
- Work 10 dc evenly across the row.
- Row 2:
- Ch 2, turn. Work hdc decreases across the row (5 decreases total).
- Row 3:
- Ch 2, turn. Work 2 hdc decreases, leaving only 3 stitches.
- Fasten off. Repeat for the second ear.
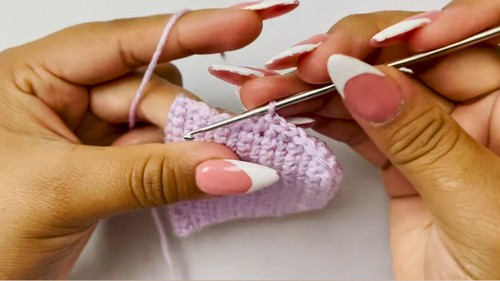
3. Bow
- With Purple Yarn:
- Chain 16, then ch 1 to turn.
- Work 16 sc across the row, ch 1, turn.
- Repeat for 14 rows to form a rectangle.
- Single crochet around the rectangle to clean the edges, making 1 sc in each corner for smooth turns.
- Shape the Bow:
- Fold the rectangle in the middle. Wrap the center with white yarn, pulling tightly to secure the pinch.
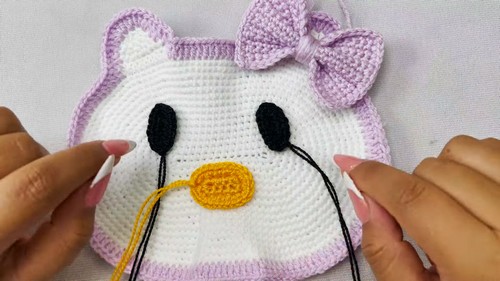
4. Facial Details
- Eyes (Make 2):
- With Black Yarn, create a magic circle and work 6 sc into the ring.
- Fasten off and leave a long tail for sewing onto the bag.
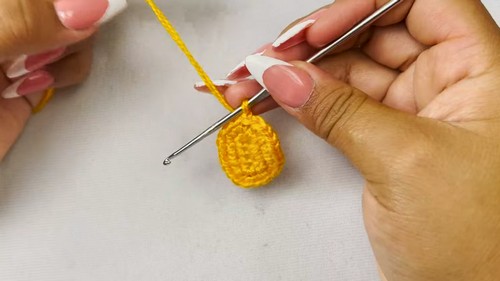
- Mouth:
- With Yellow Yarn, chain 4, then work across: increase in each stitch. Total: 12 sc.
- Work a second round of increases and fasten off, leaving a tail for sewing.
- Whiskers:
- Using black thread, embroider three whiskers on each side of the mouth.
5. Assembly
- Attach Ears to Front Panel: Sew the ears to the front piece of the bag above the face.
- Add Face Details:
- Sew on the eyes, centered between the ears.
- Place the mouth below the eyes and sew.
- Join Panels Together:
- Using purple yarn, single crochet around the edge of both panels to join, leaving an opening at the top.
6. Handle
- With White and Purple Yarn (Held Together):
- Chain the desired length for either a hand strap or shoulder strap.
- Use a slip stitch in each chain to thicken the strap.
- Attach Handle:
Sew the handle ends securely to the top corners of the joined panels.
Finishing the Bag
- Weave in all loose ends with a tapestry needle.
- Optionally line the bag with fabric for added durability.
Conclusion
This Kitty-Shaped Shoulder Bag combines functionality and charm, making it perfect for gifting or personal use. The assembly adds a 3D effect with its ears and bow, and the embroidered face transforms the piece into an adorable, character-inspired accessory.
Pattern Correction and Tips
- Corrections: Ensure all increases are evenly spaced for uniform shaping. Always count stitches at the end of each round to stay on track.
- Tips:
- Use lighter yarn for a smaller bag or bulky yarn for a larger version.
- Use safety eyes instead of crocheted ones to save time.
- For even assembly, pin all pieces into place before sewing.
Leave a Reply