
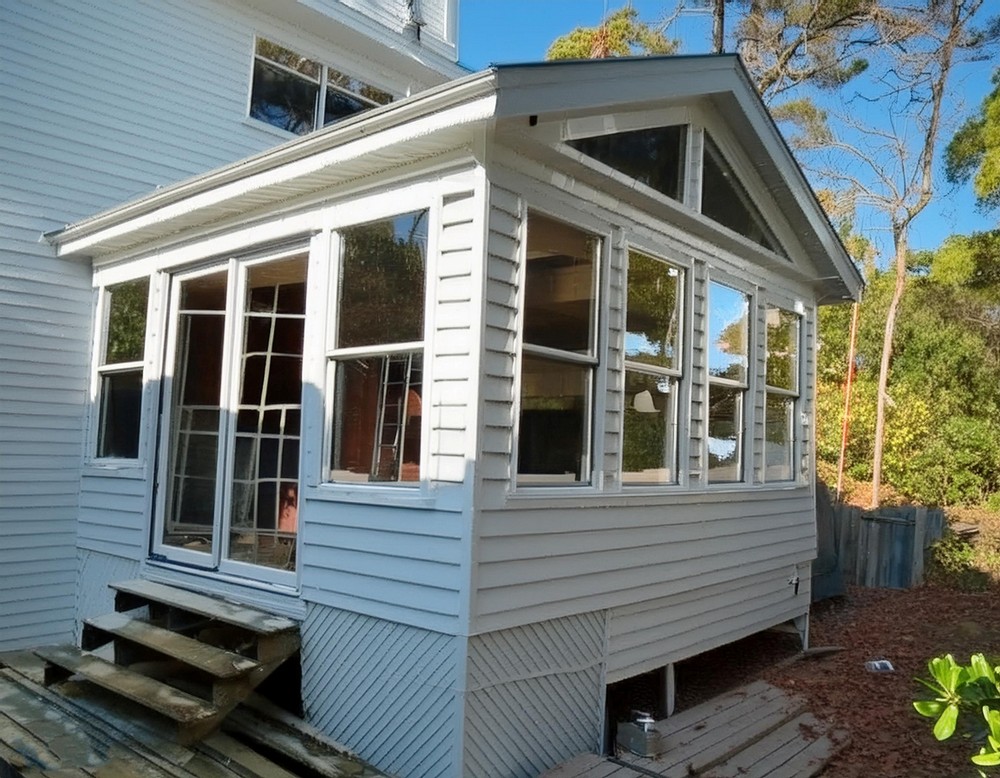
Lounge in a cozy, light-filled space where you can enjoy the beauty of the outdoors without the inconveniences of weather. Adding a sun room to your home isn’t just about gaining extra space—it’s about bringing in the warmth, light, and vitality of the sun year round. Whether you’re envisioning a quiet reading nook, a plant-filled paradise, or a new gathering place for family activities, this sun room project will guide you through making that dream a reality. Follow these carefully detailed steps to construct a 14×14 foot three-season sun room attached to your existing home, creating a place where memories are made, and relaxation is found.
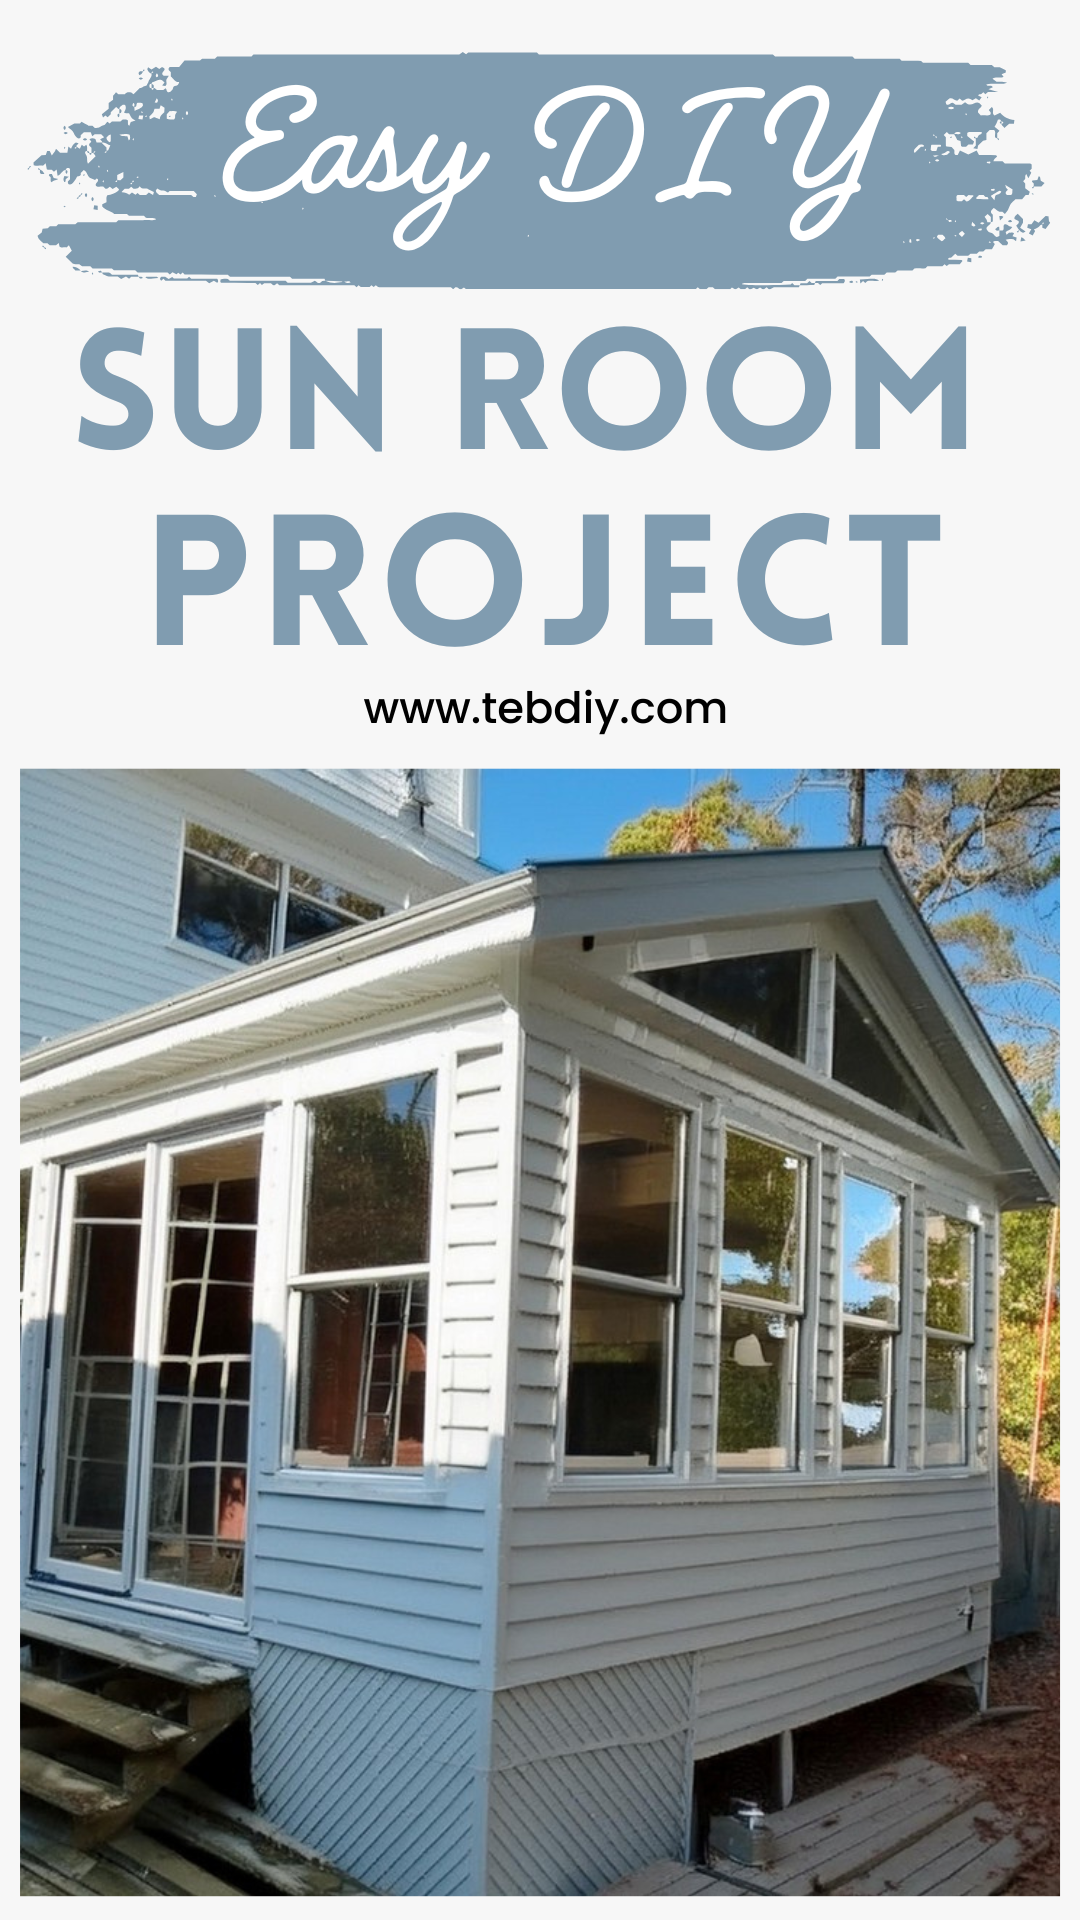
DIY Sun Room Project
Materials:
- Wood stakes
- Screw piles (or sonotubes)
- Three ply 2x10s for support beams
- Lumber for framing (size determined by local building code)
- Metal screening
- Rockwool insulation
- Vapor barrier
- 3/4 inch plywood for subfloor
- Studs (2×6)
- Sheet roofing
- Ice and water shield
- Roof shingles
- 2×6 beams
- Polystyrene air flow vents
- House wrap
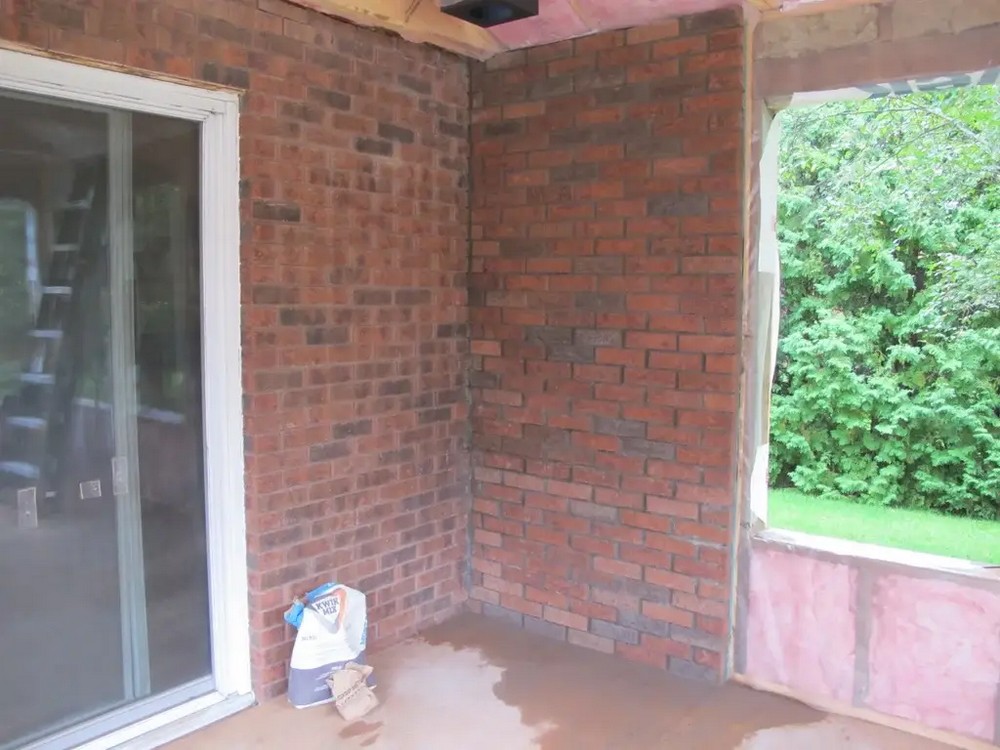
- (Optional) Faux brick material, plywood, cement board for hearth
- Tongue and groove cedar (or drywall) for ceiling
Tools:
- Hammer
- Saw (miter saw recommended)
- Drill with bits and driver
- Level
- Measuring tape
- Caulking gun
- Flooring screws
- Nails and nail gun (optional)
- Joist hangers and hurricane ties
- (Optional) Brick blade for miter saw
Step-By-Step Guide To Building Your Sun Room
Planning and Laying Out
- Clean the area of obstructions and prepare the ground.
- Use the 3,4,5 method to ensure the structure will be square.
- Mark the locations for the screw piles or sonotubes, ensuring compliance with local building regulations concerning support and spacing.
Erecting Support Beams
- Secure the beams on top of the prepared supports, adjusting for level and square.
- Adjust the height to align with the house floor.
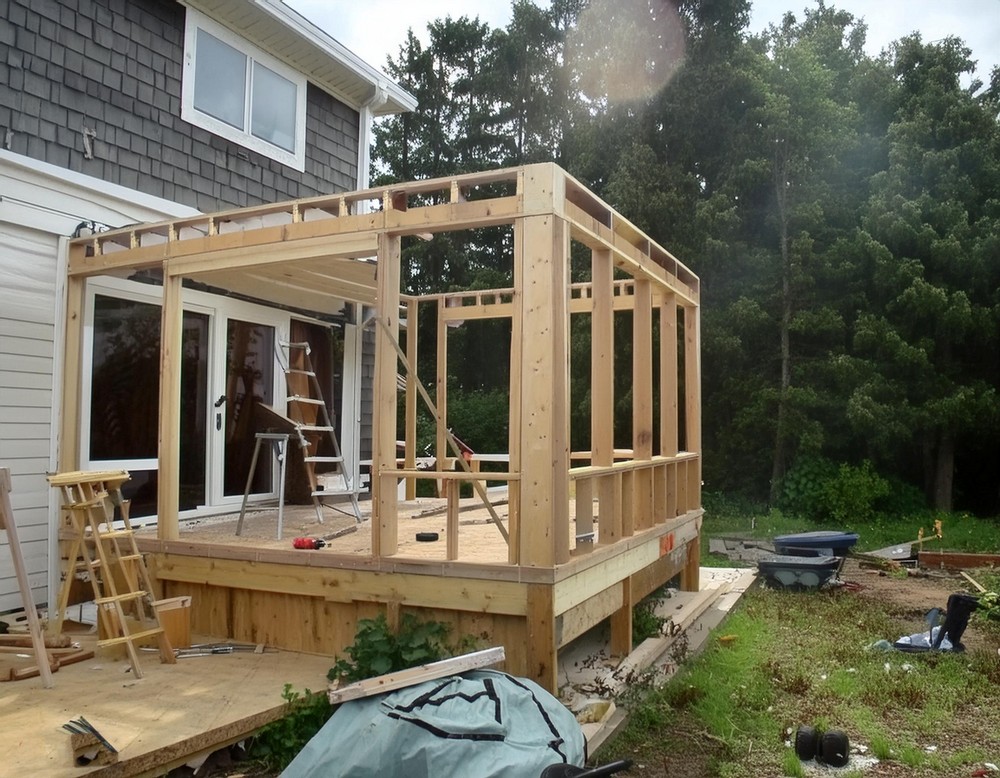
Framing the Base
- Lay out and secure the floor frame to the ledger board and support beams.
- Use joist hangers and hurricane ties as required.
Protecting from Pests
- Fasten metal screening under the joists to prevent mice intrusion.
Insulating and Sealing the Floor
- Fill the floor frame with Rockwool insulation, followed by a vapor barrier on top.
Laying the Subfloor
- Install the 3/4 inch plywood subfloor, ensuring it’s securely screwed to the joists.
Wall Construction
- Frame the walls around the perimeter, leaving space for windows and a patio door.
Roofing Structure
- Determine the roof slope and prepare the ridge board.
- Install rafters, attaching them securely to the ridge board and walls.
Roofing Finish
- Apply the roof sheeting, followed by ice and water shield, shingles, and flashing to seal the edges.
Internal Supports and Insulation
- Install internal beams and collar ties if desired, then insulate the walls and ceiling.
Wrapping for Weather Protection
- Enclose the structure in house wrap to shield against wind penetration.
Adding Interior Features
- Construct the optional brick wall and hearth for a wood stove.
Window Installation
- Secure custom gable end windows in place, adding both beauty and natural light.
Ceiling Installation
- Finish the interior ceiling with tongue and groove cedar or drywall, depending on preference.
Wood Stove Installation (Optional)
- Situate and install the wood stove, adhering to safety regulations and ensuring proper venting.
Following these steps will result in a stunning sun room that not only adds value to your home but also provides a serene escape. It will become a cherished space where comfort meets nature, offering a unique blend of the indoors and outdoors. Enjoy the fruits of your labor in all seasons, basking in the natural light of your new sun room.

Leave a Reply