
Have you ever dreamed of escaping to a warm, peaceful oasis where the stress of the day melts away in a gentle wave of heat? Building a wood-burning sauna in your backyard might just be the perfect project for you. Not only is it a chance to work with your hands and create something truly beautiful and functional, but it’s also an opportunity to install a personal haven for year-round relaxation. This DIY Wood Burning Sauna Project will take you through the creation of your wood-burning sauna, from repurposing an old propane tank into a powerful stove to shaping the timber for a cozy cabin.
DIY Wood Burning Sauna Project

Materials List:
For the Stove:
- 20 lb propane tank (for conversion to sauna stove)
- 6-inch single-wall stove pipe, 8 feet in length
- Steel banding (for constructing the stove)
- Sheet metal screws
- Plate steel (for creating the baffle)
- Small bolts (for baffle adjustment)
- Steel wire rack (to make a holder for sauna stones.
Tools Required:
- Angle grinder (for modifying the propane tank)
- Jigsaw (used for cutting the roof opening for the chimney)
- Air nailer (ideal for securing interior cedar paneling)
- Stapler (for affixing vapor barrier)
- Sawmill or table saw (for cutting and sizing lumber)
- Power screwdriver

For the Sauna Shed:
- Assorted dimensional lumber (including 2x4s)
- Western red cedar blocks (sliced into approximately 3/8″ thick panels)
- White pine boards (between 0.75 to 1.25 inches thick for the shed exterior)
- Nails and screws (various sizes for construction)
- Roofing material (metal roofing is recommended)
- Vapor barrier and wind barrier (like plastic sheeting)
- Polystyrene foam insulation boards
- Table saw (for accurately cutting lumber)
- Oak boards (for the benches)
Step-by-Step Construction:
Proof of Concept:
After a year of regular use, the sauna required some upgrades including a new window and a combined wood storage and seating area. The stove design also saw improvements for better heat retention.
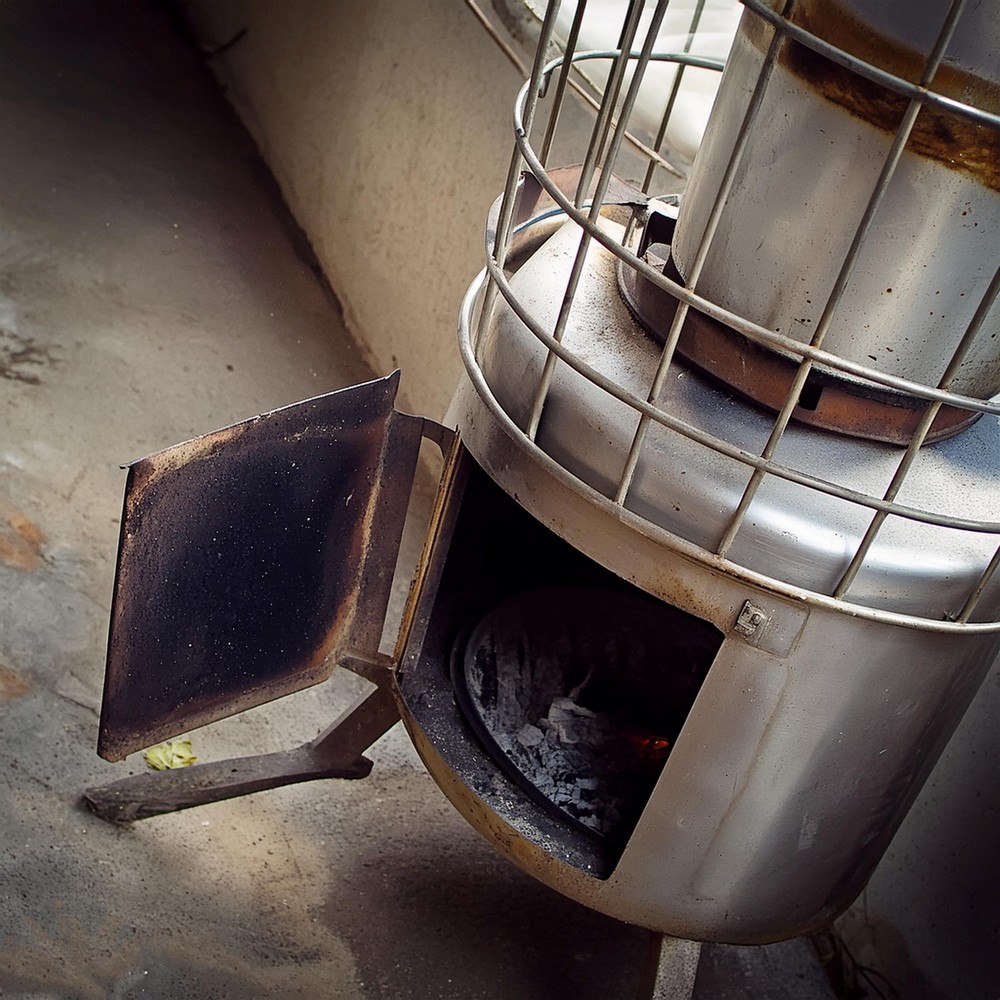
Building the Stove:
I repurposed a discarded propane tank into a sauna stove, carefully cutting and fitting it, including making space for the chimney, to craft a functional stove. I added features like a steel door and baffle to control the burn for efficient heating.
Designing the Sauna:
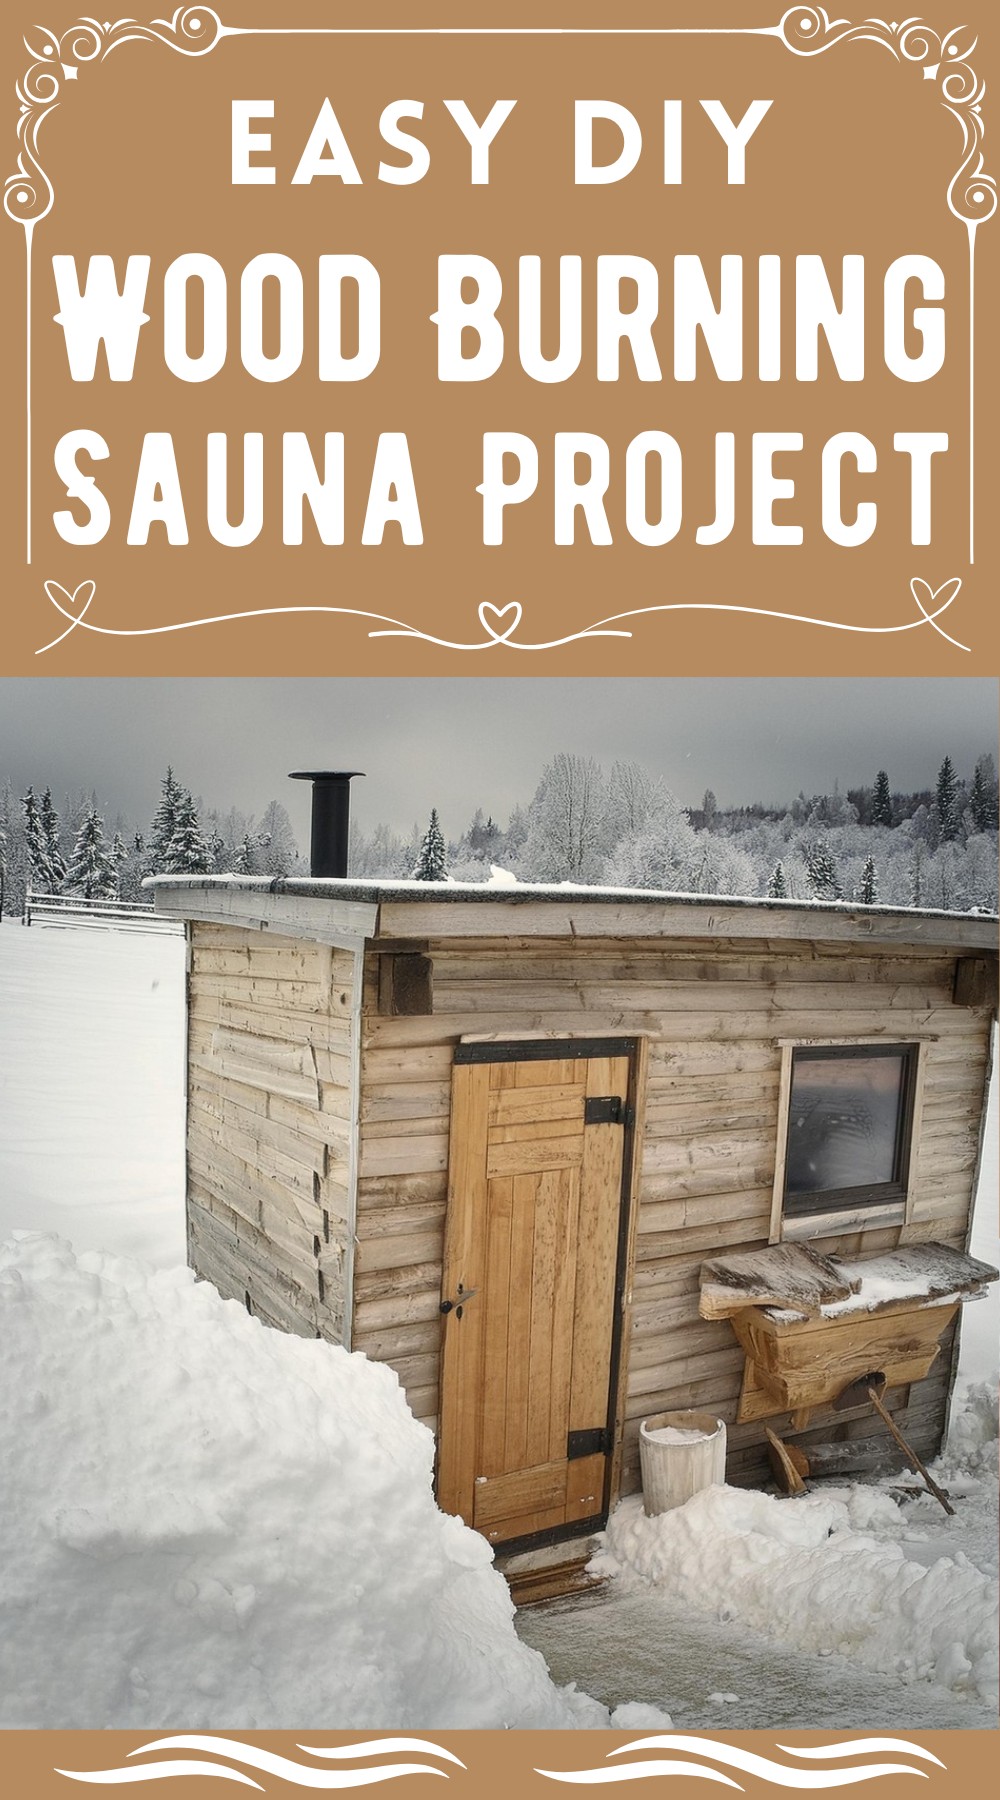
Before the building commenced, a clear, affordable plan was laid out for a 4’x8’ sauna space. It included walls built from sturdy white pine and an interior lined with aromatic cedar.
Assembling the Frame:
White pine boards were formed into walls and the pitch of the roof was set. A recycled window added character to the structure. Next, a vapor barrier and insulation were installed, set to be covered by the cedar lining.
Enhancing the Stove:
I modified the initial stove to enhance its heating capability. I used a different tank for improved heat retention and integrated parts from the first stove into a new, more efficient design for the rock tray and baffle.
Evaluation after Four Months:
With the sauna in regular use, it became clear that while wood consumption was high, the benefits of having a personal sauna were unparalleled. The warmth and comfort provided by the sauna offered a valuable retreat even during the coldest days.

With these instructions, embark on a rewarding DIY journey to craft your very own wood-burning sauna. With a bit of effort and creativity, you’ll soon be basking in the warmth of your own making, an accomplishment that brings relaxation and pride in equal measure.
Leave a Reply