The Rainbow Loom is a popular toy that lets people create bracelets and other fun shapes out of small, colorful rubber bands. Adults and kids love using the loom because it’s fun and lets you show off your creativity by making all sorts of cool designs. One design that I really love is the Rainbow Loom Starburst Bracelet, the pattern of which we are providing below. This special DIY bracelet looks like a bunch of little starbursts or flowers all around your wrist. It’s full of color and patterns that make it stand out. Plus, making it is like solving a fun puzzle with the loom and bands, which is why so many people enjoy the challenge and the awesome result.
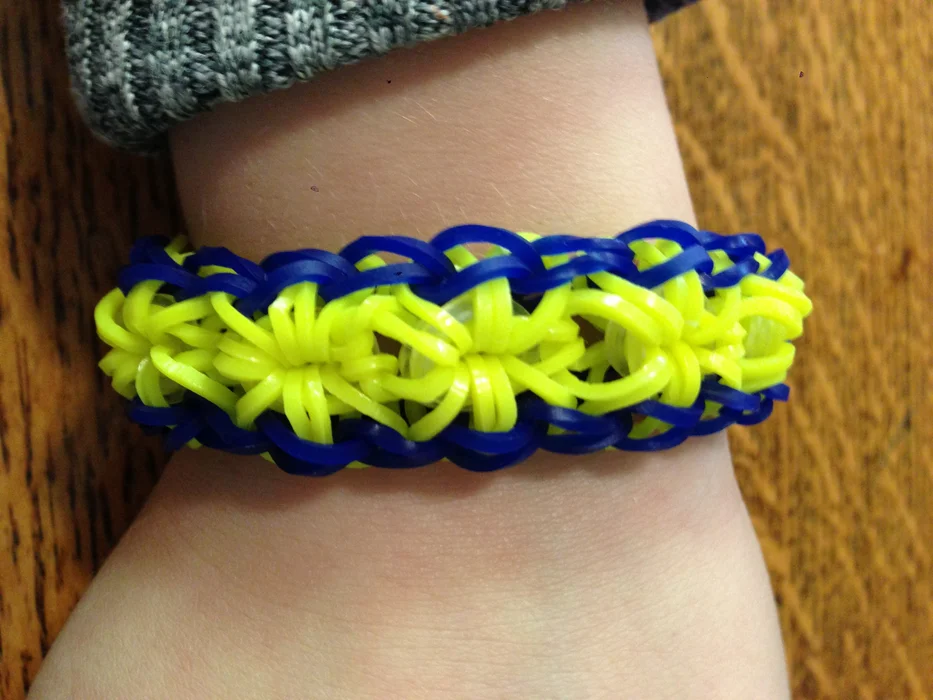
The Rainbow Loom Starburst Bracelet is a colorful and vibrant accessory. It requires bands in different colors, a loom, and a hook. This child friendly DIY bracelet is a fun and creative piece, easily customizable depending on your personal style. The design instructions are simple and beginner-friendly, consisting of detailed steps for easy creation. Making this craft can be a great way to relax while enhancing motor skills and creativity. It’s an affordable fashion piece and can make a thoughtful, handmade gift for loved ones.
Making Your
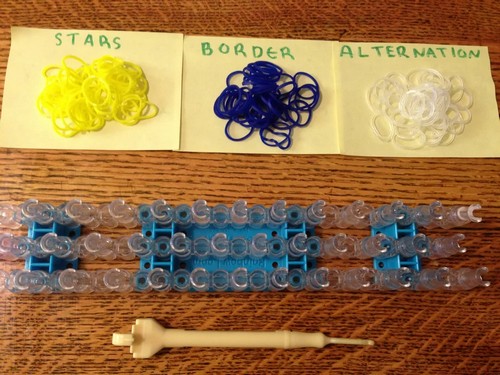
Supplies You Will Need:
- Yellow Bands: For the starburst part.
- Navy Blue Bands: For the border.
- Clear Bands: For cap bands and other alternations.
- Loom: Set with the arrows pointing away from you.
- Hook: For looping the bands.
- C-Clip: For fastening the bracelet.
Steps to Make the Bracelet:
Step 1: Gather Your Supplies
Prepare your Yellow, Navy Blue, and Clear bands, the Loom, Hook, and a C-Clip. Find a comfortable place to work.
Step 2: Placing the Navy Blue Bands
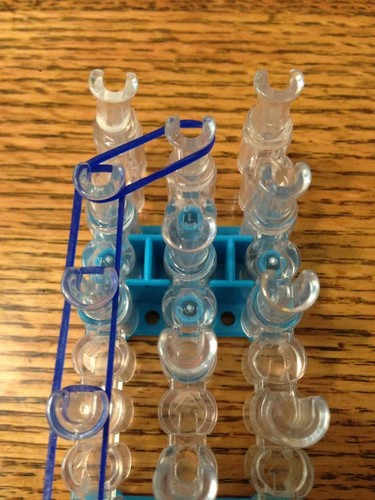
- Place a Navy Blue band from the center peg to the second peg on the left.
- Continue with Navy Blue bands diagonally and then straight to form the perimeter until you reach the end.
Step 3: Continue Placing Navy Blue Bands
- Place another Navy Blue band from the left peg to the center top peg of the loom.
- Repeat the same for the right side.
Step 4: Starting the Starburst Pattern
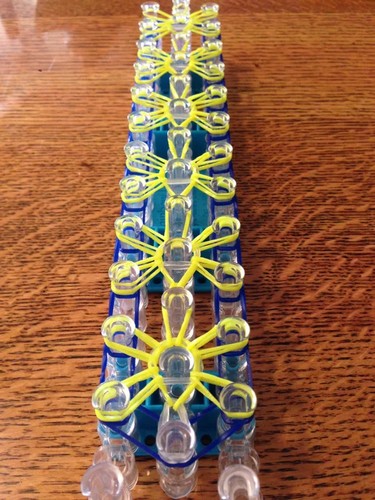
- With Yellow bands, start from the second center peg and place one to the second right peg.
- Continue placing Yellow bands in a starburst pattern until the end of the loom.
Step 5: Completing the Starburst Pattern
- Take another Yellow band and place it from the center peg to the first right peg.
- Continue in a clockwise pattern until complete.
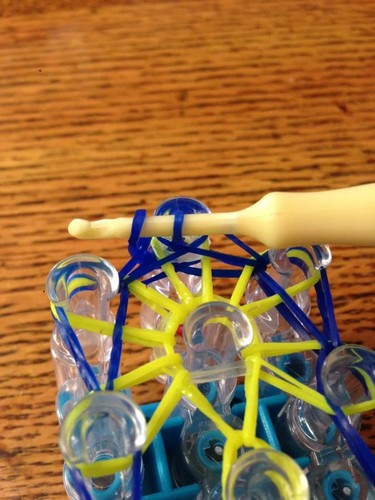
Step 6: Adding Cap Bands
- Use a Clear band to make a double cap band by twisting it into a figure-8 and placing it over the top peg of each starburst pattern.
Step 7: Turning Your Loom
- Turn your loom around so the arrows point towards you, preparing for looping.
Step 8: Looping the Bands
- Loop the first center peg band toward the middle, continuing counterclockwise until all are looped.
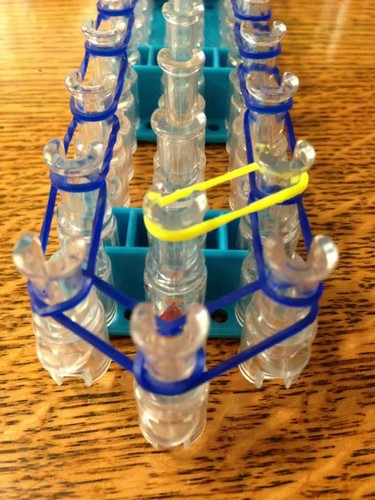
Step 9: Looping the Border Bands
- With your hook, loop the Navy Blue band on the bottom and continue with all bands on the loom.
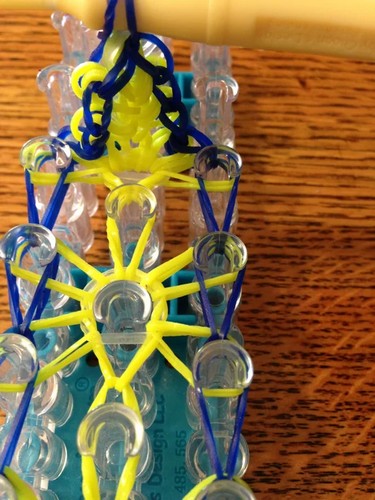
Step 10: Finalizing the Bracelet
- Use a Navy Blue band and your hook to pull through the top bands, similar to finishing a Triple Single bracelet, and prepare to remove the bracelet from the loom.
Step 11: Making an Extension
- Place Navy Blue bands straight to the top of the loom.
- Attach the open end of your bracelet and loop as usual.
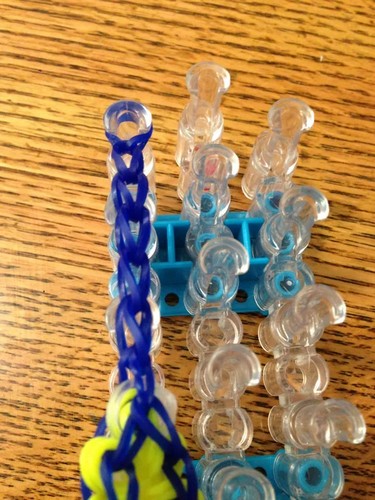
Step 12: Finishing Touches
- Remove the bracelet, attach a C-clip, and voilà! You’ve created a Rainbow Loom Starburst Bracelet.
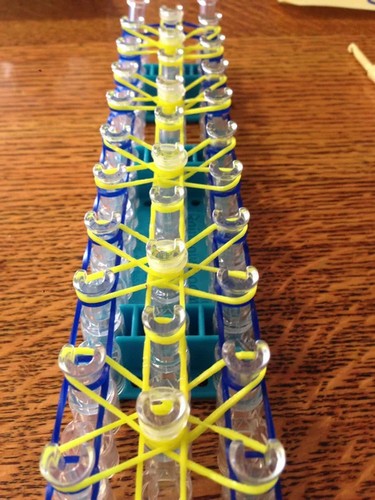
Credited by: SumSum_101

Leave a Reply