
Now, there is no need to throw away cardboard as you can create a cute little basket with our latest craft idea. The guide teaches you to make a DIY basket from cardboard using simple tools like scissors and glue. Although made from cardboard, don’t be fooled by the basket’s sturdiness, as it is functional too. You can use it as room decor, for holding stationery items, makeup brushes, and small accessories. It’s also a great item to give as an Easter gift by filling it with candies and sweets. So, start making this DIY basket, leave it as it is for a natural look, or use ribbons or brushes to make it more visually appealing and beautiful.
What we needed:
- Cardboard
- Glue
- Scissor
- Your precious time
Tearing Apart the Cardboard:
- Begin by carefully pulling apart the cardboard. This step allows you to separate the two thinner, smooth layers from the centrally-located chunkier, corrugated layer, similar to how you’d dissect a deli-style sandwich.

Crafting the Circular Base:
- Choose one of the smooth layers and, using a compass or any round object, draw and cut a perfect circle.

Forming a Solid Base:
- Apply adhesive to the cut circle and fasten it onto the other layer. This method yields a robust circular base. Making sure it’s securely glued will prevent complications down the line.

You may also like: DIY tissue paper flowers:
Cutting Two Circles:
- Next, utilize the measurements provided in the image to sketch and precisely cut two distinct circles. These circles will serve as the base for your basket structure.

Cutting the Stripes from Half a Piece
- With the leftover cardboard, proceed to cut around 22 elongated strips. Each strip should measure 11 cm in length and 0.6 cm in width. Ensuring consistent measurements will contribute to the uniform appearance of your final product.

Glue These Stripes to Make a Single One
- Take the cut strips and start sticking them together in pairs; this will give you 11 long strips. Make sure they’re lined up right so they’re evenly stacked together.

Arranging the Stripes:
- Then, set these joined strips around one of the trimmed circles, distributing them evenly, similar to how sunlight beams spread from the sun.

Gluing the Other Circle:
- After you’ve arranged the strips, stick the second circle on top. This will create the basic structure of your basket.

Cutting the narrow stripes:
- Next, cut out a number of thin strips from the remaining cardboard, each about 0.3 cm wide. These will be used to weave your basket. Connect these strips to form a long ribbon.

Knitting the Basket:
- Start at one spot, then thread one strip in and out between the strips, forming the base. Do it all around the circle, making sure not to miss any strip. Keep doing this until your basket is as tall as you want it.


Hiding the End:
- When your basket is tall enough, put some glue on the end of the final strip and tuck it away. This makes your basket look tidy and smooth.

Cutting the Extras:
- Now that the frame is done, it’s a good moment to trim down any leftover strips sticking out using sharp scissors, for a neat cut.

Cutting the Stripes:
- Cut two more stripes, 25 cm long and 0.5 cm wide each. They will form the rim of your basket to give it more strength and a finished look.

Making the rim:
- Stick these two strips together to make a single, strong piece. For a nicer look, wrap the knitting fabric around this fused strip to create the basket’s rim.

Gluing the Rim
- Next, wrap this long strip around the top edge of your basket and use enough glue to hold it in place. This creates a clean rim and adds extra strength to your basket.

Cutting Stripes for Handle:
- Trim three more strips to make the handle. Their length can be as long or as short as you like.

Making the Handle:
- Stick these three strips together to form one piece. Wrap it with knitting fiber for a nice touch. Once it’s made, curve it a bit and attach it to the basket using glue.

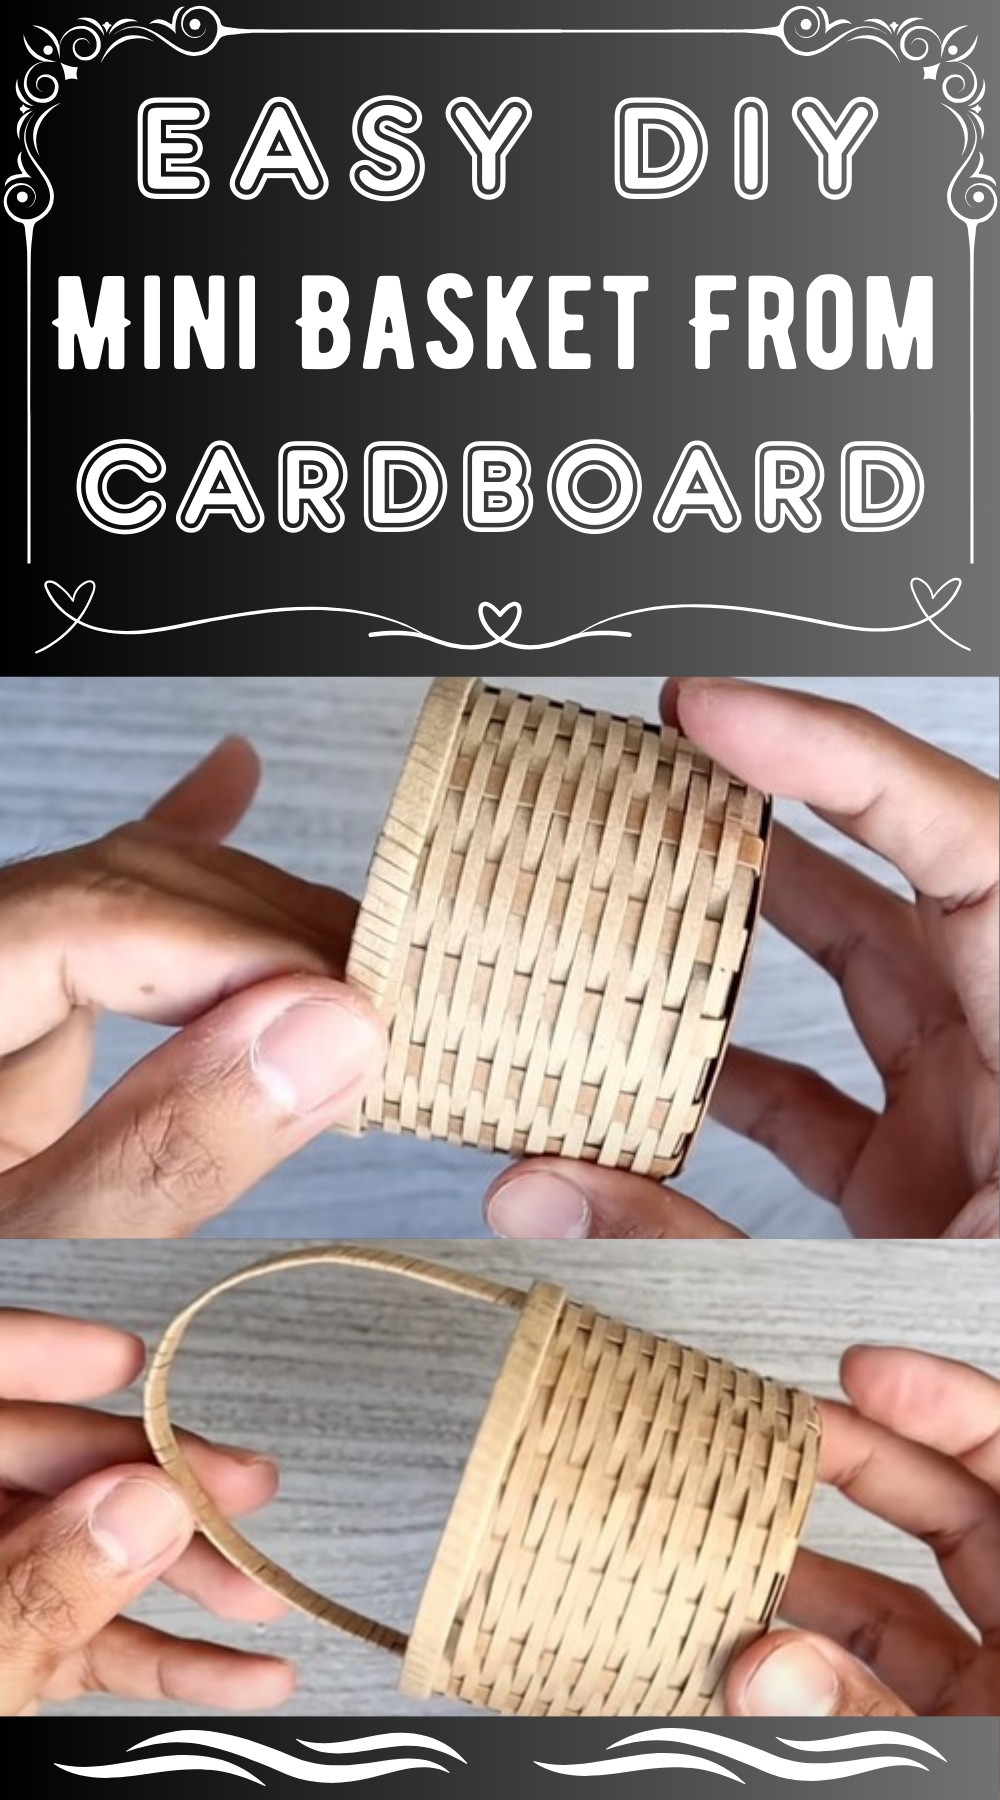
Finished Look:
Hurrah! You have successfully completed your DIY basket, which will surely please any eye. Use it as it is, paint it, or decorate it with ribbons or other embellishments; it’s pretty in every state.

Leave a Reply