
Here we came with a simple, yet stunning DIY Cherry Blossom Lights project that brings the enduring beauty of spring into your home. Whether it brightens a quiet corner or serves as a captivating centerpiece, this craft is a testament to the beauty you can create with your own hands, inspired by the wonder of nature.

How To Make Cherry Blossom Lights
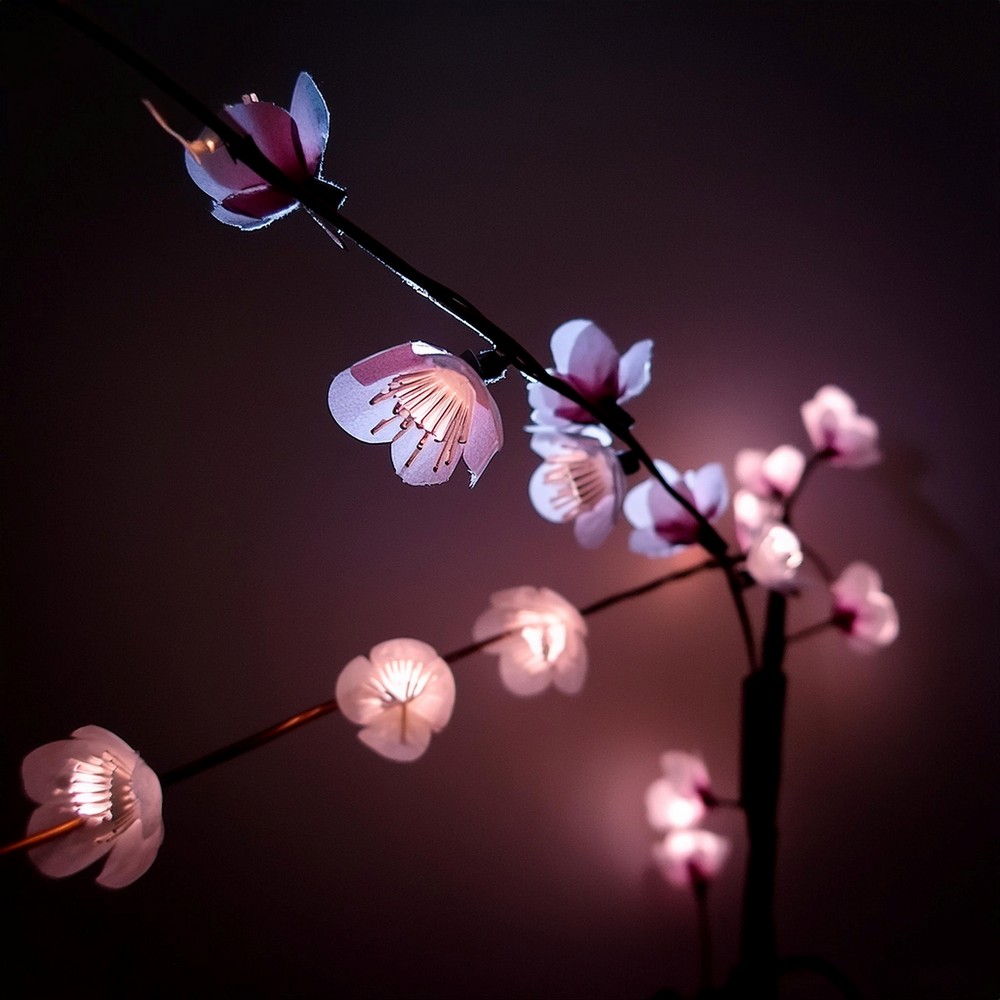
With a simple and affordable DIY project, you can create your own Cherry Blossom Lights. This craft merges the natural elegance of cherry blossoms with the cozy ambiance brought by soft LED lights, perfect for enhancing any room or occasion with a touch of magic.
Materials:
- White LED Christmas lights (battery-powered preferred)
- Tissue paper in shades of white and pink
- A branch (real or artificial from the dollar store)
- Floral stem wrap tape (brown)
- Vase (optional, depending on your display preference)
- Sand, gravel, or small stones (for vase stability, if using)
- Twist ties
- Glue (a glue stick and craft glue)
Tools:
- Pliers
- Scissors or a rotary cutting tool

Step-by-Step Guide
Light Setup
First, tidy up your branch by removing any excess flowers or twigs to create a clean canvas for your lights. Begin at the base, fasten the LED light wire onto the branch with twist ties, aiming for a balanced distribution of lights throughout. Make sure the battery pack is placed at the bottom end for easy access, and keep the wires snug against the branch.
Preparing the Artistic Touch
Take four layers of your chosen tissue papers (a balanced mix of pink and white works best) and cut them into 3×3 inch squares. Each square will serve as the base for an individual cherry blossom, so prepare as many as you have LEDs.
Crafting the Blossoms
Transform each square into a bloom by folding it in half to form a triangle, then into a cone, aligning the edges perfectly. With your scissors, snip a semi-circle from the cone’s broad end, unfold it, and you’ve got your blossom shape. Use a dab of glue at the center to secure the layers together. No need for glue on the petals; they are beautiful left as they are. Don’t forget to punch a tiny hole in the center for the LEDs to fit through.
Assembling the Blossoms onto the Branch
If your branch has faux stamens, slide them atop your LED lights before adding the tissue blossoms for a diffused light effect. Otherwise, a bit of sanding on the LED surface or a touch of glue can mimic this effect. Next, gently push each LED through the hole in a blossom, securing them to the branch as needed. Once in place, give your blossoms a gentle fluff to mimic the natural fullness of cherry blossoms.
Binding It Together
Starting from the blossoms’ bases, wrap the branch and wires with floral tape. It’s important to stretch the tape as you wrap for a snug fit, covering everything down to the battery pack for a cohesive look.
The Finishing Touch
Place your beautifully illuminated branch into a vase. If using a vase and you prefer it weighted, fill it with gravel or stones, ensuring the battery pack is both covered and accessible. It’s handy to think about the switch’s placement beforehand for convenience.

Leave a Reply