
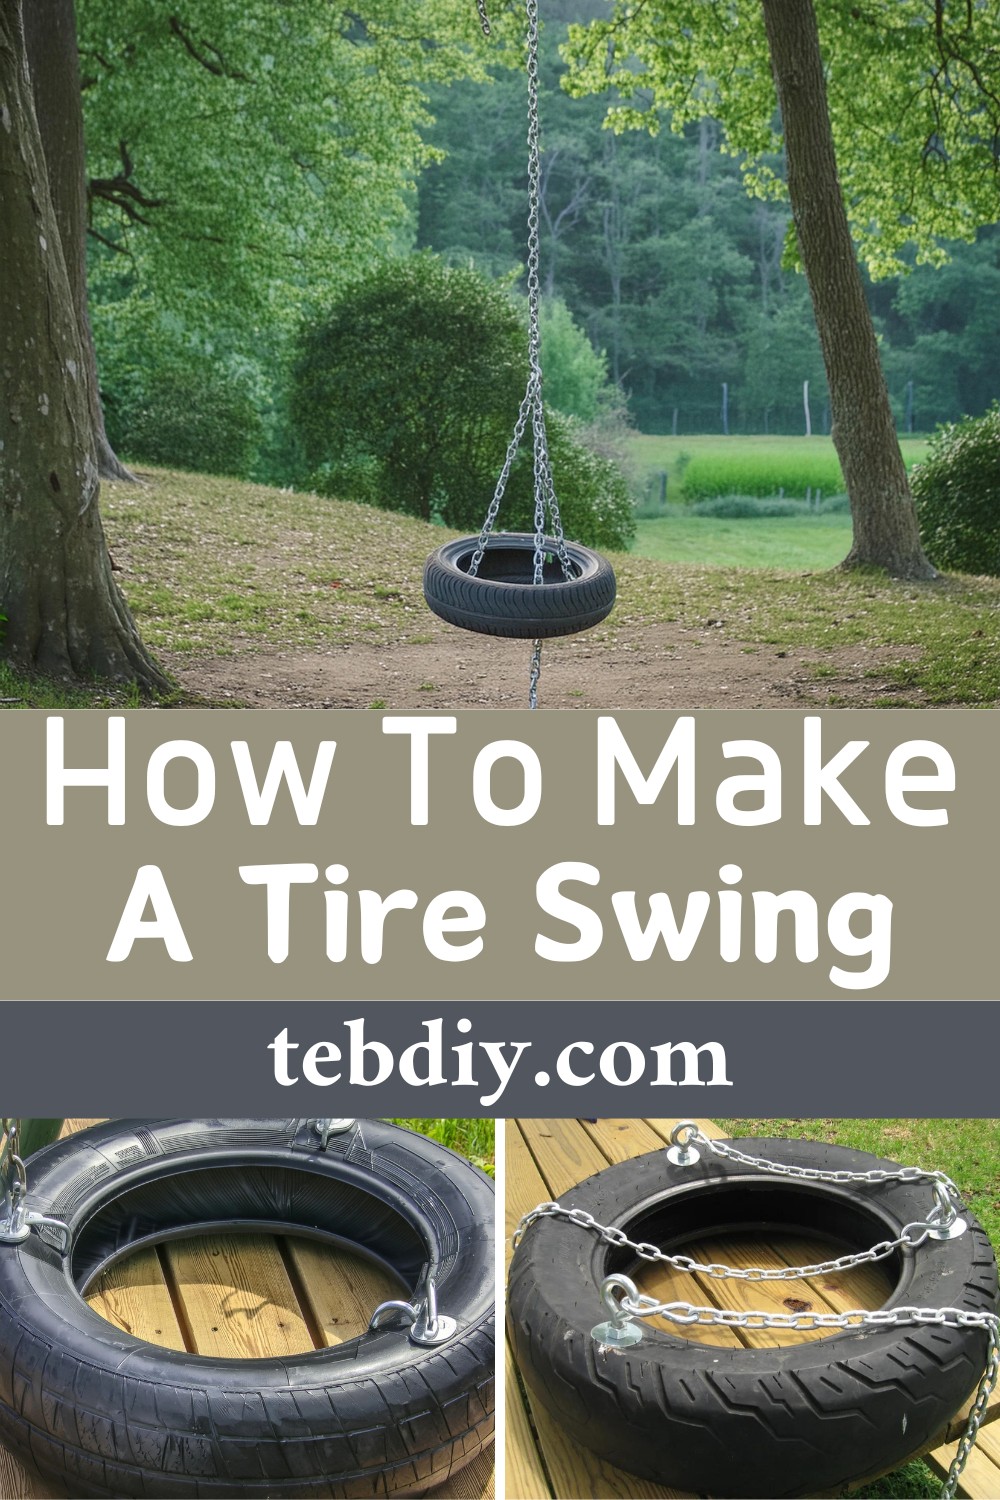
let’s experience the gentle swaying, the open-air sensation, and the laughter and delight it brings, especially to kids. It can be an eye-catching delight for your backyard that promises hours of outdoor fun. Plus, it’s also a brilliant idea for repurposing an old tire. This comprehensive guide will help you create your tire swing, combining practicality with creativity, without compromising safety. This project will be great to transport you back to simpler times and create a fun new place to play for your children.

How To Make A Tire Swing

Materials:
- An old tire (Consider who will be using the swing when making your selection)
- Three Eye bolts (weight-rated) with corresponding nuts
- Six fender washers
- Three lock washers
- Three S-hooks (weight-rated)
- Three pieces of 3′ long metal chains
- One Swivel (weight-rated)
- One Clip hook (weight-rated)
- One Connector Link (weight-rated)
- One 12′ long chain (weight-rated)
Tools:
- String
- Drill with 1/2″ drill bit
- Adjustable Vice Grip pliers
- Ratchet (for size reference)
Picking the Right Tire
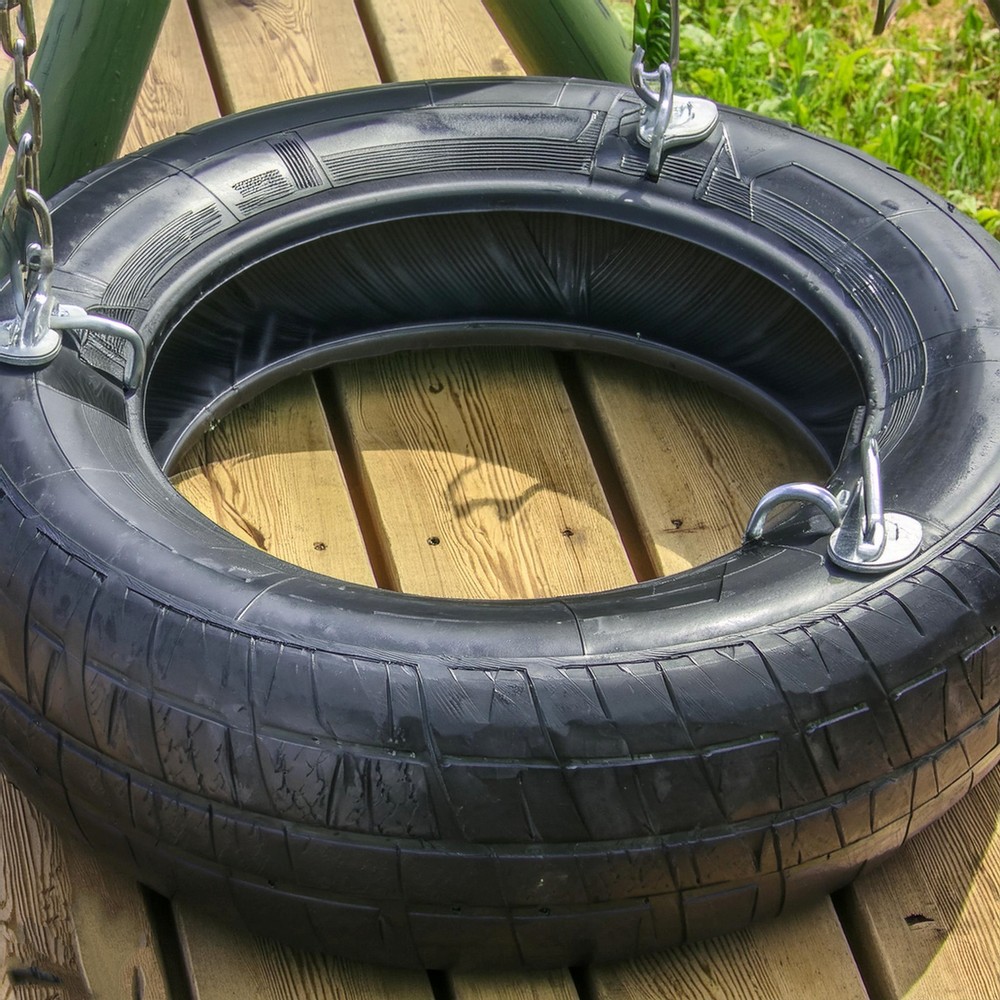
First impressions, they say, last forever. Select a tire appropriate for the user’s size. Once chosen, decide which side looks more appealing; this will be the top side. Flip the tire over and drill drainage holes in the bottom sidewall. This will prevent water from accumulating inside the tire and creating a mess. Drill holes around the sidewall, maintaining a few inches gap between each hole.
Preparing the Tire
Turn over the tire with its top side up. You will secure the eye-bolts on this side. Triangular configurations are the most stable, so you’ll want to identify three spots on the sidewall to mount your eye bolts. After determining the positions, drill the holes, then thread the eye bolt with a nut and a fender washer, followed by insertion through the tire. Cap it on the inside with another fender washer, a lock washer, and finally, the second nut. Tighten this setup to ensure a secure fit.
Installing the S-Hooks
Once the eye bolts are installed, attach the S-hooks. Adjust your Vice Grip pliers until the S-hook encloses the eye bolt securely. Each eye bolt gets an S-hook, ensuring a tight fit.
Attachment of Chains
Your S-hooks are now in place, and it’s time to attach the three 3′ chains to them. Attach one end of each chain to an S-hook.
Bringing it Together
Now attach the tops of all three chains to a 4th S-hook, securing it well. This is where we’ll connect the swivel, which allows the tire swing to spin freely.
Top Attachment
Next, connect the clip hook to the connector link, which then connects to the swivel. This configuration will let you adjust the height of the tire swing according to your requirements.
Hanging the Tire Swing
Finally, it’s time to hang up your swing. The 12′ chain should hang from a sturdy branch or structure. Connect this chain to the attached clip hook, and there you have it.
Leave a Reply