
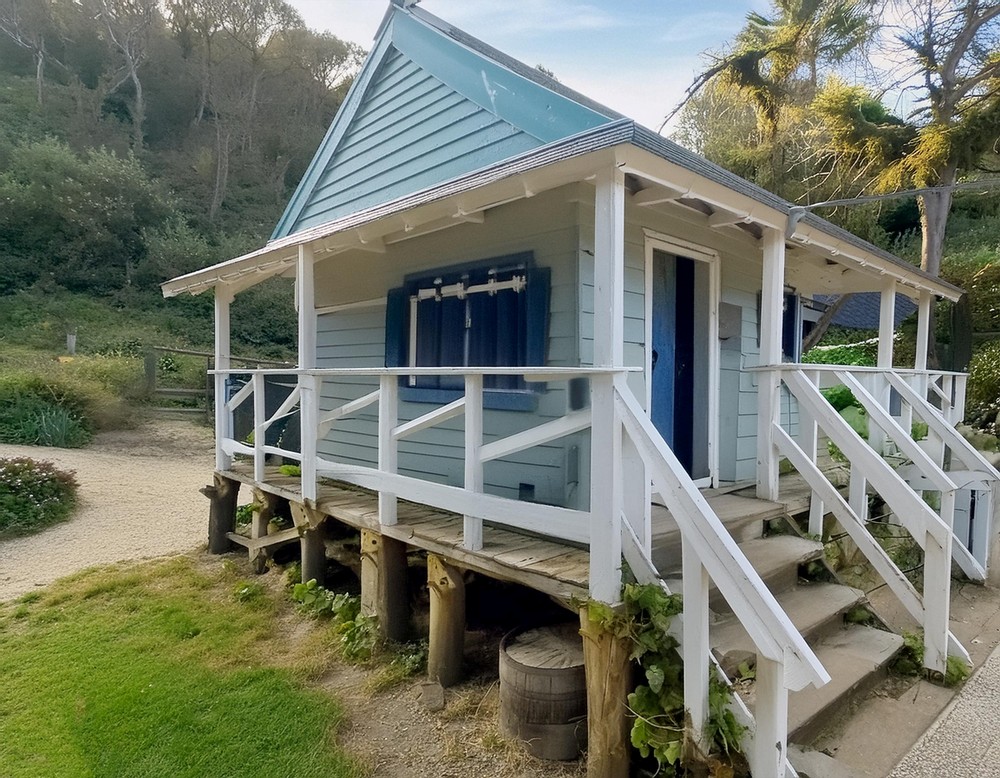
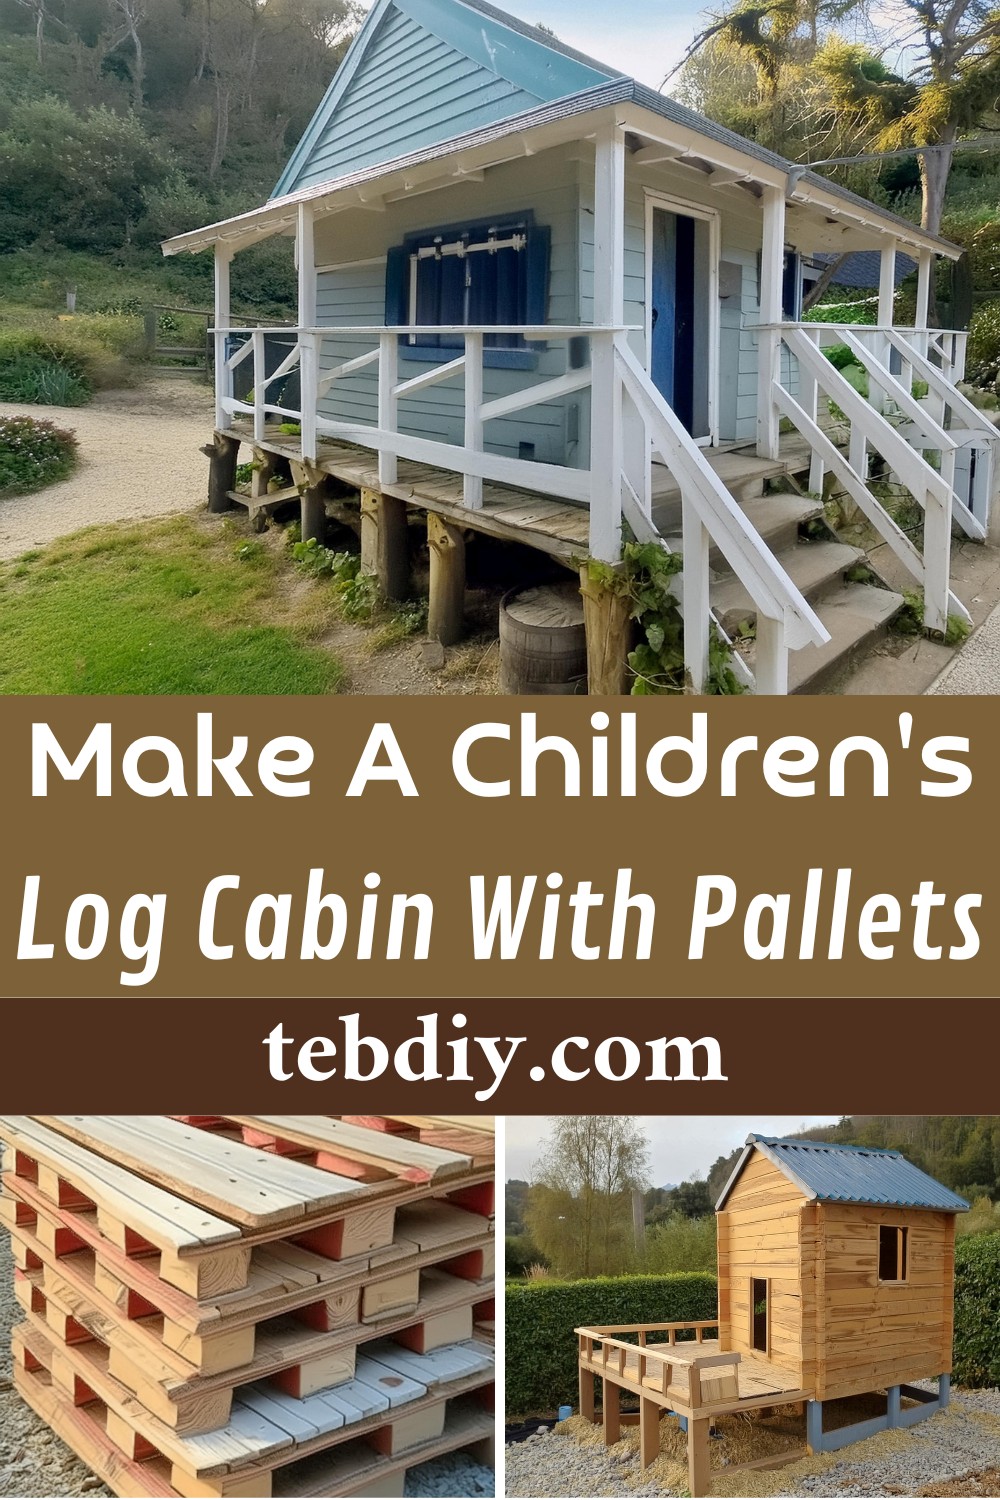
Creating a whimsical log cabin for your child can be an adventure that goes beyond mere construction. This project is a heartwarming tale of love, creativity, and recycling, fashioned into a safe haven where your child’s imagination can soar. Crafted from materials that many would regard as mere leftovers or scrap, this children’s log cabin stands as a testament to what one can achieve with a bit of ingenuity and a lot of dedication.
Introduction to Building a Children’s Log Cabin with Pallets
It will be great to bring the joy and the sparkle in your child’s eyes upon seeing a miniature house that’s just for them, made with your hands out of pallet wood and other materials, designed for countless hours of fun.
Materials and Tools Required
Materials List:
- Pallet boards
- Wood terrace floor
- Electric poles (for stilts)
- Concrete
- Battens
- Joist
- Composite plate tiles (for the roof)
- Screws
- Paint (and presumably other finishes)
Tools Used:
- Circular saw
- Miter saw
- Drill
- Screwdriver
- Router (and other tools might be needed for detail work)
Step-by-Step Guide
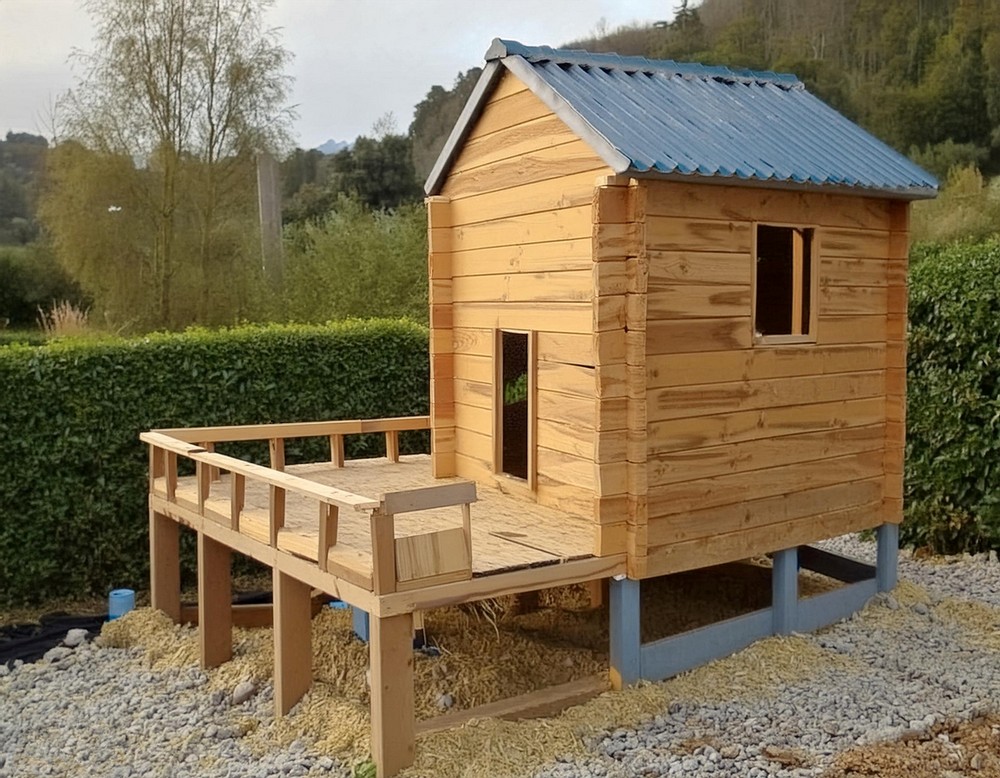
Step 1: Foundations and Wood Posts
First off, we select and prepare the ground where the cabin will sit. We use concrete pillar elements to avoid the need for formwork, ensuring a solid foundation. We secure the pole brackets, made from recovered shelf brackets, with a rail chute designed for plasterboards before filling the blocks with concrete.
Step 2: Floor
With the foundation set, we move on to erect six wood recovery poles, each 85 cm in height and 18 cm in diameter, as the base for the floor structure. We assemble joists to create a frame (3m x 1.24m) and then attach it to the posts. We screw deck boards onto this framework to form the floor.
Step 3: Structure of the Walls
We construct the skeleton of the walls from studs, join them together, and then affix them to the floor structure, setting the stage for the cabin’s overall shape and sturdiness.
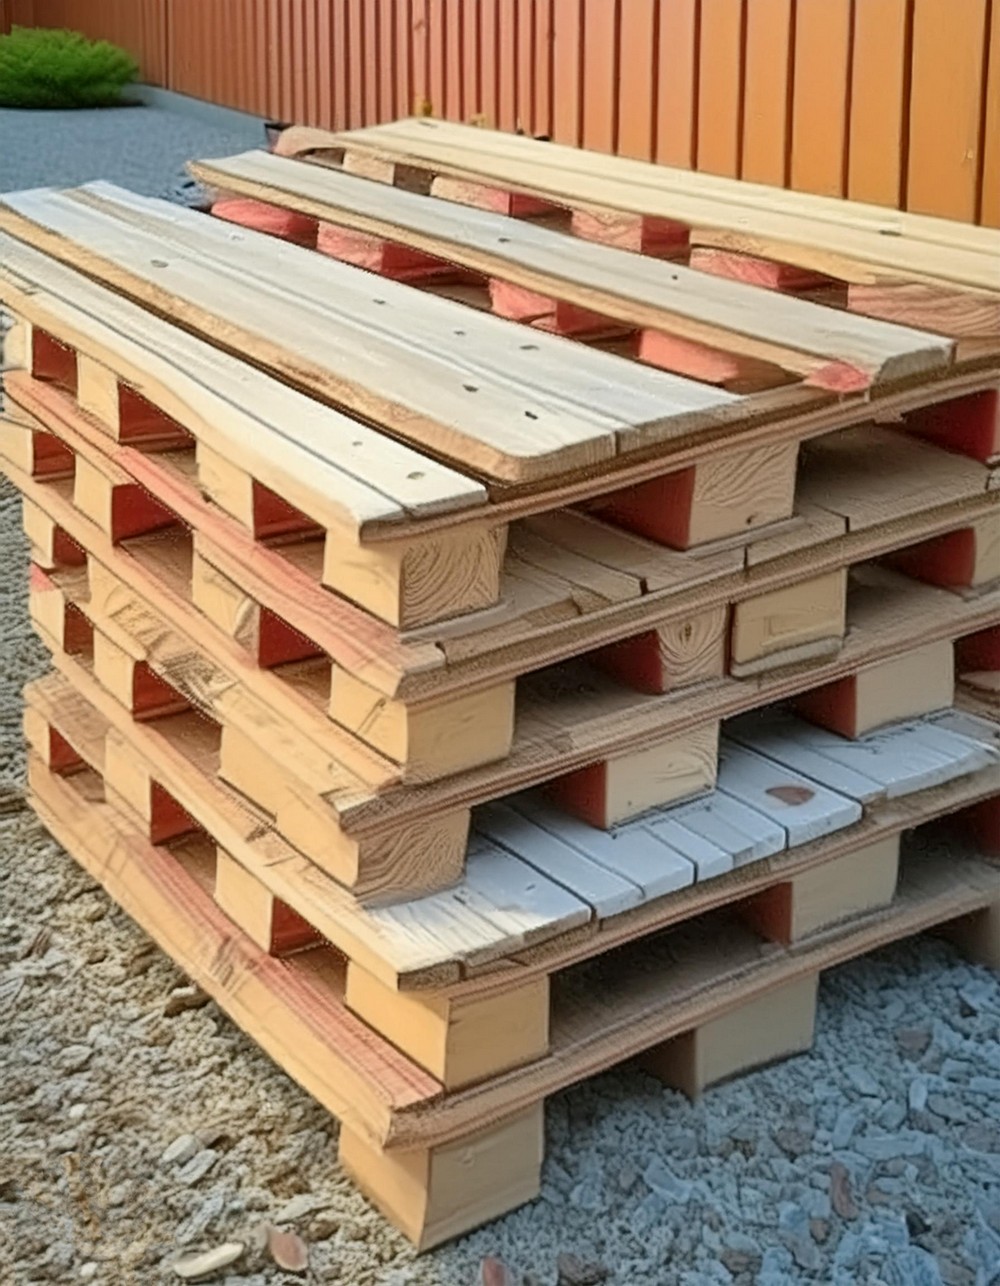
Step 4: Pallet Walls
After dismantling and preparing around thirty pallets, we handpick the finest boards to form the walls. These are cut and shaped with a miter saw before being screwed onto the wall structure, gradually bringing the cabin to life.
Step 5: Roof
For the roof, composite plates mimicking tiles are laid and secured with specialty screws that include a seal, ensuring the cabin is waterproof.
Step 6: Stair and Railing
Next, we focus on accessibility and safety, adding a staircase along with a guardrail to ensure our little adventurer can enter and exit their domain safely.
Step 7: Paint
The cabin’s aesthetics are enhanced by filling any nail holes with wood pulp and applying paint. This step transforms the previously rustic pallet boards into a visually appealing structure.
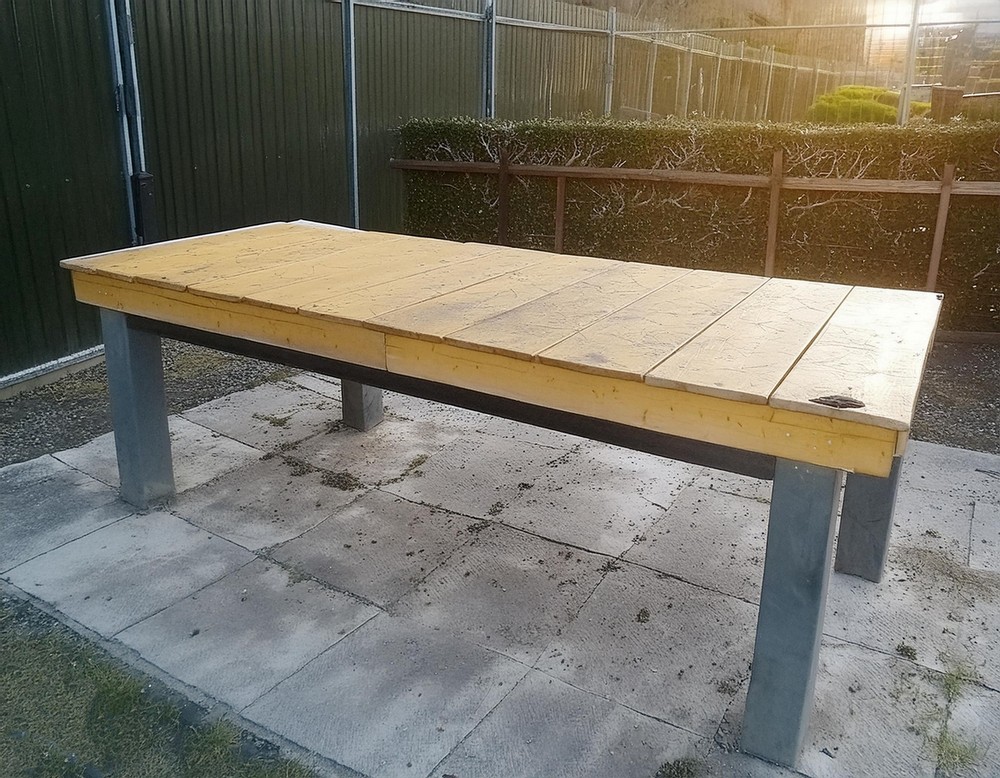
Step 8: Table and Chairs
To furnish the interior, leftover wood is repurposed into a quaint table and two chairs, perfect for tea parties, arts and crafts, or whatever else the imagination conjures.
Step 9: Solar Lighting
Finally, we introduce solar LED lighting, adding a practical yet magical touch that enables the play to continue even as the sun sets.
Step 10: Reward
The project’s completion is a reward in itself, culminating in recognition and the pride of creating a one-of-a-kind sanctuary for your child to play, dream, and grow.
Conclusion
Building a children’s log cabin from pallets is not just about constructing a playhouse. It’s about building memories and igniting the creative spark in your child’s heart. It’s a project that symbolizes resourcefulness and love, leaving a lasting impression not just in your garden, but in your child’s memories.
Leave a Reply