
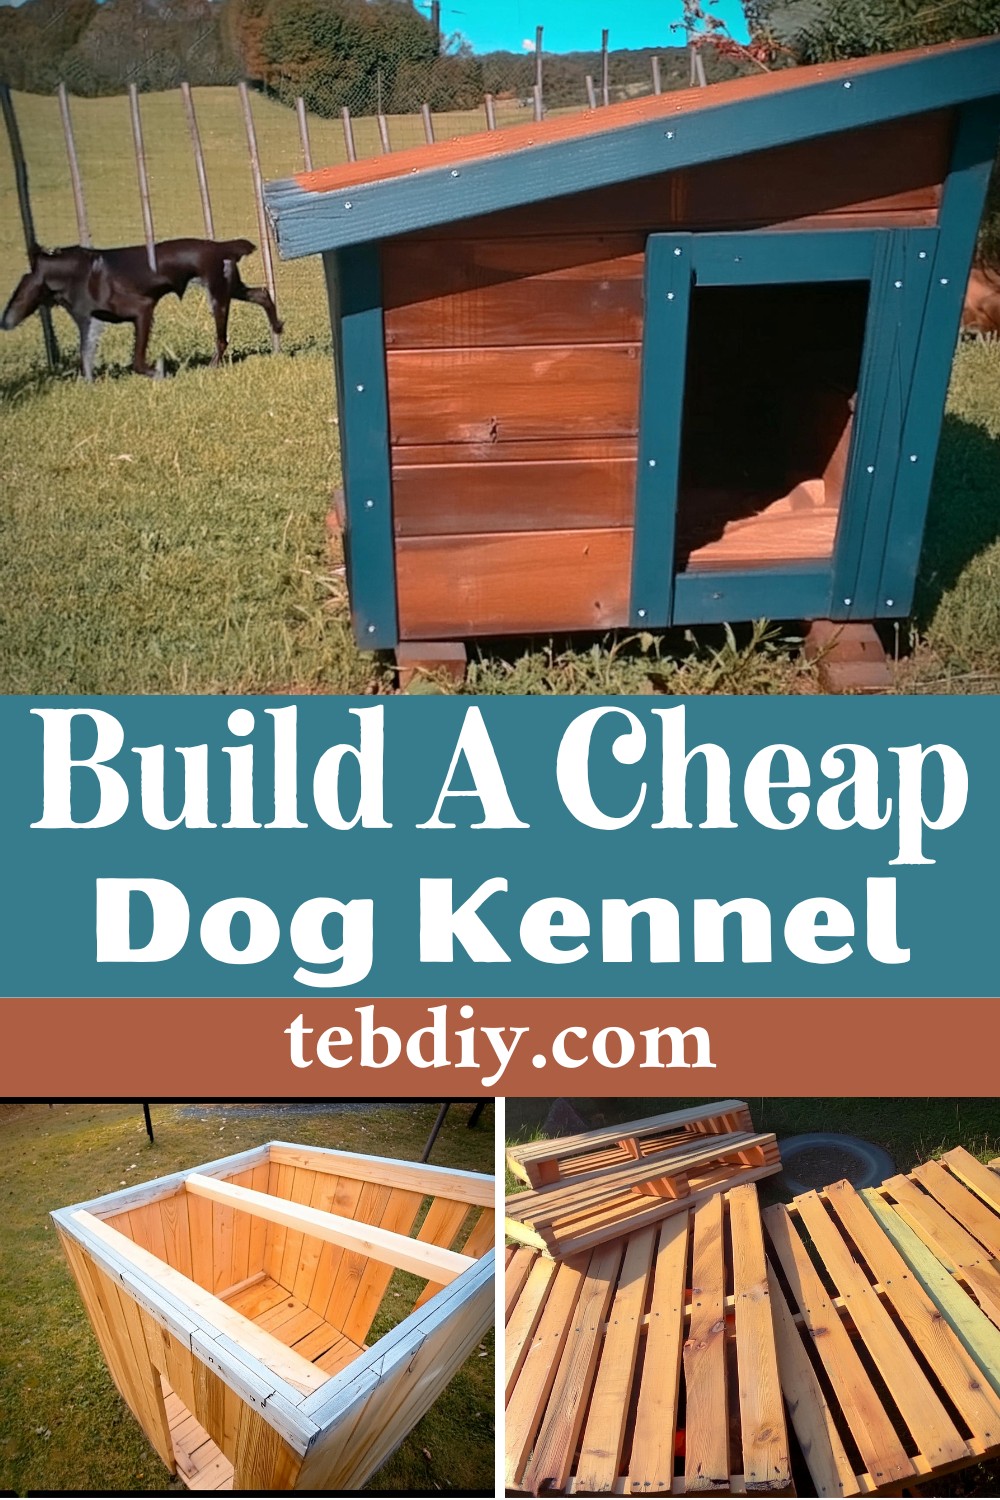
Creating a DIY dog kennel from scratch might seem like a project only a skilled carpenter could undertake. However, with a few repurposed materials and a bit of creativity, anyone can build a snug, stylish home for their beloved pet. This guide is not just about hammering wood together; it’s about crafting a shelter that keeps our pets warm, happy, and secure. Let’s roll up our sleeves and transform humble pallet wood into a luxurious lounge for our canine companions, all while keeping expenses to a bare minimum.
Cheap DIY Dog Kennel Project

Materials Needed:
- Pallet Wood: The building blocks of our project, available for free.
- Screws: A mixed assortment to hold our creation together:
- Half a box of 25mm screws – $8
- One third of a box of 40mm screws – $9
- Small pack of 100mm screws – $3.50
- Stain: 250ml for that polished look – $13
- Poster Paint: Just a dash for color – $1
- Clear Coat: 200ml to shield our work from the elements – $3.50
Tools Used:
The raw data does not list specific tools, but based on the materials and steps involved, one would typically need:
- A saw (hand saw or electric) for cutting wood.
- An angle grinder for cutting nails or smoothing edges.
- A drill for making pilot holes.
- A screwdriver or drill attachment for driving screws.
- Clamps to hold pieces in place as they’re being worked on.
- Measuring tape, a straight edge, and possibly a square for accurate alignment.
- Sandpaper or a sanding tool for finishing touches.
Constructing the Kennel:
Preparation
Disassemble a few pallets. This involves cutting them apart and deciding which pieces can be repurposed for the kennel’s floor, walls, and roof.

Plan Out the Build
Before slicing into the wood, conjure up a blueprint in your mind or on paper. The floor size should marry well with the intended bedding, creating perfect dimensions for your dog to stretch out and relax.
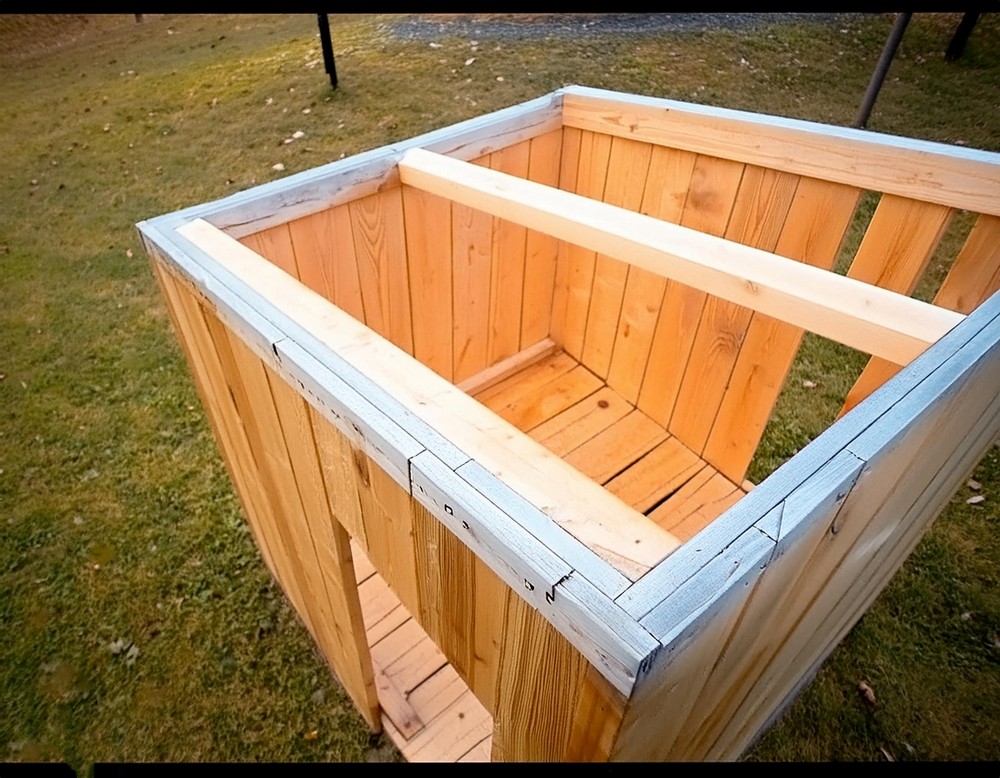
Laying the Foundation
Craft a simple base frame using pallet stringers. Cutting off nails with an angle grinder can save time here. Mark, cut, pre-drill, and countersink the wood, assembling it into a sturdy base. Add a center support for extra durability.
Flooring
Begin by attaching palings at each end of the frame, progressively filling in the center. Measure, cut, and fit any remaining spaces to ensure the floor is completely covered.
Securing the Floor
Use a straight edge to uniformly mark screw placements for the palings. Drill the holes and fasten the boards. It’s a task where you can get the kids involved and make it a fun, family activity!
Cleaning Up the Edges
Mark the overhang and trim the palings to size. A rough clean-up of these cuts will smooth any rough patches.
Erecting the Walls
Wall Assembly
Moving upwards, the walls are constructed by attaching palings perpendicularly on the base. Ensuring the structure is square and of equal width at both top and bottom is essential for stability. This step is can repeat for each wall, with special consideration for the kennel’s entrance.
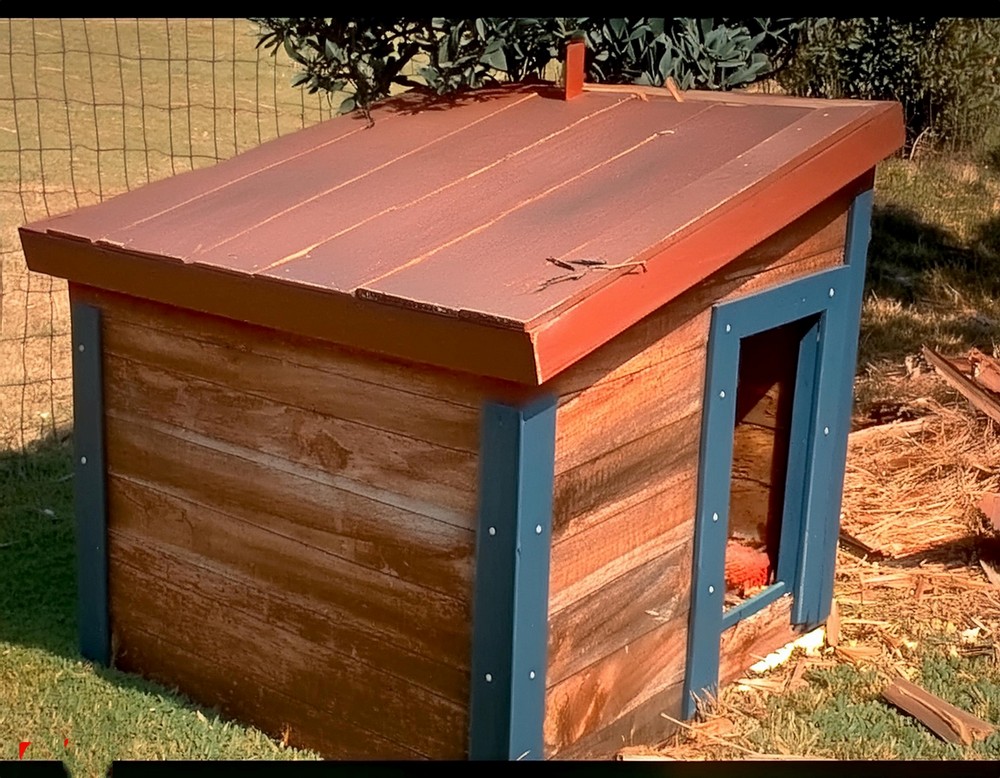
Crafting the Roof
Framing and Securing the Roof
Utilize more pallet stringers, splitting them down the middle for the roof frame. Attach them snugly, ensuring they are securely fixed and leave space for the kennel to snug up against a house wall without an overhang, if desired.
Attaching and Reinforcing Roof Palings
Cover the frame with palings, double up for extra thickness and insulation. This process not only reinforces the structure but also prevents any water ingress, keeping the inside dry and comfortable.
Final Touches
Staining and Sealing
Add a protective stain of your choice, diluted to your preference, followed by a durable clear coat to seal the wood from weather elements. Trimming the edges and adding detailed finishes will give your kennel a professional look.
Conclusion:
Building a dog kennel doesn’t have to be an expensive or overly complex project. With some basic tools, a bit of elbow grease, and a sprinkle of creativity, you can provide your furry friend with a safe, comfortable place to call home. The real beauty of this project lies not only in the cost savings but also in the joy and satisfaction derived from handcrafting a warm retreat for your dog.
Leave a Reply