
There’s something magical about watching a kite dance across the sky. It’s a pastime that infuses the air with joy, tugging not just on its string but on our hearts as well. For children and adults alike, the creation and flight of a kite represent a special blend of art, science, and pure fun. Now, imagine the pride and joy in your child’s eyes when they launch a kite into the sky that they crafted with their own hands. This project guides you through the enchanting process of creating a paper kite that is not only simple and pleasing to make but also a delight to fly.

Easy Paper Kite For Kids

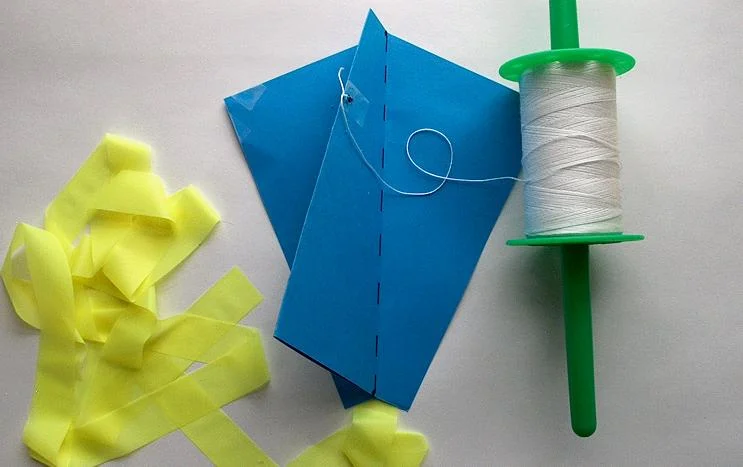
Materials Required:
- Paper (8.5″x11″) – Standard copy paper is fine; card stock offers more durability.
- Wooden skewer or Straight straw – For the kite’s structure.
- Kite string – Lightweight and strong; quilting string or similar.
- Ribbon – Ideally lightweight, such as surveyors tape for a vibrant, lengthy tail.
- Scissors or Hole punch – For cutting and piercing.
- Tape – To secure the structure.
Tools Needed:
- Scissors (for cutting materials)
- Hole punch (optional, can be substituted by scissors for making a hole)
Crafting Your Paper Kite:
Creating the Base:
- Folding: Start with an 8.5″x11″ paper and fold it in half.
- Mark & Fold Corners: On the folded paper, mark a point one inch from the fold on the top and another one inch from the open edge at the bottom. Connect these marks in your mind (or with a pencil) and fold down the top corner of the paper to follow the imaginary line. Then, flip the paper and fold the other side to mirror this fold.
- Securing the Folds: Return the paper to its initial folded position and apply tape along the center seam to secure the folds into place.
The Spine:
- Adding the Spine: Take a skewer (trimmed if necessary) and lay it along the length of the kite, on what will be its spine. Tape it firmly in place.
- Straightening the Spine: Turn the paper kite over to ensure the spine is straight and central.
Tail Attachment Point:
- Tail Attachment Reinforcement: Identify a spot around one-third down from the top of the spine and half an inch from the edge. Strengthen this area with tape on both sides.
- Hole & String: Punch or snip a hole through the reinforced spot. Thread the kite string through the hole, securing it with a sturdy knot.
Finishing Touches:
- Tail Time: Attach a length of ribbon at the kite’s bottom end on the backside. Light ribbons like surveyors tape can be long, offering 6-10 feet, while heavier ribbons should be shorter.
Test Flight:
- Launching Your Creation: Your kite is now all set to catch the wind. These kites thrive in a gentle breeze rather than strong winds. As you begin to fly your kite, remember to adjust the string length if it starts to dip or tug. Ensure the spine is straight before each flight attempt.
- Enjoy: Revel in the flight of your homemade kite and the smiles it brings!

Leave a Reply