Let’s make a unique watering can that not only does the job but also adds a bit of charm to your gardening routine. DIY watering cans can be anything you want them to be – colorful, quirky, or designed to blend with your garden’s vibe. They’re perfect for giving your plants the gentle shower they love, all while being a piece of art you created.
DIY Watering Can
Now, we’re excited to walk you through creating your own. With the list of ideas we’ve put together, you’ll find just how enjoyable and satisfying it is to make a watering can that’s all yours. From repurposing old items to adding a personal touch with paint or decorations, our ideas are easy to follow and sure to inspire.
How To Make A Watering Can
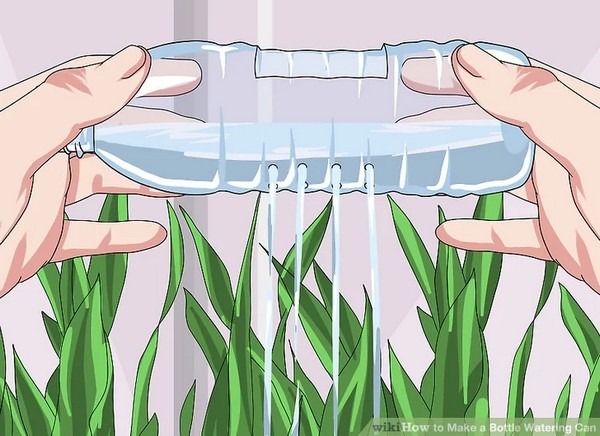
Uses: Showcasing the ingenuity of recycling, behold the homemade Bottle Watering Can! This utterly practical and easy-to-make creation offers a friendly solution to keep your beloved plants hydrated.
Materials:
Plastic Bottle
Permanent Marker
Nail or Thumbtack
Sharp Knife or Razor Blade
Making:
The simplicity of creating a Bottle Watering Can is a delight! Start by choosing a clean and label-free plastic bottle. Draw a small square towards the top of the bottle, ensuring it fits within the flat side of the container without touching the curved top. Next, use a small tool like a nail to punch evenly spaced holes within this square. On the opposite side of the bottle, create a U-shaped hole for filling water into the bottle. This will serve as your pouring space. When you wish to water your plants, fill the bottle with water, securely close its cap, tilt it on its side and let the magic happen!
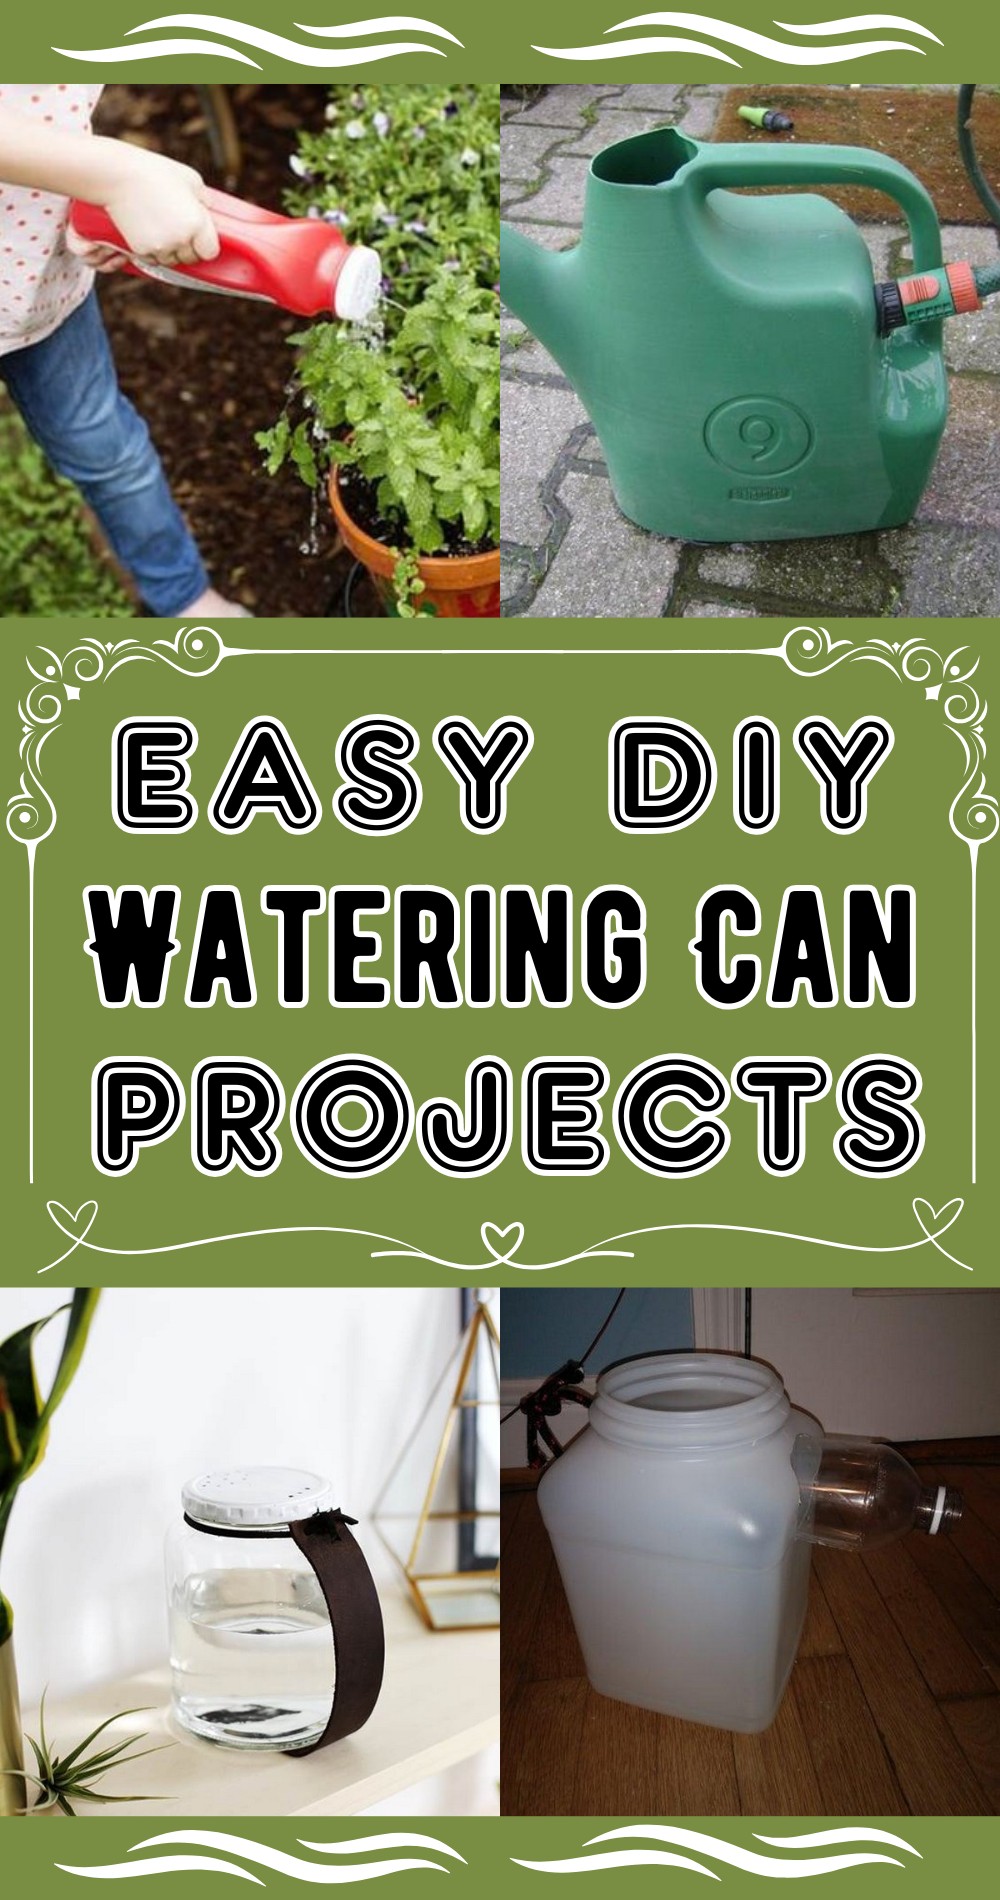
DIY Kid Watering Can
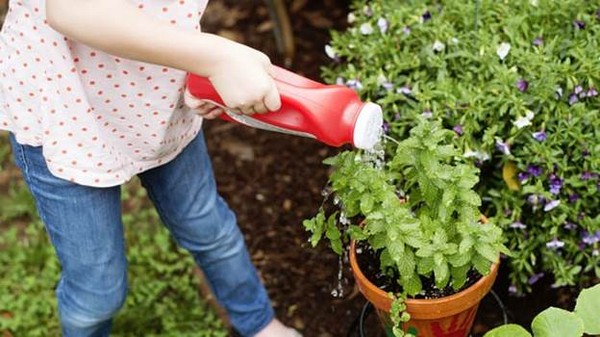
Uses: Transform an ordinary Shake-n-Pour container into an exciting DIY Kid Watering Can! This pint-sized item, modified for children’s hands, invites the little ones to participate and enjoy caring for their personal gardens.
Materials:
Clean, empty Shake-n-Pour Container or similar bottle
Marker Pen
Drill with a Thin Bit or a Hammer and Nails
Making:
The making of a Kid Watering Can is a fun and simple task! Once the Shake-n-Pour container is emptied, wash and dry it thoroughly. Then, use a pen to mark spots on the lid where the water-flow holes will be. Now comes the bit where adult help is needed: using a drill with a thin bit to create the marked holes. Once done, all that’s left is to fill the can with water, screw the lid back on, and let the kids get watering!
Foldable Watering Can
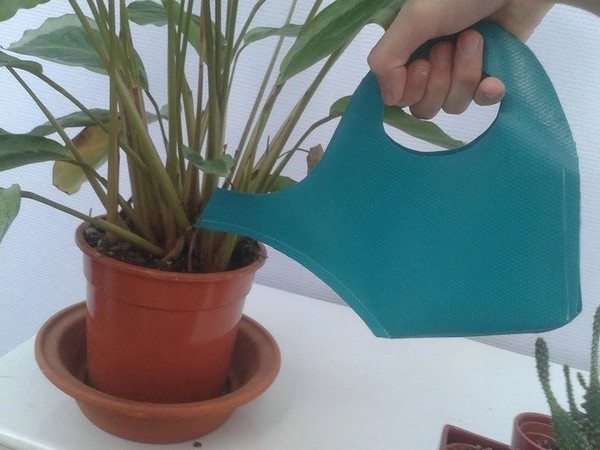
Uses: This unique item offers a smart solution to those with space issues as it can be folded flat when not in use, fitting neatly into any cupboard, perfect for small apartments or rooms.
Materials:
Paper Template
Used Truck Tarp or PVC Canvas
Knife or Sharp Scissors
Paperclips
Thread and Needle
Hairdryer
Making:
Begin by placing the printed template on a piece of truck tarp or PVC canvas. Cut out the form, but hold off on the handle cut-outs until later to keep the material easy to handle. Follow the folding instructions on the template, securing it all together with paper clips. Now it’s time to stitch it all together, starting from the front. Once stitched, the handle cut-outs can be made. Should there be any leaks, simply use a hair dryer to warm and press the material together to form a seal. Your foldable watering can is ready for action!
DIY Recycled Watering Can
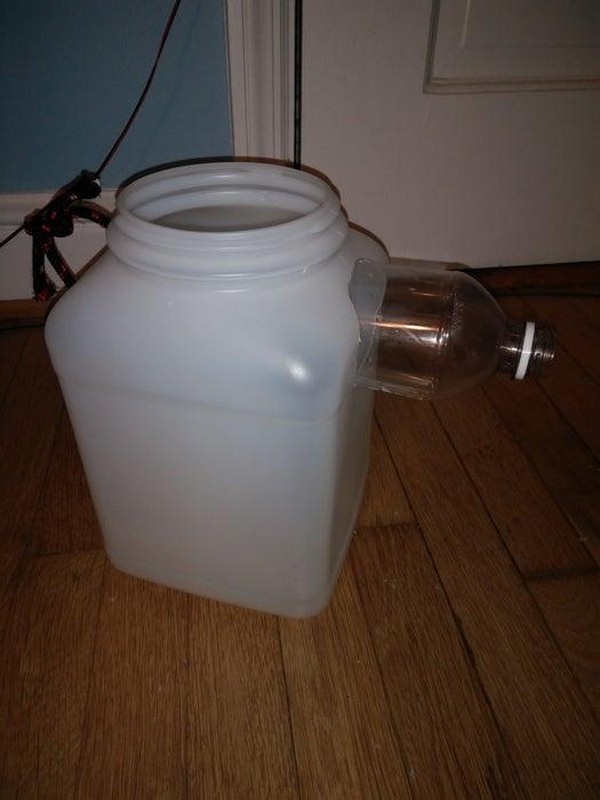
Uses: With its resourceful design, this watering can promote upcycling and help preserve the environment. Perfect for nurturing your garden, it’s a fantastic tool for those on a budget or who love repurposing everyday items.
Materials:
Large Plastic Container or Milk Jug
Smaller Plastic Bottle
Cutting Tool (Knife or Scissors)
Rope
Glue or Adhesive
Marker or Pencil
Making:
Start by cutting a smaller plastic bottle in half to be the “spout” and make a hole in a larger container to attach the spout. Mark the size of the bottle in half on the container and cut out that shape. Next, place the spout into the hole and seal it with glue or adhesive. Then, cut two holes near the top of the container and thread a rope through them, creating a handle and securing it with knots inside. Wait for everything to dry, and your recycled watering can is ready for gardening action!
DIY Watering Can
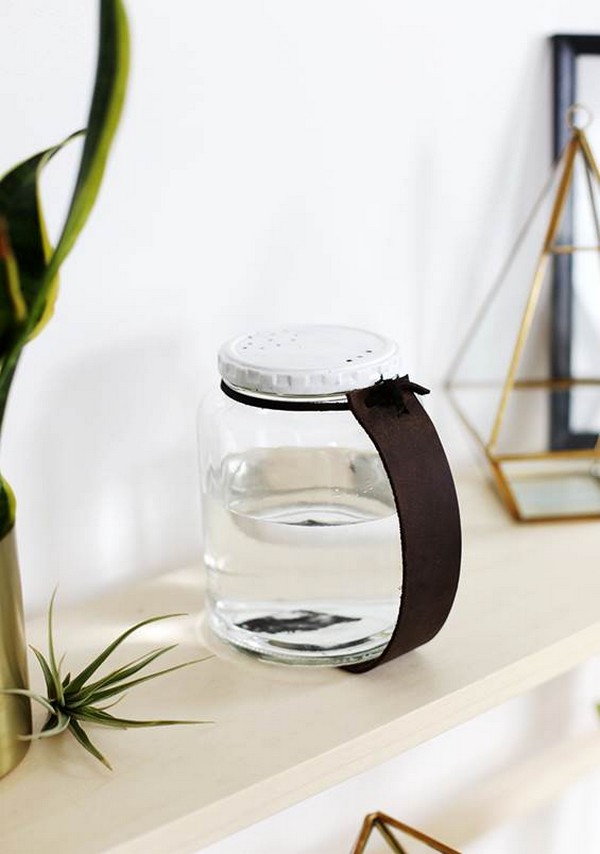
Uses: A wonderful tool to keep all house plants hydrated, this watering can hold more than your typical half-a-cup can, making watering a hassle-free and enjoyable task for garden lovers. Plus, it adds a rustic charm to your domestic equipment while promoting sustainable practices.
Materials:
Old Jar
Drill
Leather Lace
Heavy-Duty Super Glue
Paint (Optional)
Paint Brush (Optional)
Making:
Firstly, pick an old pickle jar set for recycling and drill small holes into one side of its lid for the water outlet. A few air holes should be drilled on the opposite side as well. You could add a touch of personal style by painting the lid. Next, cut a strip of leather long enough to reach the neck of the jar, permitting a comfortable grip. Punch two holes towards the top of this leather strip, thread a piece of leather lace through these holes and secure it around the neck of the jar. To ensure stability, use a strong adhesive to attach the strip along the bottom of the jar. Let it dry fully before use and voilà – your DIY Watering Can is all set!
DIY Recycled Watering Can
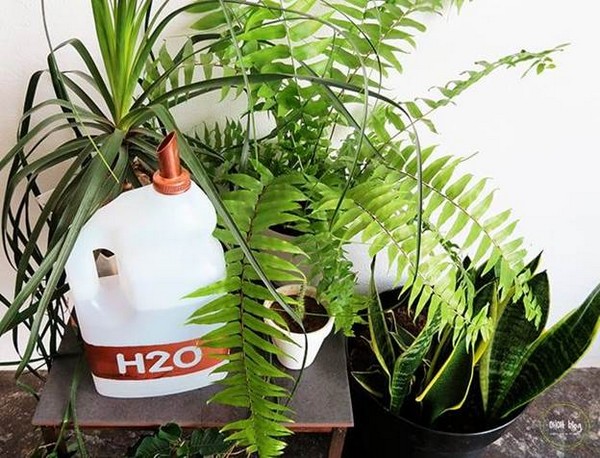
Uses: This easy-to-handle item brilliantly addresses your watering needs while adding a touch of creativity to your gardening routine. The design exudes charm and promotes the idea of recycling, transforming a simple plastic bottle into a unique and effective tool to hydrate your indoor greenery.
Materials:
One Gallon Plastic Bottle with Cap
Small Piece of Copper Pipe
Hacksaw
Universal Glue
Cutter
Spray Paint (Optional)
Tape
Making:
Transforming a plastic bottle into a DIY Recycled Watering Can is an exciting journey! Start by thoroughly cleaning the bottle. Take a small piece of copper pipe for the can’s spout and cut one end at an angle using a hacksaw. Mark the pipe’s circumference onto the bottle lid and carefully cut out the marked circle. Attach the pipe to the lid with glue, ensuring the glue doesn’t touch the screw thread. For a more pleasing look, some copper paint can be added to the bottle, though be careful as some paint may peel off. Better yet, consider using adhesive paper for a stylish finish. Once everything is dry, your DIY Recycled Watering Can is all prepared to serve your plants!
Lazy Susan Watering Can DIY
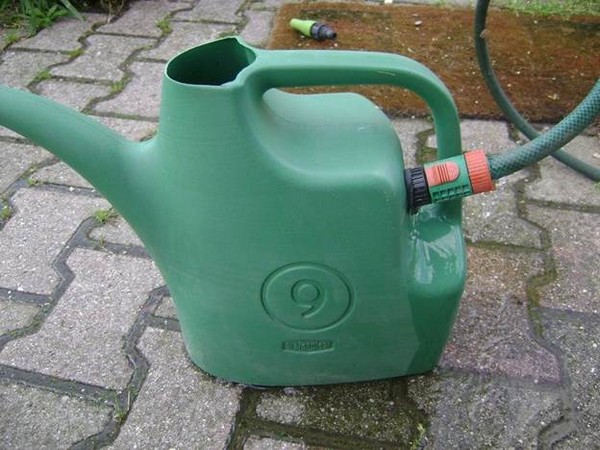
Uses: Unlike the traditional ones, this innovative watering can boast a continuous water supply. It’s a marvelous blend of the classic watering can and the ease of use of a water rubber, offering a fuss-free and smoother watering experience. If you need a little break, just let it stand—it will fill itself up without overflowing.
Materials:
Watering Can
Tap from the Toilet Water Tank Discharge System
Tubing
Double Seals
Self-Locking Screw
Making:
This DIY’s heart is a tap driven by a float, typically found in a toilet water tank discharge system. Adjust the command bar of the valve to ensure the float fits inside the watering can, and carefully make holes that allow for a comfortable balance and eventual fine-tuning of the system. Prepare the watering can to house the valve by creating an appropriately sized bore diameter. Insert the tubing, which will be attached to your feeding tube. Use double seals for a proper hold—one on the inside and another visible on the outside. Lastly, carefully bring to life the float operation by inserting your hand inside the can and running the tubing from the hole. Once properly fixed, your self-filling watering can is all ready for action!
DIY Watering Can With Crystals
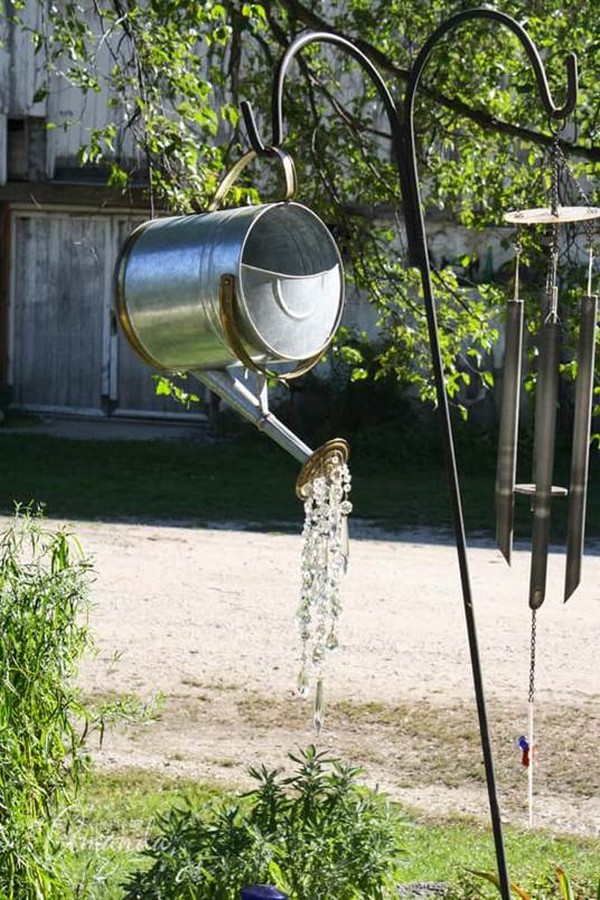
Uses: Perfect in your garden or patio, its sparkling crystals catch the sunlight, making it appear like water is streaming, creating a mesmerizing and enchanting visual effect for the viewer.
Materials:
Watering Can
Crystals (chandelier, acrylic, any type)
Floral Wire
Micro Pliers
Any Bead (only 1)
Making:
Begin by detaching the rim from the spout of your can! Now comes the fun part – stringing crystals onto a piece of wire. Thread the ends of this wire into the holes of the spout from the outside towards the inside of the can. Now, use any bead to fasten the wire ends inside the spout. After securing it with a wrap and twist, reattach the spout rim using a pair of pliers, and there you have it – a watering can that appears to pour crystals!

Leave a Reply