
Arrange a delicate display with DIY Tea Flower Cup With Polymer Clay + Resin, pairing pretty flower details and a shiny tea effect in one sweet miniature.
Flowers resting in a cup give an ordinary tea scene a gentle, storybook feeling. DIY Tea Flower Cup With Polymer Clay + Resin uses that sweet idea for a miniature display where soft floral details meet a shiny liquid effect. It is a decorative take on a familiar drink, meant to be admired rather than sipped.
Floral DIY Tea Flower Cup With Polymer Clay + Resin | Free DIY Ideas
The cup provides a simple setting for the smaller features. Its rounded body and little handle establish the shape, while the flowers give the piece its character. Each petal benefits from a careful touch so the floral form remains clear at a small size. Polymer clay can hold these fine details, and resin can suggest the smooth surface of tea. The contrast between solid flowers and a glossy finish gives the tiny arrangement its special appeal.
More About the Channel
Gentle everyday subjects appear alongside brighter ideas on PolymomoTea. The designer’s miniature work finds interest in shapes people already know, such as cups, flowers, and little household decorations. Pairing polymer clay with resin gives those subjects a different surface quality, helping small pieces feel soft, delicate and especially visually interesting.

Unlike a real cup that needs washing and refilling, this model stays as a small ornament. It could sit near a book collection, on a dressing table, or beside other miniature food and drink decorations. The gentle theme would also suit a present for someone who loves flowers or collects teacups.
Some Free DIY Ideas are appealing because they capture an everyday moment in a lasting form. Here, that moment is the calm feeling of tea served with flowers. The design does not depend on a large setting or many pieces. A simple cup and a few thoughtful details are enough to give it a quiet, welcoming mood.

Miniature Tea Cup Charms with Tea Flower and Tea Bag
Create these adorable miniature teacups, each with a unique detail—a tea flower or a tea bag nestled inside. Using resin and polymer clay, you’ll learn how to craft two delightful charm variations, perfect for gifts, keychains, or display. This project is beginner-friendly and provides step-by-step instructions for a professional, whimsical result.
In this tutorial, you’ll make two tiny teacup charms, each featuring a different “tea” element: one has a realistic pink tea flower, and the other contains a shimmering green tea bag. You’ll use UV resin for shaping the cups, colorful polymer clay for the cute details, and a mix of pigments and glitter to create the look of brewed tea. These miniatures are inspired by the soothing ceremony of tea time and invite you to add your own creative touches!
Materials and Tools
Materials
- UV resin (for forming the cup domes)
- Two-part resin (for filling with “tea” and embedding elements)
- White translucent polymer clay (teacup handles and tea bag)
- Green polymer clay (tea leaves)
- Pink polymer clay (tea flower)
- Green glitters (for tea bag filling)
- Ball chain (for tea bag string)
- Resin pigments:
- Green and yellow (for green tea)
- Pink (for pink tea)
- Super glue (for assembly)
- Black clay or paint (for cup faces)
Tools
- Half-circle (dome) silicone mold
- Sandpaper (for smoothing resin)
- Clay blade or craft knife
- Paintbrush (for resin or faces)
- Scissors
- Oven (for baking polymer clay)
- Silicone mat or circular mold (to hold tea cups upright)
- UV lamp
- Work surface or mat
Instructions
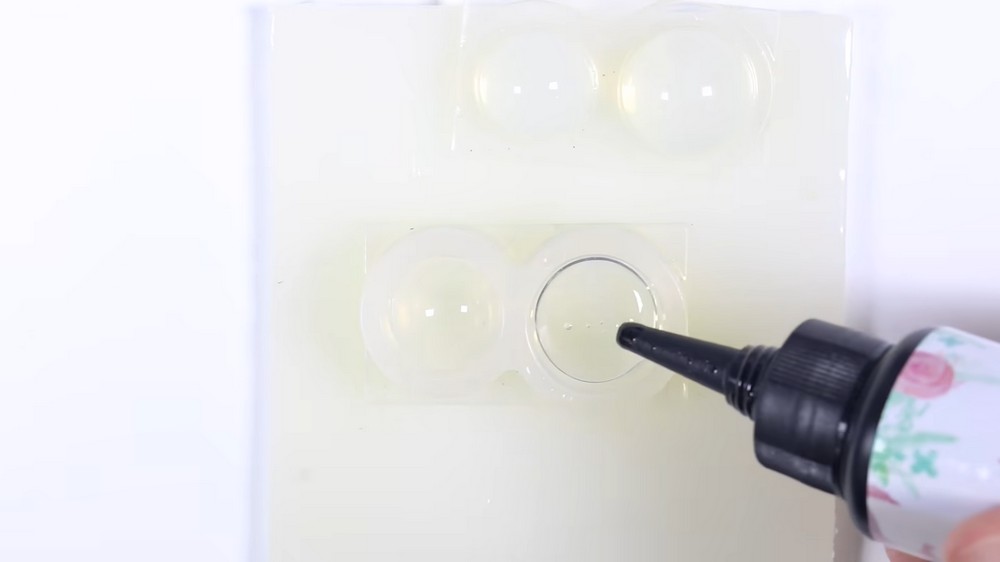
1. Making the Resin Tea Cup Base
1.1 Forming the Resin Dome
- Fill your half-circle silicone mold about a third of the way with UV resin.
- Place the mold’s cap or cover on securely.
- Cure the resin under a UV lamp until fully hardened.
1.2 Demolding and Smoothing
- Gently remove the dome from the mold once cured.
- Use sandpaper to smooth any rough or sharp edges on the bottom and sides of the dome.
2. Creating Polymer Clay Teacup Handles
2.1 Rolling and Forming
- Roll a small amount of white translucent clay into a thin snake.
- Cut the clay into short segments with your blade.
- Using your fingers, bend each cylinder into a “C” shape to mimic a teacup handle.

3. Crafting the Tea Flower
3.1 Making the Leaves
- Roll out green clay into thin, pointed needle shapes.
- Place these shaped leaves into the cleaned half-circle dome mold. This ensures the finished flower will fit smoothly inside the teacup.
3.2 Making the Flower Petals
- Roll pink clay into several long teardrop shapes.
- Arrange the pink petals in the center of the dome mold, stacking and layering until the flower looks full and balanced.

4. Creating the Teabag
4.1 Making the Teabag Body
- Roll some white translucent clay extremely flat and thin—as thin as possible so inner details will be visible.
- Sprinkle green glitter across half of the flattened clay.
4.2 Folding and Trimming
- Fold the clay over the glitter, pressing down gently to seal the glitter inside.
- Using your blade, cut the folded clay into a pentagon shape (traditional tea bag form).
- From scrap clay, cut a tiny rectangle to serve as the label of the tea bag.
4.3 Adding the String
- Cut a short piece of ball chain with scissors.
- Insert one end of the ball chain into the top corner of the tea bag.
- Attach the rectangle label to the other end, pressing gently to fix both parts in place.

5. Baking the Polymer Clay Pieces
- Place the tea flower, teabag (with string and label), and handles onto a baking tray.
- Bake in the oven according to your polymer clay’s instructions.
- Remove and let all pieces cool completely before assembly.
6. Assembling the Teacup Forms
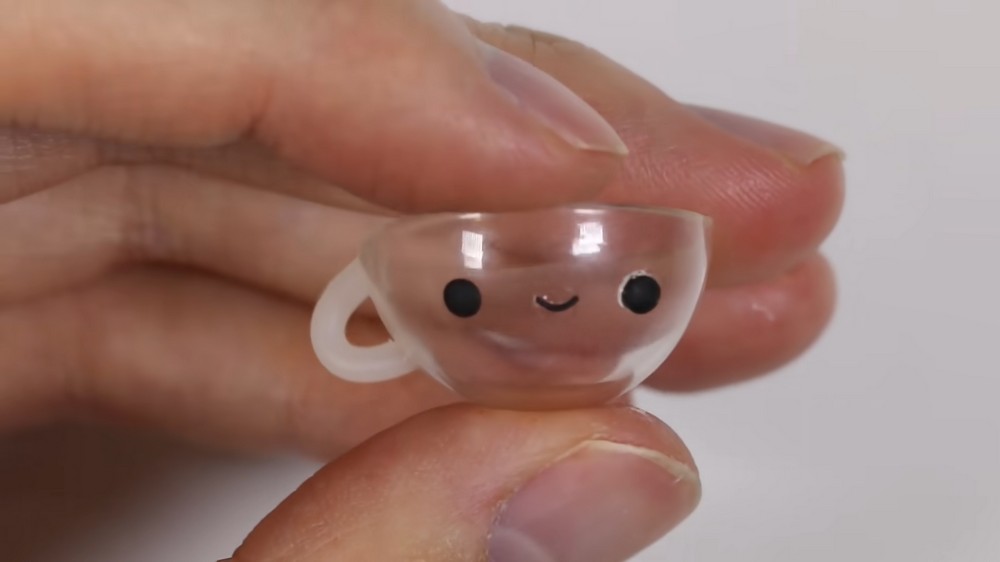
6.1 Attaching the Handles
- Dab a bit of super glue onto the ends of each clay handle.
- Carefully press the handle onto the side of the resin dome, securing it in place to form a teacup.
6.2 Adding the Faces
- Use black clay or paint to form two dot eyes and a line smile on each cup.
- Attach or paint the face features where desired, using glue if needed.
7. Filling the Teacups with “Tea”
7.1 Preparing and Pouring the Resin
For Green Tea with Teabag:
- Mix a small batch of two-part resin.
- Add a drop of green pigment and a touch of yellow pigment to mimic real green tea.
- Stir thoroughly for consistent color.
7.2 Filling and Embedding the Teabag
- Place the teacup upright on a silicone mat or circular mold to keep it steady.
- Position the teabag inside the teacup, letting the label drape out naturally.
- Carefully fill the teacup halfway with the green resin mixture, submerging the teabag and allowing the glitters to show through the translucent body.
7.3 Filling with Pink Tea and Embedding the Flower
For Pink Tea with Flower:
- Mix two-part resin with pink pigment.
- Stand the second teacup upright and place the baked tea flower inside.
- Pour resin until the flower is well submerged (slightly above halfway), ensuring the petals are visible through the side of the cup.
7.4 Curing
- Let the teacups with resin cure for 24 hours. This extended curing time helps reduce bubbles, especially around delicate items like the flower.
- Once fully cured, check for a hard, crystal-clear finish.

8. Project Notes and Tips
- If you want embedded elements and glitters to be visible, roll clay very thinly—especially for the teabag.
- Size flower petals appropriately to fill the teacup space, but not so large the resin cannot cover them completely.
- Two-part resin is preferred for encapsulating larger clay pieces because there is less chance of trapping air bubbles than with UV resin.
9. Finished Pieces and Creative Variations
- The green tea cup will have a tea bag with shimmering green glitter and a clear green-yellow resin look.
- The pink tea flower cup will showcase a delicate pink bloom inside softly tinted pink tea.
- Enjoy your charming mini tea cups as collectable figurines, charms, or unique gifts!
Conclusion
You’ve now made your own pair of unique miniature teacup charms, each telling a sweet story in resin and clay. With clear resin, delicate flower and tea bag details, and simple assembly, these miniatures are a rewarding project for crafters of any skill level. Customize your mini teas with different flower colors, types of glitter, or clay shapes for endless variations. Enjoy your adorable creations and don’t forget to display them proudly!
Leave a Reply