
Store little keepsakes in a DIY Cat Trinket Box With Polymer Clay + Resin design, where cute animal details and a glossy surface give storage extra charm.
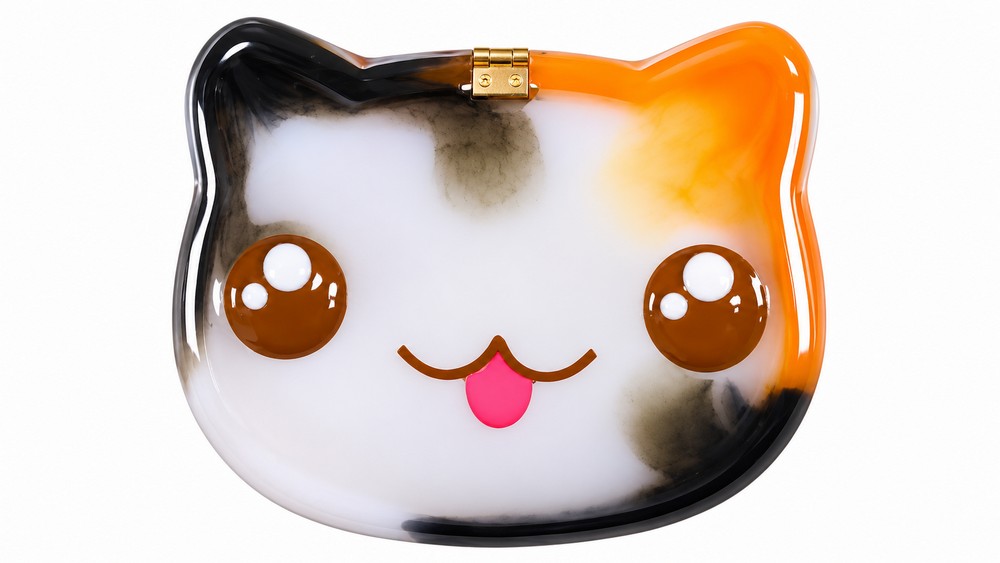
Loose keepsakes deserve a home that looks as charming as what sits inside. DIY Cat Trinket Box With Polymer Clay + Resin combines a useful little container with a friendly animal theme. Instead of a plain box, the finished idea has playful cat details that give it a warm, personal feeling.
Whiskered Cat Trinket Box With Polymer Clay and Resin | Free DIY Ideas
The container is the practical part of the design. It provides a place for small rings, earrings, or other light keepsakes, while the cat theme gives it a decorative identity. Pointed ears, a simple face, or a rounded feline outline can help suggest the animal without crowding the surface. Polymer clay works well for forming these features. Resin adds a smooth, light-catching effect wherever it is used, giving the piece an interesting contrast in finish.
The Maker Behind the Idea
Cats offer PolymomoTea a chance to combine gentle expressions with functional decoration. On the channel, small objects can be playful without losing their everyday purpose. The designer’s use of polymer clay and resin suits this idea, giving a familiar storage box its own small animal-inspired personality and appealing shiny finish.
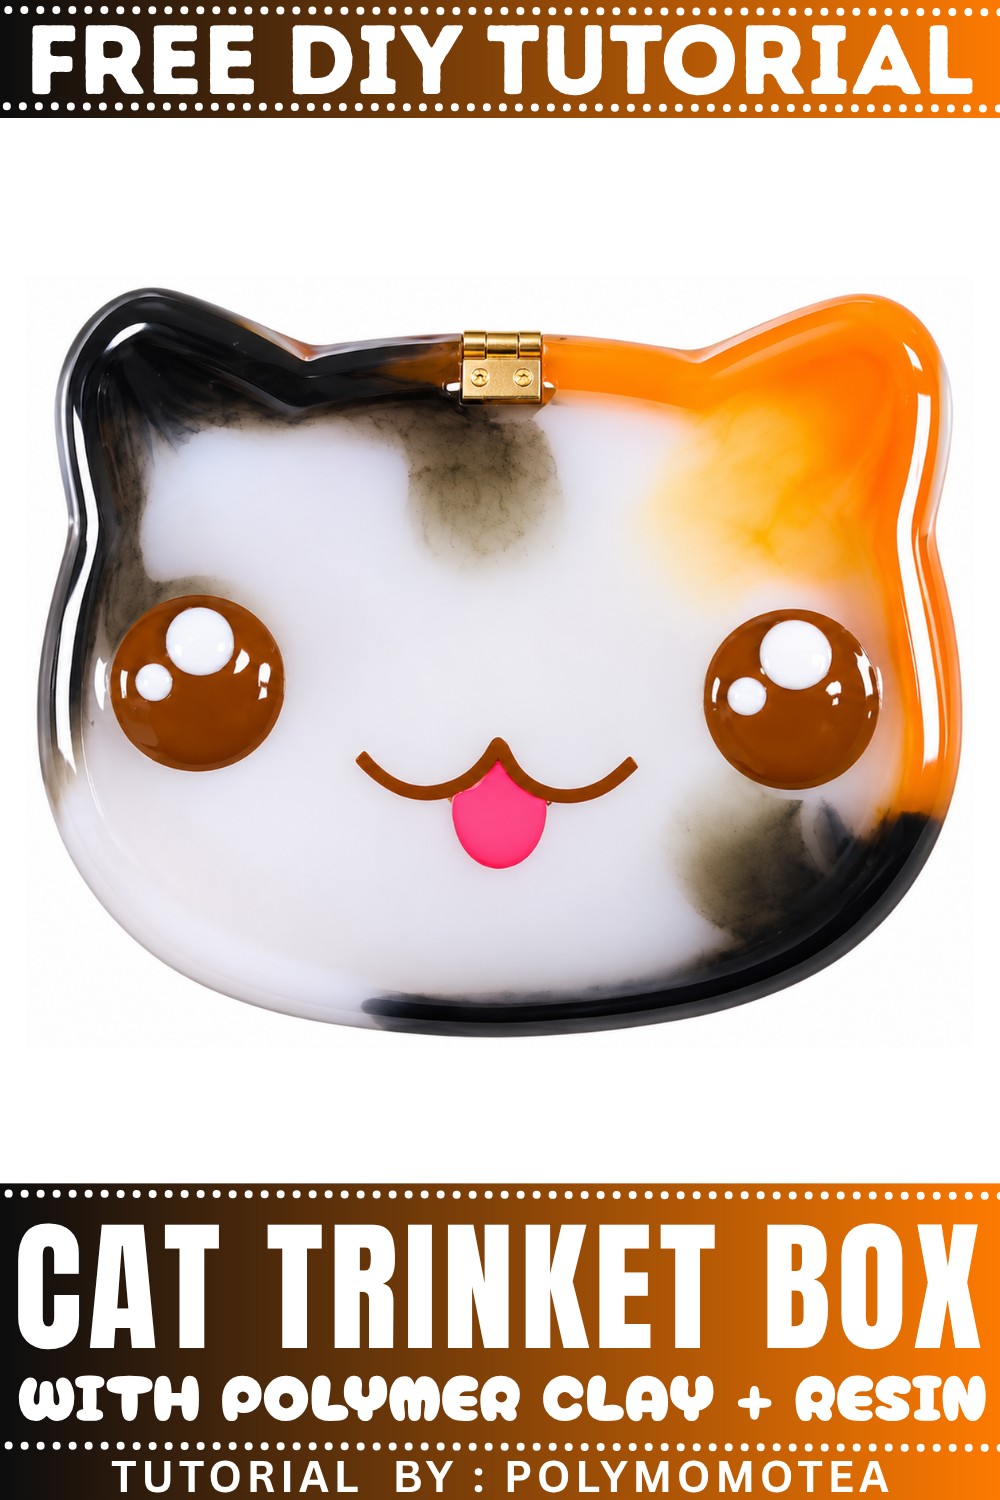
A compact box can sit on a dresser without taking much space. Its small opening encourages you to keep just a few special things together, rather than letting them disappear among larger belongings. Cat lovers may especially appreciate the playful design. It could also hold a tiny surprise when given as a birthday present.
The most appealing Free DIY Ideas often have a useful side as well as a decorative one. This cat-themed piece has both. Its gentle expression keeps it friendly, and the storage space makes it relevant to everyday routines. The result feels less like an ordinary container and more like a little companion for a favorite corner of the room.
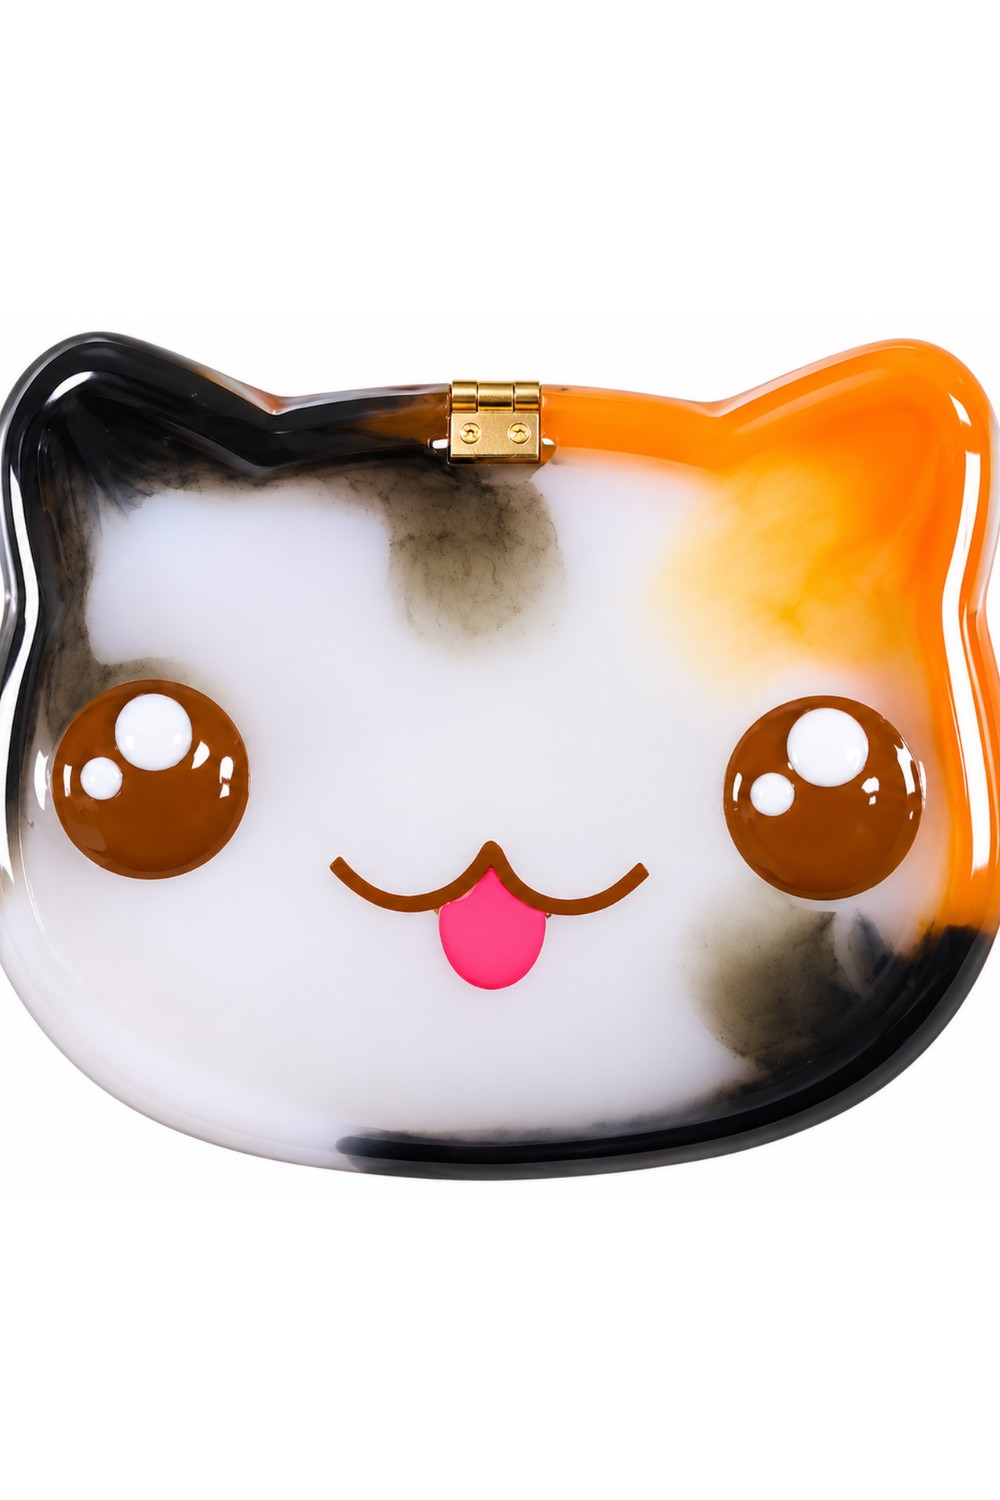
Cat Head Trinket Box Tutorial
(Polymer Clay and Two-Part Resin)
Make an adorable cat head trinket box using polymer clay and two-part resin! This charming project produces a cute, functional box that’s perfect for small treasures or for decoration. The process uses simple mold casting, custom face details, and easy assembly to help you craft a one-of-a-kind piece. Follow this beginner-friendly step-by-step guide for a fun and creative crafting session.
This cat head trinket box is made with a combination of resin and polymer clay, combining a glossy, durable base with a playful, handmade face. Using a cat-shaped mold and separate polymer clay parts for the facial features, you’ll create a box with a hinged lid that can hold tiny items. The tutorial uses tools and supplies similar to those found in a Sophie and Toffee monthly craft subscription box, but you can use alternative brands as needed.
Materials and Tools
Based on the tutorial, gather the following before you start:
Materials
- Two-part resin (3:1 ratio, or as required by your brand)
- Opaque white pigment (or alcohol ink)
- Orange alcohol ink (or resin pigment)
- Black alcohol ink (or resin pigment)
- Brown, pink, and white polymer clay (for cat face details)
- Clear plastic film (thin acetate, as used for shaker charms)
- Super glue
- Tape (for securing pieces during assembly)
- UV resin (for glazing and extra hold; optional)
- Hinge hardware (tiny hinge and accompanying nails or screws)
Tools
- Cat-shaped mold (for resin pouring)
- Mixing cups and sticks (for resin preparation)
- Scissors
- Pencil
- Sandpaper (fine grit, for smoothing resin edges)
- Drilling tool (for attaching hinge)
- Oven (for baking clay)
- Blade or craft knife (for cutting clay)
- Work mat (to protect your surface)
- Silicone mat/mold (as a raised support when pouring resin on the lid)
- Paintbrush or silicone brush (for resin, optional)
Instructions
1. Casting the Cat Head Base
1.1 Mixing Two-Part Resin
- Measure your resin components: Mix three parts of the main resin with one part of the smaller (hardener) component. (Check your specific brand for exact ratios.)
- Stir thoroughly for a few minutes, scraping sides and bottom, until the mixture is fully blended with no visible streaks.

1.2 Adding Color
- Pour a portion of the clear mixed resin into two separate containers.
- Add a few drops of opaque white pigment to the main container and mix until the color is even.
- Add orange pigment or alcohol ink to one of the mini-containers, and black pigment or alcohol ink to the other. Stir each well to achieve a rich color.

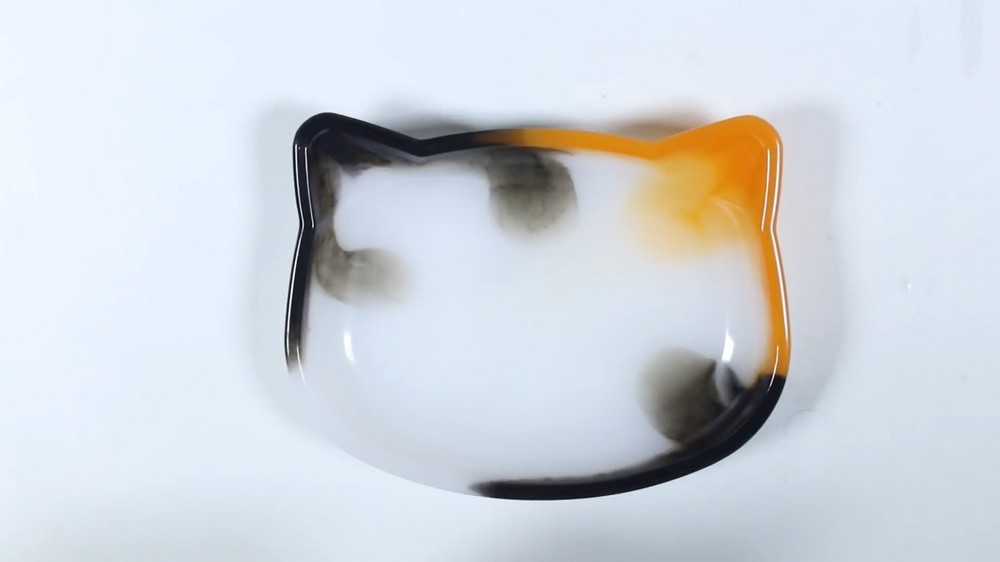
1.3 Pouring the Resin
- Pour some orange resin into one of the cat mold’s ears.
- Add the black resin in small desired areas for a calico effect, or create your own pattern around the base.
- Fill the rest of the cat mold with the white resin.
- Tap gently to help air bubbles rise and pop.
1.4 Curing and Demolding
- Allow the resin to cure for 24 hours (or as outlined by the manufacturer).
- Once cured, carefully remove the cat head shape from the mold.
1.5 Smoothing the Edges
- Use wet sandpaper to gently sand and smooth any sharp or uneven bottom edges. Rinse and dry.
2. Creating the Lid Base
2.1 Tracing and Cutting the Plastic Film
- Place the cat head upside down on a piece of paper.
- Use a pencil to trace the outline of the shape.
- Cut out this paper outline and use it as a template.
- Place the template on a sheet of clear plastic film and secure with tape.
- Cut out the cat head shape from the clear plastic film using scissors. This will form the base of your lid.
3. Making the Polymer Clay Face Details
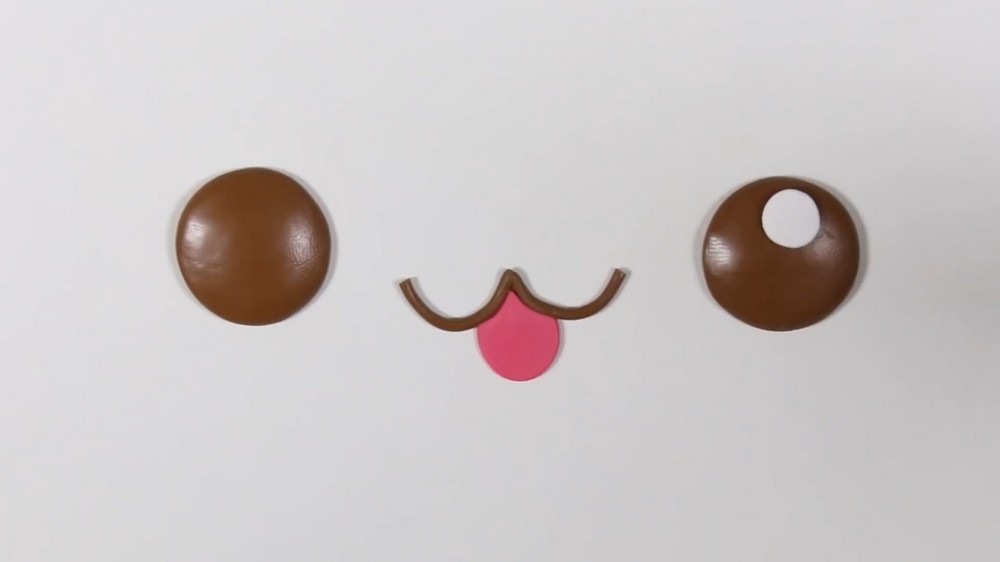
3.1 Shaping the Mouth
- Roll a piece of brown polymer clay into a thin snake.
- Cut the snake in half to create two equal pieces.
- Pinch the ends together and shape the clay into a W—this will become the cat’s mouth.
- Trim any excess clay to fit neatly in the mouth area.
3.2 Making the Nose
- Flatten a small ball of pink clay into an oval.
- Trim one end with your blade to give it a triangular point (for a classic cat nose).
- Use your fingers to gently pinch and curve the shape to fit above the mouth.
3.3 Forming the Eyes
- Flatten two small balls of brown clay into circles for the eyes.
- On each, add two tiny dots of white clay to create the cat’s “eye shine.”
3.4 Baking the Clay Features
- Arrange all facial parts on a baking tray.
- Bake according to your polymer clay’s instructions (typically around 265-275°F for 10-15 minutes).
- Let all parts cool fully before handling.
4. Assembling the Lid
4.1 Attaching the Face to the Plastic Lid
- Peel off one protective layer from one side of your cat head plastic piece.
- Super glue the eyes, nose, and mouth to the plastic film, carefully positioning them for a cute expression. Allow to dry.

4.2 Resin Coating the Lid
- Lay the face-up plastic lid onto a raised silicone mold to prevent sticking.
- Pour a thin layer of two-part resin over the surface to completely cover the clay details and plastic film.
- Allow the resin to cure for 24 hours.
4.3 Final Glaze (Optional)
- If needed, apply a layer of UV resin for extra gloss and a glass-like finish, especially if the eyes need tidying.
- Cure under a UV lamp as per instructions.
4.4 Removing Protective Film
- Once the lid is cured and fully hard, remove the second plastic film layer from the back of the lid for a crisp, clear result.
5. Assembling the Box with Hinges
5.1 Placing and Attaching the Hinge
- Position the cat head base and lid together.
- Tape the hinge onto the cat dish base to hold it steady.
- With a small drilling tool, create two holes for the hinge screws/nails.
- Insert the hinge hardware, then add a drop of super glue for extra hold.
5.2 Attaching the Lid
- Apply super glue to the other half of the hinge.
- Carefully press the cat head lid onto the hinge so the two halves can open and close.
- For extra strength, you may also apply a little UV resin around the hinge area and cure.
6. Final Touches and Use
6.1 Finishing Inspection
- Check that the hinge is secure and that the lid opens and closes easily.
- Inspect all edges for sharp spots and sand more if needed.
- Your box should now have a glossy, clear face with a cute cat expression.
6.2 Use and Enjoy!
- Use the trinket box to store small treasures, jewelry, or keepsakes.
- Admire or gift your cat-themed creation!
Conclusion
You’ve now completed an adorable cat head trinket box using two-part resin and polymer clay! Through careful casting, creative clay work, and neat assembly, you’ve crafted a functional, decorative piece sure to charm anyone. This project showcases how resin and clay can combine for strong, detailed, and beautiful results—feel free to customize your cat’s colors and face for more purr-sonalized boxes.
Leave a Reply