
Design a sweet treat with this DIY polymer clay meringue cupcake tutorial and craft a realistic, charming piece for your creative projects.
A DIY polymer clay meringue cupcake is an adorable craft project that’s as fun to make as it is to admire. This miniature design combines the classic cupcake base with a whimsical swirl of meringue-inspired frosting on top. Using polymer clay, you can create realistic textures, vibrant colors, and intricate details to bring your cupcake to life—whether you opt for pastel hues reminiscent of sweet treats or bold shades to make your piece pop. The delicate meringue-like swirl on top adds a sophisticated touch, giving the cupcake an elegant yet playful look.
DIY Polymer Clay Meringue Cupcake Ideas for Beginners
Honoring a Valuable Collaboration
It is a pleasure to acknowledge Cedric PF for his contribution to the content shared on our website. Through his YouTube channel in France, he presents original videos that offer viewers interesting ideas and opportunities to develop practical skills. We are especially grateful for his trust and permission to feature his work. We respect his role as the original creator and gladly direct our visitors to Cedric PF’s official YouTube channel, where they can continue supporting his efforts.

These charming handcrafted cupcakes are incredibly versatile. Once completed, they can be used as decorative items, personalized gifts, or even functional accessories like keychains, charms, or earrings. Their compact size makes them easy to display on your desk or shelf, and their durable nature ensures they can stand up to regular use. Plus, making them is a wonderful way to explore your creativity and sharpen your clay-sculpting skills.
Whether you’re crafting for yourself, for a gift, or to add to your polymer clay collection, a DIY polymer clay meringue cupcake is a delightful project that’s sure to bring a little sweetness to your day! Let your imagination lead and design your own tiny masterpiece.
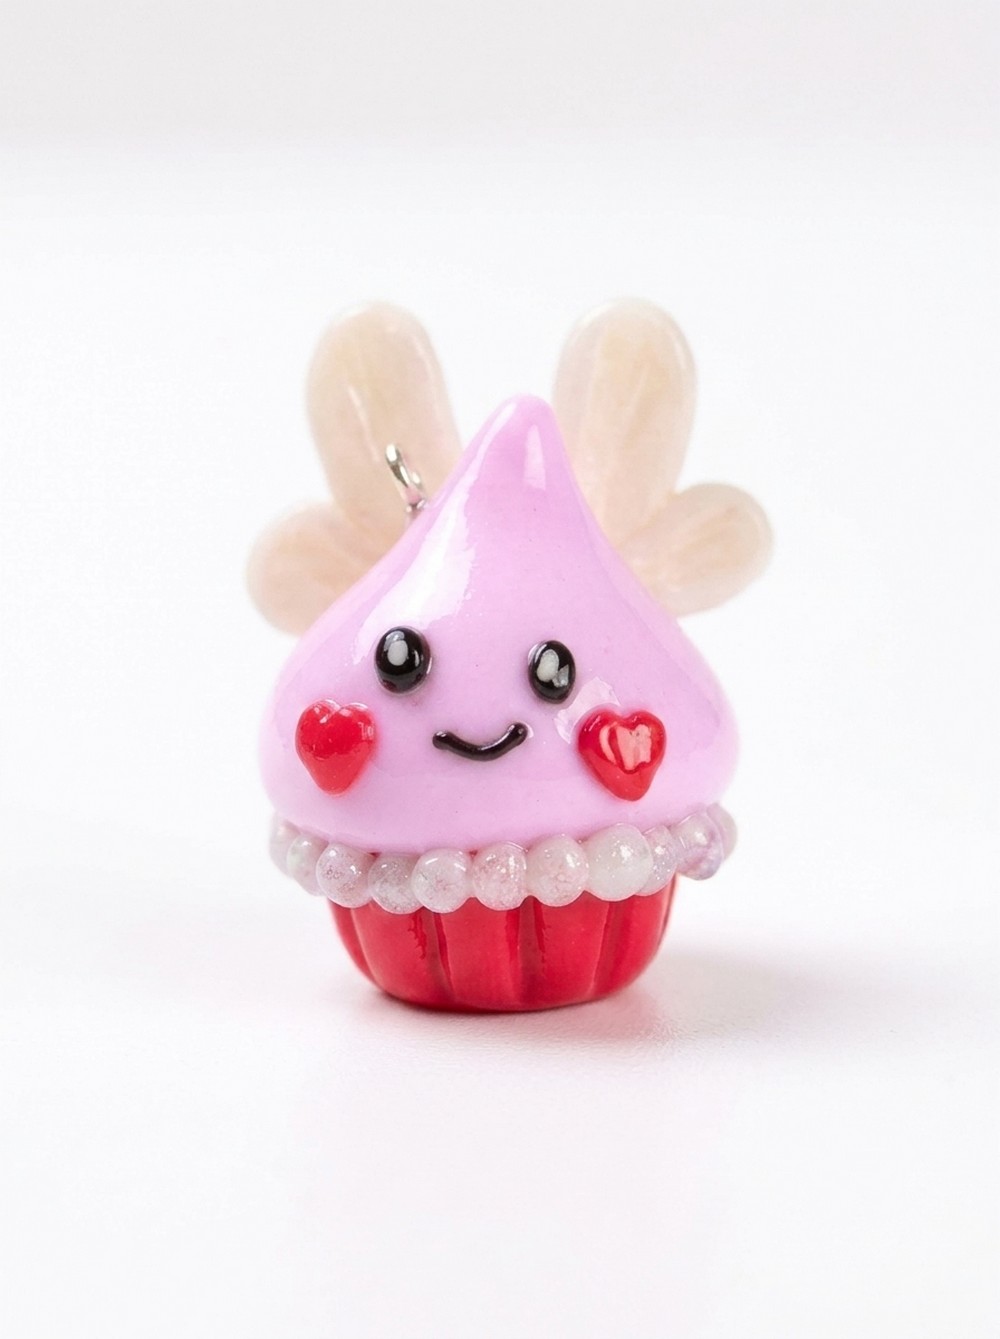
Kawaii Valentine’s Day Cupcake Charm Pattern
Essential Materials & Tools
Materials:
- Pink polymer clay (for meringue)
- Red polymer clay (for cupcake base & hearts)
- White polymer clay (for wings & decorations)
- Black polymer clay (for eyes & mouth)
- Liquid polymer clay (for attaching parts)
- Dry pastel (rosy or bluish-purple for blush/shading)
- Round-headed nail or eyepin (for keychain, optional)
- Varnish (for glossy finish)
Tools:
- Cupcake mold (DIY or store-bought)
- Blade/craft knife
- Ball tool or dotting tool
- Silicone brush or soft tool (for sculpting, smoothing)
- Wipe/cloth (for cleaning clay)
- Paintbrush (for pastel and varnish)
- Oven
Step-by-Step Instructions
1. Make the Cupcake Base
- Place a ball of red polymer clay in your cupcake mold.
- Press and flatten it evenly into the mold.
- Use your blade to trim off any excess clay for a nice, neat base.

2. Shape the Meringue Frosting
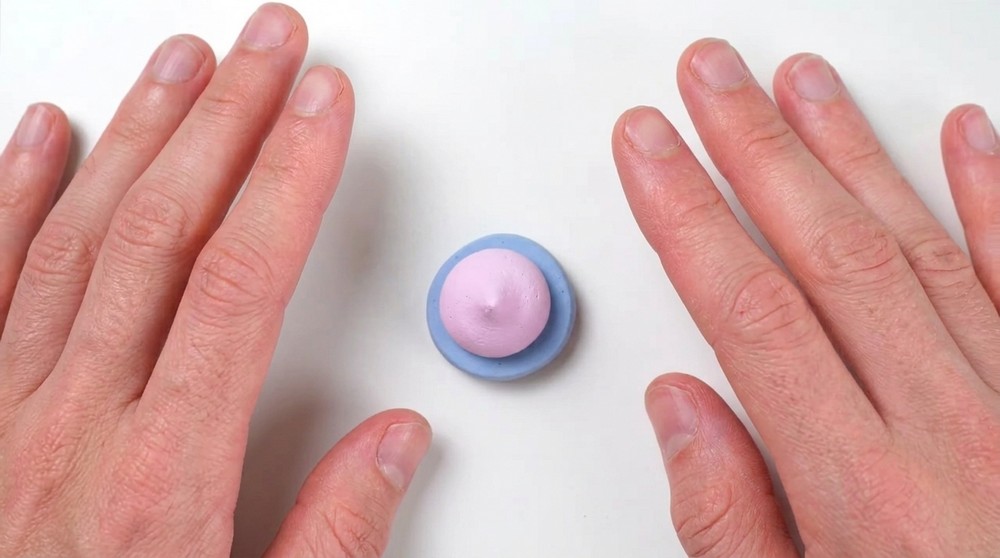
- Take a large ball of pink polymer clay.
- Flatten the bottom so it sits well atop the cupcake base.
- Use your fingers to gently curl and swirl the clay upwards, forming a peak like a meringue.
- Pinch the top for a pointy, curly effect.
- Place the meringue on top of the cupcake base, press gently so it attaches.
3. Create the Kawaii Face
Eyes and Mouth
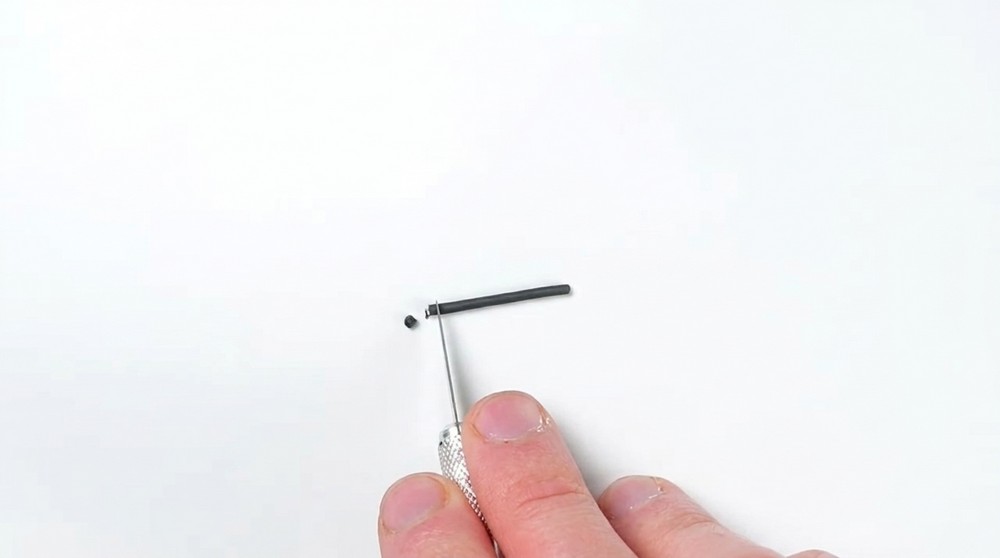
- Roll a thin sausage from black polymer clay.
- Cut three tiny pieces:
- Two for the eyes: shape into small ovals/balls.
- One for the mouth: roll and round into a curved smile shape, use a ball tool to help with rounding.
- Add a tiny dot of liquid polymer clay where you want the eyes and mouth for strong attachment.
- Use a silicone brush to position and gently press the pieces onto the meringue, forming a cute Kawaii face.
Eye Highlights
- Add two tiny balls of white polymer clay to the tops of the eyes for shiny, cute “light” effect.
4. Add Valentine Hearts (Cheeks)
- Roll two small balls from red clay.
- To make hearts:
- Cut each red ball in half.
- Put the two halves together to form a heart shape.
- Sculpt with your silicone brush and flatten tool to smooth and refine the shape.
- Repeat to get two hearts.
- Attach each heart underneath the eyes, on the “cheek” area of the meringue using a dot of liquid clay.
5. Make & Attach Cute Wings
- Roll two small sausages from white polymer clay, making sure they are the same size.
- Flatten each sausage into an oval.
- Make a smaller third sausage, flatten, and add it to each side for extra cute wing shape.
- Trim with your blade for flat, symmetrical edges.
- Use your tool to texture the wings:
- Draw a line through the middle of each wing for structure.
- Add small lines radiating from the center to each side for “feather” detail.
- Pre-bake the wings:
- Place them on a tray and bake at 110°C (230°F) for 10 minutes.

6. Add a Keychain Pin (Optional)
- While the wings are baking, gently hammer a round-headed nail or eyepin into the center top of the cupcake if you wish to make it a charm/keychain.
7. Attach Wings
- Once the wings are cooled, press them gently into the back of the cupcake (just like cat ears or angel wings).
- Mark the location by pressing them slightly.
- Apply a drop of liquid polymer clay at each spot, then reposition the wings and gently press to attach.
- Bake the cupcake (with wings attached) for 10 minutes at 110°C.
8. Add Decorative Balls
- Once cooled, unmold the cupcake.
- Roll several small balls of white polymer clay.
- Apply a little liquid clay under the cupcake, between the base and the meringue top.
- Position the small balls all around for a cute border.
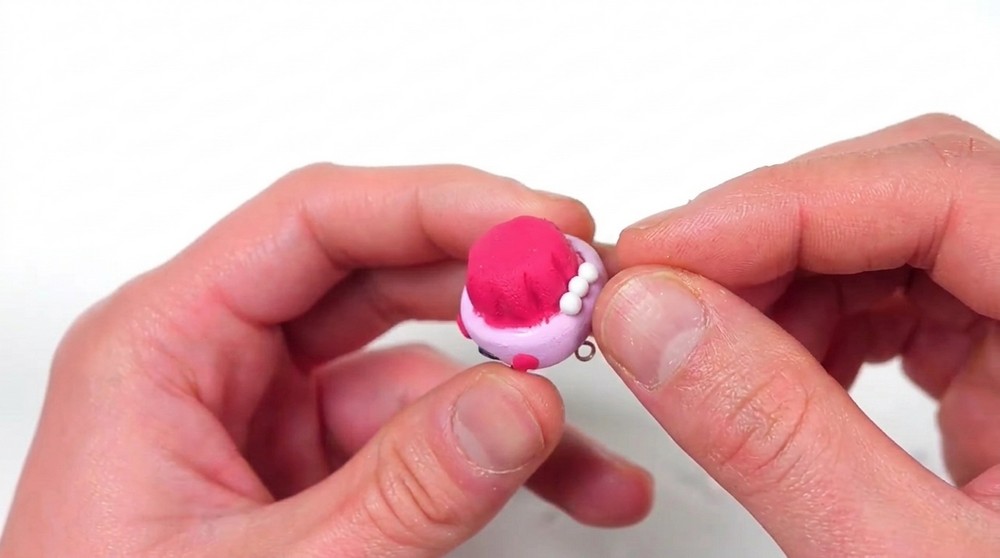
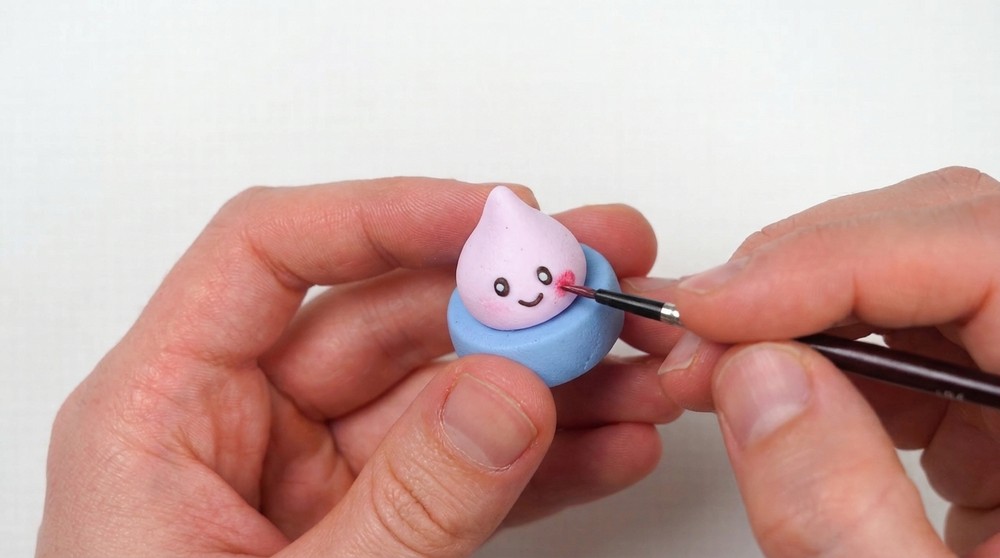
9. Add Blush & Shading
- Use a paintbrush to apply dry pastel (rosy or bluish-purple) to the cheeks or along the white balls for extra cuteness and depth.
10. Final Baking & Varnishing
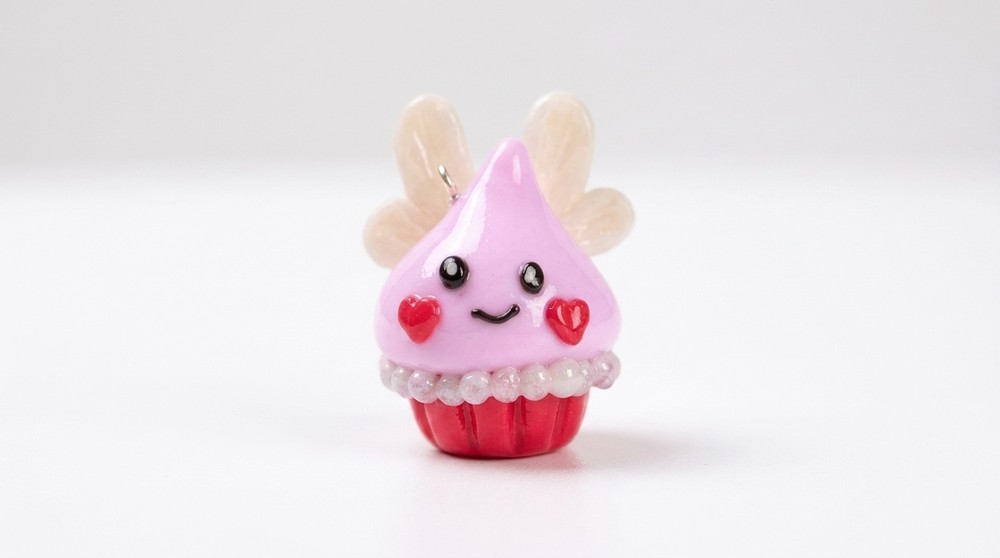
- Bake the finished cupcake for 15 minutes at 110°C.
- Allow to cool fully.
- Brush with varnish for a shiny, durable finish.
Beginner Tips
- Clay picks up dust easily: clean hands and tools often.
- Wing texture: Use gentle, short strokes for soft feather detail.
- Heart shaping: Pinch top center for “indented” look; flatten bottom for a “tip.”
- Face placement: Eyes should be wide apart, mouth low for a truly kawaii expression.
- Baking: Always let items cool between steps for easy handling.
Finished!
Now you have an adorable, Kawaii Valentine’s Day Cupcake Charm—perfect for gifts, accessories, or just to brighten up your desk!
Leave a Reply