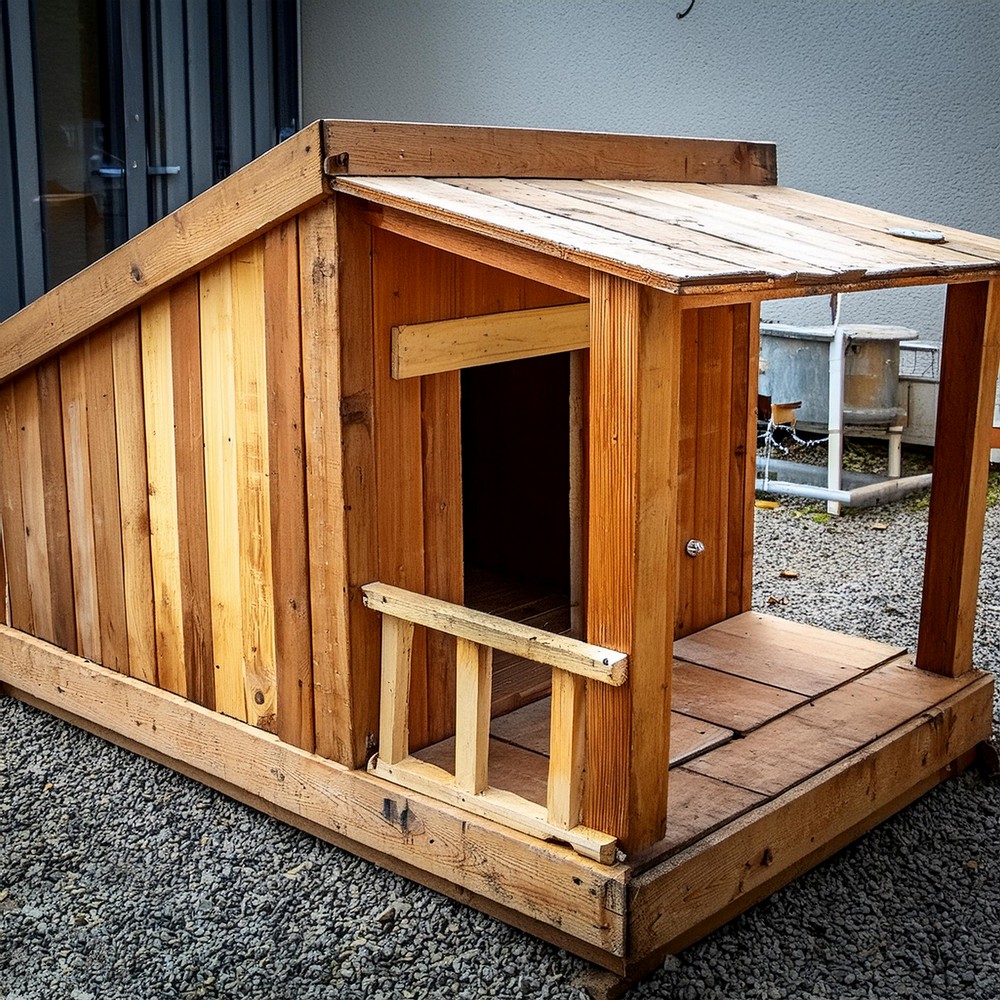
Creating a spacious and comfy heaven for your four-legged friend doesn’t have to be a complex venture. With some basic materials and a little investment of time, you can craft a lovely home for your pet using recycled pallets. It’s not just about providing a roof for them; it’s about giving them space they would love to dwell and feel safe in. This simple DIY Pallet Dog House is all about upcycling materials and expressing your affection for your pet in the most heart-warming way. So, are you ready to give your pet the cozy retreat they deserve?

How To DIY Pallet Dog House
Necessary Materials
- Pallet wood (Inexpensive or Free!)
- Plywood sheet for base and roof overlay
- Wooden cross beams
- Fiberglass insulation (Optional for weather-proofing)
- Caulk (For sealing gaps)
- Thick blankets (For extra snug surroundings)
- Stain or paint (For color and weather protection)
- Cardboard (For those who prefer templates)
- Wooden slats (For veranda and roof shingles)
- Hinges and latch for the door (If desired)
Tool Time!
- Circular saw or hand saw
- Measuring tape
- Angled rule
- Hammer or screwdriver
- Paintbrush or roller
- Safety goggles and gloves (Safety first!)
- Sandpaper (For a smooth finish)
- Insulation cutter (If using fiberglass insulation)
- Clamps (To ensure pieces stay put during assembly)
Building the Ideal Pooch Palace: Step-by-step guide
Step 1: Laying a Solid Foundation
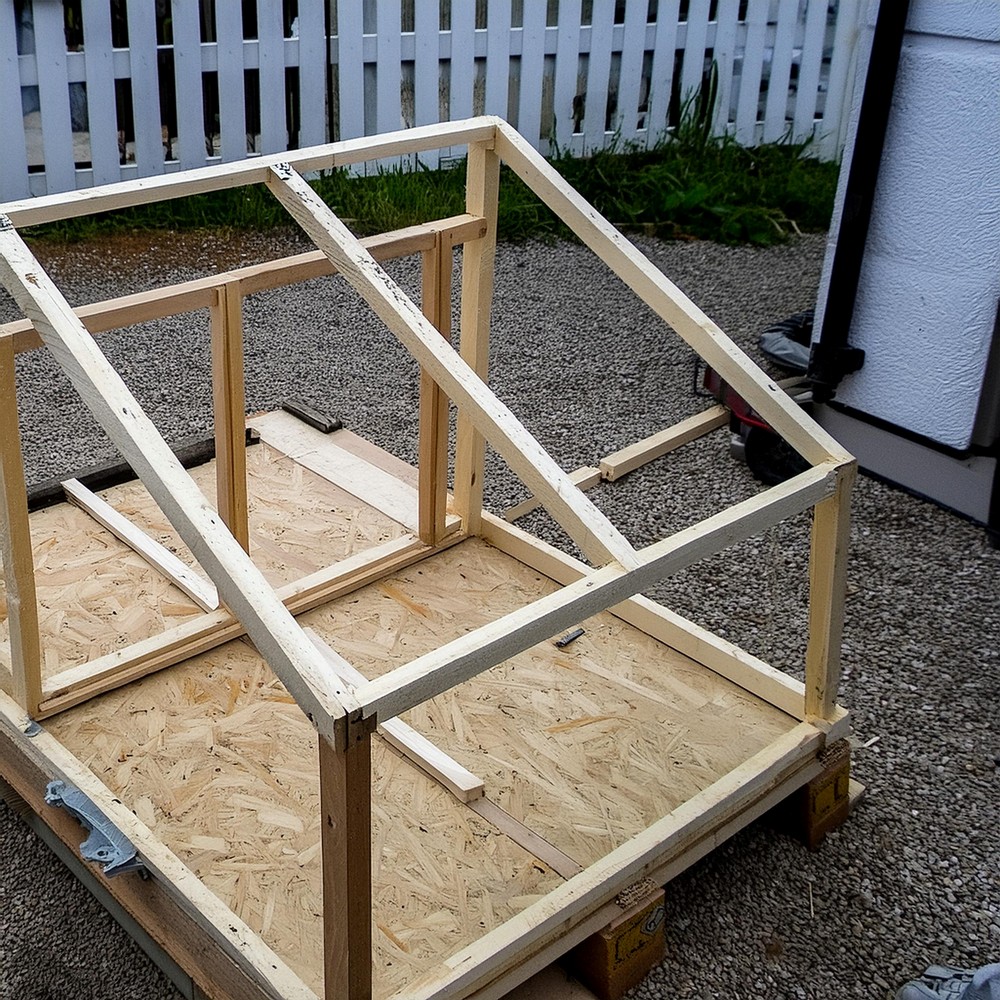
Start with a solid pallet as a base, and overlay it with a smooth plywood sheet for added surface refinement.
Step 2: Building Up
With the size and dimensions of the dog house in mind, construct the basic framework using slats of pallets comprising strong pillars and cross beams. It’s like building the bones of your construction.
Step 3: Fixing the Roof Style
Decide what type of roof you want – tilted or flat. Tilted roofs are recommended as they prevent water retention. Depending on your decision, adjust the length of the back pillars accordingly.
Step 4: Roof Frame Setup
Reliably connect the back pillars to the front with durable wooden cross beams, adding an extra one in the middle for a robust roof.
Step 5: Veranda Support
Fix veranda pillars to the roof pillars using wooden cross beams.
Step 6: Apply the Stains
Start staining the dog house frame for enhanced visual appeal and weather protection. Remember, your pet’s home should look good too!
Step 7: Detailing the Cross Beams
Double up the thickness of the side and back cross beams with additional wooden lengths.
Step 8: The Wall Game
Fill in the sides and overall frame with straight pallet planks, leaving a space unfilled for the front entrance.
Step 9: Shingling the Roof
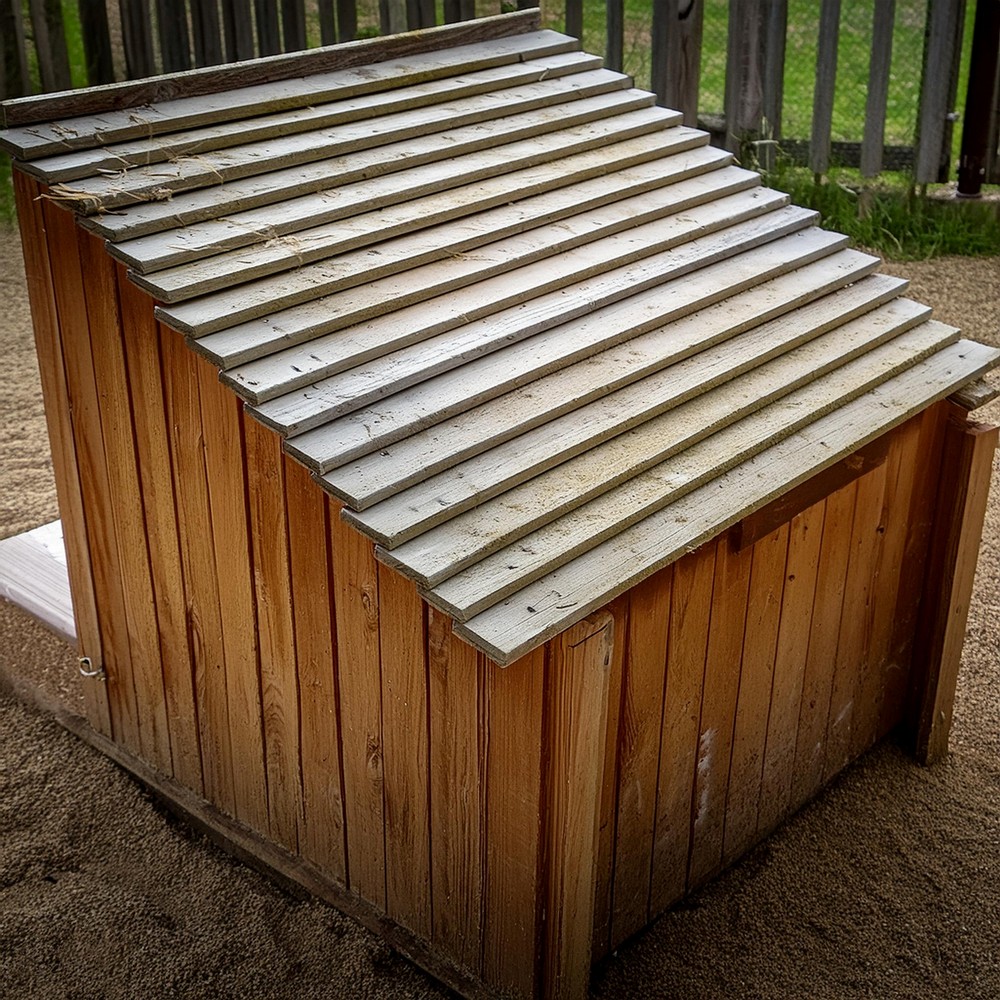
Begin from the lower backside, and arrange the pallet slats flat like stair steps. Jump in the joy of reaching the peak!
Step 10: Beautifying the Roof
Stain the roof to match the rest of the structure.
Step 11: Side Trimming of Roof
Trim the excess edges for a neat finish.
Step 12: Entrance and Veranda Fence
Next, install the door frame and one side of the veranda fence using dismantled pallet slats.
Step 13: Building the Veranda Roof
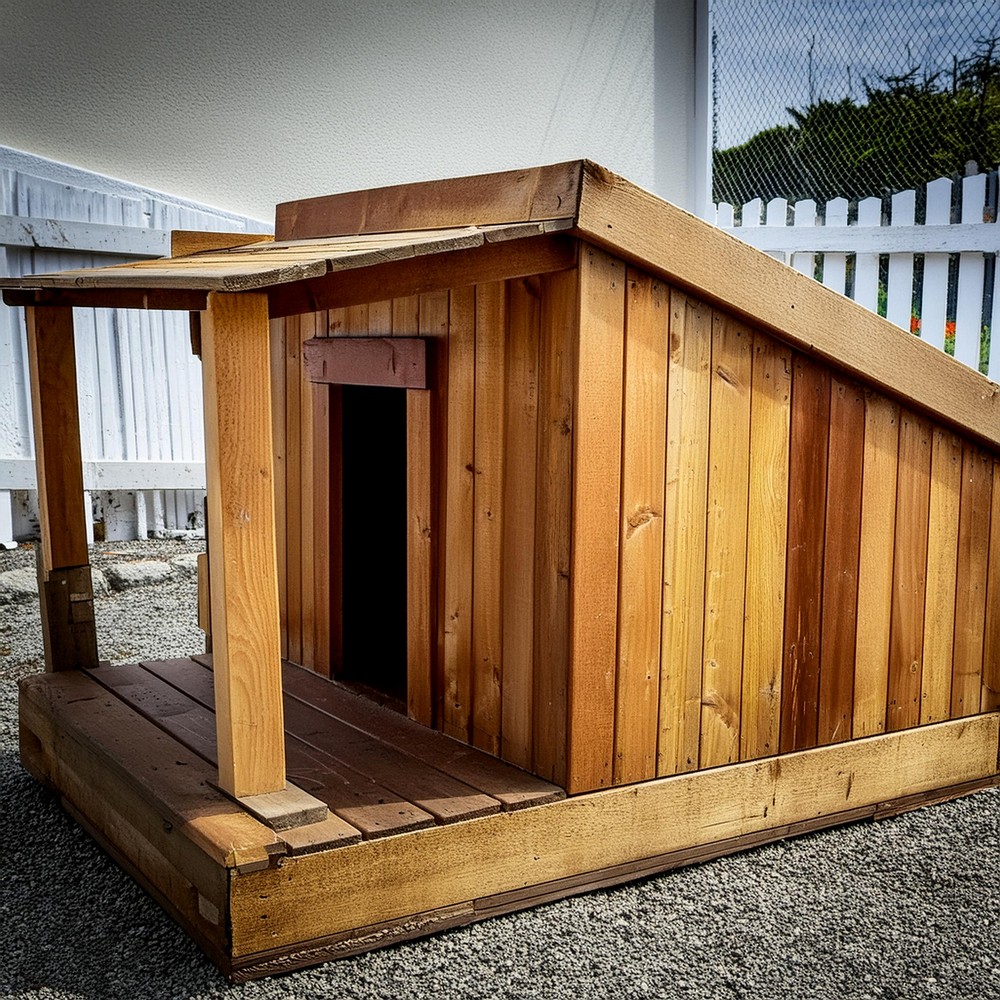
Construct the veranda roof using flat slats of pallets. Let the front edges have a V-shape for an attractive design!
Step 14: Staining the Veranda Roof
Stain the roof of the veranda properly to make it ready for your pet!
Step 15: Sealing Phase
Seal the wooden surfaces for a necessary shine, clarity and provide protection from weather and water.
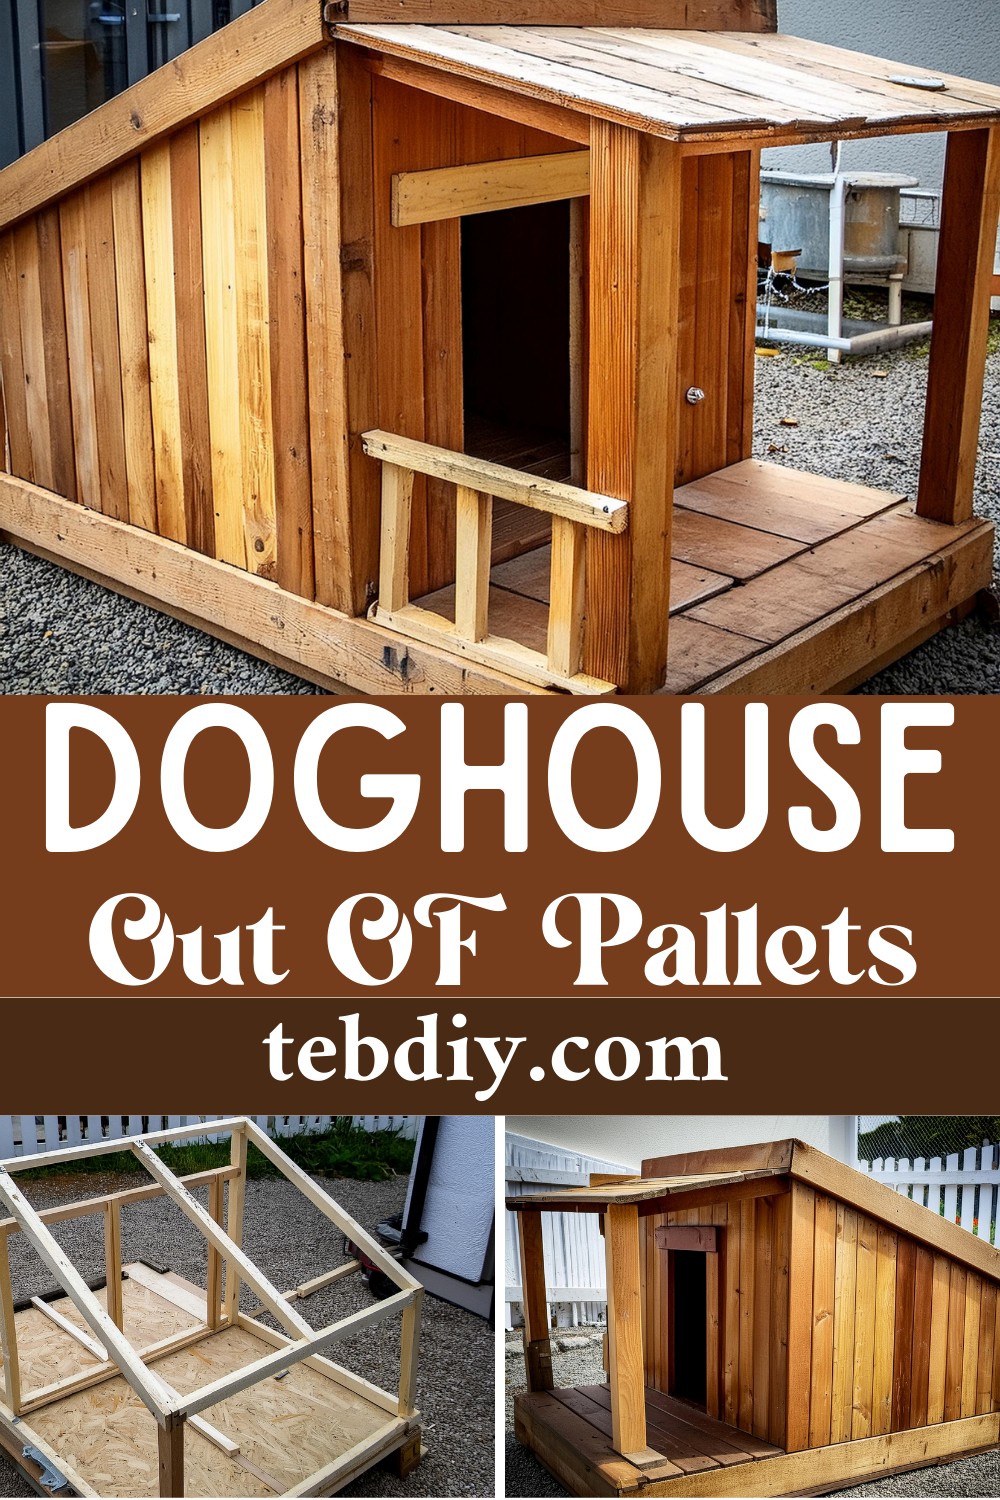
And voila, your canine companion has their very own castle ready for them! Undertaking this project not only ensures a great home for your pet but also gives you a sense of achievement. Enjoy the craftsmanship and the sight of your pet snoozing in their new snug haven!

Leave a Reply