
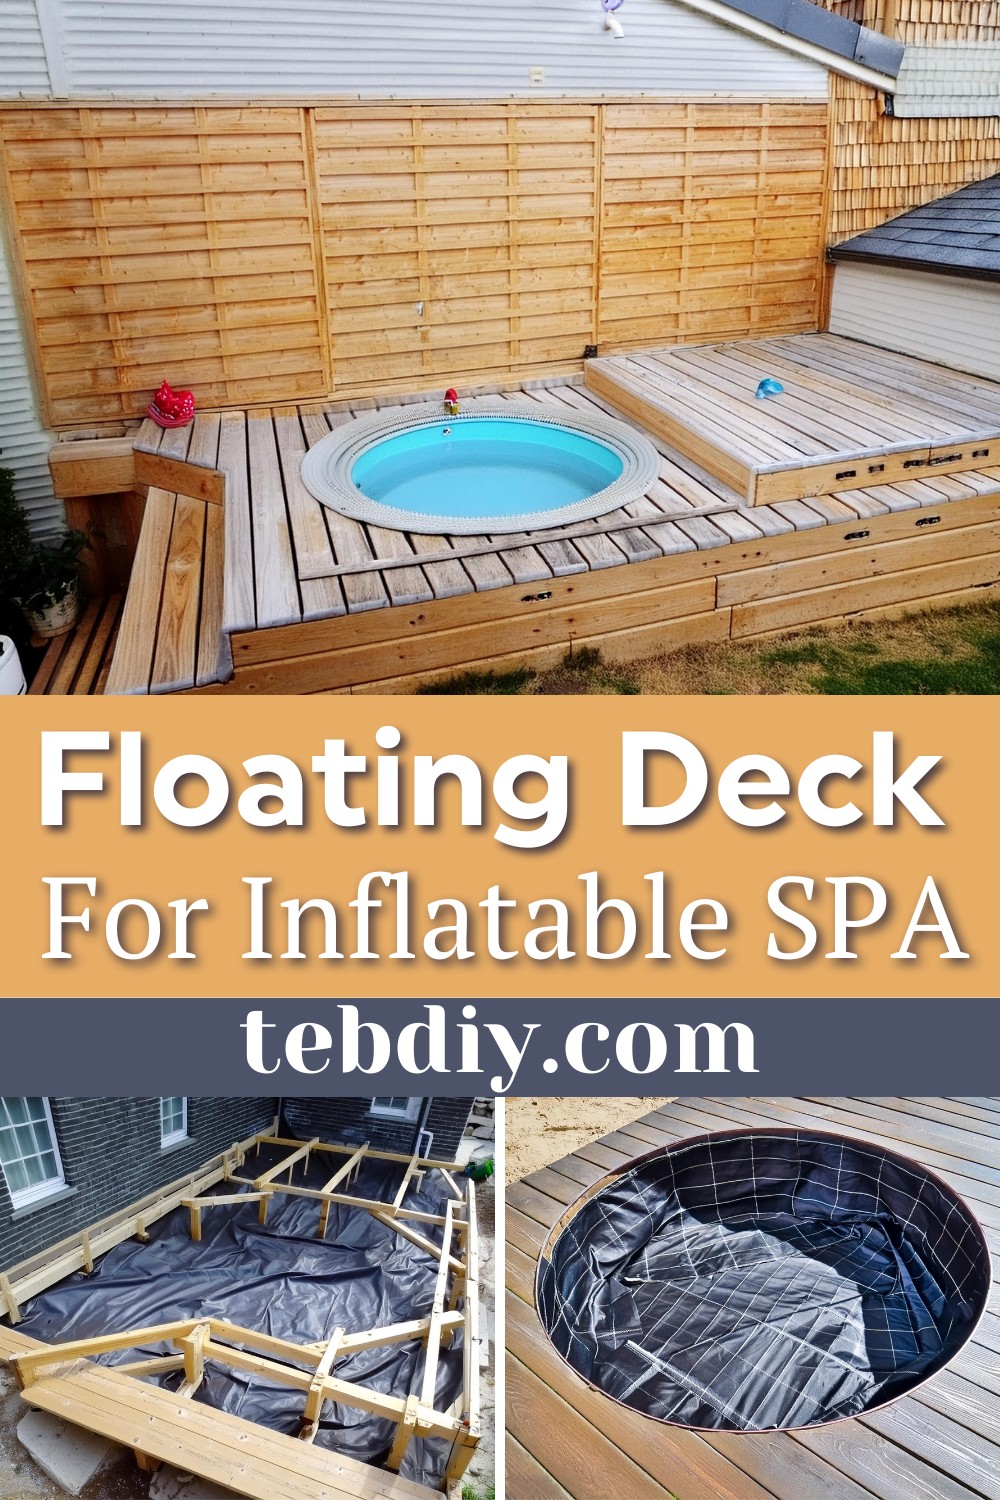
Transform an unused section of your garden into a luxurious retreat, complete with a floating deck and a cozy, inflatable spa. Not only does this project offer a unique leisure spot, but it also incorporates a motorized cover for added convenience and protection. This clever addition is not just about safeguarding against the elements or curious pets; it’s about seamlessly integrating technology into our relaxation spaces. Whether you’re looking to impress your guests or create a sanctuary for personal downtime, this project promises a blend of function, style, and tech-savviness.

DIY Floating Deck Project

Materials:
- SPA inflating Lay-z-Spa LED Round TAHITI 4 places
- 15 square pine posts (7x7x240 cm)
- 10 class 4 green pine joists (4.5x7x420 cm)
- 55 pine decking boards (14.5×240 cm, 27 mm thick)
- 3 blackout wood panels (180×180 cm x 28 mm)
- 100 ETANCO Superwood fixing screws (8×80 mm)
- 500 Spax screws for terrace (5×60 mm)
- 4 Goodia buried spotlights, warm white LED IP68 3W
- 3 gate rails, 3 mm thick, 3 meters long for 16 mm round groove wheel
- 4 gate wheels, diameter 60 mm
- Electrical and electronic equipment (Arduino, Shelly, etc.), hinges, screws, various
Tools:
- Drill press
- Miter saw
- Router (for spots)
- Jigsaw
- Table saw
- Hand tools
Project Steps:
Designing the Plan
The journey begins with devising a plan. Adjustments were made along the way to accommodate the slope of the ground and integrate the spa.

Preparing the Site
An unused garden spot was excavated to a depth of 20 cm to nest the spa, then strengthened with 36 concrete slabs to support the structure.
Constructing the Wooden Frame
Following the drafted plan, locations for each post were marked and drilled. The assembly of posts to joists commenced, with adjustments for uneven heights and extra support around the spa region.
Rethinking Design for the Pump
An oversight in planning for the pump’s location led to a quick structural modification before proceeding further.
Underlying Geotextile
Before laying the deck boards, we installed a geotextile barrier to prevent weed growth and ensure the deck area’s longevity and cleanliness.
Decking the Boards
We cut the deck boards with precision, spaced them for expansion, and secured them down as we progressed towards the spa area.
Carving Out Space for the Spa
As we approached the spa with the deck boards, we drew an outline and carefully cut it to snugly fit the spa into the deck.

Installing the Spa
With the deck in place, we set up the spa, tested it, and sealed the surrounding deck sides.
Creating an Access Hatch
Craftsmen meticulously created an access hatch to make maintaining the spa’s heater and pump system easier.
Embedding the Spotlights
Workers cut precise recesses in the deck to embed spotlight fittings, then installed and wired them for added ambiance.
Assembling the Cover
Due to the cover’s heaviness, designers implemented a sliding mechanism with gate hardware, making it easier to use than a lift-open model.
Enhancing with Wall Panels
Installers hung decorative wall panels to cover an unattractive cinder block wall, converting an eyesore into a visually appealing feature.
Motorizing the Cover
An innovative approach repurposed a sliding gate motor to automate the cover’s opening and closing, adding a luxurious touch to the deck’s functionality.
Wiring the Electronics
A custom control box for the motor and lights incorporated smart technology for operation via smartphone or voice command.
Additional Access Hatch
For under-deck access, another hatch was created on the deck’s high side, completing the construction phase.
Enjoying the Outcome
The project not just survived the summer but provided a blissful haven for relaxation and leisure, proving the effort utterly worthwhile.
Reflection and Looking Forward:
By addressing common queries and justifying the approach taken, the creator emphasizes the project’s value, inviting others to find inspiration in this blend of practicality and innovation.
This project exemplifies how a bit of creativity, some technical ingenuity, and a weekend’s worth of effort can transform an ordinary space into an extraordinary escape right in your backyard. Whether it’s the satisfaction of DIY or the comfort of your new spa retreat, this floating deck project is bound to be a rewarding venture.
Leave a Reply