
Ever thought about blending functionality with pet-friendly design in your living space? This DIY Double Dog Kennel TV Stand project embodies just that, aiming to offer your furry friends a cozy corner right in your living room while serving as a stylish TV stand. Perfect for households with two large dogs, this DIY project not only gives your pets their own space but also enhances your interior decor.
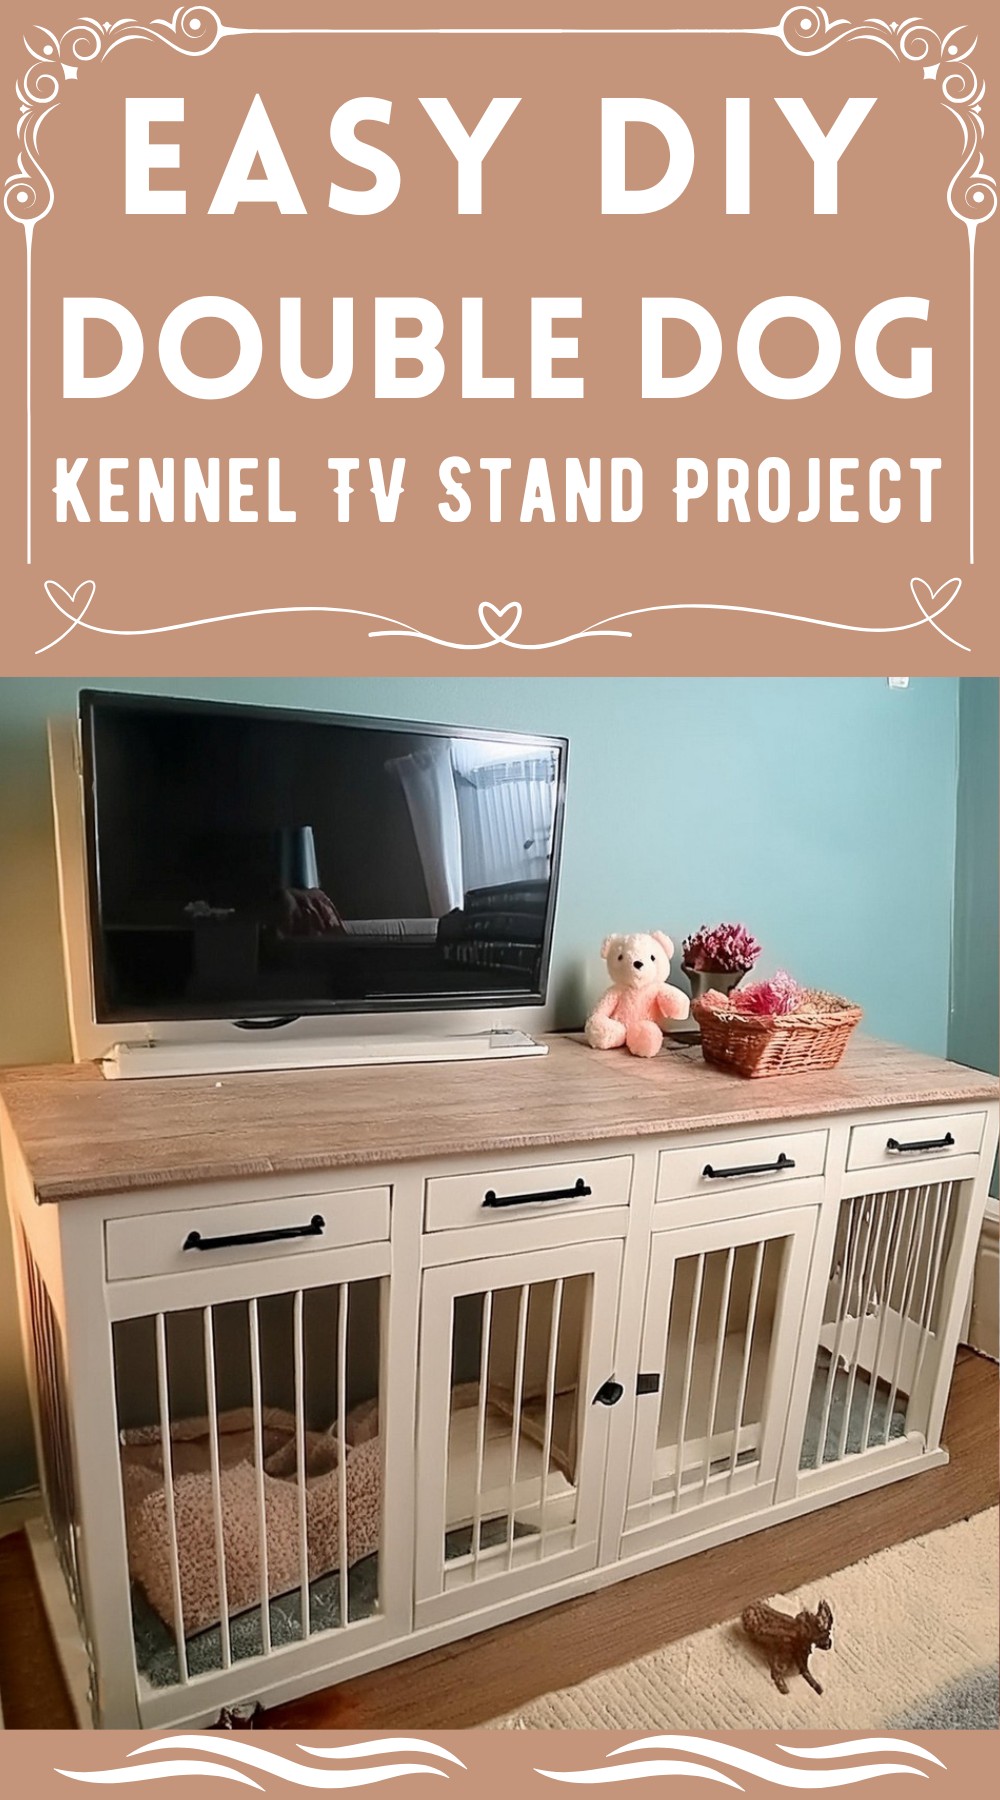
DIY Double Dog Kennel TV Stand Project

The design allows for personalization in finishing, like painting or staining, to match your existing furniture. Whether you’re an experienced woodworker or a novice looking to tackle a new challenge, this project promises a fulfilling journey from start to finish, creating a piece that’s as practical as it is aesthetically pleasing.
Materials List
To embark on this project, here is what you’ll need:
- (1) 2×4 – 10′-0″
- (2) 2×4 – 8′-0″
- (7) 1×3 – 10′-0″
- (7) 1×6 – 10′-0″
- (1) 1×6 – 8′-0″
- (4) 1×8 – 8′-0″
- (2) 1×2 – 10′-0″
- (2) 1×2 – 8′-0″
- (4) 3/4″ Plywood – 41 1/8″ x 25 1/2″
- (28) 3/8″ Diameter Rebar – 30″
- (6) 3/8″ Diameter Rebar – 25″
Tools Required
- Pocket-hole jig
- Miter saw
- Screwdriver
- Wood glue
Step-by-Step Guide
Constructing the Base
- Preparing the 2x4s: Begin by cutting the 2×4 lumber according to the dimensions provided, creating two 86 1/2” lengths and five 22” pieces.
- Assembly: Lay out the 2x4s to form the bottom frame. First, apply wood glue for initial adhesion. Then, drill pocket holes and secure the pieces together using 2 1/2″ screws.
Crafting the Vertical Panels
- Cutting the 1×3 Lumber: Measure and cut the 1×3 lumber for the front panel which includes two 84 1/2” lengths, five 28” pieces, and prepare ten 30” rebar pieces.
- Assembly: After drilling dual pocket-holes on both ends of the 28” pieces, attach them only to the bottom lumber initially. Then, drill 3/8” diameter holes (1” deep) on both top and bottom lumber to fit the rebar, following the same process to build the side and center divider panels. Secure these vertical panels to the base with 3/8″ screws.
Floor and Top Shelf Panels
- Cutting Plywood: Measure and cut the 3/4” plywood to the specified dimensions.
- Placement: Position the plywood directly atop the base frame and use 2 1/2” screws to affix it securely.

Assembling the Door Panels
- Preparing 1×3 Lumbers: Cut 1×3 lumber into two 18” pieces, two 23” lengths, and prepare three 25” rebar pieces for each door, making two sets in total.
- Assembly: Drill dual pocket-holes at both ends of the 1x3s. Initially secure them only at the bottom. Space the rebar at 3 1/4” O.C., adjusting as necessary for your dog’s size.
Constructing the Back Panel
- Lumber Assembly: Use seven 84 1/2” 1x6s, drilling pocket holes as indicated before gluing them. Secure firmly with 1 1/4” screws. Alternatively, other lumber sizes or 3/4” plywood can be used to achieve an 84 1/2” x 38 1/2” back panel.
Building Upper Shelves
- Cut & Place: Measure and cut ten 1×6’s to 25 1/2” and five 1×3’s to 4”. Follow the dimensions given for exact placement, creating four identical 18” drawer bays. Use 3/8” pocket holes for securing and fill any visible holes with 3/8” dowel.
Crafting the Drawers
- Drawer Construction: Utilizing 1×6’s, 3/4” and 1/4” plywood, construct the drawer, leaving a 1/2” gap for drawer slides. Cut the panels accordingly and join them using 1 1/4” pocket screws. Attach a 1/4” plywood base with nails.
Finishing the Table Top
- Preparing the Surface: Cut four 1x8s (or 2x8s for athicker top) to a length of 86 1/2”. Drill pocket-holes as per the layout and secure them using 1 1/4” screws, ensuring the pocket-hole side faces downward.

Sanding and Painting
- Finishing Touches: Sand the wood surfaces until smooth and apply either an oil-based stain for a deeper finish or paint in your chosen color for a customized look. Prime, let dry, and apply the paint coats as desired.
This project, combining utility with pet comfort, adds a personal touch to your living space while keeping your pets close and content. Dive into this rewarding DIY journey and create a unique piece that reflects your style and love for your furry family members.

Leave a Reply