

Imagine a table that’s not only a cinch to create but also as light as a feather and sturdy to boot! The DIY Cardboard Table is a crafty wonder, transforming the humble cardboard box into a chic, eco-friendly piece of furniture. Without the need for fancy tools just scissors or a cutter and with materials that can often be found for free, this table is a budget-friendly choice for any home. Plus, it’s customizable to fit any space, and with a splash of paint, becomes a conversation-starting centrepiece. This cardboard creation is proof that great design doesn’t have to come with a hefty price tag.
DIY Cardboard Table
Materials Needed:
- Cardboard boxes and sheets
- Cutter
- Scissors
- Ruler
- White glue
- Glue gun
- Wallpaper glue (or similar adhesive)
- Old newspapers
- Tile adhesive
- Paint
- Varnish
- Brush
Tools Required:
- A cutter or scissors for cutting the cardboard
- A ruler for measuring
- Glue gun for fastening pieces together
- Brushes for applying glue, paint, and varnish
Step-by-Step Guide
Preparing the Base
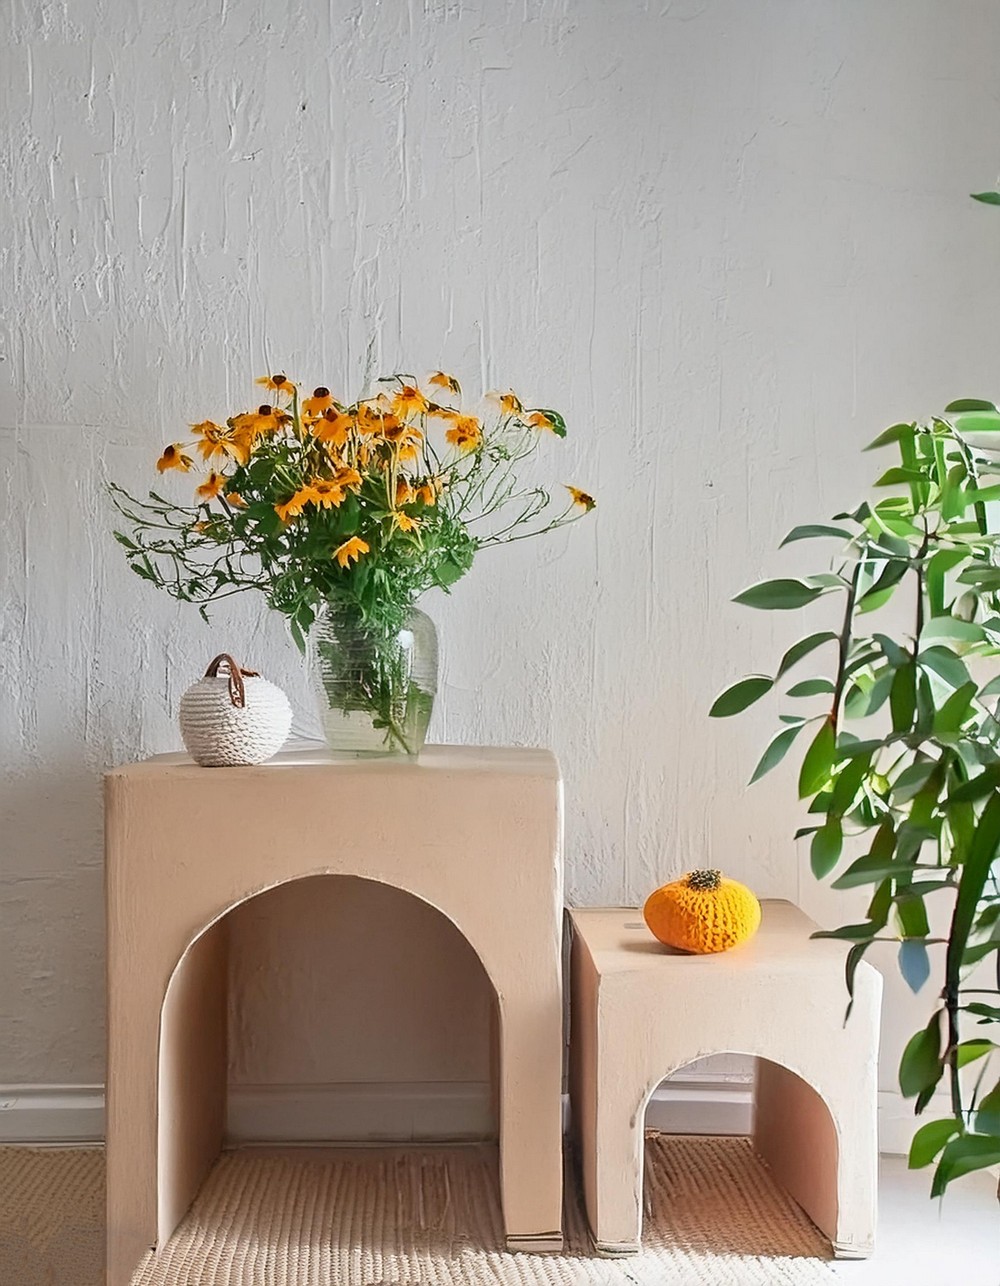
- Initiate the project by selecting a cardboard box of desired size, considering the dimensions you want for your table. A 20x20x15 inch box works well for a large table.
- Decide which side of the box will serve as the top, and reinforce it by gluing the flaps together. Use weights such as books to press down on the sides while the glue dries.
Crafting the Arches
- Draw an arch on one side of the box, ensuring there’s a minimum 4-inch gap from the top and 2½-inch from the sides, enhancing structural integrity.
- Duplicate the arch on the opposite side, using the cutout from the first as a stencil to ensure symmetry.
- Keep the box’s solid flaps attached; they’ll add strength.

Making the Inserts
- For internal support, take additional cardboard pieces and cut arch-shaped inserts that will fit snugly inside the box.
- Precision is key – measure and cut the inner arches carefully, as they will fortify the table structure. Aim for an inner arch every 2½ inches across the box’s length.
Assembling the Structure
- Attach the cut arch inserts within the box using a glue gun, starting from the center and working your way out to ensure even support.
- Introduce additional cardboard rectangles between each arch for extra reinforcement, applying two rows for robustness.
Finalizing the Design
- Close up the arch by attaching a cardboard rectangle across its span, allowing it to curve according to the arch’s shape. Secure it with white glue for an adjustable fit and use masking tape to hold it in place while it dries.
- Optionally, add an extra layer of cardboard on top of the table to create a flat surface, ensuring no gaps are present.

Waterproofing and Finishing Touches
Option 1: Papier Mache
- Begin by tearing old newspapers into strips.
- Dip the newspaper strips into wallpaper glue and layer them over the table for a smooth finish.
- After drying overnight, apply paint in coats, allowing for adequate drying time between, followed by a final application of acrylic varnish for protection.
Option 2: Tile Adhesive
- Apply a coat of tile adhesive directly to the cardboard with a spatula for texture.
- Once dry, sand for smoothness if desired, remove any dust, and then paint in two coats. Varnish can be applied for additional durability.
Making the Decision
- Papier Mache: Offers a lightweight finish but requires patience for layering and drying.
- Tile Adhesive: Provides a quicker solution with a bit more heft to the finished product, and with a texture that disguises the cardboard origin.

Leave a Reply