
Build a modern and sturdy accessory with this crochet t-shirt yarn bag pattern, featuring a chunky texture that is perfect for daily use.
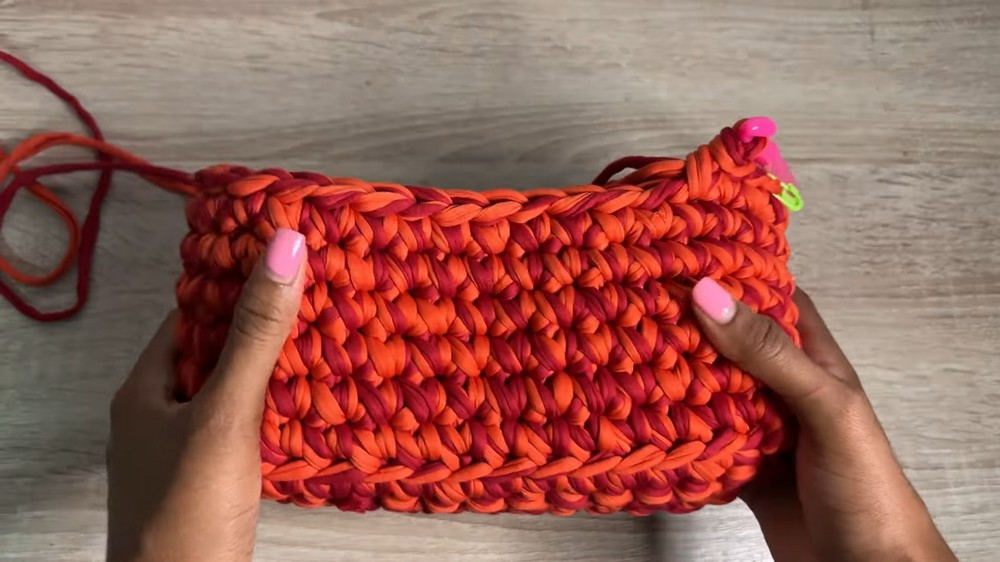
Fusing industrial strength with a high-fashion silhouette a crochet t-shirt yarn bag pattern acts as a definitive guide for a robust accessory that makes a powerful visual statement. This design utilizes thick and slightly elastic recycled fabric strips to produce a dense and chunky texture that stands upright with impressive structural integrity. The resulting item is remarkably durable and easy to maintain making it a premier choice for carrying heavy laptops, gym gear, or daily essentials without the risk of overstretching.
High-End Crochet T-shirt Yarn Bag Pattern for a luxury feel
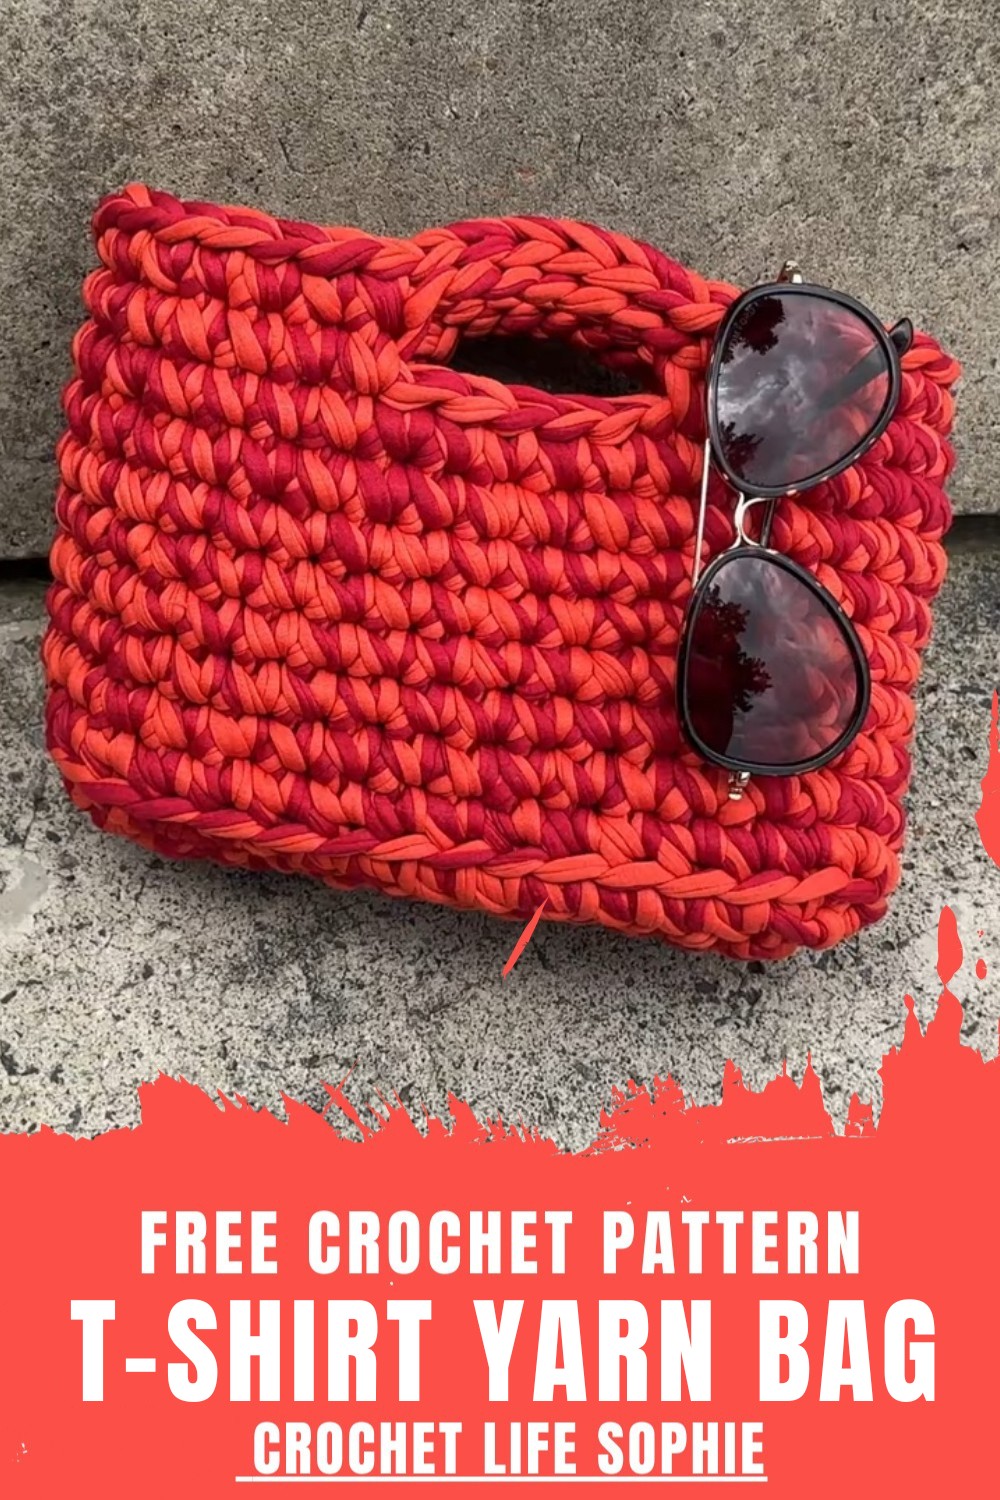
The overall look is defined by oversized and architectural stitches that offer a modern and minimalist appeal suitable for a sleek city wardrobe. Beyond its rugged utility the material provides a soft and cushioned feel against the skin ensuring comfort during long commutes or errands.
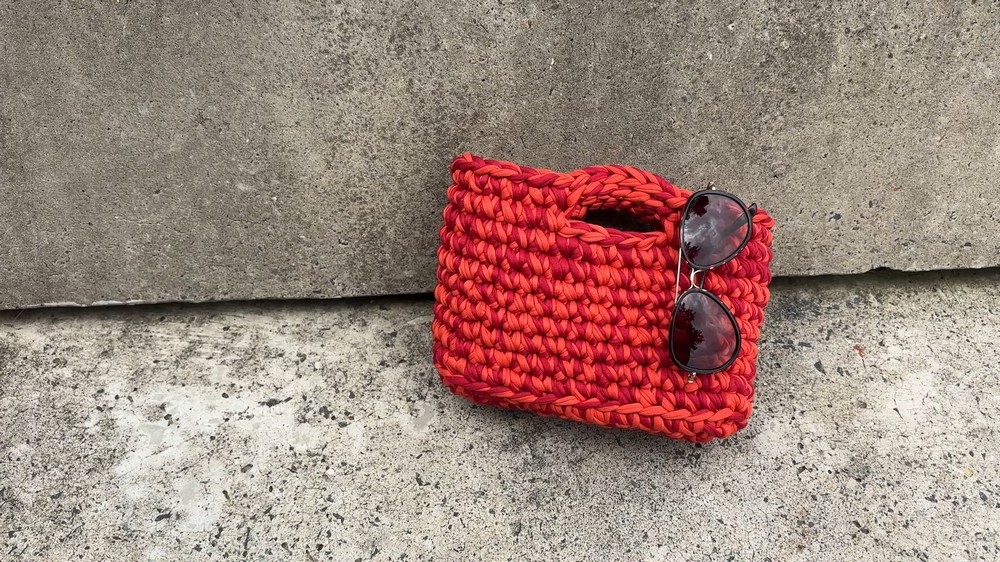
This accessory presents a sustainable way to repurpose textile surplus into a chic and heavy-duty vessel that feels both substantial and luxurious. It delivers a polished and intentional finish that balances bold presence with practical everyday reliability.
Step-by-Step Details
Materials Needed
- T-Shirt Yarn: Use two strands held together for a chunky look and added durability.
- Crochet Hook: 12 mm crochet hook.
- Scissors: For cutting yarn.
- Tapestry Needle: For weaving in the ends to secure the work.
- Stitch Markers: Sophie’s essential suggestion to help maintain symmetry and track rounds during the process.
Steps to Crochet the Chunky Bag
1. Begin with the Base
- Start with a slipknot, leaving enough tail to weave in later.
- Chain 14 stitches for a medium-sized bag. For a wider or narrower bag, adjust this number.
- Skip the first chain and work a single crochet (SC) into the second chain from the hook. Continue with SCs in each chain until the end (13 SCs if you started with a chain of 14).
- For the base, create five rows of single crochets:
- At the end of each row, chain one, turn your work, and single crochet across every stitch.
Tip: If you want a bag with a wider base, make more than five rows of single crochet stitches.
2. Shape the Edges
- In the last row of the base, make an increase of two single crochets in the last stitch at each corner to create a curved shape for the bag’s base.
- Begin working SCs into the side stitches (bumpy edge of the base). Insert your hook where possible; there’s no specific “right” way to do this.
- Weave in the starting yarn tail as you crochet along the sides for a clean finish.
- When you reach the opposite side of the base, continue working SCs across. Add two SCs in the corner stitch to define the curve.
- Finish the round by working SCs along the final side and increase at the corner.
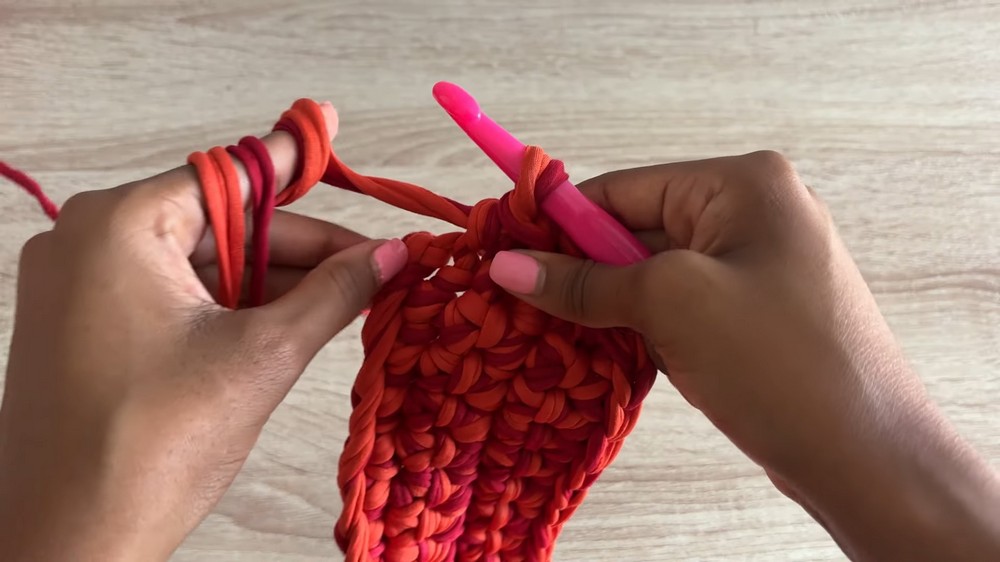
3. Build the Bag’s Walls
- Work SCs in the back loop only (BLO) for one full round after completing the base. This creates a distinct transition from the flat base to the walls of the bag.
- Once this round is complete, switch to SCs in both loops for a smoother finish and continue crocheting in each stitch around.
- Use a stitch marker to note the starting point of each round for consistency.
- Crochet a total of eight rows for the walls of the bag. If you want a taller bag, you can create more rows, or fewer rows if you prefer a shorter bag.
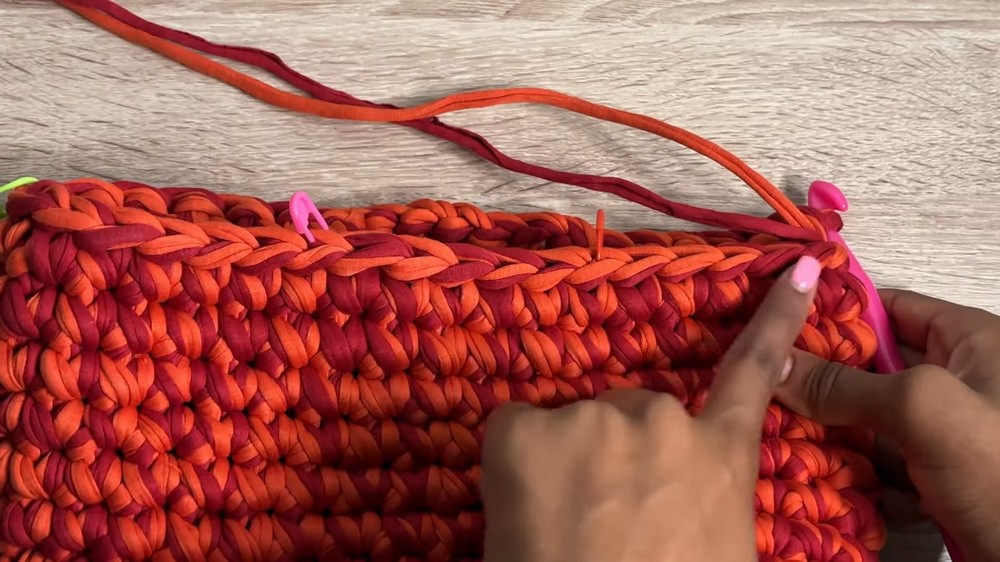
4. Create the Handles
- Flatten the bag to determine the best position for the handles. Use stitch markers to mark the placement for symmetry.
- Start at the first stitch marker, work six SCs, then chain seven (or adjust for longer handles).
- Skip the necessary stitches for the handle gap and attach the chain with a single crochet.
- Continue with SCs to the second stitch marker. Repeat the same steps to create the second handle on the opposite side of the bag.
- Work SCs across the rest of the round, ending at the starting stitch marker.
5. Reinforce the Handles
- Work slip stitches along the chains for each handle. This ensures the handles are sturdy and retain their shape over time.
- After slip stitching across the chain, attach it back to the body of the bag with a single crochet and resume working SCs around the bag.
- When you finish reinforcing the handles, continue with SCs for one more round.
- End the project by working final slip stitches, chaining one, and leaving a long yarn tail for weaving in securely.
6. Weave in the Ends
- Use a tapestry needle to weave in the two strands of yarn from the ends one at a time for extra security.
- For a cleaner finish, weave in the stitches along different sides of the bag.
Special Features
- Durability: Holding two strands of t-shirt yarn together makes the bag sturdy and stretch-resistant.
- Customizable Handles: Sophie demonstrates how to adjust handle length for practicality and personal preference.
- Seamless Transition: The BLO round creates a clean, professional separation between the base and walls of the bag.
- Beginner-Friendly: This straightforward bag design is ideal for beginners while still offering some opportunities for learning skills like increasing, working with stitch markers, and slip stitching for reinforcement.
Level of Difficulty
This project is beginner-friendly with easily explained techniques like single crochet, increases, working in the round, and using stitch markers. Slight difficulty may arise when working along the bumpy side of the base, but it becomes manageable as Sophie offers flexibility in how you insert the hook.
Tutor’s Suggestions
- Use Stitch Markers: Make full use of stitch markers to track rounds and ensure symmetry in the handle placement.
- Allow for Stretch: T-shirt yarn stretches over time, so make shorter handles if you want them to remain snug.
- Count Consistently: Count stitches frequently, especially on the sides and corners, to maintain thhttps://youtu.be/4yBCYoXrgvk?si=HtM2jMnhqAoHCjIOe bag’s shape.
- Weave Securely: Weave in yarn ends one strand at a time for increased durability and a professional finish.
Uses
- Reusable Tote: Perfect for groceries, books, or daily shopping trips.
- Casual Accessory: A stylish and lightweight everyday bag.
- DIY Gift: Thoughtful and practical for friends or family.
- Home Storage: Organize items like yarn, toys, or other small household items.
Tip
When working with t-shirt yarn, maintain a light grip on your hook to avoid wrist strain due to the chunky nature of the yarn. Relax your tension to create smoother, even stitches.
Conclusion
Sophie’s tutorial makes it easy to craft a beautiful and functional chunky crochet bag that blends style, practicality, and sustainability. The step-by-step process ensures crocheters of all experience levels can follow along and create something versatile and long-lasting. Whether for personal use, gifting, or storage, this customizable project is sure to satisfy your crochet goals.
Leave a Reply