
Providing your dog with a DIY feeder not only complements your living space with its classic design but also caters to their comfort, encouraging a healthier posture during mealtimes. It will not only serve as a piece of furniture; but an example of expressing love and care for your pet in a unique and practical way.
DIY Dog Feeder Project

With a mix of carpentry and metalwork, you’ll create a durable and stylish dog feeder that’s sure to be a talking point among your pet-loving friends. So, gear up for a fulfilling DIY project that will bring joy to both you and your dog.

Materials List
- Wood plank
- 2 stainless steel dog bowls
- 1 Metal profile 1″x1″ Cal 20 (0.9 mm)
- Caps for Profile 1″x1″
- Black paint can
- Mineral oil
Tools Used
- Abrasive cut-off saw
- Welding machine
- Angle grinder
- Miter saw
- Table saw
- Sander
- Flexometer (tape measure)
- Corner clamp
- Speed square
- Protective equipment (gloves, goggles, etc.)
- Drill
Step by Step Making Process
Cutting the Pieces
Begin by cutting the metal profiles that will form the structure of the feeder. Use either an angle grinder or an abrasive cut-off saw. For this project, you’ll need:
- 2 pieces of 8”
- 2 pieces of 11”
- 4 pieces of 5.5”
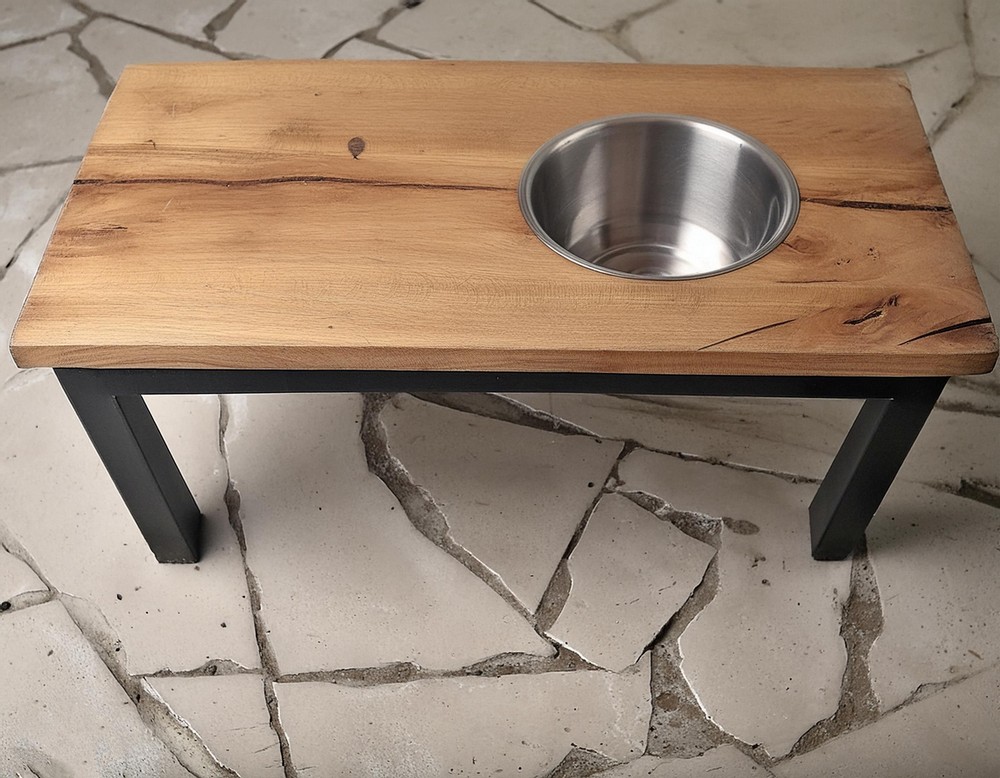
If you choose a galvanized metal profile, remember to clean the weld areas thoroughly to avoid the release of harmful gases. For the wood section, utilize a table saw and miter saw to cut a plank measuring 17.5”x9.5”.
Welding Time
With all metal pieces cut to size, it’s now time to weld them together, ensuring each connection is square. You might find a design or sketch helpful to guide you during this process. After welding, clean the welds with an angle grinder for a neat finish.

Painting
Next up, let’s get painting. A can of black spray paint will do the job nicely. Apply a light first coat over the entire metal structure, followed by a second, heavier coat, and then a third to ensure full coverage. Allow about 10 minutes of drying time between coats. Once dry, fit the caps onto the ends of the metal profiles.
Crafting the Wood Base
Mark the diameter of the dog bowls on the wood plank, not including any tabs or edges that extend beyond the bowl’s base. You can use a thread to measure the circumference accurately, then a bow compass to draw two circles for the bowls.
Cutting the Wood Base
After outlining the bowls’ diameters, drill a pilot hole inside each circle to insert the jigsaw blade. Carefully cut out the circles. If done right, the bowls should fit snugly into these openings.
Final Touches
The last step involves refining the wooden base. Use a sander to smoothen the surface and round off the edges. Treat the wood with mineral oil to enhance its appearance and protect against moisture. Lastly, drill from the bottom of the metal structure to attach the wood base securely.
This project combines the warmth of woodwork with the industrial feel of metalwork, creating a truly classic dog feeder that shows your pet how much you care.

Leave a Reply