
In the quest for unique and eco-friendly garden solutions, the DIY Staggered Pallet Planter stands out as a beacon of creativity. For those amongst us who find beauty in the rustic charm of repurposed materials, this project aligns with the ethos of sustainability while offering a delightful challenge. Whether you’re navigating the spatial limitations of a cozy garden or simply aspire to elevate your green space in style, this planter promises not only to enhance your area visually but also to introduce a tiered dimension to your planting adventure.
DIY Staggered Pallet Planter Project

Tools:
- Tape Measure
- Hammer
- Pry-bar or Wrecking Bar
- Handsaw (with a 45-90 handle for marking)
- 2 Clamps (G-Clamps or Quick Clamps)
- Pencil and Permanent Marker
- Hand Drill or Cordless Drill/Driver
- Various Drill Bits and Drivers
- Sandpaper
- Paintbrush
Materials:
- Two Pallets
- Two Wine Boxes or Wooden Crates
- No.8 x 1” (4.0 x 25mm) Screws (approx. 200)
- Fence Paint or Exterior Wood Stain
- Two Small General-purpose Tarpaulins

Step-by-Step Guide
Planning and Acquisition
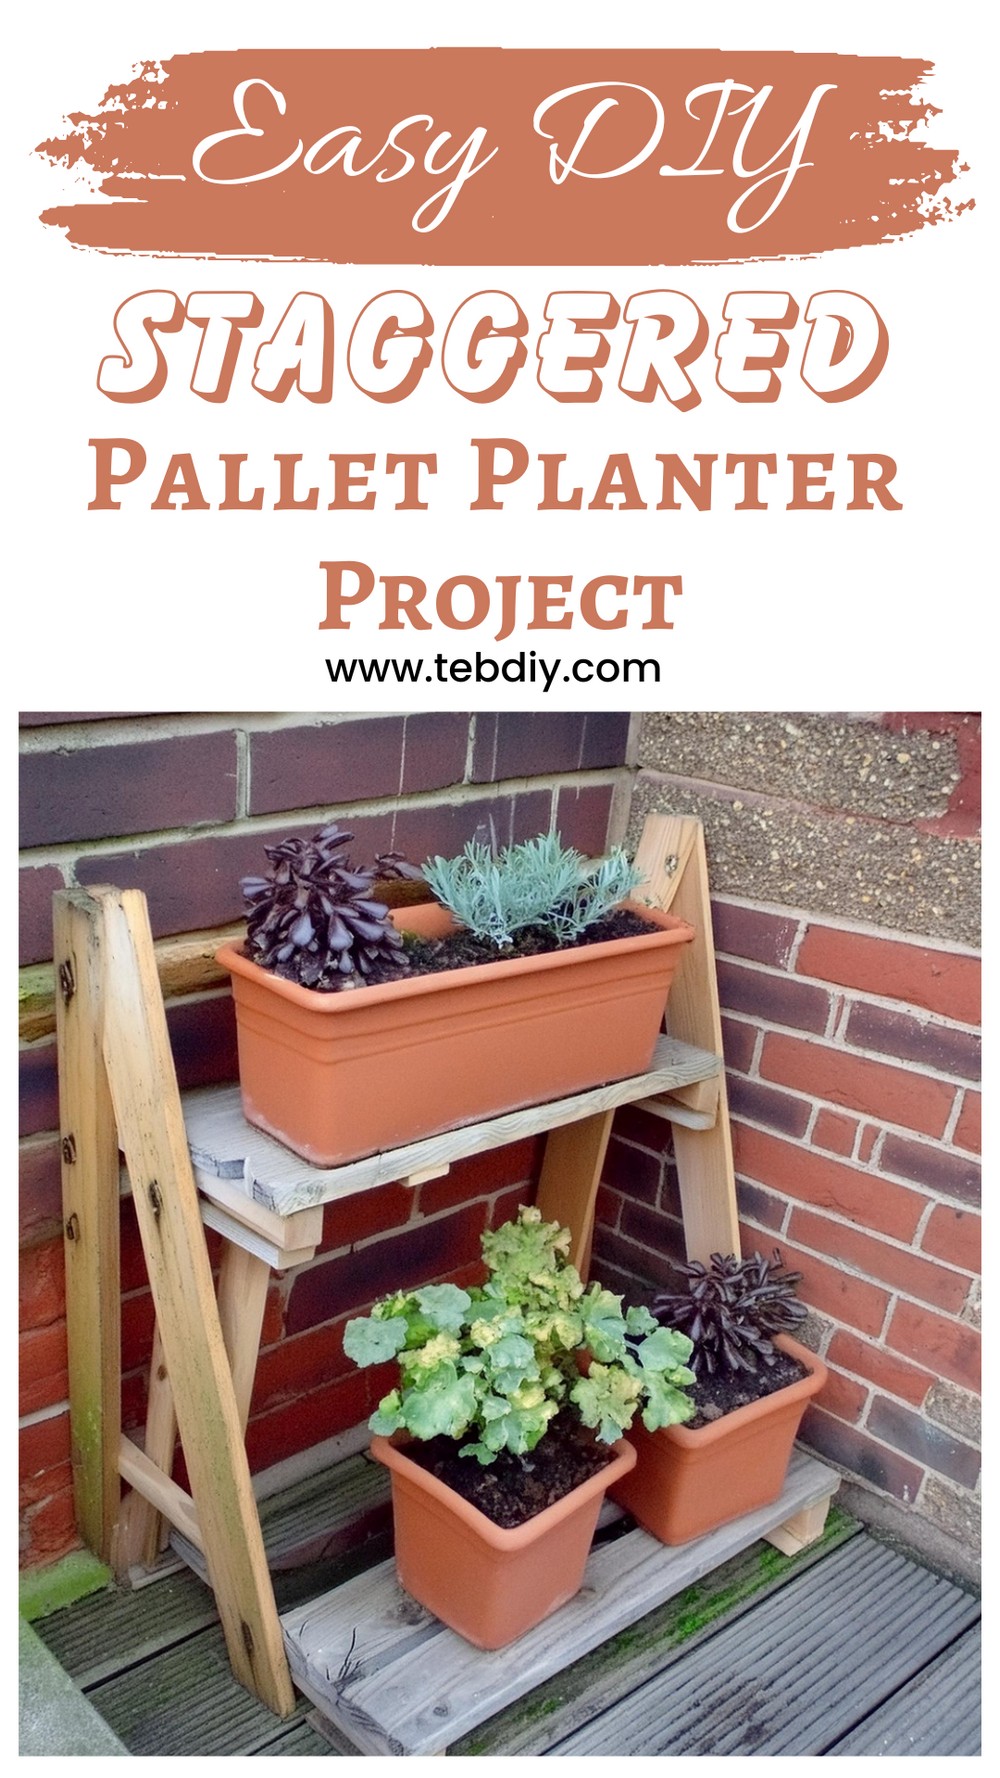
The journey begins with a vision; in this case, a drawing skillfully detailing the planned structure. The first mission involved obtaining two wine boxes from a local wine merchant, generously provided at no cost. The adventure continued at a garden center, where two pallets were acquired—again, free of charge. Before ideas could solidify, dismantling the pallets was paramount, a task that soon proved a test of patience and skill.
Dismantling Pallets
Disassembling pallets can be both an art and a struggle. Turning the pallet upside-down facilitated the removal of nails from the base planks using a crowbar or wrecking bar, a process requiring both finesse and force. Removing nails hidden below the wood’s surface demanded a gentle yet firm approach, with a careful inspection for imperfections concluding this step.

Crafting the V-Frames
With lumber in hand, marking and cutting the legs for the V-frames ensued, guided by precise measurements and a bit of trigonometry. Assembling these frames involved counter-boring, pilot drilling, and screwing the pieces together. Ensuring the legs would stand flush against the ground, a testament to the meticulous planning and execution required.
Constructing the Top Shelf
Turning attention to the horizontal components, the first task was slicing a plank in half to serve as the rails for the top shelf. Slats were then painstakingly sawed from planks, arranged, and spaced with meticulous care. Once satisfied with the layout, the rails were cut at their ends for a smoother finish, and slats were affixed, ensuring structural integrity and aesthetic appeal.
Assembling the Bottom Shelf
Mirroring the process of the top shelf with minor adjustments to account for weight distribution and aesthetic considerations, the bottom shelf brought its own set of challenges and learning opportunities. Experimentation played a key role in achieving balance and stability.
Joining the Shelves to the Frames
Precision was vital in attaching the shelves to the V-frames. Ensuring the structure remained level and square required careful measurement and adjustment, a process that underscored the project’s demand for attention to detail.

Weatherproofing and Final Touches
The final leg of the journey involved protecting the planter against the elements with a coat of fence paint, applied diligently to every nook and cranny. Preparing the wine boxes for their new life as planters included a similar treatment, with an additional step of lining them to prevent water damage and contain the plant roots, ensuring longevity and functionality.
Conclusion
The Staggered Pallet Planter project encapsulates the essence of creative recycling, challenging individuals to see beyond the ordinary uses of everyday materials. Through each step, from conception to completion, the project not only fosters a deeper connection with the materials. And the environment but also leaves a lasting imprint of craftsmanship and sustainability in one’s garden space.

Leave a Reply