
In the heart of a cozy family gathering, the idea of trading the traditional Christmas dinner for an adventurous build-your-own pizza night sparked a challenge that couldn’t be ignored. The quest to construct a homemade pizza oven from mere thoughts into a reality commenced. This DIY Super-insulated Black Glitterball Pizza Oven project isn’t just about creating another oven; it was about designing a super-insulated, efficient, and visually stunning Black Glitterball Pizza Oven that invites you into the magical world of wood-fired pizzas. The process of making this oven not only promises delightful cooking experiences but also stands as a fun DIY adventure.
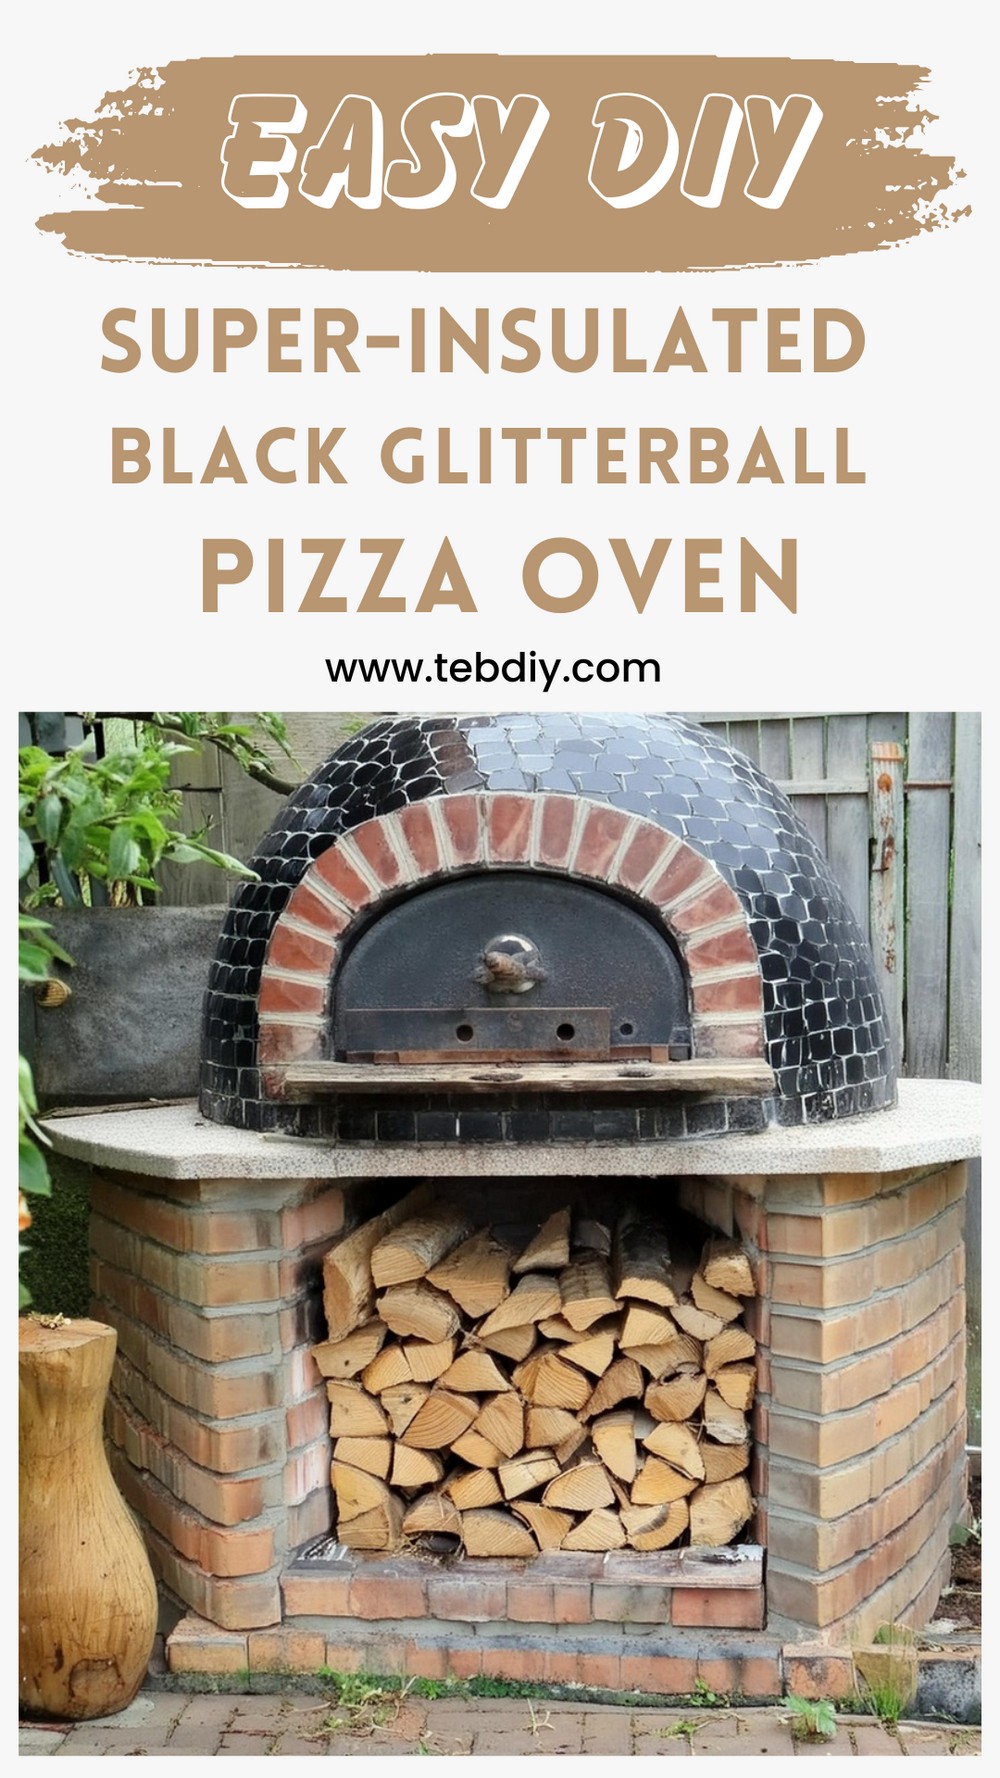
DIY Super-insulated Black Glitterball Pizza Oven

Materials Required
Physical Build:
- Reclaimed red clay bricks (~220)
- Ciment Fondu (2 bags – £97.80)
- Fast setting cement (3 bags – £60)
- Perlite (100 litre bag – £27.99)
- Ceramic wool (5 metres 50mm thick – ~£160)
- Gravel (3 or four bags – ~£12)
- Sharp sand (2 bags – ~£7)
- Builders sand (5 bags – ~£15)
- Fire bricks (reclaimed)
- Steel rods (6 metres of 10mm – ~£20)
- Steel chimney flue (reclaimed)
- Reclaimed vented cowling/cap
- Ceramic tiles, broken
- Reclaimed red terracotta roof tiles (broken)
Mould Making:
- Drawing materials
- Plywood (reclaimed)
- Hardboard (reclaimed)
- Acrylic sheet (reclaimed)
- Aluminium coated foam board (reclaimed)
- Duct tape (a roll – ~£4)
Oven Door:
- Plywood (reclaimed for the exterior door)
- Waste elm block (door handle)
- Steel sheet (inner heat shield)
- Ceramic wool (leftovers from above)
Tools Needed:
- Spade
- Float trowel
- Pointing trowels
- Circular saw
- Jigsaw
- Angle grinder
- Metal snips
- Large serrated knife
- Impact driver
- Hammer
- Spirit level
Step-by-Step Guide to Building Your Pizza Oven
Step 1: Oven Design and Preliminary Research
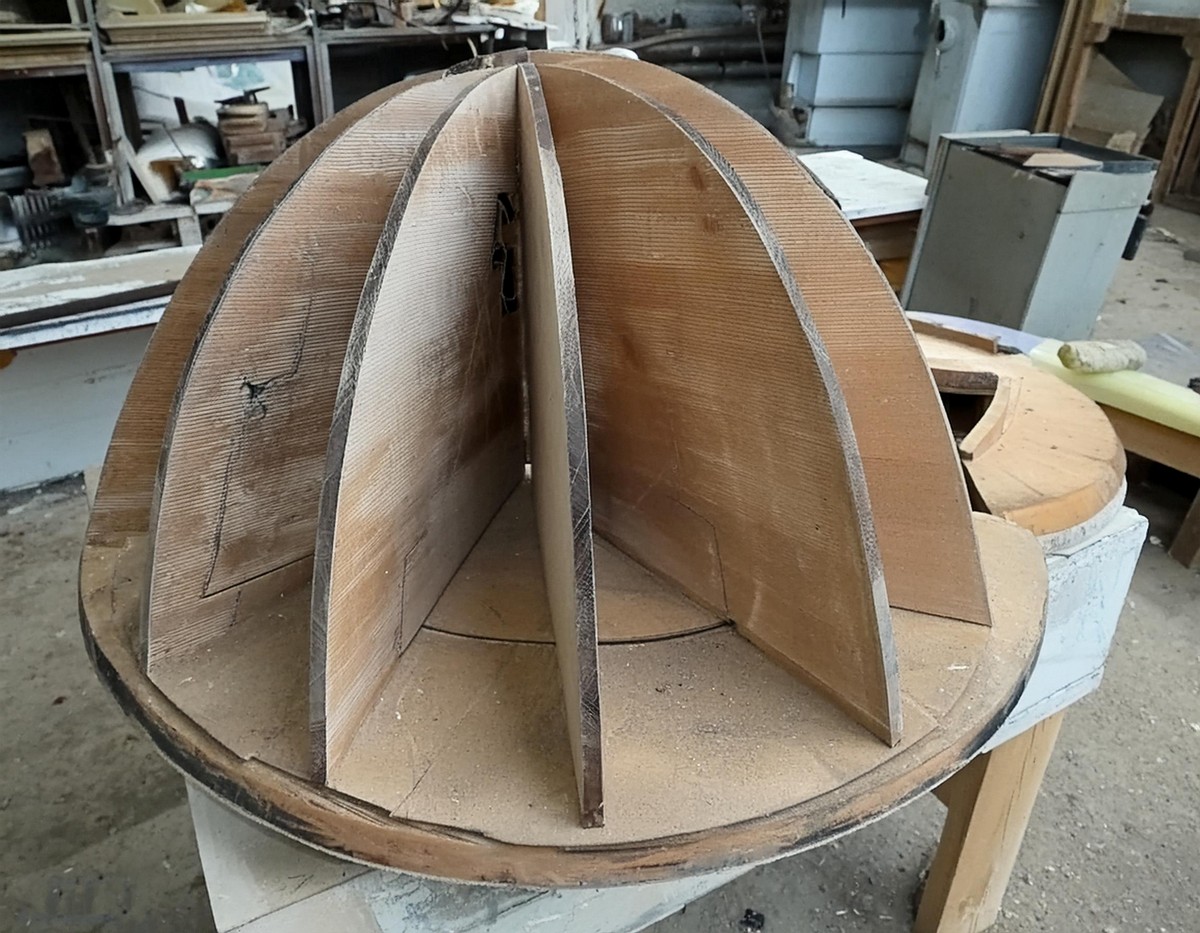
Embarking on the oven construction begins with thorough research. Understanding different oven concepts and gathering insights from various sources online is key. Deciding on a parabolic shape for efficient heat distribution was a crucial part of the design process.
Construction Steps:
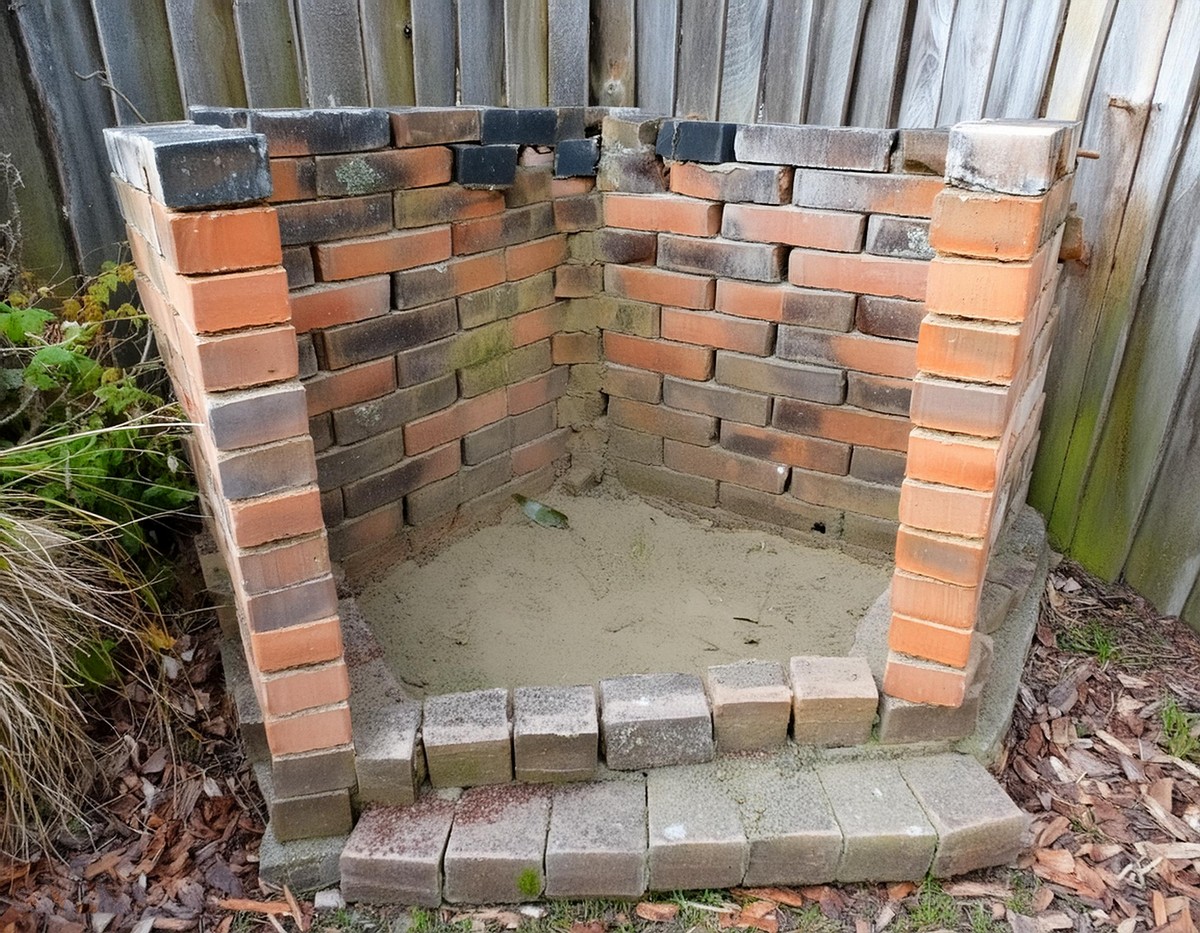
Woodstack Base & Reinforced Plinth:
- Foundation Preparation: Laying a sturdy foundation using reclaimed bricks to build the woodstack base, ensuring a solid ground for the oven.
- Supporting Structure: Reinforcing the base with a plinth made from Ciment Fondu mixed with sharp sand for heat resistance.
Internal Parabolic Chamber & Insulation Layers:
- Creating the Chamber: Utilizing plywood and hardboard to design a parabolic mould for the internal chamber.
- Insulation: Applying a thick layer of ceramic wool around the chamber, secured with the use of fast-setting cement and perlite mixture to ensure super insulation.

Chimney, Oven Opening Arch, and Fireproof Door:
- Chimney Installation: Fitting a reclaimed steel chimney flue atop, adjusting it with a custom-shaped acrylic mould.
- Arch Construction: Shaping the oven’s opening with an arch made from reclaimed clay bricks.
- Door Fabrication: Crafting a fireproof door from plywood and steel, incorporating ceramic wool insulation to protect from heat.
Finishing Touches:
- Dome and Crazed Black Finish: Covering the dome with a layer of Ciment Fondu mixed with broken ceramic tiles for that glitterball effect.
- Paving: Utilizing broken red terracotta roof tiles to pave the surrounding standing area.
Throughout the process, a special focus rests on employing reclaimed materials and ensuring the oven is not only a functional cooking device but also an art piece gracing your backyard.
Final Notes
The creation of the Super-Insulated Black Glitterball Pizza Oven is a labor of love and persistence. Every material and tool plays its part in crafting an oven that not only meets the eye with its unique design but also promises an efficient and versatile cooking experience. Whether it’s hosting a pizza night under the stars or exploring slow-cooked delicacies, this oven is a gateway to endless culinary adventures.
Leave a Reply