
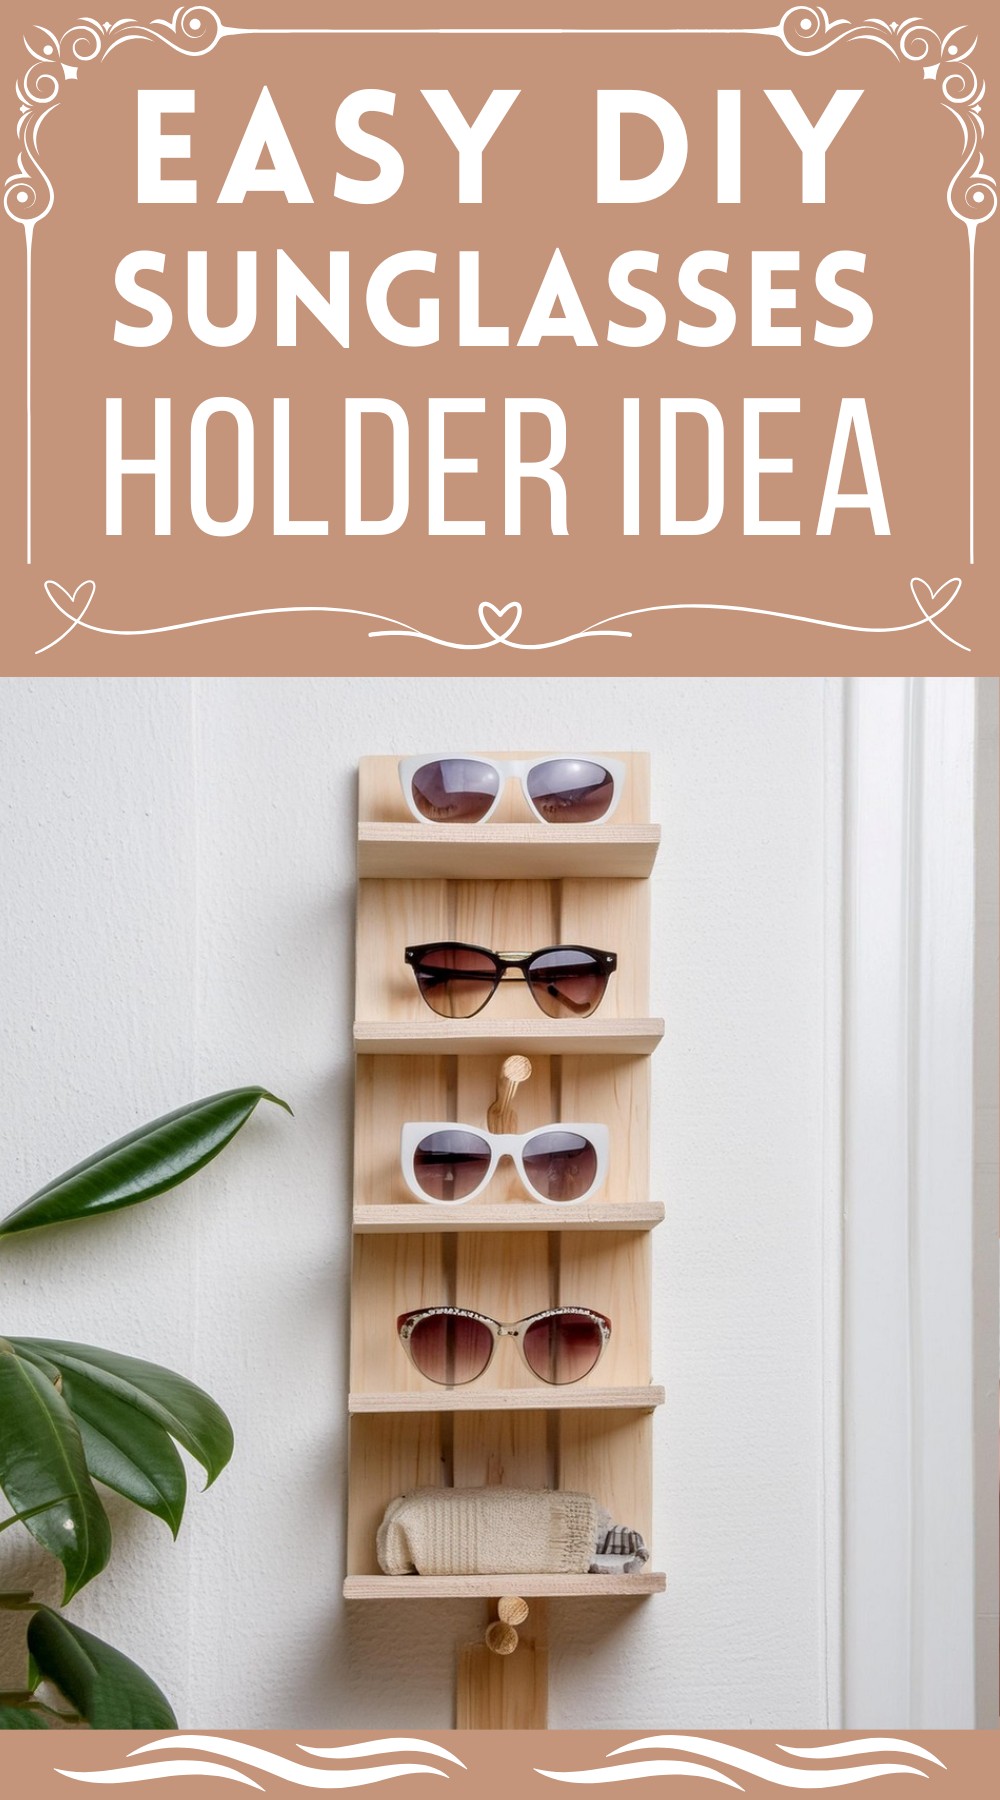
Make a special spot for all your sunglasses, a place where they can hang out after summer’s done by following this easier guide. You don’t see this kind of shelf every day and might think it’s a bit tricky to make, especially if you’re renting and can’t make big changes to your place. But guess what? It’s not that hard! This cool DIY sunglasses holder was inspired by neat displays in stores and is made in a way that’s easy for anyone to put together, even if you’re borrowing your living space for now. With some simple materials like wood, screws, sandpaper, and a little bit of crafty work, you can create a perfect spot for your sunglasses (or even your crystals) to live on your wall without worrying about leaving marks.
DIY Sunglasses Holder

Materials Needed
- 1/2″ Birch plywood
- Wood screws (2 per shelf)
- Sandpaper (low and medium grit; approximately 80 & 220)
- Wood butter or sealant (optional)
- Large Command Strips (16 lb. max hold)
Tools Required
- Drill
- Drill bit
Step-by-Step Instructions
Cut and Sand Your Plywood:
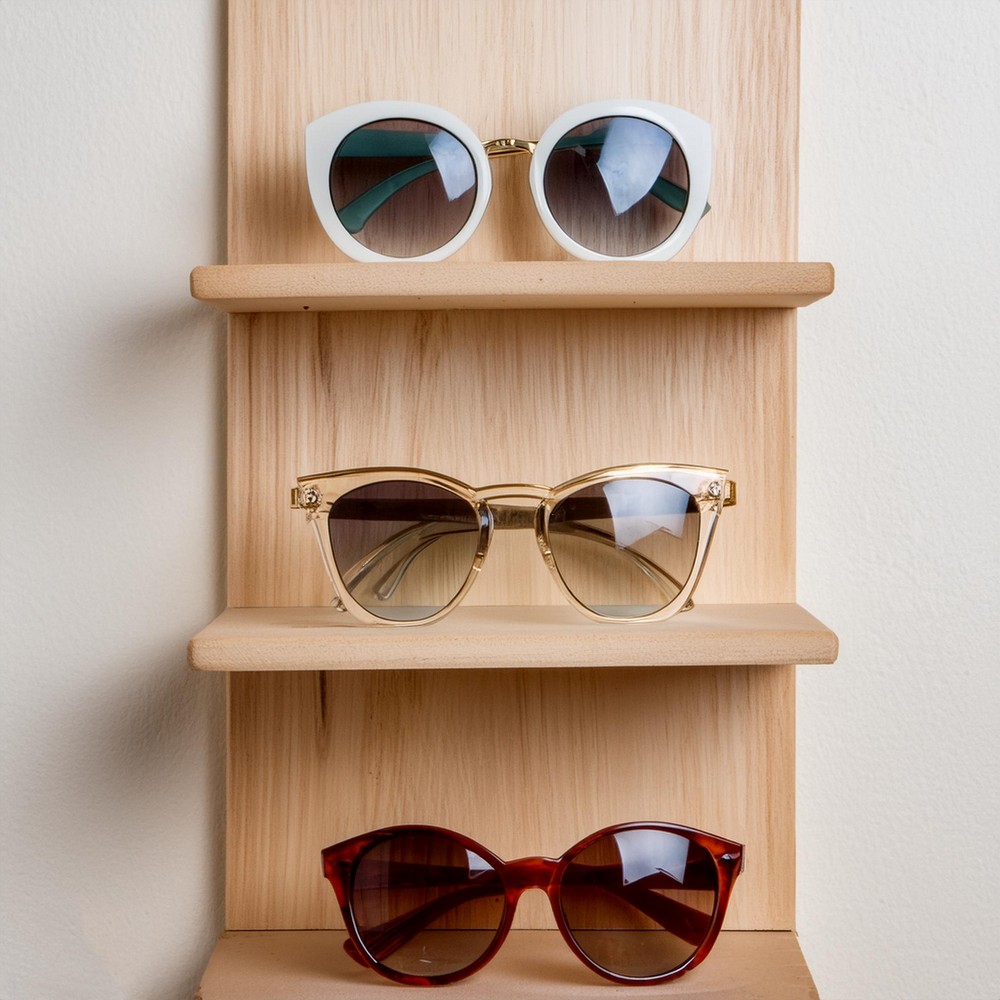
Start by cutting your birch plywood into the required sizes. For this project, five shelves measuring 4×8.5 inches and a back piece measuring 4×22.5 inches are optimal. These dimensions ensure that sunglasses can stand upright comfortably. Smoothen the edges with rough-grit sandpaper, and then refine the finish with medium-grit sandpaper.
Treat the Wood (Optional):
After your pieces are smooth, you may choose to apply a beeswax-based wood butter to give your plywood a warmer texture. This not only enhances the look but also adds a layer of protection. Remember to leave the back of the back piece untreated; this ensures that your Command Strips grip the surface well and don’t damage the paint on your wall.
Prepare for Assembly:
Before you start screwing the pieces together, weigh them to ensure they’re within the weight limit of your Command Strips. This step is vital for ensuring the holder remains securely mounted on the wall.
Drill Pilot Holes:
Using a drill bit that’s one size smaller than your screws, drill pilot holes 1.5 inches from the edges on the back edge of your shelf pieces and the corresponding spots on the back piece. This is essential to prevent the plywood from splitting when you insert the screws.

Assemble:
To assemble, start by screwing both sides of the shelf just enough so that the screws poke through slightly. This helps you align the shelves perfectly with the pilot holes on the back piece. Screw one screw halfway in and then do the same with the screw on the other side to keep the shelf level. Repeat this step with all shelves.

Leave a Reply