
Bring the adorable Ajax the Cat to life with this simple DIY project, crafting a lovable feline friend that will charm your heart and home.
Say Thanks & Supports To: Cedric PF
If you’re looking for a fun and creative way to honor your favorite feline or bring a charming character to life, crafting your own DIY Ajax the Cat is the perfect project. Inspired by whimsical and lovable cat designs, this craft allows you to shape a unique and endearing version of Ajax using polymer clay, felt, or other materials. With its elegant whiskers, soft fur details, and signature playful pose, your finished creation will perfectly capture the personality of a curious and mischievous cat. Whether you opt for a classic tabby look or give Ajax a colorful and imaginative coat, the result will be bursting with charm.
How to Create a DIY Ajax the Cat for Your Collection

Not only is this project a fun way to spend your crafting time, but the finished product also has so many potential uses. Your handmade Ajax can be displayed proudly on a bookshelf, used as a character in storytelling or stop-motion animation, or even gifted to a fellow cat enthusiast. If you’re feeling adventurous, you can personalize Ajax with accessories like a tiny bow tie or a miniature ball of yarn.
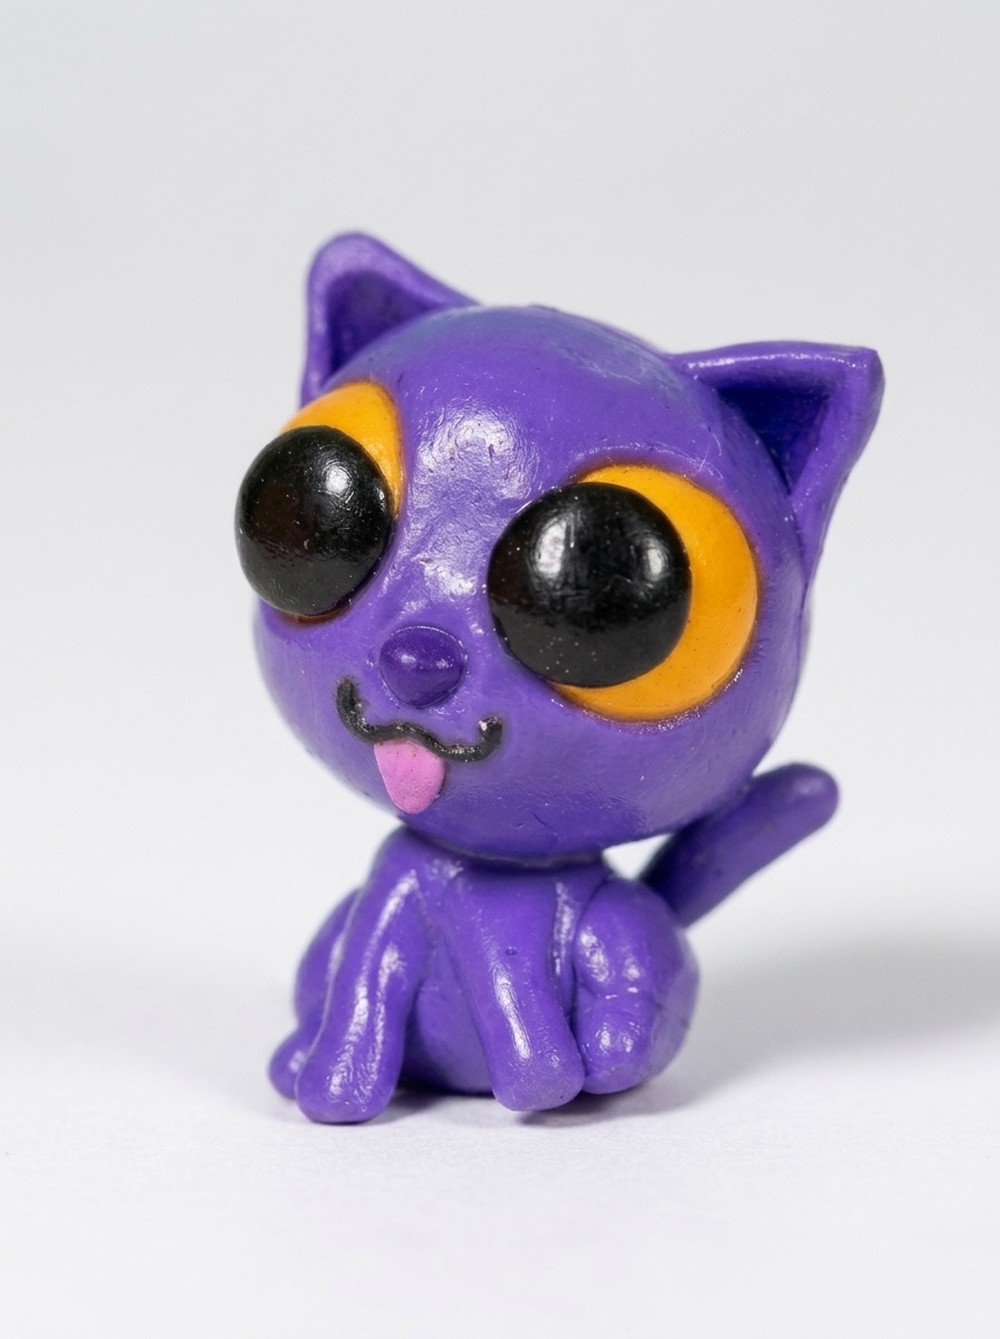
Ajax the Cat – Polymer Clay Figure Tutorial
This guide will help you make Ajax, the adorable but “deadly” cat, using polymer clay. The instructions assume you have basic tools and are new to sculpting, making it accessible for beginners (and fun for more advanced makers, too!).
Essential Materials & Tools
Materials
- Plum polymer clay
- White polymer clay
- Sunflower yellow polymer clay (for eyes)
- Black polymer clay (for pupils, mouth, details)
- Raspberry polymer clay (for tongue and blush; blend with white for lighter pink)
- Liquid polymer clay (for joining parts)
- Aluminum rod or thick wire (for internal support)
- Varnish (for finish)
Tools
- Silicone sculpting brush
- Flat accessories (blades, spatulas)
- Dotting tools and ball tools (for shaping)
- Cookie cutters (diamond-shaped; two sizes)
- Pasta machine or rolling pin
- Wet wipes or soft cloth (for smoothing)
- Paintbrush (for varnish)
- Oven
Step-by-Step Instructions
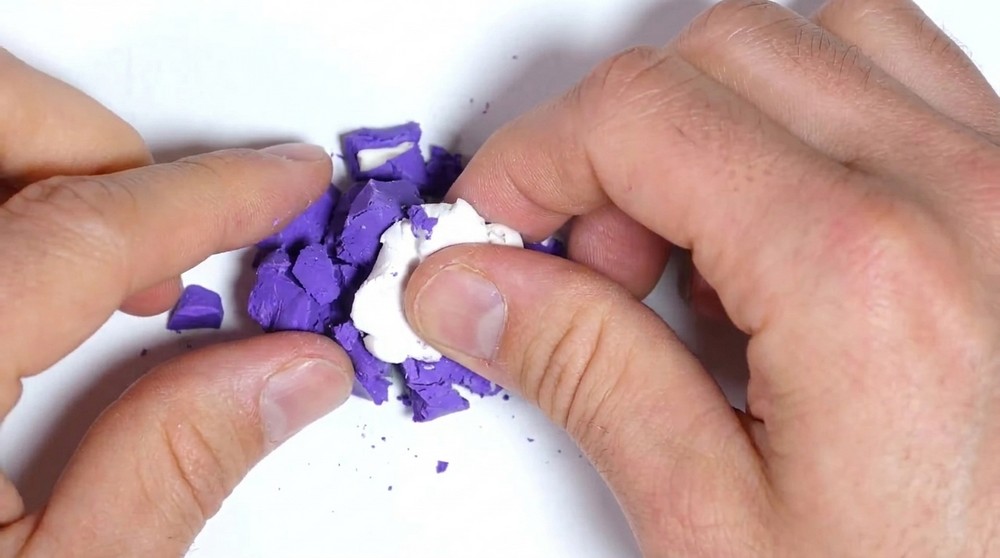
1. Prepare the Correct Color Mix
- Create Ajax’s Main Color:
- Mix two bars of plum clay with one bar of white clay.
- Knead until the color is fully blended and even.
- This becomes the Ajax base color, a pale plum.
2. Make the Body
- Form the Body:
- Roll a large ball of your plum-white mix.
- Slightly elongate and chubby the ball (like a Tsum Tsum plush), creating a “sitting” cat shape.
- Flatten the back/bottom so Ajax can sit upright.
- Create Thighs:
- Make two small balls with the same color.
- Slightly flatten them and attach to each side of the body, forming the thighs.
- Make Legs:
- Roll two small sausages, cut at an angle for easy attachment under the thighs.
- Position these as back legs, making sure they stick out from under the thighs.
- Make Front Legs:
- Roll a longer sausage, cut in half.
- Attach at the front of the body near the neck area (note: you’ll be joining them to the body with a silicone brush to spread and blend the clay).
- Tail:
- Roll a long, thin sausage from the plum-white mix.
- Attach to the back, shaping with your fingers for desired curvature.
3. Smooth & Finish the Body
- Use a silicone brush and wet wipes to smooth out seams and blend together joins.
- Remove any fingerprint marks or lines.
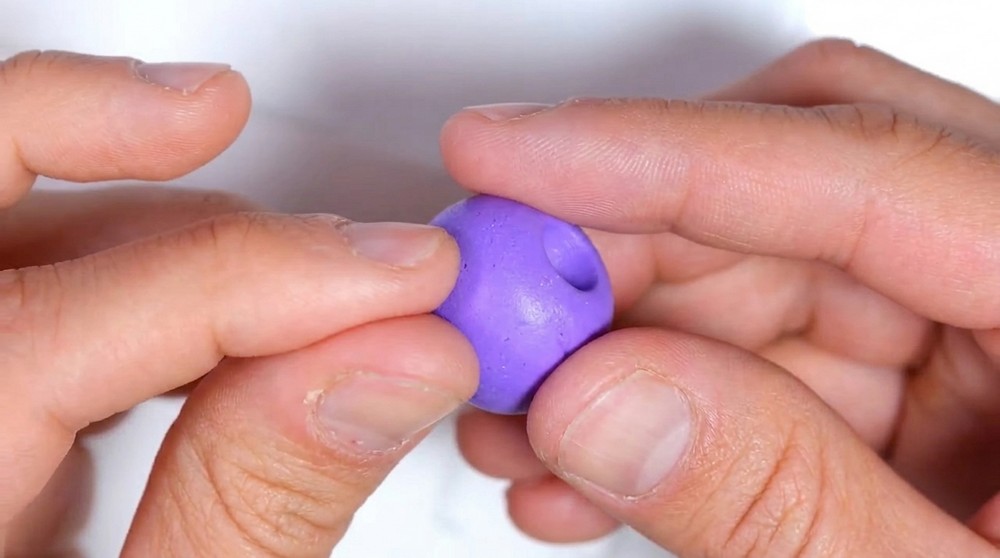
4. Make the Head
- Shape Ajax’s Head:
- Roll a large ball from the plum-white blend (about three times bigger than a thigh ball).
- Using ball tools, gently create two indentations where the eyes will go.
- Define the Muzzle & Eyes:
- Use dotting tools of increasing size (small to large) to deepen the eye sockets.
- For damaged areas during sculpting, re-roll gently using thumb and forefinger to restore the rounded shape.
- Accent the Muzzle:
- Roll with your hand to ensure the face is rounded and free from sharp lines.
5. Add the Eyes
- Sunflower Yellow Balls:
- Make two sunflower-yellow clay balls, place them carefully in the eye sockets.
- If the holes are too big, gently press and curve the balls into the sockets using your thumbs and wipes.
- Pupils:
- Use a round cookie cutter on black clay to cut two circles for the pupils.
- Place pupils at the edge of each yellow eye for a lively, expressive look.
- Tap lightly to secure.
6. Details: Nose, Mouth, and Tongue
- Nose:
- Sculpt a small plum-colored ball (not mixed).
- Flatten gently and shape into a small triangle.
- Position in the center above the mouth area, using a silicone brush and flat tool to refine.
- Mouth:
- Roll a thin sausage of black clay, shape into a small wave or ripple.
- Attach with a paintbrush, forming a fun expression.
- Tongue:
- Mix raspberry and white clay for a light pink color.
- Shape a small sausage, flatten, and cut to size.
- Position below the mouth, so Ajax looks like he’s sticking out his tongue.
- Press gently with a flat tool to adhere.
7. Ears
- Outer Ear:
- Flatten a piece of the plum-white mixture using a pasta machine.
- Cut a diamond shape with a large cookie cutter.
- Smooth edges with your blade.
- Inner Ear:
- Use pure plum clay and cut a smaller diamond shape.
- Position in the middle of the ear and smooth with wet wipes.
- Shape Ears:
- Cut both diamonds in half.
- Round corners to create triangle ear shapes (cat ears).
- Attach to the top of the head, blending the edges with a silicone brush.

8. Assembly
- Join Head & Body:
- Use an aluminum rod or thick wire as an armature.
- Make a hole in the center of the body, insert the rod, and press the head onto it for support.
- Add liquid polymer clay at the joint for extra strength.
9. Bake & Finish
- Bake Ajax:
- Bake your assembled Ajax for 30 minutes at 110°C (230°F) according to your clay brand instructions.
- Let cool fully.
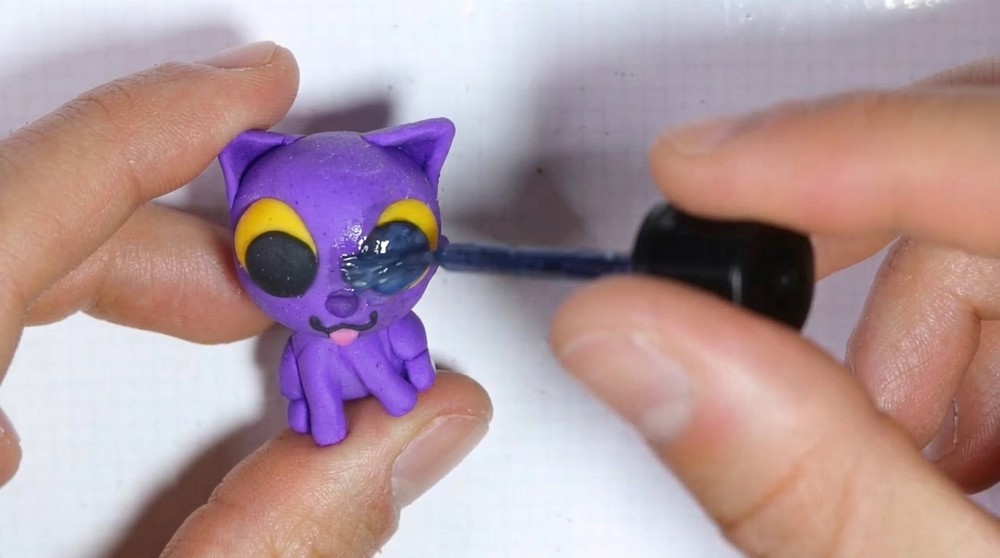
- Varnish:
- Use a paintbrush to apply varnish for a glossy, finished look.
Tips for Beginners
- Blend clay thoroughly to avoid streaks in color.
- Use wet wipes and silicone tools for seamless joins and a professional finish.
- Don’t over-roll the head/eyes; work in stages, checking after each indentation.
- If clay is dry or cracking, a tiny bit of hand cream can help smooth and rework it.
- Experiment and adjust eye, ear, and tongue size for your own Ajax style!

Congratulations!
You’ve crafted your own Ajax the Cat, complete with expressive face and chubby body.
Display, gift, or use as inspiration for future animal sculpts.
Leave a Reply