
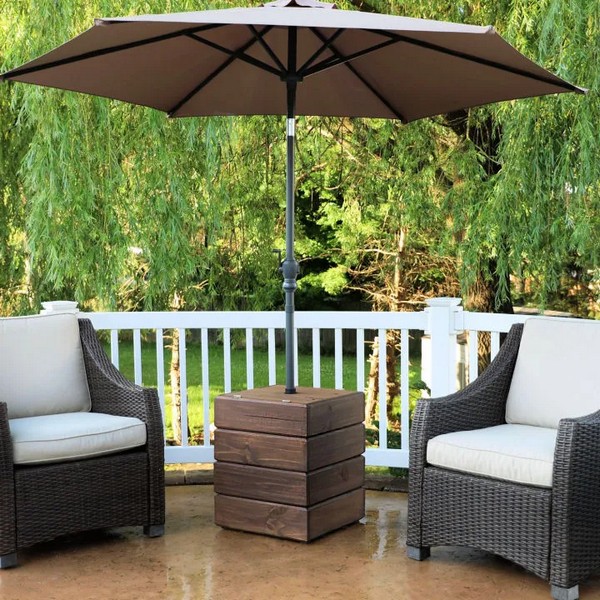
Let’s talk about making your very own DIY Umbrella Stand Side Table. It will serve the same as a regular bar table and a nifty place to keep your umbrella! This table will serve great to spruce up your home, but it’s also practical and easy to make. With our easier step-by-step guide, you will learn how to whip up this piece yourself. Once you’ve finished making your first DIY Umbrella Stand Side Table, you’ll be amazed at how simple and enjoyable this project is! And who knows, it might spark your creative side to make even more lovely DIY projects for your home.
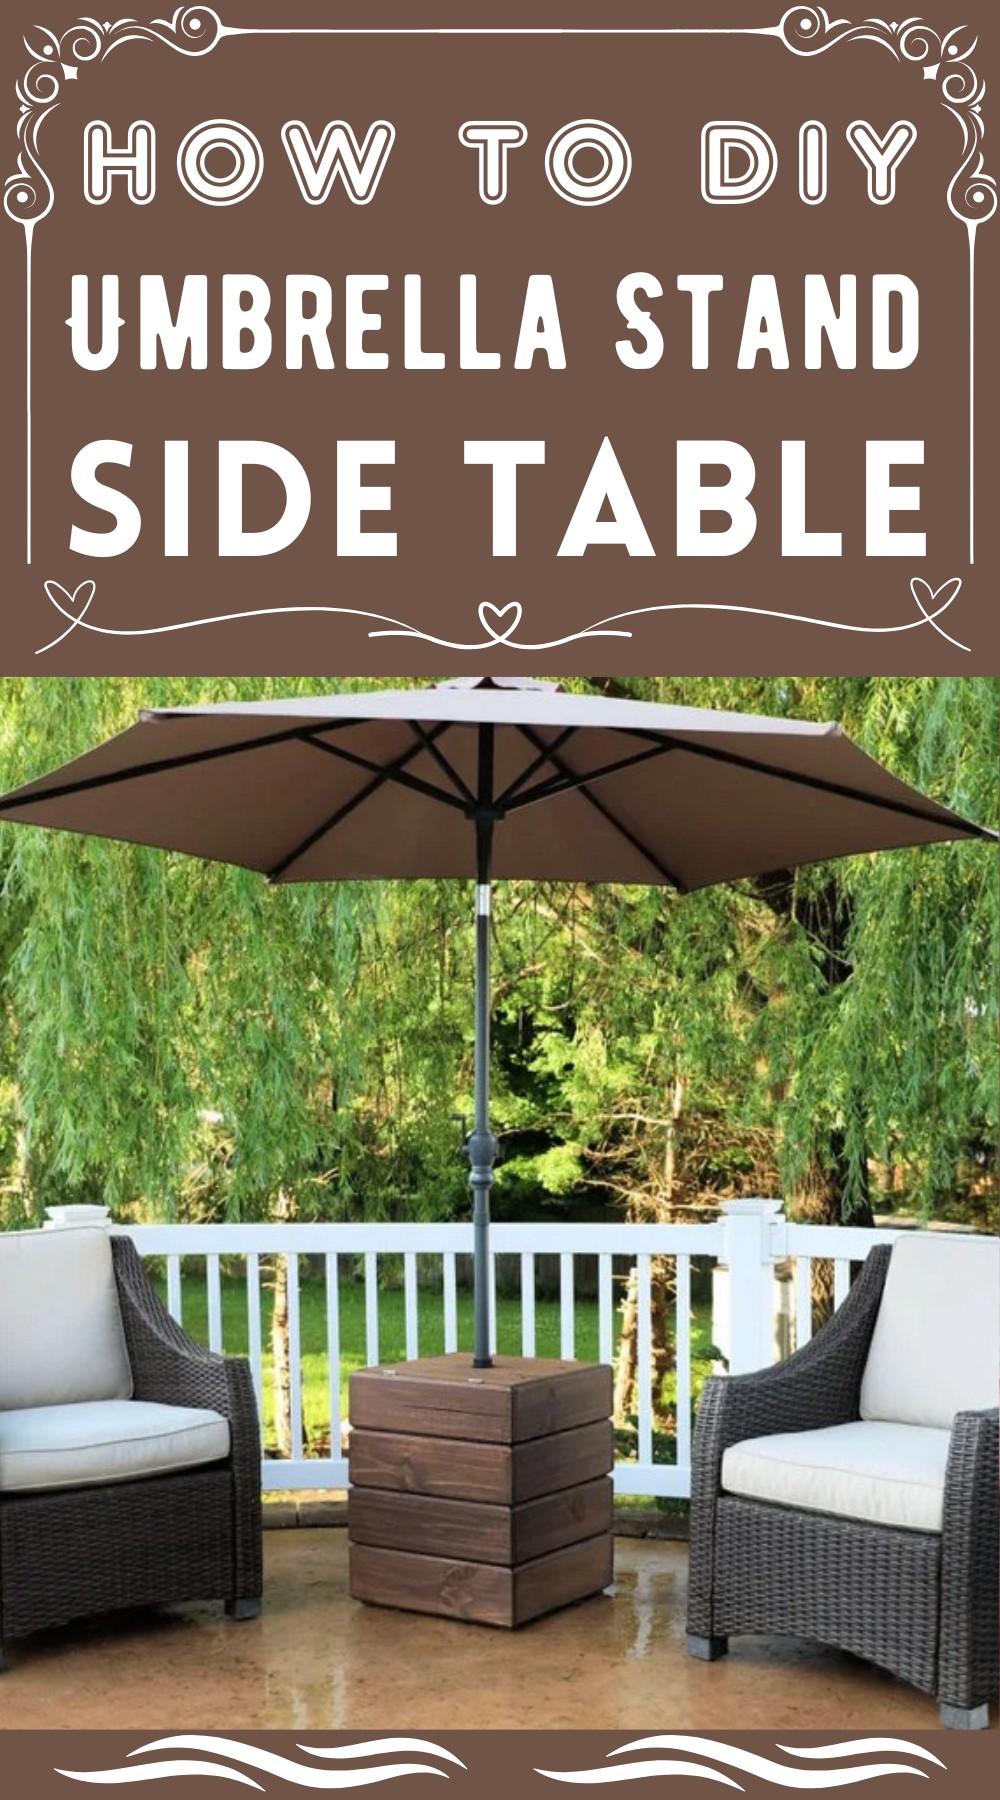
DIY Umbrella Stand Side Table
Materials Required:
- 5 x 1x6x8′ Boards
- 2 x 2x2x8′ Boards
- 2-inch Deck Screws
- 1¼-inch Pocket Hole Screws
- 1 x 1½”x2′ PVC Pipe
- 2 x 14″x6″x8″ Plastic Bins
- 4 x 2-inch hinges
- 1 x Thumb Screw
Tools Needed:
- Router fitted with a Chamfer Bit
- A miter saw or a similar cutting tool
- Drill with a hole saw attachment
Screwdriver
Step-by-Step Tutorial:
1. Getting Started: Start by beveling the face edges of four 1×6 boards using a router fitted with a Chamfer Bit.
2. Precise Measurement: Depending on the size of your umbrella and the size of the table you desire, size all parts using the cut list and ensure all the boards are cut evenly.
3. Getting into Shape: Prepare the longer pieces by clipping the corners at 45 degrees and aligning the miter with the beveled edges. For the shorter boards, drill two pocket holes at each end of the beveled boards and the ends of one of the lid pieces.
4. Assembly: Position the side boards between the front and back boards. Proceed to screw pocket hole screws through the pocket holes in the short boards connecting to the longboards. Repeat to create the four levels of the table. Arrange the levels on their side and install 2×2’s cut to length along their inside corners. Secure the boards together with deck screws through the 2×2’s.
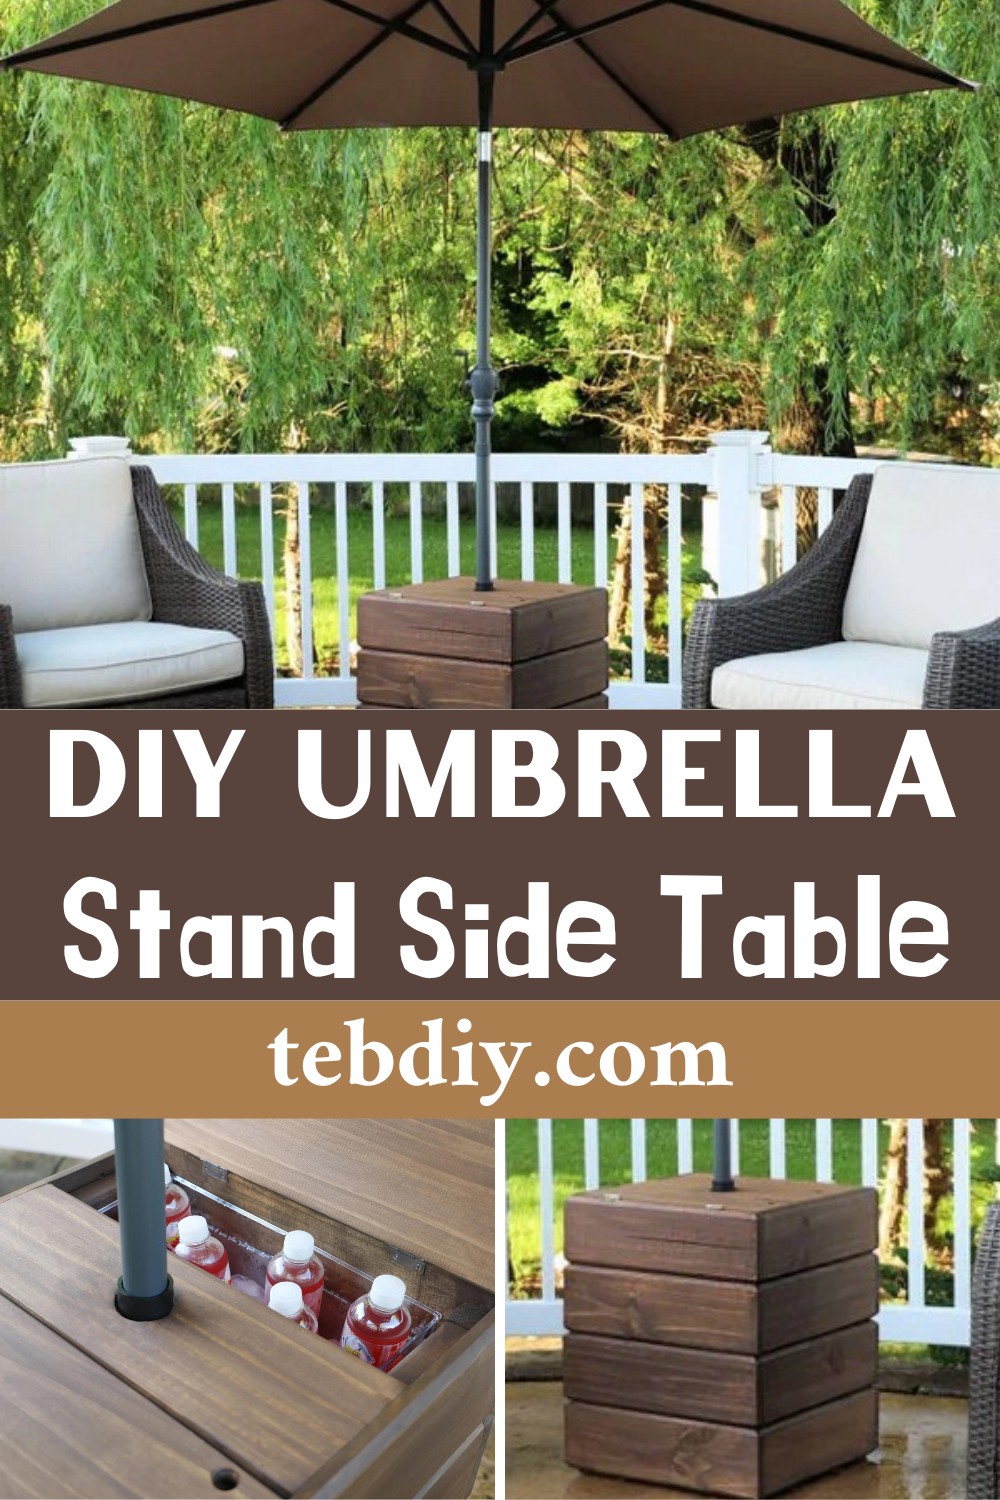
5. Working on the Lid: Attach two hinges to the edge of two lid boards. Position them to hinge towards the front and back of the table’s opening. Cut a hole for the umbrella pole in the remaining lid piece, then secure this board with pocket hole screws.
6. Making Room for the Umbrella:
Attach two shelf pieces at a height that allows your containers to fit. Drill a hole in the center of the remaining board, install it in the center, and flush it with the bottom edge to hold the base of the pipe.
7. Pipe Installation: Drill a small hole in the base of the pipe for water drainage. Insert the pipe through the bottom hole in the table, allowing it to pass under the lid and rise through the opening.
8. Finishing Up: Add a knob or finger hole to each hinged lid piece for easy access. Apply a bead of clear silicone caulk around the pipe to hold it in position within the opening.
And voila! You’ve successfully created a stylish and functional addition to your backyard furniture.
Leave a Reply