
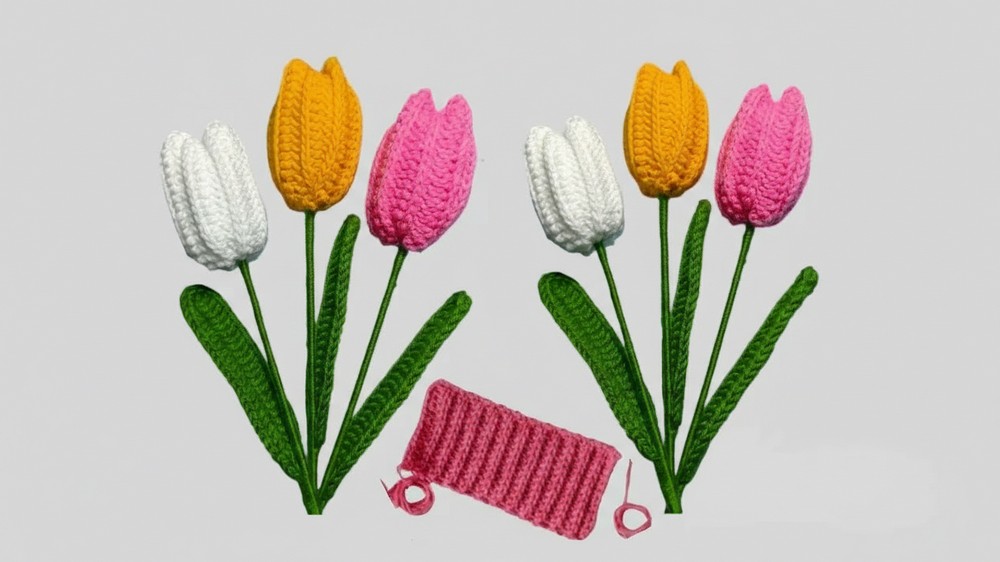
Decorate your space with a beautiful crochet tulip pattern that is easy for beginners and makes a perfect cheerful touch to any room or gift.
Soft petals slowly form as yarn slips through gentle hands, creating a special piece you can admire every day. With the crochet tulip pattern, anyone can crochet a single lovely blossom that never wilts. This tulip brightens any spot you choose—standing proud in a vase, tucked as a sweet detail on a gift, or adding a cheerful pop to your favorite hat or bag.
Free Crochet Tulip Pattern: Step-by-Step Guide
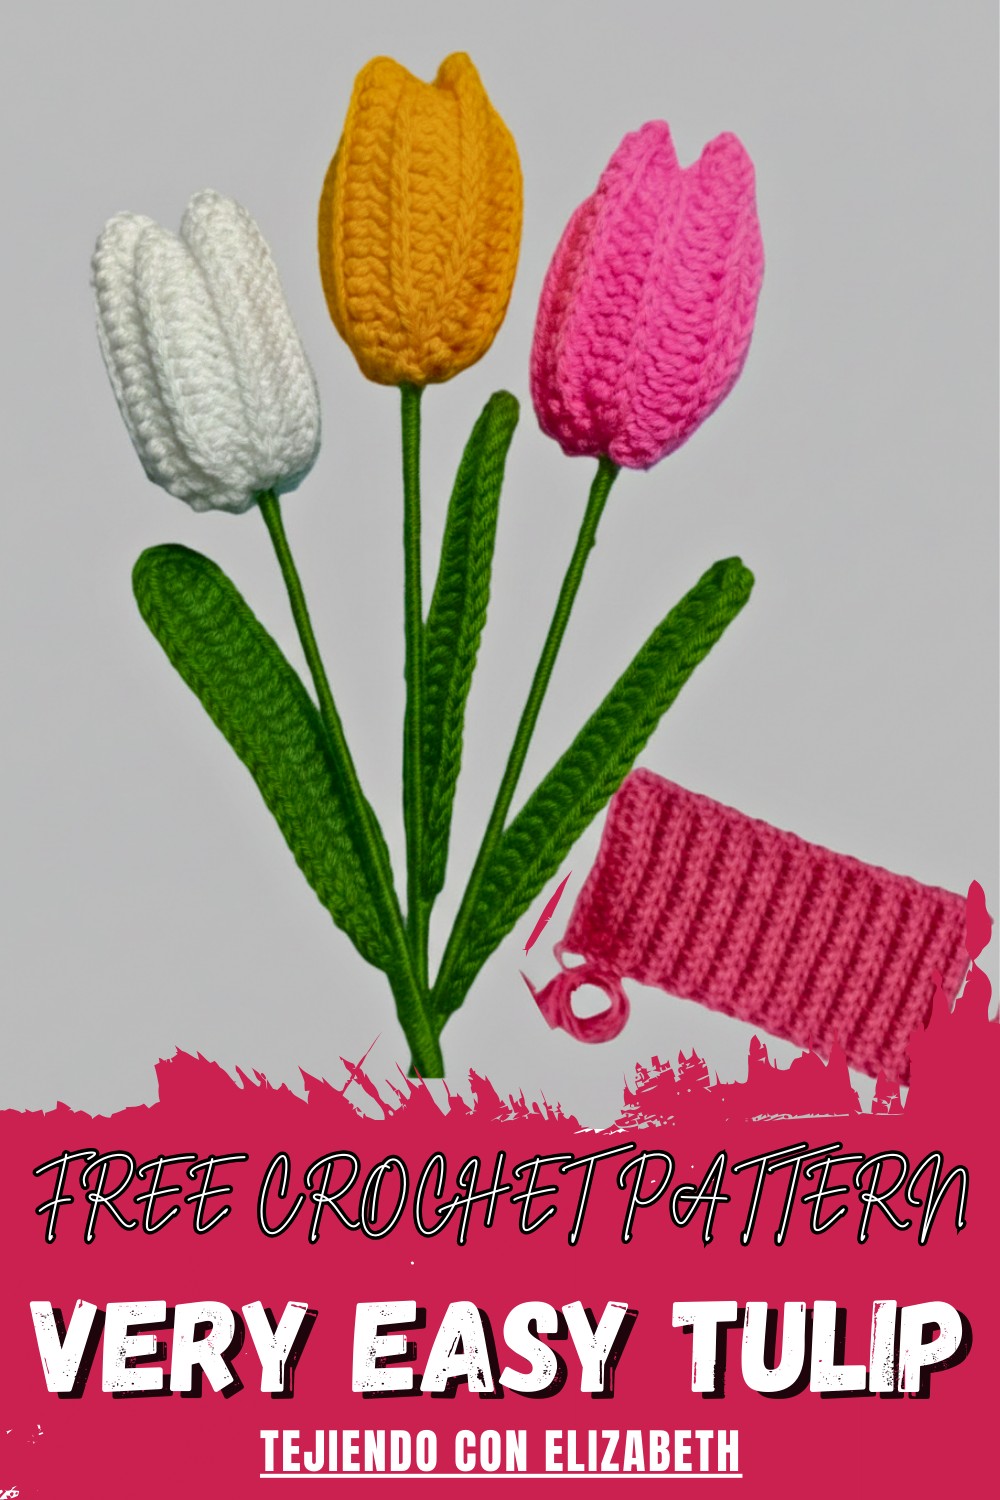
No water is needed and the colors stay smiling and fresh all year long. The charm of this handmade tulip comes from its simple, beautiful design, easy for anyone to make, even without reading. Every step brings more joy, and by the end, you have a soft flower ready to bring warmth and happiness to your home. Yarn and caring hands are all it takes to make a piece of spring that lasts forever.
Free Crochet Tulip – Step-by-Step Pattern
Materials
- Yarn: White acrylic thread (Silvia yarn suggested), Green yarn for the leaf (Silvia or similar weight)
- Hook: US Size B-1/2.25mm or size to match your yarn
- Stuffing: Polyfill or similar for plushies
- Needle: Tapestry or wool needle
- Wire: Craft wire, for shaping the leaves (optional but recommended)
- Stick: Wooden skewer, or any thin stick for the flower stem
- Hot Glue: For assembling the flower (optional, but helpful for added stability)
- Scissors
Abbreviations
- ch: Chain
- hdc: Half double crochet
- sl st: Slip stitch
- st: Stitch
- sc: Single crochet
Special Notes
- Work in rows unless otherwise noted.
- Adjust the hook and yarn size as desired for smaller or larger tulips.
- Add or remove “leaves” for fuller bouquets.
Pattern Instructions
Tulip Petal
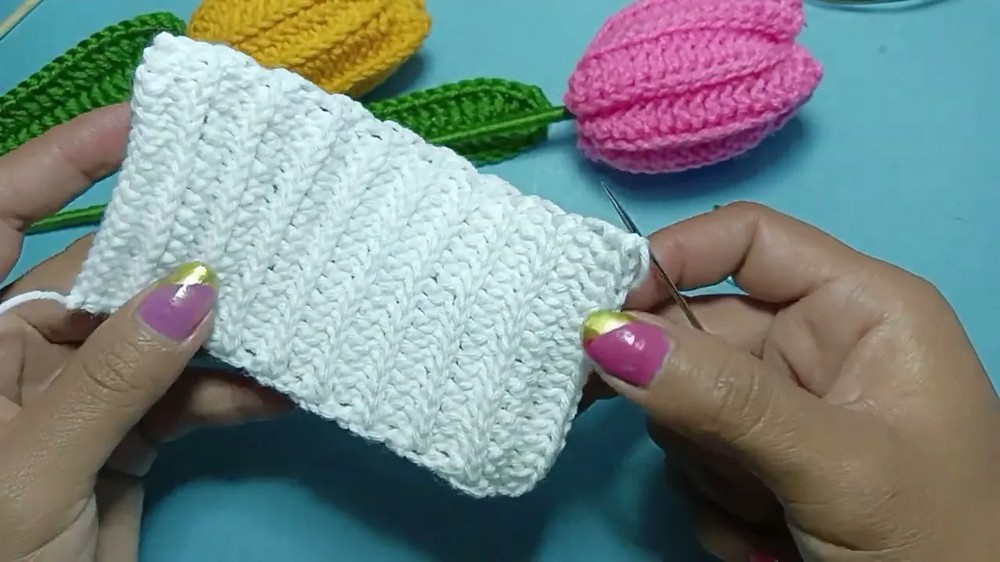
- Foundation:
Ch 18. - Row 1:
Starting in 2nd ch from hook, hdc in each ch across. (17 hdc)
Ch 1, turn. - Rows 2–17:
Working in BLO (back loop only) of each st, hdc across. (17 hdc)
Ch 1, turn at the end of each row. - Row 18:
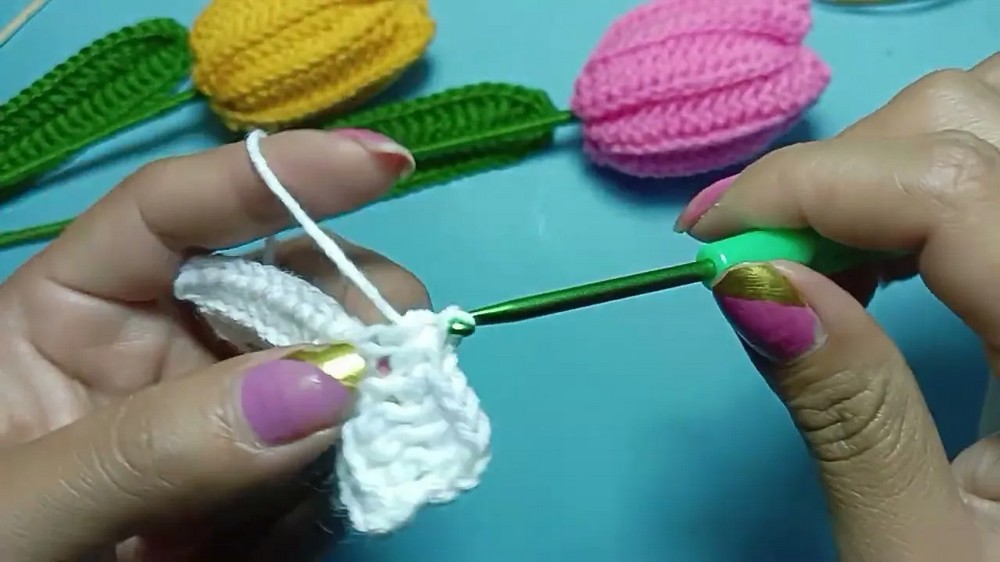
Hdc across (17 hdc). Cut yarn, leaving a long tail for sewing. - Seaming Petal:
- With the tail and tapestry needle, sew the short sides of the rectangle together to form a tube.
- Weave the needle through one open edge in-and-out, pull to cinch closed. Secure well.
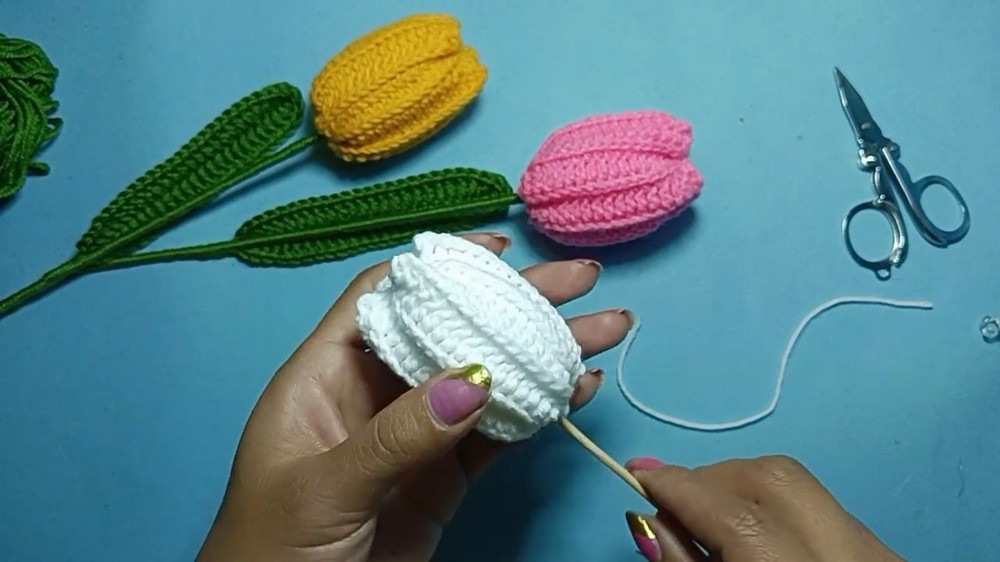
- Insert the wooden skewer into the center from the cinched side.
- Use hot glue to secure the skewer if desired.
- Stuffing:
- Insert polyfill into the tulip through the opening around the skewer.
- Sew the remaining end slightly closed around the skewer, leaving the stem exposed.
Crochet Leaf
- Leaf Foundation:
With green yarn, ch 25. - Insert Wire:
Lay craft wire (measured/doubled to fit your chain length, plus extra for wrapping), along the chain. (Optional, for a realistic leaf that holds its shape.) - Row 1:
- Begin in 2nd ch from hook; hdc in each ch across.
- At the tip (last st), work 3 hdc in same st.
- Insert wire alongside as you crochet.
- Row 2:
- Turning to work along the other side of the foundation chain:
- Hdc in each st across to the end.
- At the last st near the base, sl st to join. Fasten off.
- Finish:
- Tuck in yarn tails.
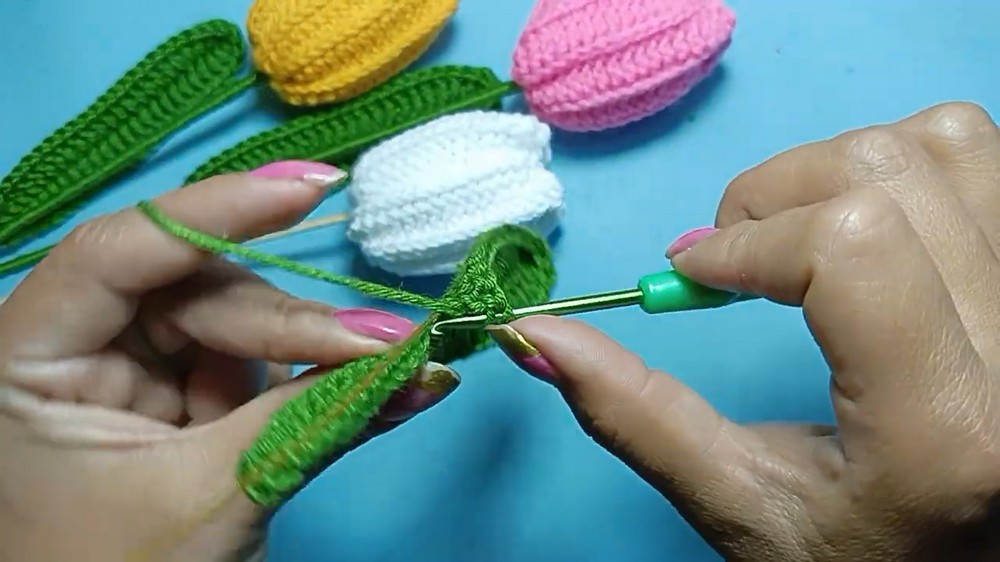
- Add hot glue at the base and wrap the wire and green thread around the tulip stem to secure the leaf in place.
Assembly
- Secure the Leaf:
- Position and wrap the crocheted leaf around the skewer stem using the extra wire, securing with hot glue as needed.
- Finish Stem:
- Wrap green yarn or thread around the skewer to cover it and secure with a dab of hot glue.
- Finishing Touches:
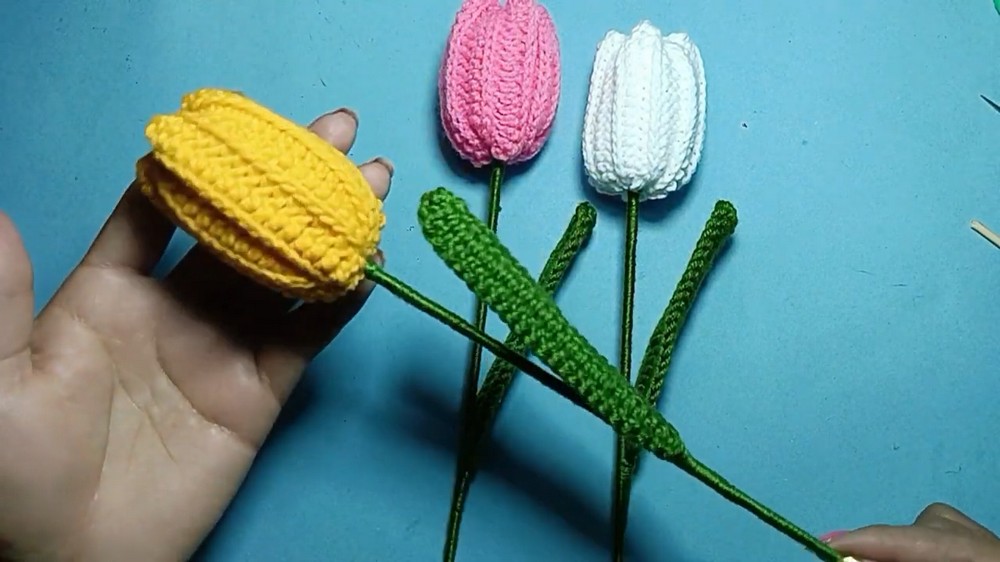
- Shape the flower and leaf as desired.
- Repeat for more flowers and create a bouquet.
Pattern Correction
No major corrections, but ensure your stitch count remains consistent along the rows (17 hdc for the petal panel). Adjust the length or number of rows for smaller or larger flowers.
Tips
- For a fuller tulip, add more stuffing, or make the petal panel slightly wider.
- Mixing yarn colors makes bouquets more vibrant.
- For added stability, secure all glued parts thoroughly with tacky or hot glue.
Conclusion
You have now created a beautiful crocheted tulip—perfect for brightening any room, gifting, or even selling. With this step-by-step pattern and easy-to-find materials, you can create as many as you wish for bouquets or special occasions.
Leave a Reply