
Bring floral beauty with this free crochet rose with leaves pattern that offers elegant detail adds natural charm and suits decor or gifting.
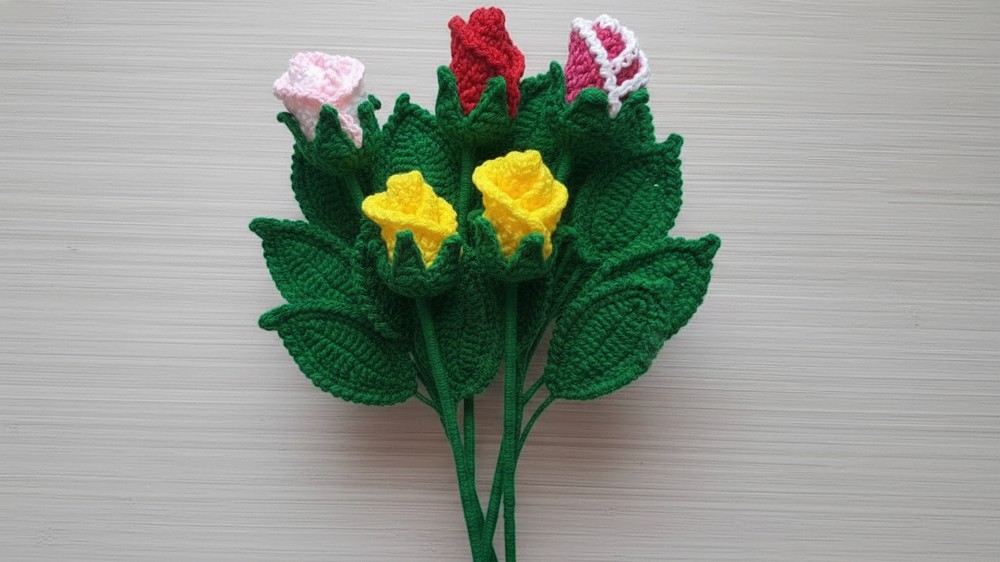
Petals slowly take form as a lovely flower grows with gentle curves and small leaves that give it a fresh and lively look. The Crochet Rose with Leaves pattern helps shape a graceful rose that feels pleasing to the eyes and adds a natural touch to any space. Its layered petals and neat leaves give it a soft and realistic appearance that stands out in a simple way.
Free Crochet Rose with Leaves Pattern You Will Love
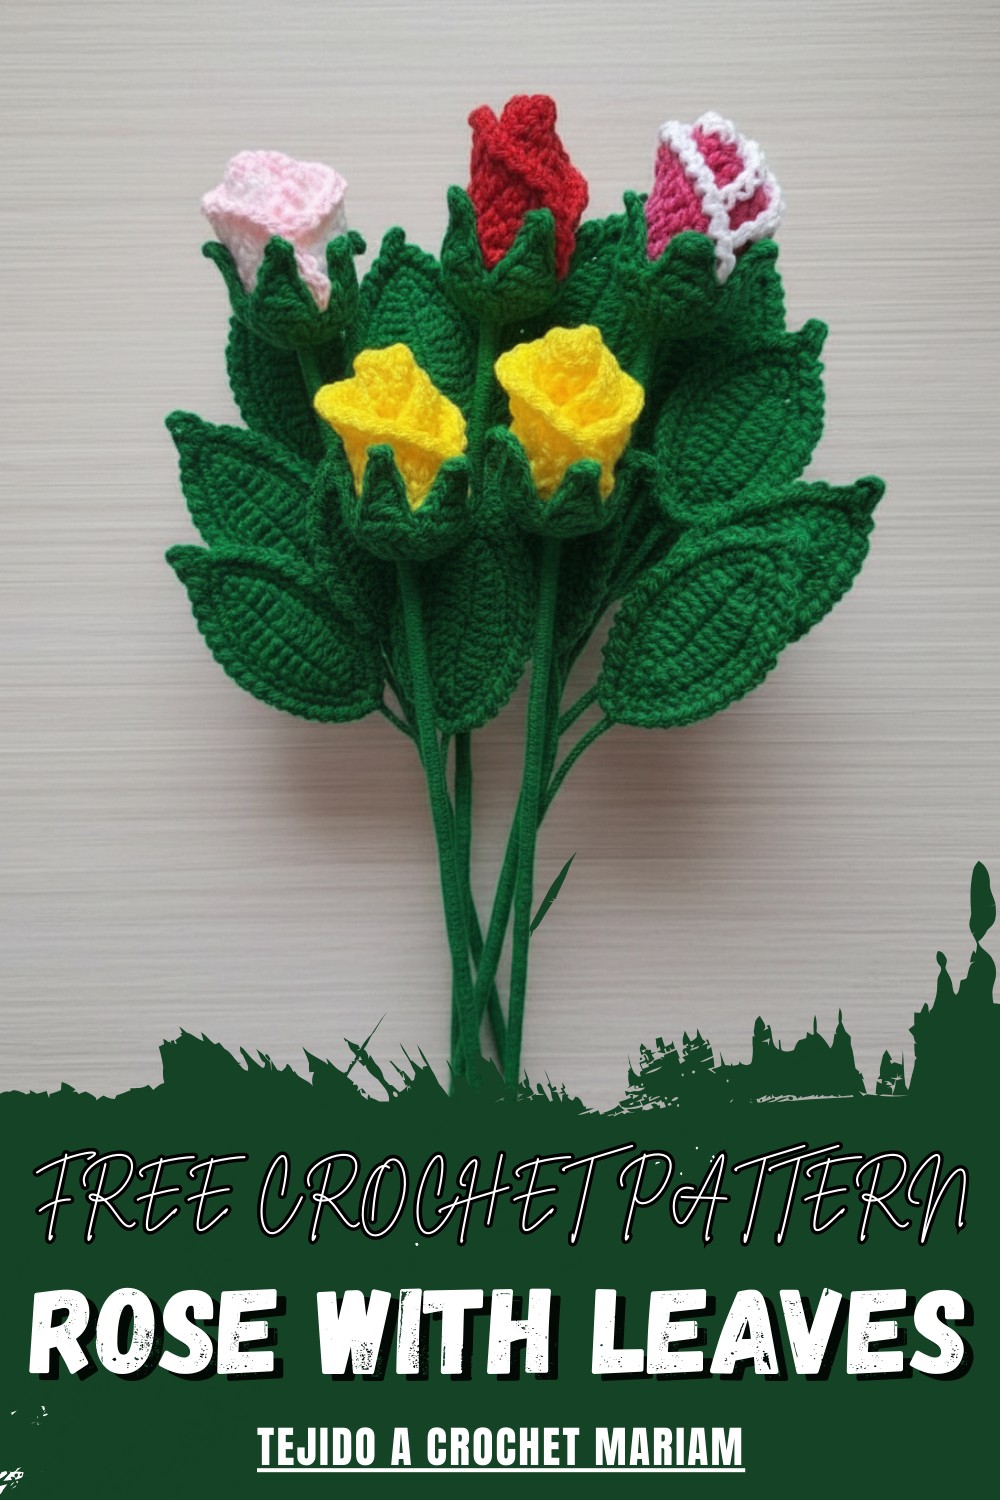
It can be placed on tables, used on hair clips, added to bags, or used to decorate small items around the home. The guide is easy to understand so anyone can complete it without difficulty. The finished rose looks calm and beautiful, giving a special handmade feel. It offers charm, creativity, and a sense of joy, turning simple material into a lovely floral piece that adds warmth and beauty to everyday surroundings.
Crochet Rose with Wired Leaves Pattern
Materials
- Yarn:
- Main rose color (fuchsia, red, yellow, etc.)
- White (for edge highlights, optional)
- Green (for leaves and stem)
- Hook:
- Size suitable for yarn (2.5mm–3.5mm recommended for amigurumi/dk cotton)
- Notions:
- Scissors
- Floral wire (for shaping leaves)
- Craft glue (cold silicone preferred)
- Wooden stick (for stem, e.g., kebab skewer)
- Yarn needle (for sewing/weaving ends)
Abbreviations (US Terms)
| Abbreviation | Meaning |
|---|---|
| MR | Magic ring |
| ch | chain |
| sl st | slip stitch |
| sc | single crochet |
| hdc | half double crochet |
| dc | double crochet |
| tr | treble crochet |
| st(s) | stitch(es) |
| rep | repeat |
| yo | yarn over |
Special Notes
- Wire gives leaves a realistic shape and stability.
- The rose petal piece is rolled up to form the flower.
- Use glue to secure yarn ends, attach pieces, and cover stem.
Pattern
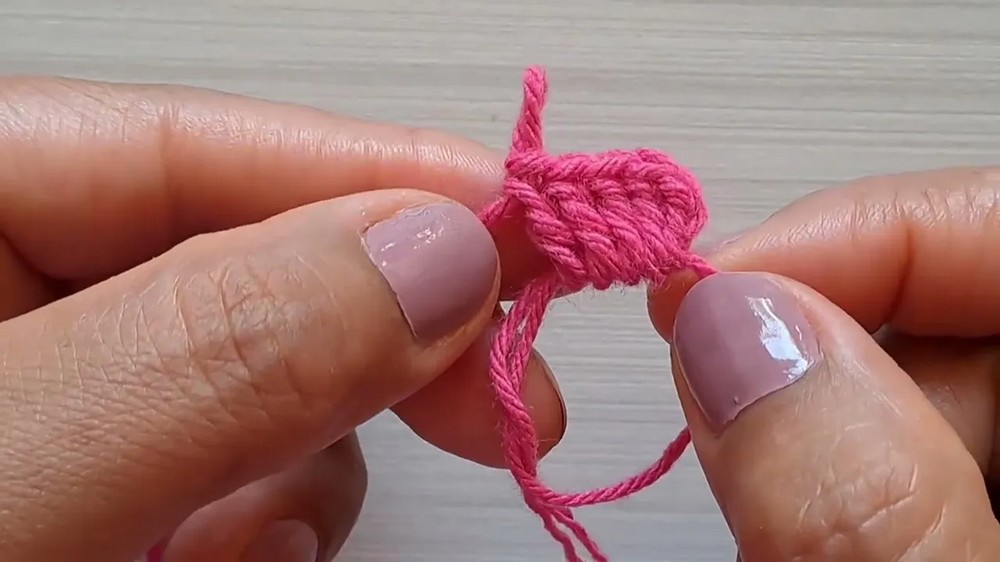
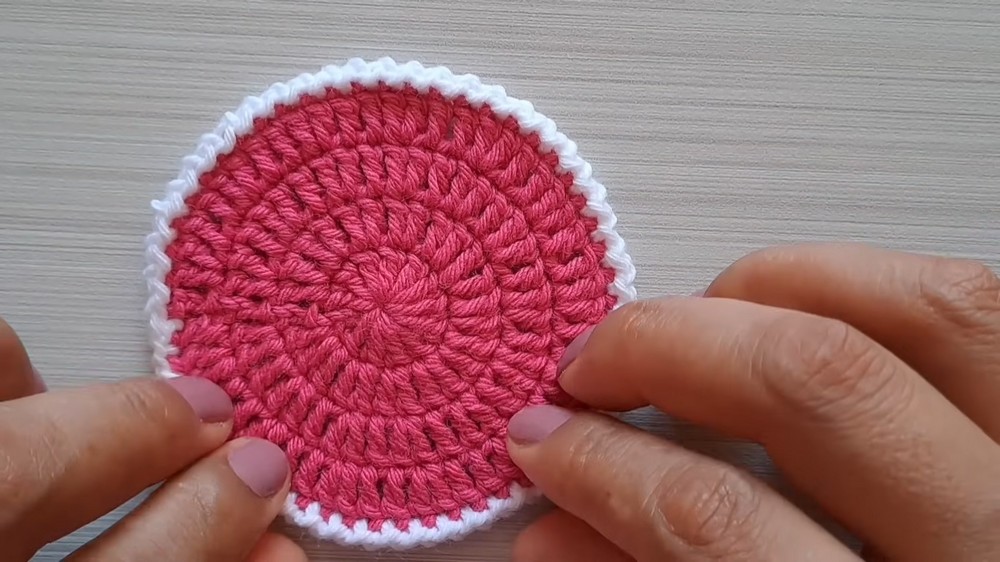
1. Rose Petal Base
Rose Center:
- With main petal color:
- MR, ch 3 (counts as first dc).
- Work 12 dc into ring (13 dc total).
- Tighten the ring slightly (leave center open).
- Sl st into top of starting ch 3.
- Round 2:
- Ch 3 (counts as dc).
- Dc in same st (increase).
- 2 dc in each st around (26 dc total).
- Sl st to top of beginning ch 3.
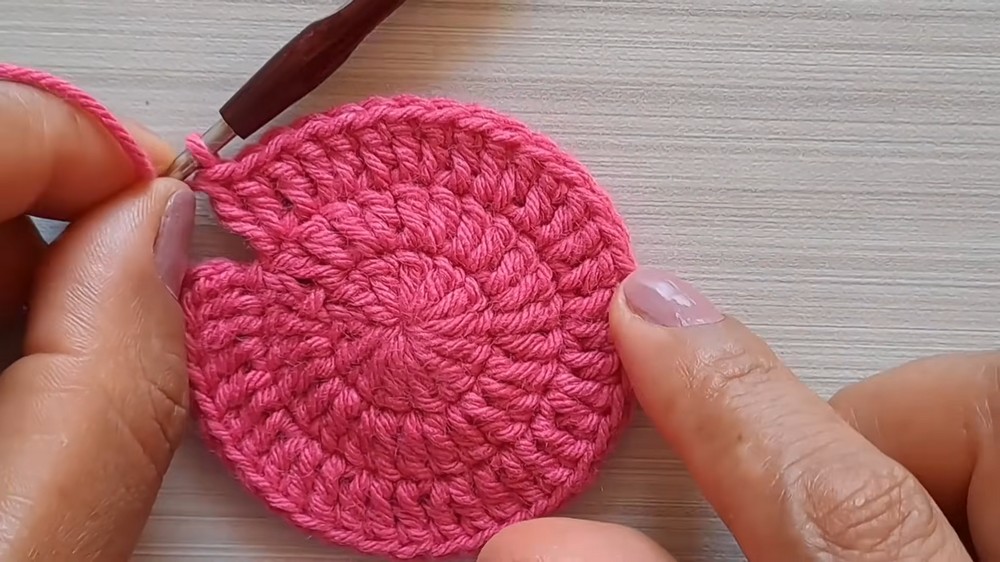
- Round 3:
- Ch 3 (counts as dc).
- In next st, 2 dc (increase), in next st, 1 dc; rep around.
- Continue: Alternate 2 dc in one st, 1 dc in next.
- (39 dc total.)
- Sl st to top of beginning ch 3.
- Round 4:
- Ch 3 (counts as dc).
- Dc in next st.
- In next st, 2 dc (increase), dc in each of next two sts; rep around.
- (52 dc total.)
- Sl st to top of beginning ch 3.
- Fasten off petals color.
2. Rose Edge Highlights (Optional)
With white or contrasting color:
- Join yarn at petal edge.
- (Ch 1, sl st in next st) around edge for subtle highlight.
- Fasten off, weave in ends.
3. Assemble Rose
- Gently roll the petal circle in a spiral from one edge to the other, overlapping to shape into a rose.
- Secure tightly at base with yarn and knot.
4. Calyx
Green Center:
- MR, ch 3 (counts as dc).
- Work 14 dc into ring (15 dc total).
- Leave center open (do not tighten completely).
- Sl st into 3rd ch of starting chain.
Calyx Points (Repeat 5 times):
- Ch 5;
- Sl st in 2nd ch from hook (sc),
- hdc in next,
- dc in next,
- tr in last ch.
- Sk 2 sts, sl st into next st on calyx ring.
- Rep to make 5 points in total.
- Fasten off, weave in ends.

5. Leaves (Make 3; Two Short-Stem, One Long-Stem)
Leaf Shape:
- Ch 15.
- On back bumps of chain:
- Sc in 2nd ch from hook,
- Hdc in next ch,
- Dc in each of next 9 ch,
- Hdc in next ch,
- Sc in next ch,
- 3 sc in final ch (leaf tip).
- Turn, work down opposite side of foundation chain:
- Sc in next ch,
- Hdc in next ch,
- Dc in next 9 ch,
- Hdc in next ch,
- Sc in last ch.
- Sl st to first sc to join.
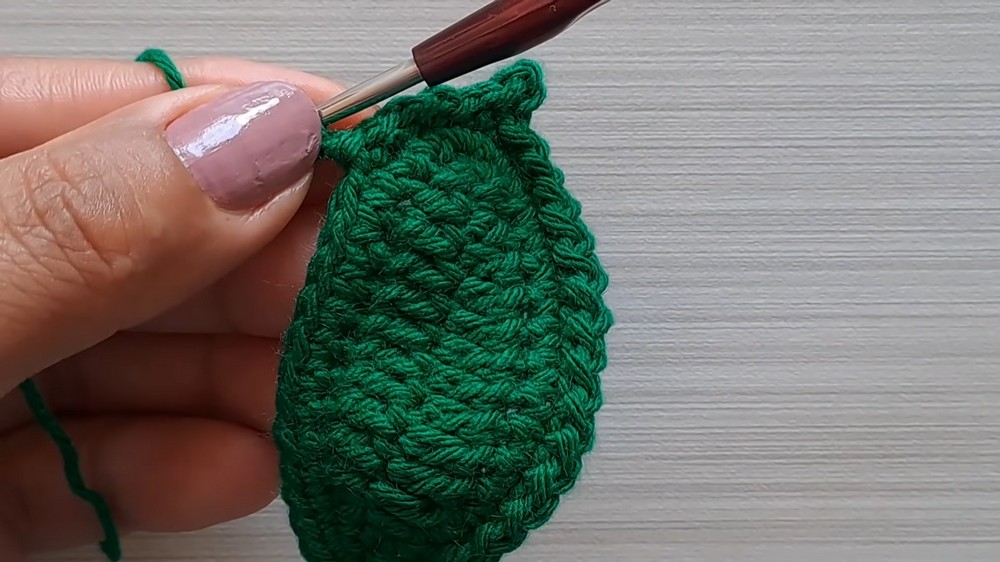
Insert Wire:
- Hold wire parallel to leaf, crochet over wire with sc or sl st around entire leaf border, covering wire.
- At tip, work an extra sc or hdc, ch 2, sl st for slight point.
Picot/Edge Detail (Optional):
- (Ch 1, sl st in next st) around for gentle edging.
- At leaf tip: hdc, ch 2, sl st in hdc.
- Fasten off, weave in ends.
- Short stems: Trim wire to short length for two leaves.
- Long stem: Leave wire extended for one leaf.
6. Leaf Assembly
- Arrange leaves: Two with short stems, one with a long stem.
- Wind wires together to form a branch, wrap with green yarn, secure with glue or knots.
7. Stem
- Take wooden stick, apply craft glue. Wrap tightly with green yarn, covering completely.
- Leave top portion unwrapped for attachment.
8. Final Assembly
- Attach Leaves:
- Position leaf assembly along stem.
- Wrap with green yarn, secure with glue.
- Attach Calyx:
- Slide calyx over top of stem.
- Position so that points flare out under rose.
- Attach Rose:
- Glue base of rolled rose petals to calyx and top of stem.
- Hold securely and allow to dry fully.
- Finishing:
- Adjust petals, leaves, and calyx for best appearance.
- Trim any excess yarn or wire.
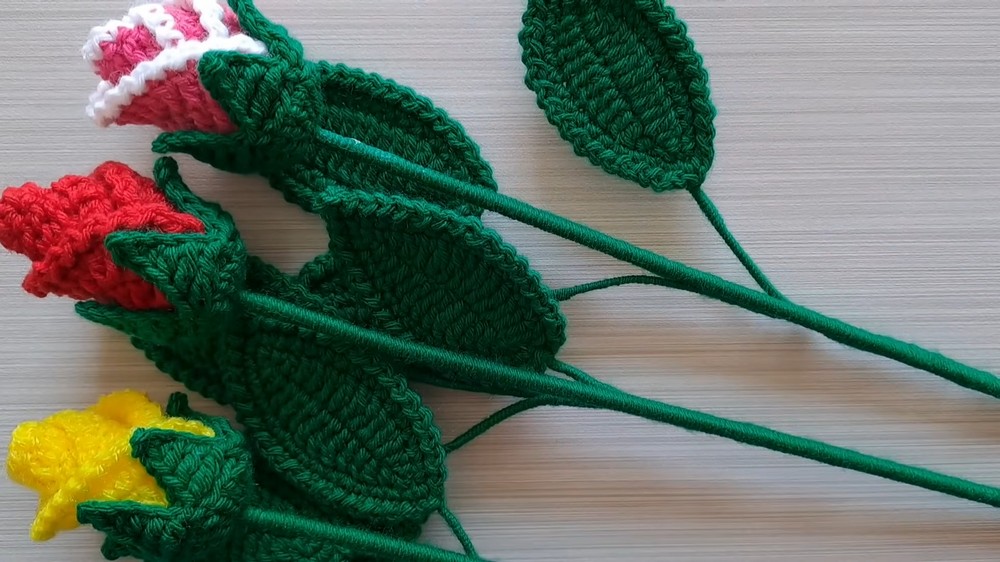
Conclusion
This realistic crochet rose features a spiral petal shape, a decorative calyx, and poseable wired leaves. The finished flower is perfect for gifting or decorative use, with customizable stem and leaf lengths for bouquet arrangements.
Pattern Corrections & Tips
Corrections:
- If leaf instructions use “medium bow/midpoint,” substitute with “hdc.”
- Increase rounds alternate increases for smooth circle; follow pattern exactly for petal volume.
- Calyx tips can be made longer or shorter with chain length adjustments.
Tips:
- Use cold silicone glue and allow full drying before handling.
- Wrap wire tightly for a clean finish and durability.
- For sturdier stems, use thicker stick or multiple strands of green yarn.
- Block leaves and petals lightly for extra definition.
Leave a Reply